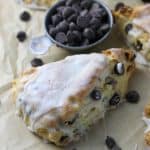
Chocolate Chip Scones
These quick and easy chocolate chip scones are perfect for breakfast!
Servings: 8 scones
Calories: 448kcal
Ingredients
For The Dough
- 2 cups (240 g) all purpose flour
- 3 tablespoons granulated white sugar
- 1 tablespoon baking powder
- ½ teaspoon table salt
- 5 tablespoons unsalted butter cold
- 1/2 cup chocolate chips
- 1 cup (240 mL) heavy cream
- 1 teaspoon vanilla extract
For The Glaze
- 1 1/2 cups (170 g) confectioners sugar
- 3 tablespoons milk or heavy cream
- 1/2 teaspoon vanilla extract
Instructions
- Combine dry ingredients. In a mixing bowl, whisk together all purpose flour, sugar, baking powder, and salt.
- Cut in butter. Using your fingertips, two knives, or a pastry blender, cut the butter into the dry ingredients until the butter are pea-sized. If adding mix-ins, stir them in now.
- Add wet ingredients. Make a well in the center of the dry ingredients and add the heavy cream and vanilla extract. Stir to combine.
- Shape and cut the scones. Empty the bowl onto a lightly floured surface. Knead the dough lightly to bring the mixture together. Pat the dough into a 8-inch circle. Using a sharp knife cut the circle into 8 triangle wedges.
- Refrigerate scones. Line a cookie sheet with parchment paper or silicone baking mat. Place scones onto prepared cookie sheet, about 2 inches apart. Refrigerate for 15 minutes (this will help with spreading).
- Preheat and prepare pan. Preheat your oven to 400°F.
- Bake The Scones. Bake for 20-22 minutes until golden brown on top. Remove from the oven and cool on a cooling rack.
- Make Icing. In a small bowl, whisk together the icing ingredients. Drizzle over cooled scones before serving.
Notes
- Storage: Store leftover scones in an airtight container at room temperature for up to 2 days or in the fridge for up to a week.
- Freezing: Once you cut them into wedges, you can freeze them by placing them on a cookie sheet. Then once frozen, wrap in either plastic wrap or store in a plastic bag in your freezer for up to 3 months. I like to do both to ensure they don’t have freezer burn. Then when ready to bake, no need to thaw, just bake frozen. You will just need to tack on a few extra minutes of baking time.
- Measure flour correctly. Be sure to measure your flour correctly by scooping into your dry measuring cup and levelling off with a flat edge. For best accuracy use a kitchen scale. For a complete tutorial on how to measure your flour accurately, read this post.
- Use Cold Butter. Make sure to use cold butter. The cold butter will coat the flour which will shorten the gluten strands making for a tender scone. And because the butter is cold, it will not be absorbed by the flour, so when those pieces of butter are in the oven the water in the butter will turn to steam creating flaky layers and helping the scones to rise.
- Knead lightly. You don’t want to overwork the dough. Just knead enough for the dough to come together. Overworking the dough will develop the gluten causing the scones to be tough. It could also cause the butter to warm up and melt resulting in it getting absorbed into the dough.
Nutrition
Calories: 448kcal | Carbohydrates: 60g | Protein: 5g | Fat: 21g | Saturated Fat: 13g | Trans Fat: 1g | Cholesterol: 62mg | Sodium: 170mg | Potassium: 218mg | Fiber: 1g | Sugar: 34g | Vitamin A: 690IU | Vitamin C: 1mg | Calcium: 111mg | Iron: 2mg
