This Post May Contain Affiliate Links. Please Read Our Disclosure Policy.
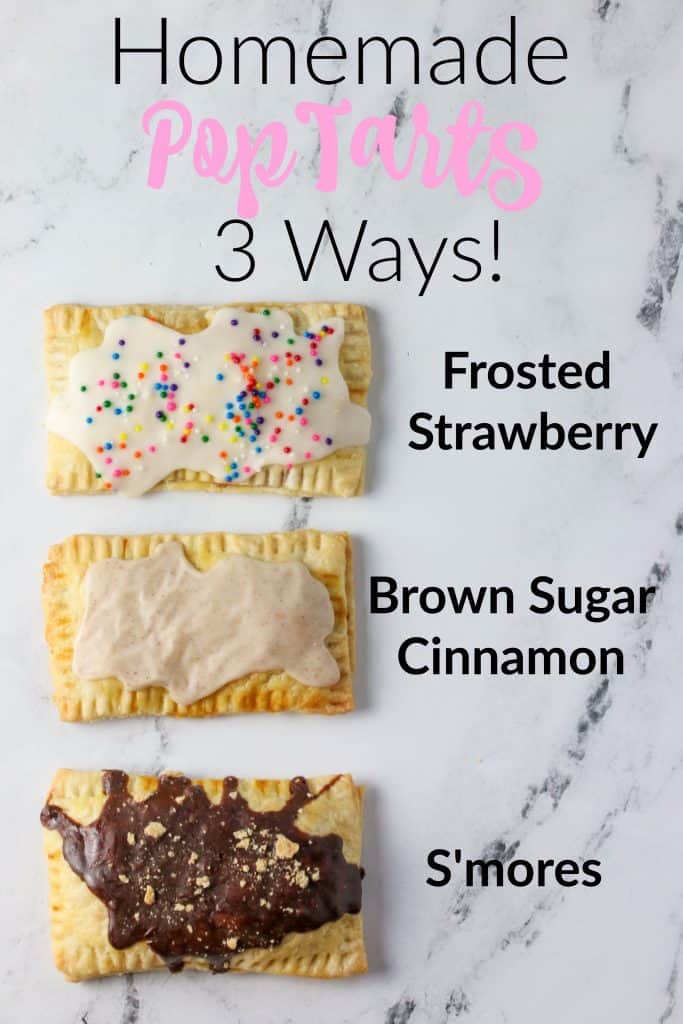
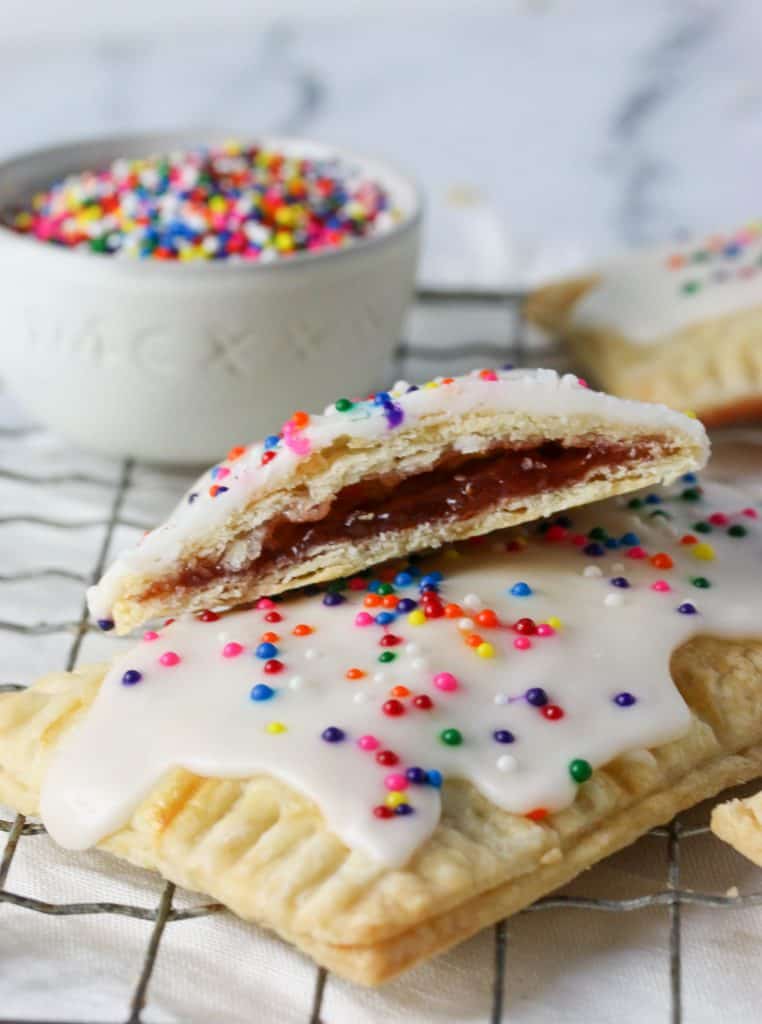
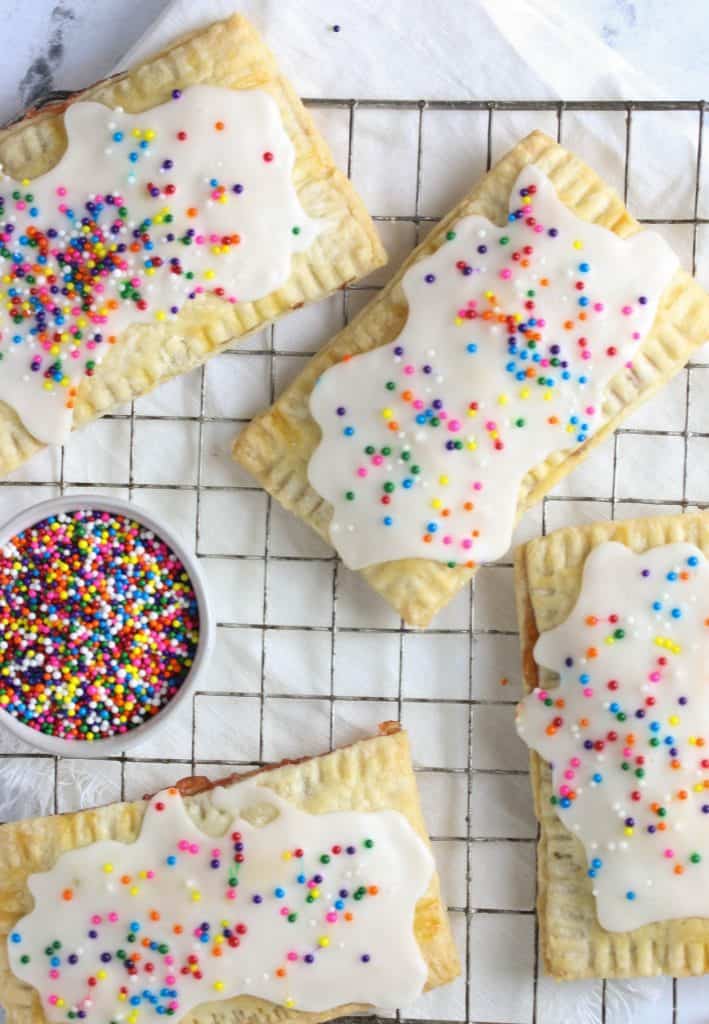
Homemade Pop Tarts are 1000% better than store-bought. A homemade version of the classic breakfast treat for when the kid in you cries out. I’ll show you how to make homemade poptarts 3 ways! Frosted Strawberry Poptarts. Brown Sugar Cinnamon PopTarts. And S’mores Poptarts!
I have to admit I have had more than my fair share of those silvery packaged (ok, I have to admit DRY) crumbly pastry tarts in my day. I always went for the strawberry iced or the brown sugar cinnamon. In my college and barely post college days, I would scarf these down for breakfast, snack, dinner…ok even dinner. Sometimes I even went to great lengths and actually used a toaster oven to heat them up. Most times I didn’t. The toaster took too long. So did making pasta back then. Ha, how times have changed.
Since my boxed pop tart days, I have found great satisfaction in making everything from scratch. It seemed only natural that I would get around to making my own homemade version of the classic breakfast treat. And let me tell you, once you try the homemade version it will be hard to go back and tear open another silver package with your teeth ever again.
As per usual, I couldn’t decide WHICH kind of pop tart to make. Strawberry glazed? Brown Sugar Cinnamon? Or maybe it’s summer (or you’re longing for summer!) and want that S’mores without a campfire. So, I decided not to decide. Isn’t’ being indecisive the best? Ok only in the kitchen is that probably true. I’ve included instructions for all three pop tart versions!
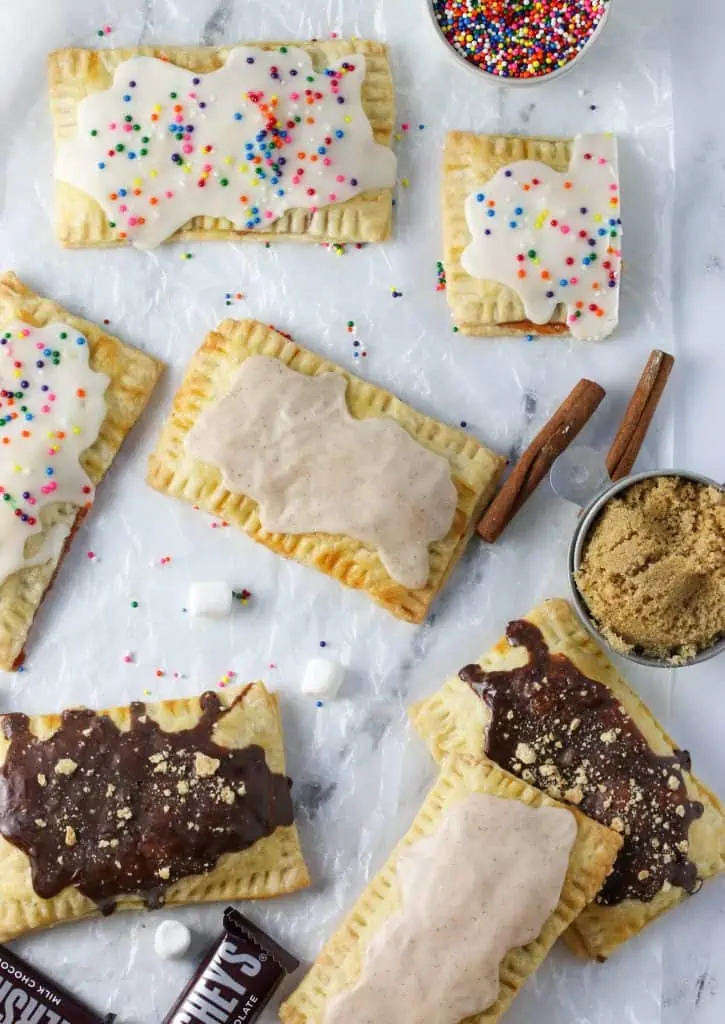
Ingredients for Homemade Pop Tarts
Listed below are the ingredients you need to make all the fun variations!
For The Pie Crust:
- Flour
- Salt
- Butter
- Water
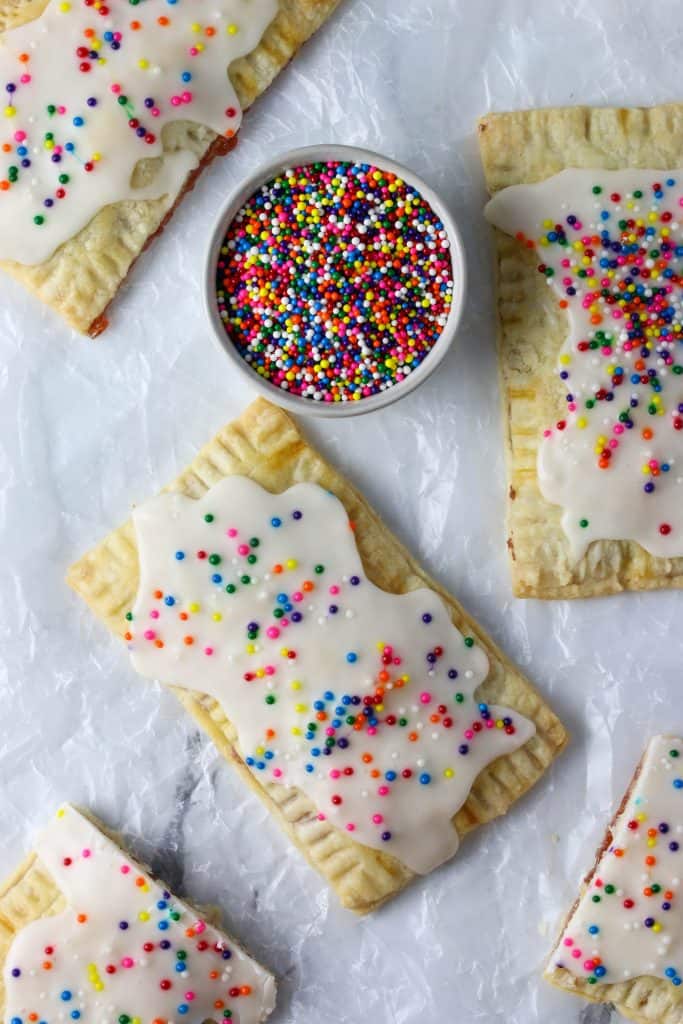
For The Frosted Strawberry PopTarts:
- Jam
- Powdered sugar
- Milk
- Vanilla
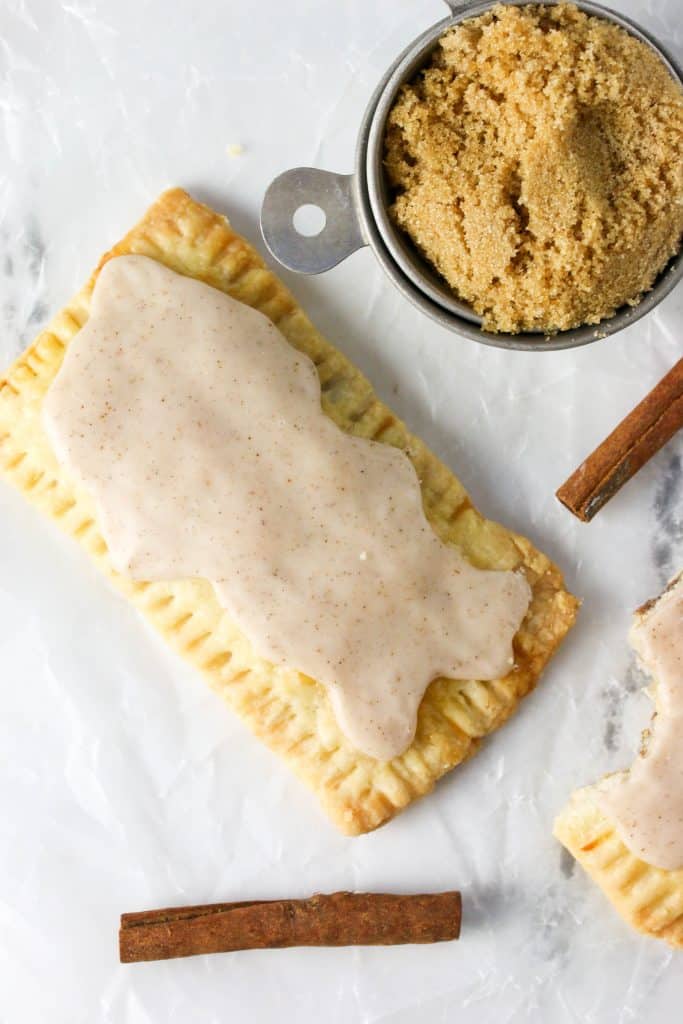
For The Brown Sugar Cinnamon PopTarts:
- Brown sugar
- Cinnamon
- Flour
- Glaze
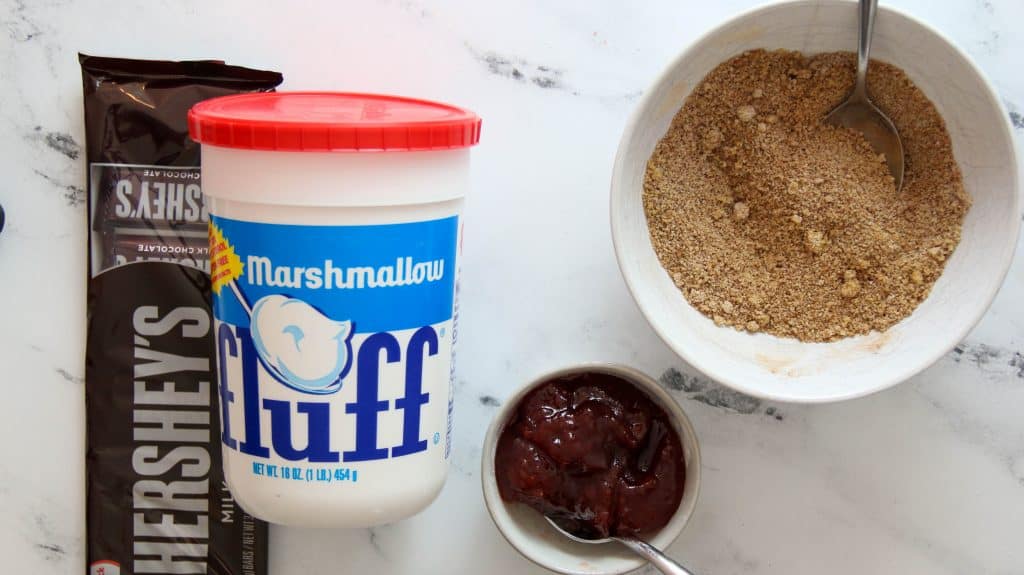
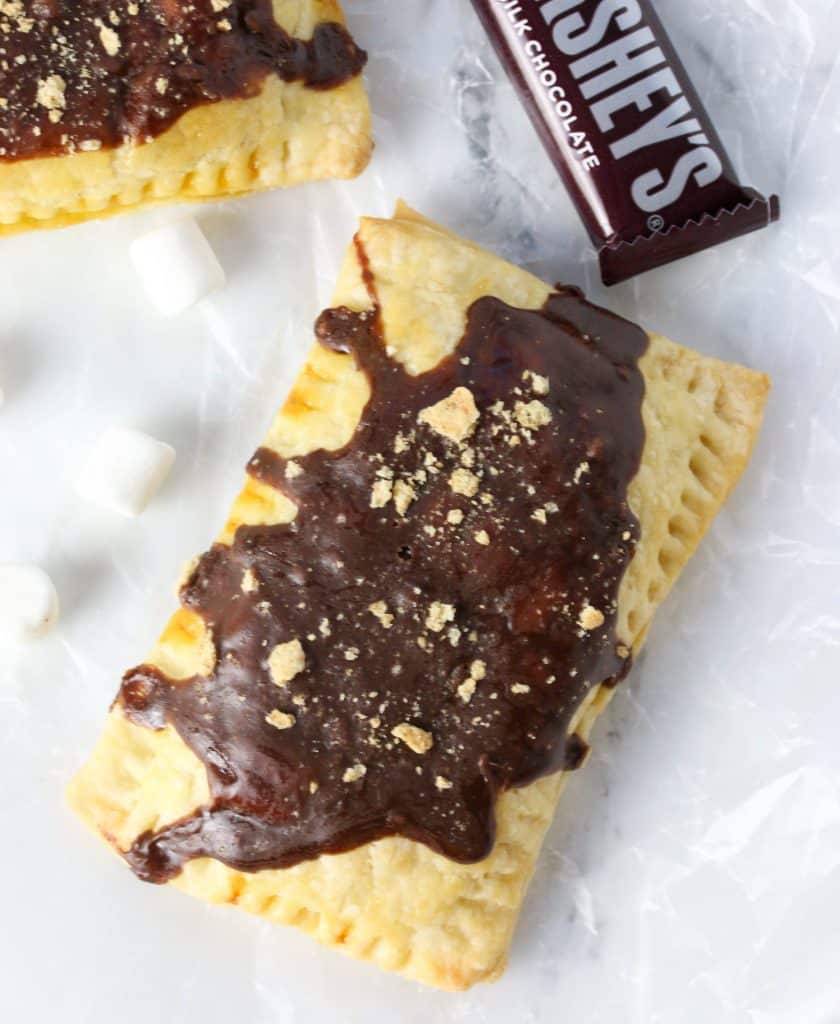
For The S’mores PopTarts:
- Marshmallow fluff
- Hershey’s chocolate bars
- Heavy Cream
- Graham crackers
How to Make Homemade Pop Tarts
Make the crust.
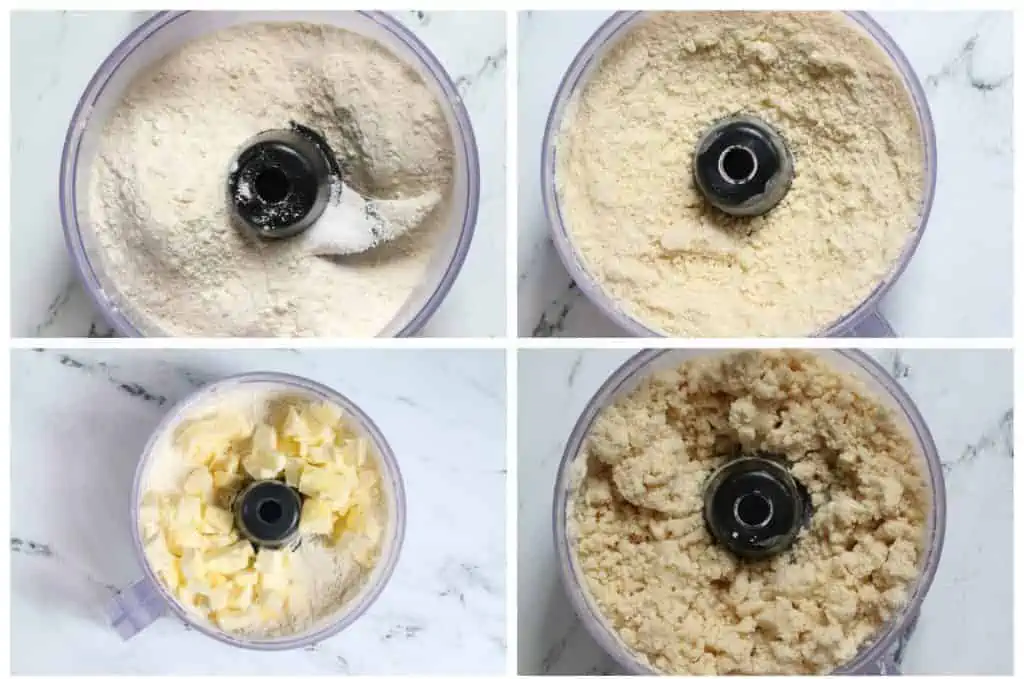
Process flour and salt together in food processor until combined, about 2 one-second pulses. Add butter and process until homogenous dough just starts to collect in uneven clumps, about 10 seconds (dough will resemble cottage cheese curds with some very small pieces of butter remaining, but there should be no uncoated flour). Scrape down sides and bottom of bowl with rubber spatula.
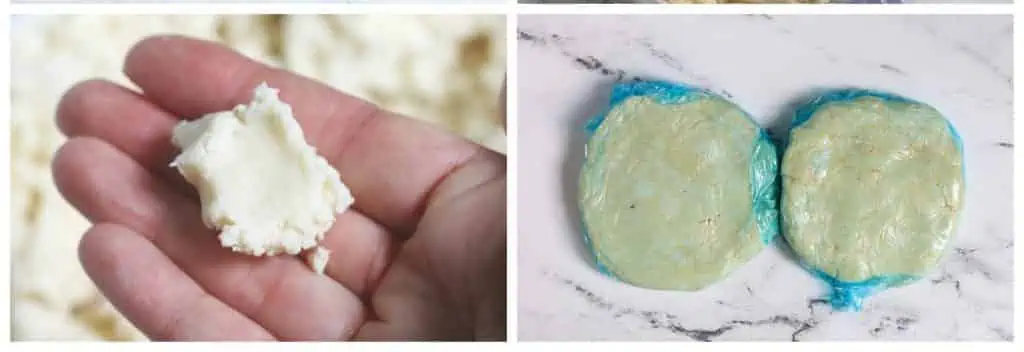
The crust if ready should hold together when you pinch some of it. If it’s dry and crumbly, then it needs more water.
Then go ahead and wrap the crust in plastic wrap and refrigerate for at least 30 minutes to firm up the crust and make it cold!
Shape the crust.
Remove one disk of dough from refrigerator and roll out on generously floured work surface to 13 by 9-inch rectangle about 1/8 inch thick. Trim dough so that all sides are even and straight. Using a pizza cutter, cut the dough into 8 even small rectangles. Use a ruler if you wish.
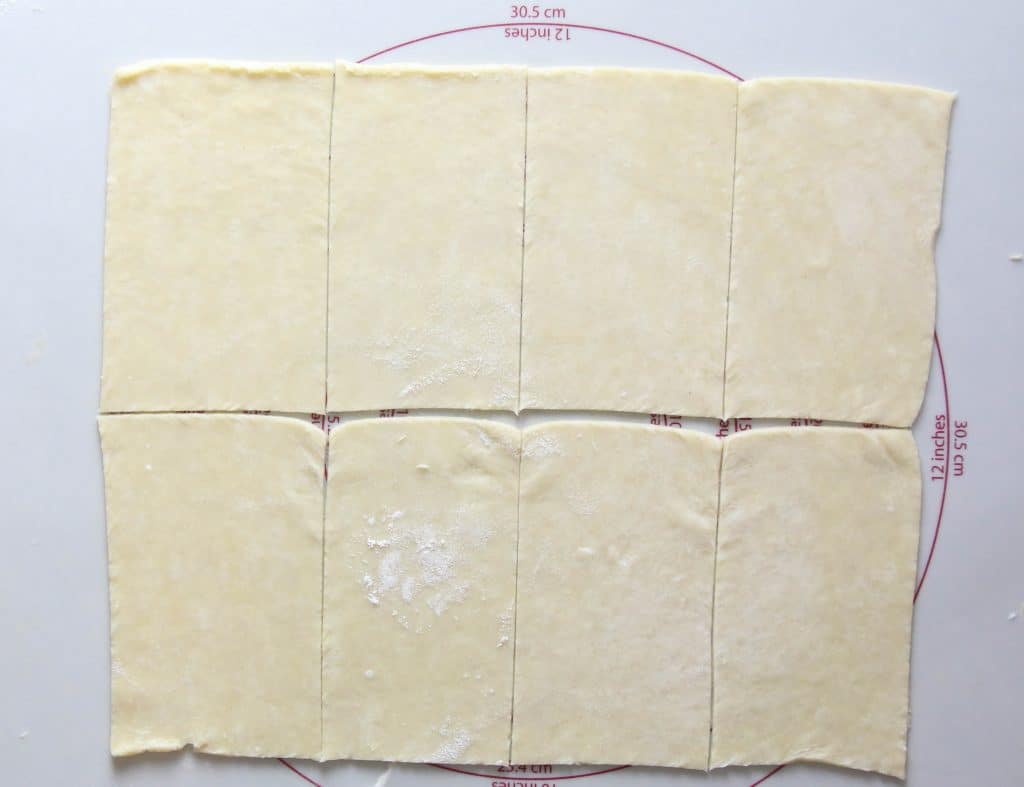
Add the filling.
For Frosted Strawberry poptarts place one tablespoon of jam in the center.
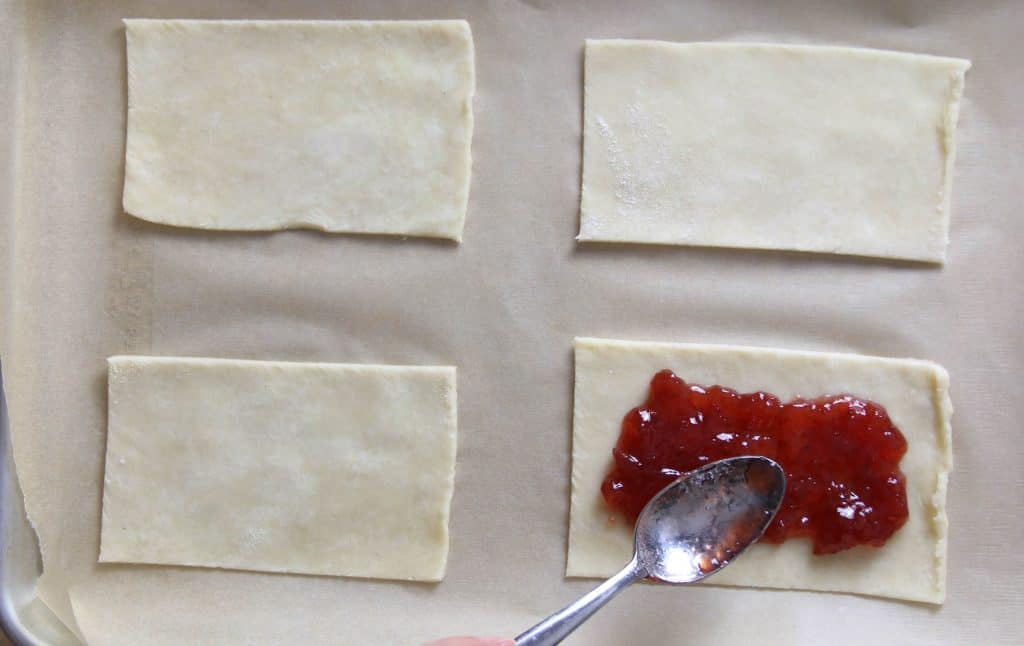
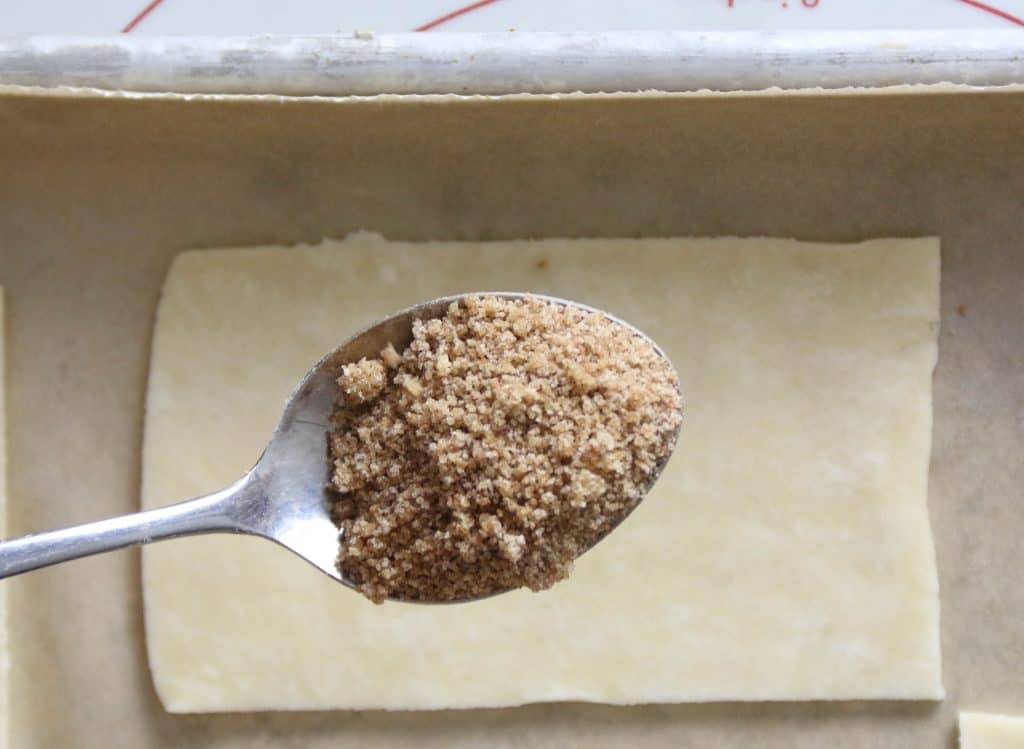
For the brown sugar cinnamon filling, simply measure and place all the ingredients into a bowl and stir to combine. Then add a 1-2 Tablespoons to a center of rectangle.
For the S’mores Poptarts, spread about 1 Tablespoon of fluff onto 1 rectangle and then top with Hershey squares.

Top With Another Rectangle And Crimp.
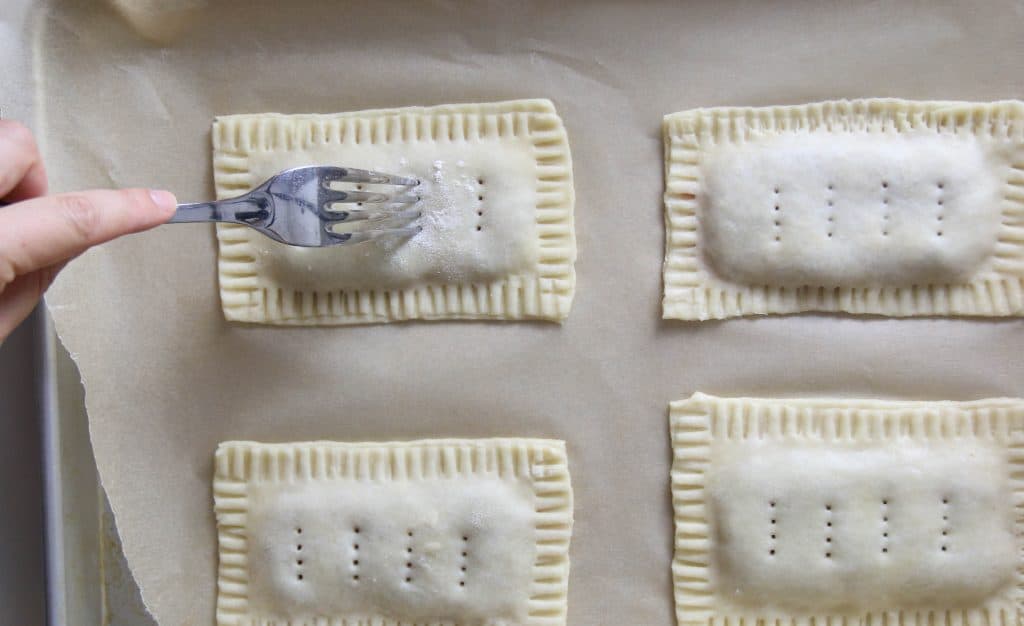
Place another square on top and use a fork to crimp the edges to prevent the filling from leaking out in the oven.
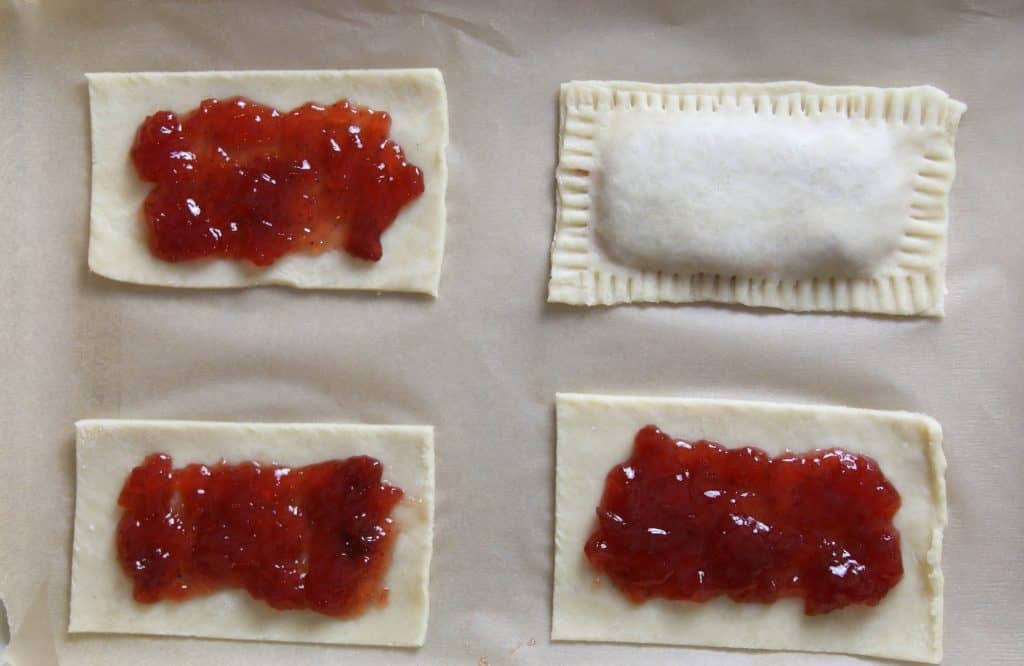
Poke Holes In The Top.
You want to make sure to poke holes in the top of each with the tines of a fork to allow steam to escape as they bake.
Chill. And Egg Wash.
After they are all prepared, place in the refrigerator on a parchment lined cookie sheet to firm up again for another 30 minutes. Then repeat with the remaining dough disk.
Bake.
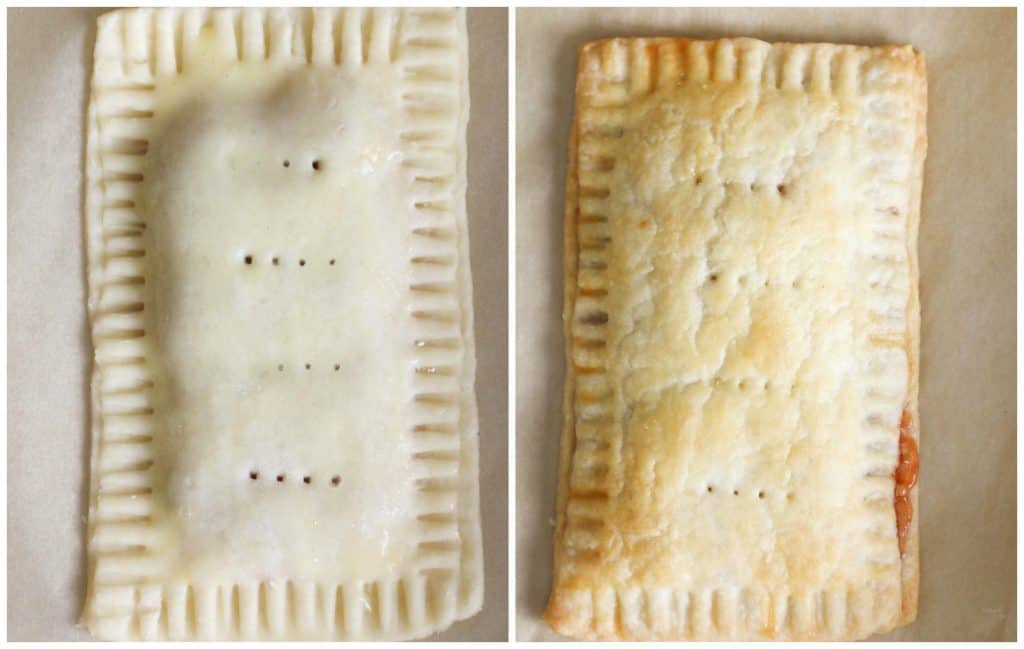
When ready, preheat the oven to 350 degrees. Place the prepared cookie sheet in the pre-heated oven. Bake for 18-20 minutes until golden brown. Place on a cooling rack before applying glaze.
Make icing.
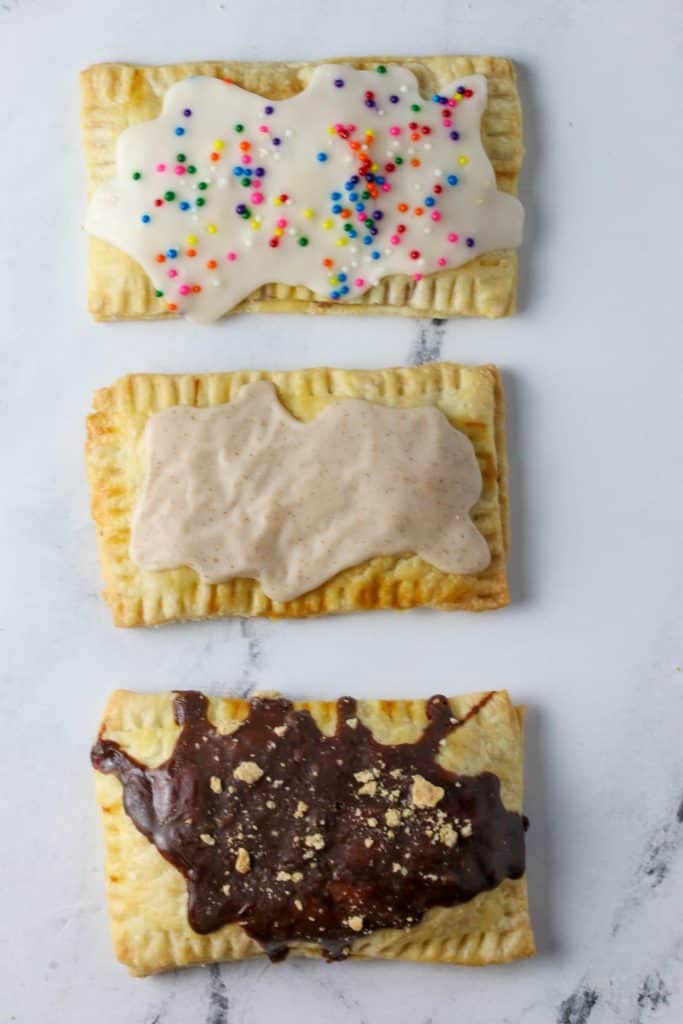
Whichever filling you choose, a good glaze on top is also recommended. I chose a cinnamon glaze for the brown sugar cinnamon, a vanilla glaze for the raspberry jam, and a milk chocolate ganache for the S’mores.
For either glaze option, just combine all the ingredients and stir to combine. You may find you need to add either more powdered sugar or milk to achieve the desired consistency. Then simply spread the glaze on your cooled tarts. For the S’mores I do like to garnish with some graham cracker crumb to give it the authentic S’more taste.
Enjoy!
Tips on Making Homemade Pop Tarts
- Great pie crust is key! Use very cold butter, ice cold water, and don’t overwork the dough.
- Leave A Border. You want to make sure to leave about 1/4-inch border from filling to edge of the pie crust. Otherwise it might leak out!
- Don’t Add Too Much Filling. I add about 1 to 2 Tablespoons MAX of filling. Too much and you risk it leaking out.
- Seal the pop tarts really well. This dough is very tender and flaky. If you find your dough is tearing, just pop it back in the fridge for awhile. Seal it with the tines of a fork to get the best closure.
Recipe FAQ’s
Store pop tarts in an air-tight container at room temperature for 2-3 days. These are really best eaten fresh. If you can’t finish them within a few days, try freezing the leftover for a quick breakfast or snack in the future!
Yes! Once fully cooled, store the pop tarts in an air-tight container or zipper bag and freeze for up to 4 months. Easily reheat them in the toaster straight from frozen.
Other Recipes To Try
They say a sign of maturity is being able to delay pleasure for a greater result (or at least that’s what Google told me anyhow).
So clearly a sign of maturity is being able to put down that little cellophane package and bust out your rolling pin and whip up some homemade pop-tarts. So let’s recap. Maturity = making homemade Pop-tarts. Man if only my 23 year old self could see me now…
Homemade Pop Tarts
Ingredients
For the Pie Crust
- 3 cups (360 g) unbleached all-purpose flour
- 1 teaspoon kosher salt
- 16 tablespoons (2 sticks, 227 g) cold unsalted butter cut into cubes
- 8-10 tablespoons ice water
For The Frosted Strawberry
- 3/4 cup strawberry jam
For The Brown Sugar Cinnamon
- 1/2 cup (107 g) light brown sugar
- 1 tablespoon all purpose flour
- 2 teaspoons cinnamon
For The S'mores
- 3/4 cup marshmallow fluff
- 8 mini Hershey bars (or 2 regular chocolate bars or milk chocolate chips)
For Vanilla Glaze
- 1/2 cup (60 g) powdered sugar
- 1/4 teaspoon vanilla
- 1 Tablespoon milk (or you can use water, or cream)
- sprinkles for topping
For Cinnamon Glaze
- 1/2 cup (60 g) powdered sugar
- 1/4 teaspoon cinnamon
- 1 tablespoon water milk, or cream
For The Milk Chocolate Ganache
- 3 ounces (1/4 cup) heavy cream
- 1 cup (6 ounces) milk chocolate chips
- graham crackers crumbs for garnish
Instructions
To Make The Pie Crust
- In a food processor or by hand, stir together the flour and salt. Sprinkle very cold butter over the top and pulse for a few seconds or cut the butter with the pastry cutter/fingertips until it is about the size of split peas.
- Sprinkle half of the ice water over the flour mixture and mix gently to dampen flour. Add the remaining water in two stages and continue to pulse or stir until a dough forms. When enough water has been added to allow dough to hold together, gather it into a ball and transfer to lightly floured surface.Press dough into a flat disk, then place in large zipper bag. Refrigerate dough for at least an hour or overnight.
To Shape The Pop Tarts
- Cut dough in half. Keep the second half wrapped in plastic wrap and in the fridge. Roll out one half of the dough onto a lightly floured surface to a 13 by 11 inch rectangle (about 1/4 inch thick). Trim dough so sides are even and straight, to a 12 by 10 inch rectangle.
- Cut the dough into eight 5 by 3 inch rectangles.
- Arrange 4 rectangles onto a parchment lined baking sheet.
- Brown sugar cinnamon: If making brown sugar cinnamon: Simply measure and place all the ingredients into a bowl and stir to combine.
- Add Filling. For each rectangles, place one tablespoon (to 2 tablespoons max) of filling in the center. Spread out but leave a 1/2 inch border. Place another rectangle on top and use a fork to crimp the edges to prevent the filling from leaking out in the oven. Poke the top of each poptart with a few holes with the tines of a fork to allow steam to escape as they bake.
- Refrigerate. After they are all prepared, refrigerate to firm up again for another 30 minutes. Repeat with the remaining dough disk.
- Egg Wash and Bake. When ready, preheat the oven to 375 degrees. Make egg wash and brush each poptart with a little egg wash. Place the prepared cookie sheet in the pre-heated oven. Bake for 20-25 minutes until golden brown. Place on a cooling rack before applying glaze.
Make Glaze
- To prepare vanilla glaze: Combine all three ingredients and stir to combine. You may find you need to add either more powdered sugar or milk to achieve the desired consistency. If making cinnamon glaze, then add cinnamon. Then simply spread the glaze on your cooled tarts. For frosted strawberry, sprinkle on sprinkles.
- For milk chocolate ganache: Heat heavy cream in a microwave safe bowl for about 30 seconds until very hot (but not boiling). Add chocolate chips. Let sit for 1-2 minutes. Then stir until smooth. Frost cooled poptarts and then sprinkle on crushed graham crackers.
Video
Notes
- Great pie crust is key! Use very cold butter, ice cold water, and don’t overwork the dough.
- Leave A Border. You want to make sure to leave about 1/4-inch border from filling to edge of the pie crust. Otherwise it might leak out!
- Don’t Add Too Much Filling. I add about 1 to 2 Tablespoons MAX of filling. Too much and you risk it leaking out.
- Seal the pop tarts really well. This dough is very tender and flaky. If you find your dough is tearing, just pop it back in the fridge for awhile. Seal it with the tines of a fork to get the best closure.

Cassidy says
Just made these tonight and we loved them! I’m on a mission to making better-than-store-bought recipes and I’ll have to add this one to my favs 😊
Heather says
Woo-hoo, homemade is always better than store bought! I am so happy that they turned out so well for you, Cassidy! Enjoy your baking journey, and thanks so much for letting me know that you loved them!
Saif says
I love pop tarts. I made this for my family and they all loved it. The brown sugar cinnamon tart was their favorite.
Heather says
That’s fantastic news, Saif! I’m thrilled to hear that you and your family enjoyed my Poptarts. Thank you very much for sharing your feedback with me!
Carrie Robinson says
What a great idea to make your own pop tarts! 🙂 I just love how you frosted these.
Heather says
Thanks so much Carrie, the frosting makes them shine!
Holley says
Oh yeah! So much better than store-bought! My family and I love these! Thanks for sharing!
Heather says
I’m so happy to hear that you and your family loved my homemade Poptarts! Nothing beats homemade, right? Thanks for giving them a try and sharing your feedback with me. It means a lot!
DK says
Yes! Now I can make these on my own instead of pay expensive prices for store bought pop tarts. And it tastes better too!
Heather says
Hey, thanks a bunch for the awesome review! I’m thrilled you enjoyed my homemade Poptarts. Totally agree, making them at home is way more satisfying and budget-friendly, right? So glad you liked the taste too! Thanks for giving them a try!
paula says
Oooh I can’t wait to try the brown sugar cinnamon ones!
Heather says
You’re in for a treat with the brown sugar cinnamon Poptarts. I think you’re gonna love ’em! Let me know what you think once you’ve tried them out. Enjoy!
dana says
These are amazing! I love poptarts so much but haven’t bought them in ages. This was a great way to enjoy them, and a fun process too!
Heather says
Thanks a bunch for the awesome review of my homemade Poptarts! I’m so happy you loved them! It’s great to hear you enjoyed the process too. Making them is half the fun, right? So glad I could bring a bit of Poptart joy back into your life.
Ann says
Poptarts before school brings fond memories but now as an adult I’m glad I can recreate the joy without the mystery ingredients. Thanks!
Heather says
Hi Ann, thanks a bunch for the awesome review of my homemade Poptarts! I totally get the nostalgia of having Poptarts before school, but it’s even better knowing we can enjoy them as adults without all those mystery ingredients, right? So glad you enjoyed them!
Kristin says
This recipe was a thousand out of a thousand!! So good the best “pop tarts” I’ve ever had. My kids will never have a store bought one again. The crust was amazing and flaky but perfect with the sweet filling and icing. Wow
Heather says
aw I’m so happy to hear this Kristin! This comment made my day!
Jessica says
I haven’t tried these yet but plan to here soon. Can you freeze the dough just like any other before making the pop tarts?
Heather says
absolutely you can 🙂
Virginia says
Dude! Yes! Not exactly like a pop tart but I would much rather eat these than a normal pop tart any day!!!
I made them gluten-free exactly how the recipe went except gluten-free, and when I went to crimp the sides, first I put a light layer of cold water on the half inch edging, which made the dough stick together perfectly. I smashed them down and then used a knife to push against the sides to make them perfectly rectangular and then used the fork to put the crimping. Mine turned out, flaky and flippin amazing.
I run a bakery and I will definitely be putting these on the fun list of items.
Heather says
oh my gosh Virginia! This comment just made my day 🙂 – that’s so wonderful!! And such an honor to hear you would put these on your menu. I’d love to know the bakery if you don’t mind sharing!
Lisa says
This is me overthinking this, but for the vanilla glaze is it milk water, or milk OR water?
Heather says
Hi Lisa, you can use either milk or water. I prefer milk!
Lisa says
Thank you! Can’t wait to try this!!
Heather says
Let me know how it turns out!
Caitlin says
If you wanted to freeze these, do you freeze them raw, Then bake when you want them? Or bake, freeze then warm them up when you want them?. I want to make them, but will make a large batch when I do in order to freeze a bunch.
Heather says
You can freeze them both ways – You can freeze them unbaked, then bake them when you want (frozen no need to thaw) they may need a few extra minutes. Or let them cool after baking then freeze. Hope you like them!