
Salted Caramel Sauce Recipe
This Post May Contain Affiliate Links. Please Read Our Disclosure Policy.
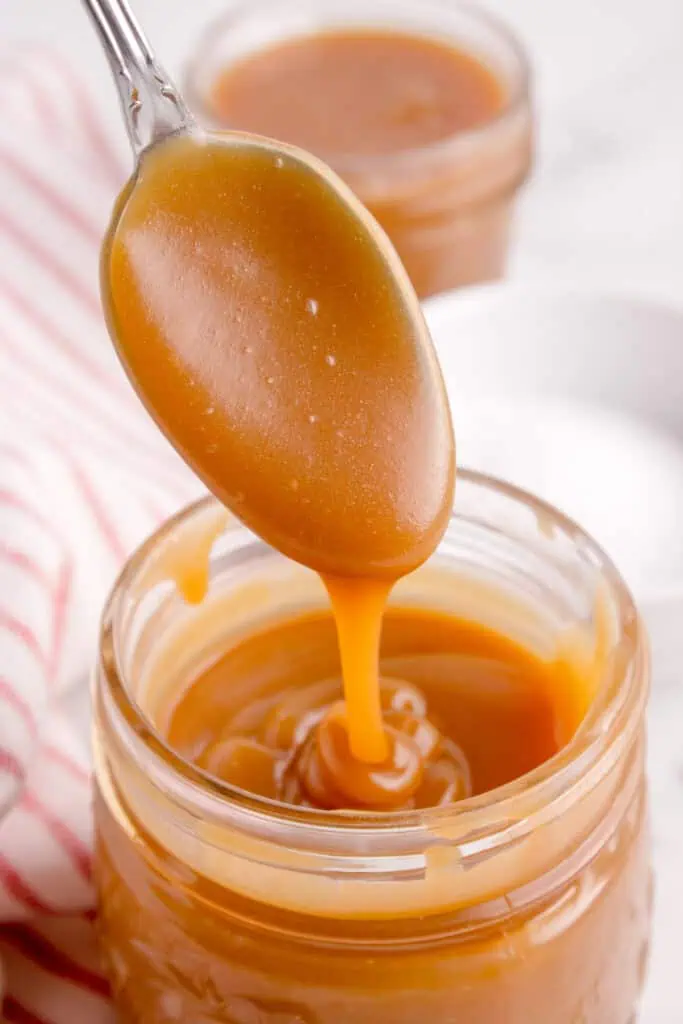
A step by step photo tutorial for making your own homemade salted caramel sauce that can be drizzled over ice-cream or stirred into desserts!

I remember the first time I made homemade salted caramel. I was so nervous. I carefully watched my caramel and tried to follow each step exactly according to the recipe. So what happened? Oh yea, I burnt it. Burnt it good.
Caramel goes from perfect, to you kicking screaming and throwing pots and pans in the sink. Yes, it can be that temperamental.
Craving caramel? Indulge in these irresistible caramel desserts that will leave you spoon-licking! Check out these sweet treats and get ready to satisfy your caramel cravings: Caramel Dessert Recipes.
So let’s get started, shall we?
Ready To Take Your Baking To The Next Level?
Join the Ultimate Baking Bootcamp and master essential techniques like mixing methods and the why behind every recipe! Whether you’re a beginner or looking to refine your skills, this step-by-step class will help you bake with confidence and create flawless desserts every time. Start your baking journey today!
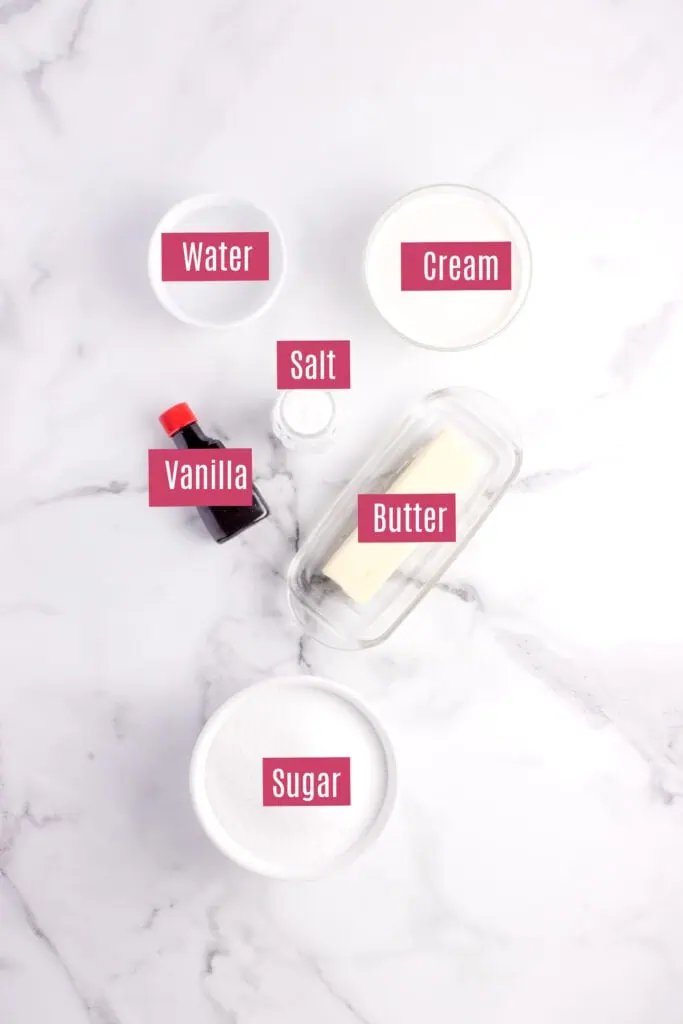
Ingredients Needed
- Sugar – You want to use just regular granulated sugar.
- Water
- Heavy cream: You want to use heavy cream, or whipping cream, but not milk. Make sure the cream isn’t cold, right from the fridge. You can bring it to room temperature or heat it so it’s warm (but not boiling).
- Butter – Unsalted or salted work fine. I used unsalted butter
- Vanilla – Use pure vanilla extract for the best flavor.
- Salt – I love a coarse sea salt, and for a splurge I go with a good fleur de sel!
How To Make Homemade Caramel Sauce
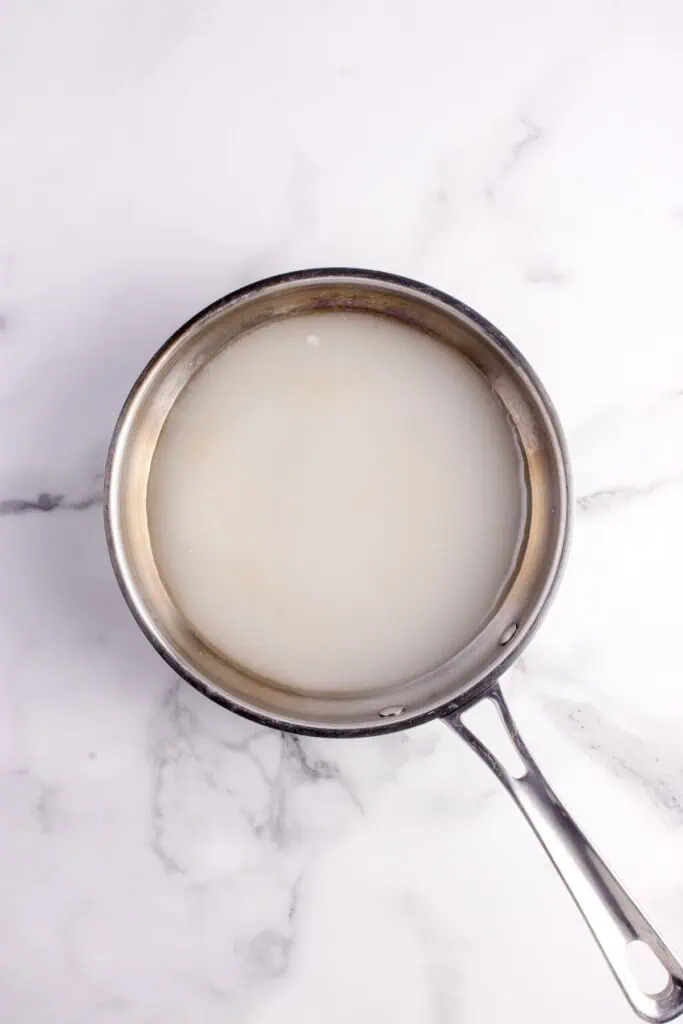
Combine sugar and water. Pour the water into a heavy-bottomed saucepan, then carefully pour the sugar into the center of the pan (try not to let any crystals touch the sides). Gently stir just once to combine, then stop stirring—this helps prevent crystallization.
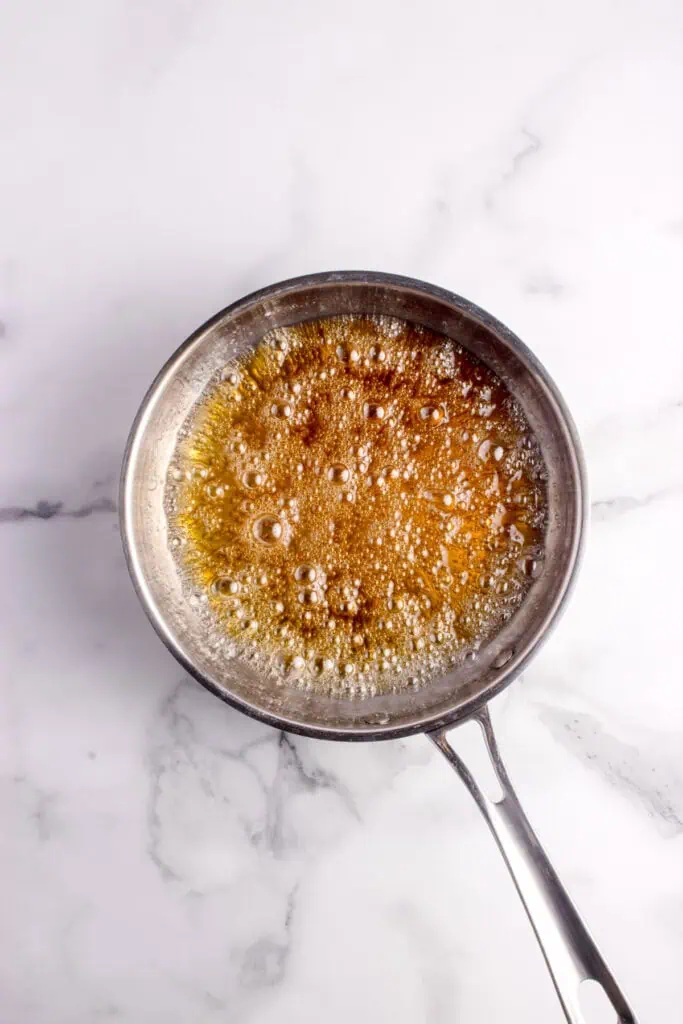
Boil until amber. Place the pan over high heat, cover, and bring the mixture to a boil. Once it’s boiling, uncover and continue to cook without stirring.
Stirring the sugar mixture while it’s boiling can cause sugar crystals to form. Instead I just tilt the pan from side to side to help make sure it’s cooking evenly. You can also use a wet pastry brush and brush down the sides of the pan if any has splashed up on the sides.
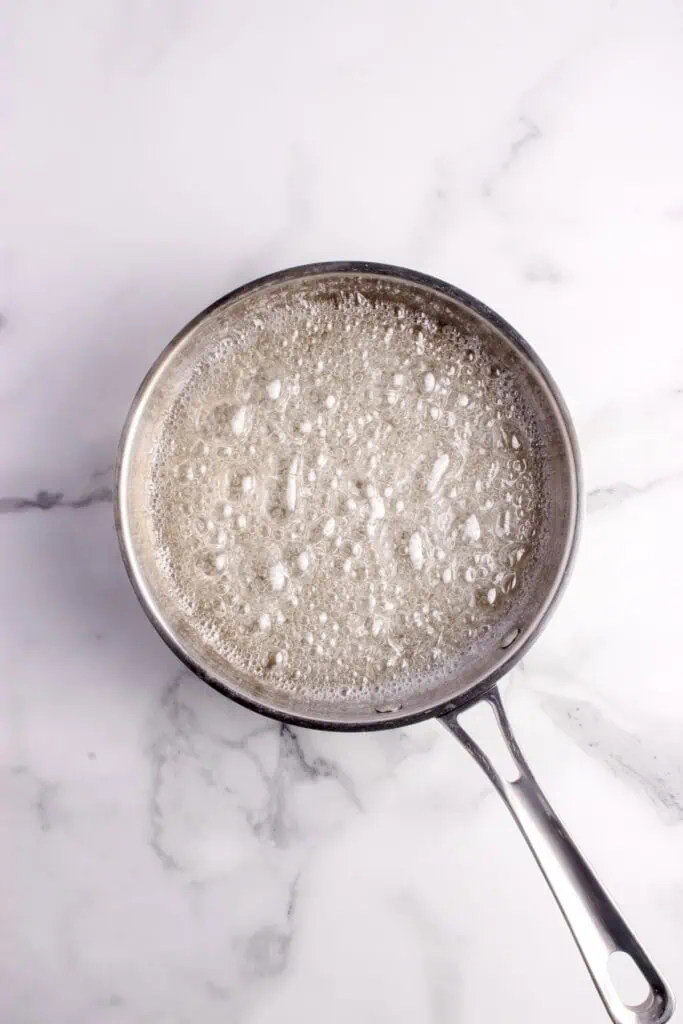
Watch closely as the syrup thickens and begins to change color.
When it turns a deep amber color (like honey or dark maple syrup), remove it from the heat immediately. Caramel goes from perfect to burnt in seconds. Pay super close attention as the color change drastically and your caramel can go from perfect to burnt in seconds.
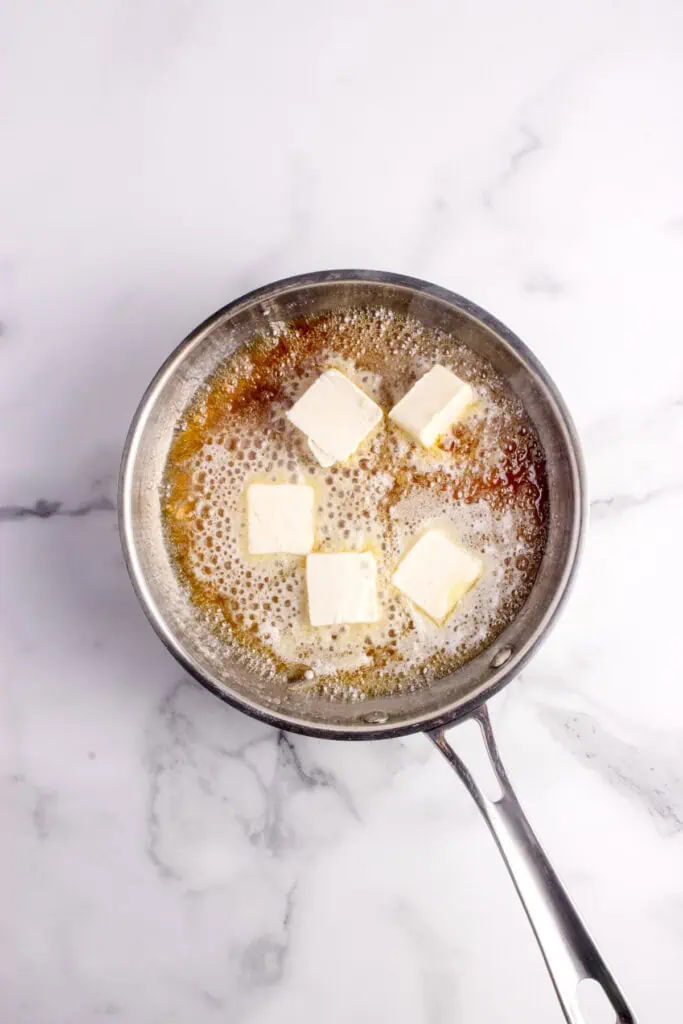
Add the cream carefully. Once the caramel reaches that amber stage, carefully pour in the warm cream. It will bubble up vigorously—just let it settle before slowly adding the rest of the cream.
Do not use cream straight from the fridge. Make sure it’s been warmed a little on the stove, or at least room temperature. But do not let it boil.

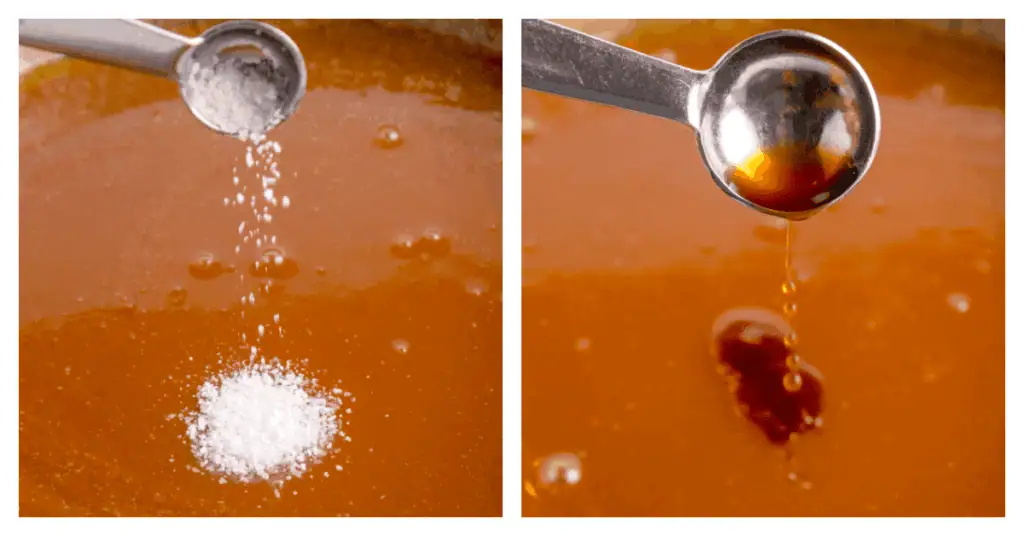
Finish the sauce. Whisk gently until smooth, then whisk in the butter.
Add the vanilla, and salt. The caramel will look thin at first but will thicken beautifully as it cools.
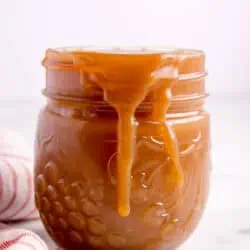
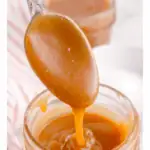
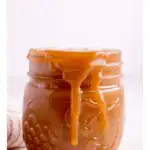
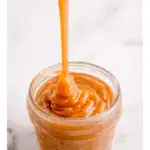
Cool and store. Let the sauce cool until warm, then serve or transfer to a jar. Store in the refrigerator for up to 2 weeks.
The caramel will be thin at first and thicken as it cools.
Recipes To Use Your Caramel Sauce With
You can use this caramel sauce in so many ways! Try drizzling it over a slice of my vanilla cheesecake recipe. Or a scoop of vanilla ice cream. Or dip some fresh fruit, like sliced apples in it for a fun snack!
You can also use it in my caramel buttercream frosting, caramel apple bars, or caramel apple cheesecake bars!

Master The Art Of Baking!
Don’t miss out on the chance to elevate your baking skills! Join the Ultimate Baking Bootcamp today and unlock the secrets to creating perfect desserts every time. With expert guidance, step-by-step lessons, and insider tips, you’ll be baking like a pro in no time. Sign up now and start mastering your baking!
Salted Caramel Sauce
Ingredients
- ½ cup (120 mL) water
- 1 cup (200 g) granulated sugar
- ½ cup (120mL) heavy cream room temperature
- 1 Tablespoon unsalted butter chilled
- 1 teaspoon vanilla extract
- 1 teaspoon salt
Instructions
- Combine sugar and water. Pour the water into a heavy-bottomed saucepan, then carefully pour the sugar into the center of the pan (try not to let any crystals touch the sides). Gently stir just once to combine, then stop stirring—this helps prevent crystallization. ½ cup (120 mL) water 1 cup (200 g) granulated sugar
- Boil until amber. Place the pan over high heat, cover, and bring the mixture to a boil. Once it’s boiling, uncover and continue to cook without stirring. Watch closely as the syrup thickens and begins to change color. When it turns a deep amber color (like honey or dark maple syrup), remove it from the heat immediately.
- Add the cream carefully. Once the caramel reaches that amber stage, carefully pour in about a quarter of the warm cream. It will bubble up vigorously—just let it settle before slowly adding the rest of the cream. ½ cup (120mL) heavy cream
- Finish the sauce. Whisk gently until smooth, then whisk in the butter, vanilla, and salt. The caramel will look thin at first but will thicken beautifully as it cools. 1 Tablespoon unsalted butter 1 teaspoon vanilla extract 1 teaspoon salt
- Cool and store. Let the sauce cool until warm, then serve or transfer to a jar. Store in the refrigerator for up to 2 weeks. The caramel will be thin at first and thicken as it cools. The caramel will thicken as it sits in the refrigerator. Just re-heat in the microwave to warm it back up and be able to drizzle.
Notes
- Storage: Keep in a container in the fridge for up to 2 weeks.
- Saucepan: Use a pan with TALL sides because when you add the cream it will bubble up vigorously. Cheap metal pots can heat unevenly. And do not use non-stick pans as high heat can damage them.
- Timing: All stovetops and saucepans are different so timing can vary – keep an eye on the color.
- Heavy cream: You want to use heavy cream, or whipping cream, but not milk. Make sure the cream isn’t cold, right from the fridge. You can bring it to room temperature or heat it so it’s warm (but not boiling).


followed it to a tee, minus having a thermometer on hand. pretty yummy, perfect texture and turned out well. I use a cheap tjmaxx pan and it was fine. I could understand how easy it would be to.mess up, but just go for it and try it!
Thank you so much for sharing! 😊 I’m glad it turned out well, even without the thermometer. Happy to hear the pan worked fine too. Appreciate the encouragement for others to give it a try! 🙌
This was my first attempt at a caramel. I’m an accomplished baker of breads and savory things, but not so much sweets. I want to improve my baking skills so I am trying your caramel apple cupcakes and this caramel os the first step. I followed your directions EXACTLY and OMG…just shut the front door! This caramel is spot on AH-MAZING! I burned my fingers because I can’t stop going in for a taste, LOL. Thank you for making an intimidating process simple and easy to follow with stellar results!
Hi Stephanie! Sorry for the burnt fingers haha but so glad you were successful at making this!!! I’m so glad you found process simple and got amazing results 🙂
I’m a baker who has struggled with and stressed over making caramel since I studied pastry arts in college. It would constantly crystallize and become unusable no matter what recipe I used. But I’ve used this recipe countless times now and haven’t had a single fail. Amazing!! Thank you!
Oh that’s so great to hear Sarah!! Love hearing that 🙂
I’m sorry but your recipe for salted caramel did not work because the temperature was too high and it burnt the sugar, so I will never use this recipe again. I hope I didn’t ruin sauce pan😠😡
sorry to hear that it didn’t work. Proper caramel is cooked to 350oF but it can be easy to go over. It’s important to use an accurate quality thermometer. You can also go by the color. It should be a deep amber color and then remove it from the heat. It can change quickly so you need to keep an close eye as it can burn easily. To fix your pan, fill with water and heat on the stove and the caramel mixture should then melt again and be able to be cleaned.
My sugar mixture burnt around 10 minutes in 🙁
Oh no I’m so sorry Bonnie! I can try to help trouble shoot for you – could be if you used a larger sauce pan maybe? Are you saying it burnt during the first 15 minutes of the sugar and water boiling together? After the first 15 minutes or, then it should take just and additional 5 minutes to turn color. It can turn quickly. Let me know how I can help!
PERFECTION! I have been trying to perfect my caramel and thought I had finally figured it out, but THIS is IT! The recipe is divine and has all the tips and tricks to make it practically fool proof! Delicious!
I am SO happy to hear this Nancy!
This is a GREAT recipe! I’ve been working on figuring out caramel and thought I had it, but this recipe is a game changer. Perfect ratios, and tips and tricks to make the most dreamy, easy to make caramel sauce! Yet another keeper recipe!
Thanks Nancy! I’m so glad you found it helpful!