
Cheesecake Brownies
This Post May Contain Affiliate Links. Please Read Our Disclosure Policy.
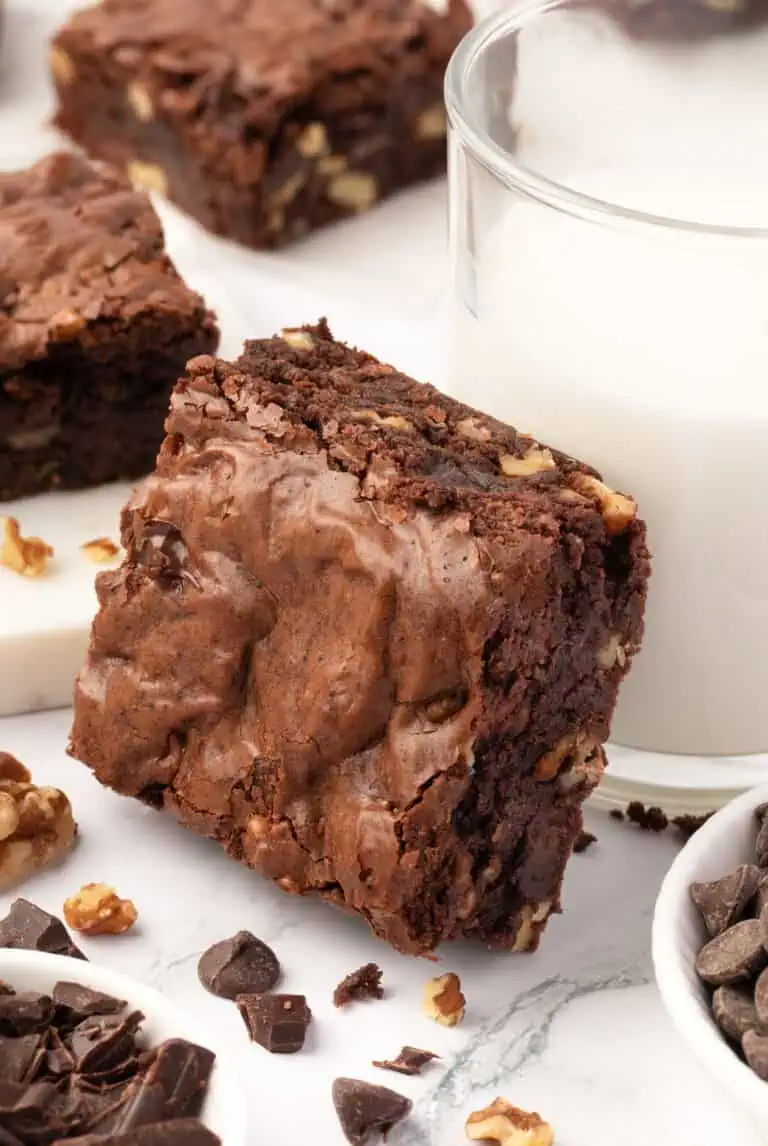
These classic Cheesecake Brownies are the perfect combination of soft, chewy brownie swirled with a sweetened cream cheese layer! They’re a rich and indulgent treat for any occasion that can be made ahead or frozen for extra ease.

If you’re obsessed with brownies, you’ll want to try these decadent treats. From Chocolate Chunk Almond Blondies to rich Milky Way Brownies, fudgy Fat Witch Chocolate Brownies, and classic Cocoa Powder Brownies, plus the super easy 3-Ingredient Nutella Brownies and indulgent Brownie Pie, there’s a brownie for every craving!
Game. Changer.
Why have one dessert when you can have two in one? And as much as I love cheesecake, making it can be a pain. So if I can swirl it on top of a chocolatey brownie you know I’m going to do that.
Grab My Cheesecake Book Now!
Discover the joy of baking with my digital cookbook, ‘Cheesecake for All Seasons‘! This comprehensive eBook features over 50 delectable cheesecake recipes, organized by season to suit every occasion.
Each recipe comes with detailed, foolproof instructions, essential baking tips, and troubleshooting advice to ensure your cheesecakes turn out rich, creamy, and delicious every time. Whether you’re a seasoned baker or a novice, this e-book will help you create perfect, indulgent desserts all year round.
Why You Will Love These Cheesecake Brownies
- Rich and fudgy – These brownies are rich and fudgy underneath the cheesecake layer!
- Great make ahead dessert – You can make these up to 2 days ahead of time, making it perfect dessert to bring to a potluck or get together.
- Easy pantry staple ingredients – No fussy ingredients here! You might even have all these ingredients already on hand.
Ingredients You Will Need
To make these cheesecake brownies go ahead and round up from your pantry…
- Flour – Be sure to measure your flour correctly as well. Using a weighing scale is always best if you can.
- Baking soda
- Salt
- Cocoa Powder – I used natural unsweetened cocoa powder here. Not dutch process which is different. Don’t mix them up! They don’t react the same way and can result in differences in your brownies in the end. You can read here about Natural Cocoa Vs Dutch Process Cocoa Powder.
- Butter – We’re adding salt, so I recommend using unsalted vs. salted butter can vary by brand as to how much salt they use! If you only have salted then I recommend reducing or completely omitting the added salt in the recipe.
- Eggs
- Sugar – To sweeten the brownies and the cheesecake. I prefer using granulated sugar. Brown sugar I find adds a little too much moisture, so granulated sugar works best here.
- Vanilla
- Chocolate chips
- Cream cheese
How to Make Cheesecake Brownies – Step by Step
Prep the oven. Preheat the oven to 350 degrees. Lightly butter or spray a 8×8 pan and line with parchment paper.
Make the cheesecake filling. Beat the cream cheese mixture until smooth about 1 minute. Add in your sugar and vanilla and beat until very smooth (about 1 to 2 minutes). Add in your egg and mix until combined. Set the filling aside.

Make the brownie batter.
Be sure to not overmix the batter once the flour has been added, which can result in a very tough brownie.

Assemble the brownies. Reserve 1/3 cup of brownie batter for swirling. Pour the rest of the batter into the prepared baking pan. Pour cheesecake filling on top and smooth into an even layer.
Then use a spoon to drop tablespoons of the reserved brownie batter evenly over the cheesecake filling.
Swirl the batters by running a clean knife through the filling in a criss-cross or zig-zag pattern.

Bake. Bake on the center rack for 30-35 minutes. The cheesecake filling will look puffy and dry.

Recipe Tips
- Use quality ingredients. For the best flavor and texture, choose high quality chocolate and cream cheese.
- Don’t overmix. The cheesecake should be mixed at a low speed until just smooth or combined to avoid cracks. The brownie batter should be mixed until just combined to avoid a tough, dense brownie.
- Cut brownies after chilling. For clean, straight lines wait to cut the brownies until they are thoroughly cooled. Even better, chill them in the fridge for a few hours before cutting.
- For fudgy brownies: This brownie is a little less fudgy and a little more cake-like due to the whipped eggs in the mixture. If you prefer a more fudgy brownie, then take it out of the oven a little sooner.
- Bake In A Light Colored Metal Pan – Glass pans will take longer and could result in a gummy texture. Dark pans will cook the edges too quickly. So be sure to use a light colored baking pan.

Baking Pan Recommendations
I always recommend baking brownies in a metal baking pan, as oppossed to a glass pan. If you do use a glass pan it will take longer for the brownies to cook and can result in a gummy texture. And make sure you aren’t using a dark pan which can cause the edges to cook through before the middle does resulting dry, even possibly burnt edges.
This is the baking pan I love and use to bake brownies in. I also like lining my pan with parchment paper so I can easily lift the brownie out and cut into squares.

Recipe FAQ’s
Store the brownies in an air-tight container at room temperature for 1-2 days or the refrigerator for up to 5 days.
You can freeze the whole slab of brownies in the pan for a 1-2 hours, then take them out of the pan and wrap tightly in plastic wrap and foil before putting them back in the freezer. Or you can cut and wrap the brownies individually and freeze that way. Freeze for up to 3 months, then thaw at room temperature before serving.
Yes to both! You can make them ahead and store in the fridge for 1-2 days before serving,

Other Indulgent Desserts to Try
Craving more cheesecake? Then try my Oreo cheesecake recipe and my Oreo cheesecake cookies!
And don’t forget to try my decadent strawberry cheesecake recipe!
Get My Cheesecake Book!
Don’t forget to grab a copy of my cookbook, Cheesecake For All Seasons! It’s an easy to download digital e-book with over 50 delicious cheesecake recipes, toppings, tips and tutorials for you to master making cheesecake at home!

Cheesecake Brownies
Ingredients
For the Cheesecake layer
- 8 ounces (225 g) cream cheese
- ⅓ cup (67 g) granulated sugar
- 1 teaspoon vanilla extract
- 1 large egg
For the Brownies
- 8 tablespoons (1 stick, 113 g) unsalted butter
- ½ cup (42 g) natural cocoa powder
- ⅔ cup (132 g) granulated white sugar
- ⅓ cup (142 g) light brown sugar
- 2 large eggs at room temperature
- 1 teaspoons vanilla extract
- 1 cup (120 g) all-purpose flour
- ½ teaspoon salt
- ½ cups (85 g) semi-sweet chocolate chips
Instructions
- Position a rack in the center of the oven and preheat to 350℉ (180℃) degrees. Lightly butter an 8×8 inch baking pan and line with parchment paper.
For the Cheesecake Layer
- Beat the cream cheese mixture until smooth about 1 minute. Add in your sugar and vanilla and beat until very smooth (about 1 to 2 minutes). Add in your egg and mix until combined. Set the filling aside. 8 ounces (225 g) cream cheese ⅓ cup (67 g) granulated sugar 1 teaspoon vanilla extract 1 large egg
For the Brownies
- Melt butter in a saucepan over medium heat. Remove from heat. Stir in cocoa powder and sugars. 8 tablespoons (1 stick, 113 g) unsalted butter ½ cup (42 g) natural cocoa powder ⅔ cup (132 g) granulated white sugar ⅓ cup (142 g) light brown sugar
- Stir in eggs and vanilla. 2 large eggs 1 teaspoons vanilla extract
- Stir in flour, salt and chocolate chips. 1 cup (120 g) all-purpose flour ½ teaspoon salt ½ cups (85 g) semi-sweet chocolate chips
- Reserve about 1/3 cup of the brownie batter to be swirled on top later. Spread the rest of the batter into your prepared pan. Pour your cheesecake filling over and smooth to cover the brownie batter. Then with a spoon drop tablespoons of the reserved brownie batter evenly over the cheesecake filling. With a clean knife, run the knife through the filling in a criss-cross pattern to swirl the brownie and cheesecake together.
- Place in the oven on a center rack and bake for 30-35 minutes until cheesecake is set and slightly puffy. Remove from the oven and place on a cooling rack to completely cool. Then remove from the pan and cut into squares.
Notes
- Storage: Store the brownies in an air-tight container at room temperature for 1-2 days or the refrigerator for up to 5 days.
- Make Ahead: You can make them ahead and store in the fridge for 1-2 days before serving, or make long ahead and freeze. You can freeze the whole slab of brownies in the pan for a 1-2 hours, then take them out of the pan and wrap tightly in plastic wrap and foil before putting them back in the freezer. Or you can cut and wrap the brownies individually and freeze that way. Freeze for up to 3 months, then thaw at room temperature before serving.
- Use quality ingredients. For the best flavor and texture, choose high quality chocolate and cream cheese.
- Don’t overmix. The cheesecake should be mixed at a low speed until just smooth or combined to avoid cracks. The brownie batter should be mixed until just combined to avoid a tough, dense brownie.
- Cut brownies after chilling. For clean, straight lines wait to cut the brownies until they are thoroughly cooled. Even better, chill them in the fridge for a few hours before cutting.
- Bake In A Light Colored Metal Pan – Glass pans will take longer and could result in a gummy texture. Dark pans will cook the edges too quickly. So be sure to use a light colored baking pan.


Quick question about the brown sugar measurements. The recipe states ⅓ cup brown sugar, but 142 grams? I’m going to go with grams, because I believe brownies use a LOT of sugar. Should that read ⅔ cup? Thanks so much. Brownies and Cheesecake truly are a match made in heaven! Today is National Cheesecake Day, and I found your recipe. I’m sure it’s going to taste as amazing as all your recipes!
Thanks for asking! The recipe uses packed brown sugar, so ⅔ cup should weigh ~142g. If you lightly spoon it, it might be closer to 133g—but for fudgy brownies, I recommend packing it slightly for that perfect texture. Hope that helps, and happy baking! 😊🍫
Wow, these brownies look and sound amazing! I’m a huge fan of cheesecake and brownies, and combining the two is pure genius. Can’t wait to give this recipe a try and share it with my family and friends!
Thank you, Mandy, I am so happy to hear that you enjoyed them!
can u make these into cupcake form?
Hi Ama, I haven’t tried but I don’t see why not – you will just need to adjust the baking time!
thank u!
you’re welcome!!
You can never go wrong with brownies, but adding the cheesecake layer takes them to another level of deliciousness! They were a hit for sure!
aw that’s awesome Adrienne I’m so glad you loved them!!
Can it be doubled and baked in a 13×9 pan? How long would it need to be baked?
Yes you can double the recipe and bake in a 9×13 pan and and I would recommend baking for 40-45 minutes but I can’t say for sure without testing.
just had these the other day for the first time and they’re the best dessert i’ve ever eaten. do you think you could use box brownies in a pinch? i have a feeling they won’t be nearly as good but was wondering. if so, would you follow the time on the box or on the recipe? thank you!
Hi Chelsea! I’m so glad you loved them… I think boxed brownies would work and I would follow what the box says for time.
These brownies are amazing and so addicting! My hubby and daughter absolutely loved this recipe! Definitely on our remake list.
Aw that’s awesome Beth glad to hear it 🙂
I would like to say I would have the strength to freeze some of these but from the way they smell they aren’t going to last long.
No judgement here 🙂 Glad you love them!
Two of my favorite desserts in one! Thanks for the tip about freezing– super helpful.
You’re welcome Sarah! 🙂
I appreciate the note on what type of baking pan to use – I’m terrible at baking so it was a really useful tip! Can’t wait to make these!
You’re welcome Elise! 🙂
I’m with you, I love a good brownie and I really love cheesecake so these brownies were the perfect combination of both!! Thanks for the step-by-step guide!
Thanks Emily 🙂 and glad you found the step by step helpful!
In the beginning you say 9×13 turn the photos are 8×8 and in the directions it’s 8×8 so which is it?
My apologies Taki- it is an 8 by 8 pan. I fixed the typo! Thanks 🙂