Whole Wheat Sandwich Bread
This Post May Contain Affiliate Links. Please Read Our Disclosure Policy.
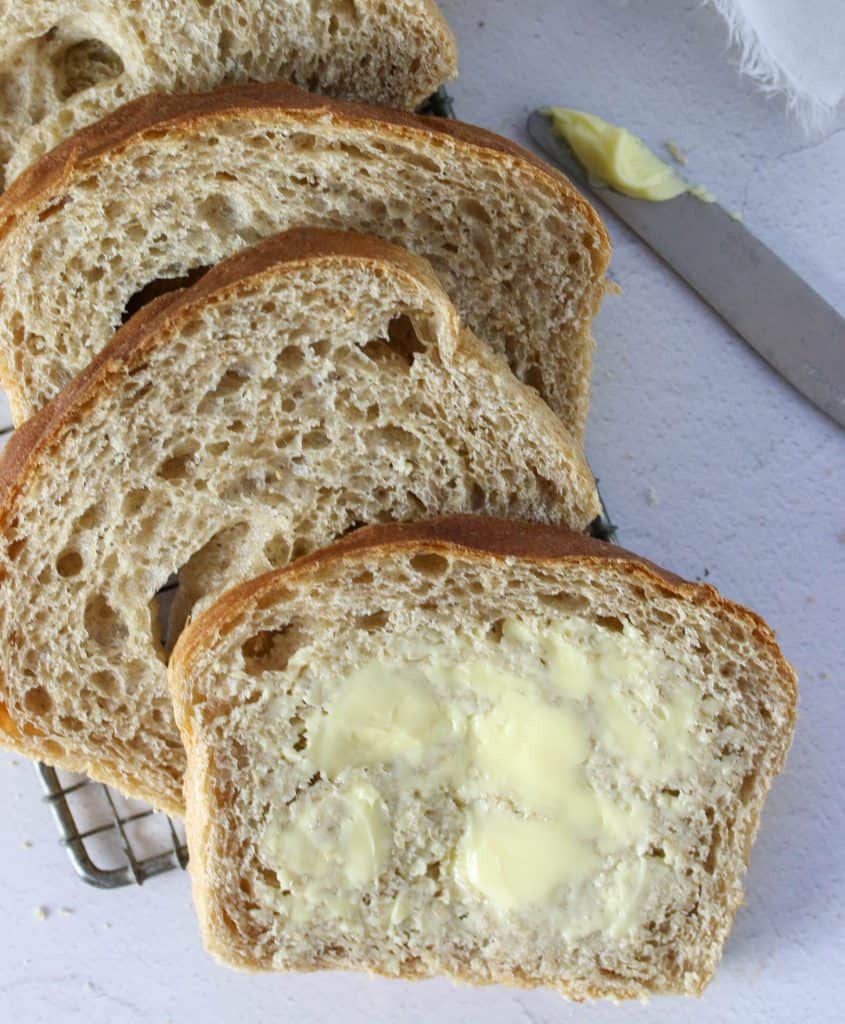
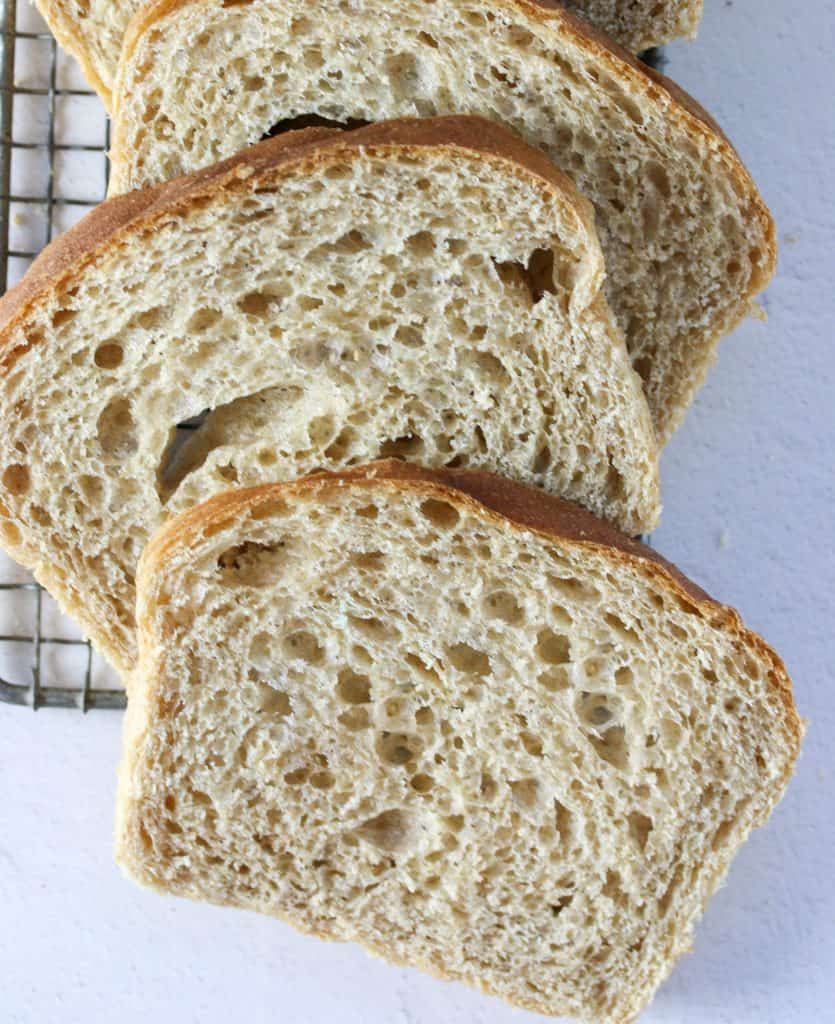
This Whole Wheat Sandwich Bread is moist, soft, and deliciously flavorful! It’s easy to make in one bowl, freezer-friendly, and full of extra nutrients – so you can have seconds with no guilt! Slather it with fresh jam, top with avocado, or make great sandwiches.

Homemade bread is one of my simple pleasures in life. Soft, tender bread with a crazy delicious smell just can’t be beat! This recipe is a slightly adapted version of my Best Homemade Bread Recipe, adding whole wheat flour and honey for a bit of sweetness.
Now you can feel good about every slice. Less guilt and more bread. I think that needs to be made into a T-shirt.
Ok now you might be wondering why would I bother making my own bread?! Oh. My. Let me count the wonderful reasons.
There are a lot of reasons to make bread homemade. First, it’s much cheaper than buying a loaf at the store. It also fills the house with amazing smells and makes you feel like a very accomplished baker, even though it is easy and the whole recipe is made in one bowl. Plus it’s a great item to freeze and have on hand for all your future bread needs. Make it once and you won’t go back! (To the bread aisle that is, wink wink)
Ready To Take Your Baking To The Next Level?
Join the Ultimate Baking Bootcamp and master essential techniques like mixing methods and the why behind every recipe! Whether you’re a beginner or looking to refine your skills, this step-by-step class will help you bake with confidence and create flawless desserts every time. Start your baking journey today!
New England Country Mart
This post is sponsored by the New England Country Mart. They are a premium fresh produce and grocery home delivery service in the greater Boston area. I love their focus on quality food and building community, yet without subscriptions or memberships. They use local artisan brands, stock nutrient-rich ingredients, and offer free shipping for orders over $150! Plus everything comes shipped in a temperature controlled box.
New England Country Mart started providing their grocery delivery service during the height of the COVID-19 crisis, which was a helpful service for many families. On a personal note, I love getting my groceries delivered to begin with (I use instacart all the time), but I love that this market uniquely focuses on local brands and organic products. Not only can I get my grocery regulars (fresh produce, eggs, bread, etc.), but I can also get wonderful, unique items I have never seen in other grocery stores in the area.
And for your first order, use the code: bostongirlbakes and they will give you $10 off!
Ingredients You’ll Need
- Warm water – This will help the yeast activate and start the rising process. It should be between 105-110°F.
- Orange Juice – I added orange juice to this whole wheat bread, which helps cut that bitterness of the whole wheat flour.
- Honey – I used Republic of Vermont Raw Honey. It adds a bit of sweetness and gives the yeast something to activate with.
- Yeast – You can use instant yeast or active dry. And no need to proof (unless you are unsure if your yeast is old!). Otherwise add it right to the ingredients.
- Kosher salt – Just a little to draw out the flavors of the honey and flour.
- Oil – I used organic canola oil, but vegetable oil works here too. Or melted butter as well.
- All-purpose flour – I used Hecker’s Unbleached Flour, but any AP flour will do.
- Whole wheat flour – I used Main Grains Organic 100% Whole Wheat Flour, but any other whole wheat flour will work.
How to Make Whole Wheat Sandwich Bread
Step 1: Make Your Dough
In the bowl of your stand mixer, go ahead and all your ingredients all at once. Yup, all at once. Just stir them all in with your paddle attachment.

Step 2: Knead
Switch to the dough hook attachment and knead dough for about 5 minutes, starting on low and moving it to high speed once it comes together. The dough should be smooth and pull away from the bowl.

Step 3: Let the dough rise.
Spray the top of the dough with cooking spray and turn over the dough. Spray the top of the dough. Cover with a damp cloth and then allow to rise until doubled in bulk, about 1 hour.
Time can vary depending on how warm your kitchen is!

Step 4: Shape the loaves and let rise again.
Once it has risen, use your fist to gently press the dough down. This will remove the large air bubbles.
Then scrape the dough onto a lightly floured surface and divide the dough in half. Then shape into loaves. This is really easy. Just flatten the dough into a rectangle (about 9×5) then roll the dough up. Tuck the ends under and place into two well oiled 9×5 inch loaf pans.

Step 5: Bake
Allow to rise for 1 -2 hours depending on kitchen temperature. Dough should bounce back when touched, and be slightly higher than the pan (about 1 inch higher).
Bake at 350 degrees F (175 degrees C) for 30 minutes. Let the bread cool completely before slicing.

Recipe Tips
- Check your yeast. Make sure your yeast is not old and expired. You can actually skip the proofing process, even with active dry yeast now. However if you are unsure if your yeast is still active or has expired it’s good to proof first in the water and honey to see if it bubbles.
- Lukewarm liquids. I like to use lukewarm water and I even take the chill off the OJ as well, by warming up in the microwave for about 15 seconds. Before dumping the yeast into the water, test the temperature. If it is too hot, it will kill the yeast. Too cool and it won’t activate the yeast. It should be between 105 and 110°F.
- Measure your flour accurately. You can use a kitchen scale to be exact. If you don’t have one, make sure to fluff the flour with a fork before measuring. Then spoon the flour into your cup and level with a flat edge. For a complete how and why you need to measure your flour accurately read this post on how to measure your flour accurately.
- Don’t add extra flour. If the dough seems a little sticky at first, don’t worry. Let it knead until the dough forms and pulls away from the bowl (it shouldn’t be sticking to the wall).
- Spray and flip! Make sure to spray the dough and flip it over and spray it again before it’s allowed to rise. No need for a second bowl here.
- Give it time to rise. The length of time needed for rising depends on the temperature of the kitchen. Especially on the second rise, check the dough after an hour. If it isn’t slightly higher than the pan and doesn’t bounce back when touched, let it keep rising. If your kitchen is pretty cold, try turning the oven on to warm the room or place the bread in a warmer place in the house.

How can I use whole wheat sandwich bread?
The possibilities for using this bread are endless! Here are some of the things I have tried so far. All of these options I was able to make with the groceries I had delivered from New England Country Mart. Let’s just say I was eating well ALL week long for breakfast, lunch, and dinner!
- BLT sandwiches: BLT’s using their local Massachusetts tomatoes, organic lettuce, and local Savenor’s bacon.
- Jam and butter!: Slathered in New England homemade Lyman’s jam or local Massachusetts-made Beckah’s bangin’ almond butter.
- The BEST avocado toast: Yup I was able to pick up my usuals as well, like avocados!
- Croutons: Turn leftovers into croutons and serve as a caprese panzanella salad with local cherry tomatoes, fresh basil, and Narrangasett burrata, then drizzled with an aged balsamic.
- Egg and Cheese Sandwiches: Can you get a better breakfast? With local organic eggs from the New England country mart, and gourmet Comte cheese! Heck, maybe add some leftover bacon too?
- Turkey sandwiches: I made the best turkey sandwiches this week with organic turkey breast and this crazy good balsamic fig mustard. Some romaine lettuce and heirloom tomatoes as well rounds it all out.

Recipe FAQ’s
Yes! Once the bread has cooled completely, wrap it in a layer of plastic wrap, then a layer of tinfoil (or put it in a zipper bag). You can freeze it for up to 3 months.
You can also freeze the bread before baking. Follow the recipe all the way through the shaping. Shape the loaves and place in the greased pans. Then freeze uncovered. Once frozen, cover them completely with plastic wrap, foil or a plastic bag. When ready to bake, remove the plastic or foil and let them rise (this will take 45 minutes to 1 hour). Then you can bake normally as directed in the recipe.
For a full guide, read this post on how to freeze bread.
This bread will last for 2-3 days at room temperature. Let it cool completely, then wrap tightly with plastic wrap to keep it moist. If you want it to last longer, just freeze it.
You can check your bread by using a digital thermometer if you are unsure. The bread should be golden brown on the outside and a thermometer should read 190°F when inserted in the center of the bread.
I did make one batch with ALL whole wheat flour and it was a bit denser but still delicious! You could also use white whole wheat flour, which will yield a softer loaf.

More Recipes To Try
Master The Art Of Baking!
Don’t miss out on the chance to elevate your baking skills! Join the Ultimate Baking Bootcamp today and unlock the secrets to creating perfect desserts every time. With expert guidance, step-by-step lessons, and insider tips, you’ll be baking like a pro in no time. Sign up now and start mastering your baking!

Whole Wheat Sandwich Bread
Ingredients
- 1 1/2 cups (360 mL) warm water
- 1/2 cup (120 mL) orange juice
- 1/4 cup honey
- 1 1/2 tbsp yeast (instant or active dry)
- 1½ tsp kosher salt
- ¼ cup neutral-tasting oil
- 3 cups (360 g) all-purpose flour
- 3 cups (338 g) whole wheat flour
Instructions
- In the bowl of your stand mixer, combine all ingredients together using a paddle attachment until a sticky dough forms.
- Switch to the dough hook attachment and knead on low for 5 minutes until a smooth supple dough forms.
- Spray the top of the dough with cooking spray and turn over the dough. Spray the top of the dough. Cover with a damp cloth. Allow to rise until doubled in bulk, about 45 minutes to 1 hour. Time will vary depending on the temperature of your kitchen.
- Punch dough down. Scrape dough onto a lightly floured surface and divide in half. Shape into loaves by pressing dough into a 9×5 rectangle. Roll up the dough from the long side to form a log. Fold the ends under.
- Place into two well oiled 9×5 inch loaf pans. Cover the pans. Allow to rise for 1 -2 hours (depending on kitchen temperature. Dough should bounce back when touched, and be slightly higher than the pan (about 1 inch higher than the rim of the pan).
- Bake at 350 degrees F (175 degrees C) for 30 minutes until an the bread is golden brown on top and the internal temperature reaches 190F.