This Post May Contain Affiliate Links. Please Read Our Disclosure Policy.
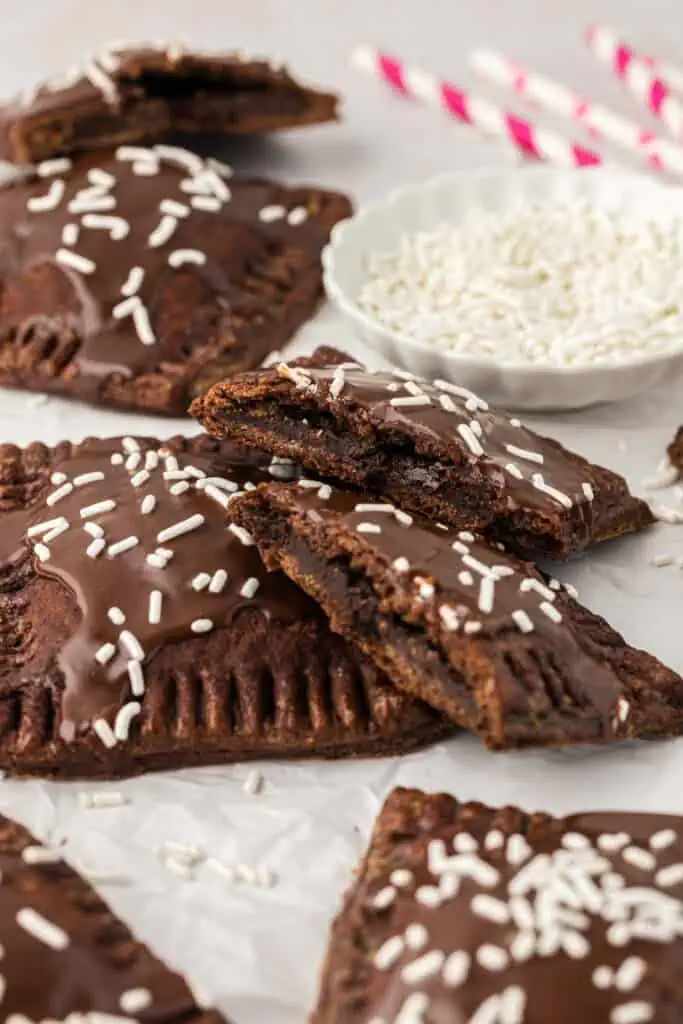
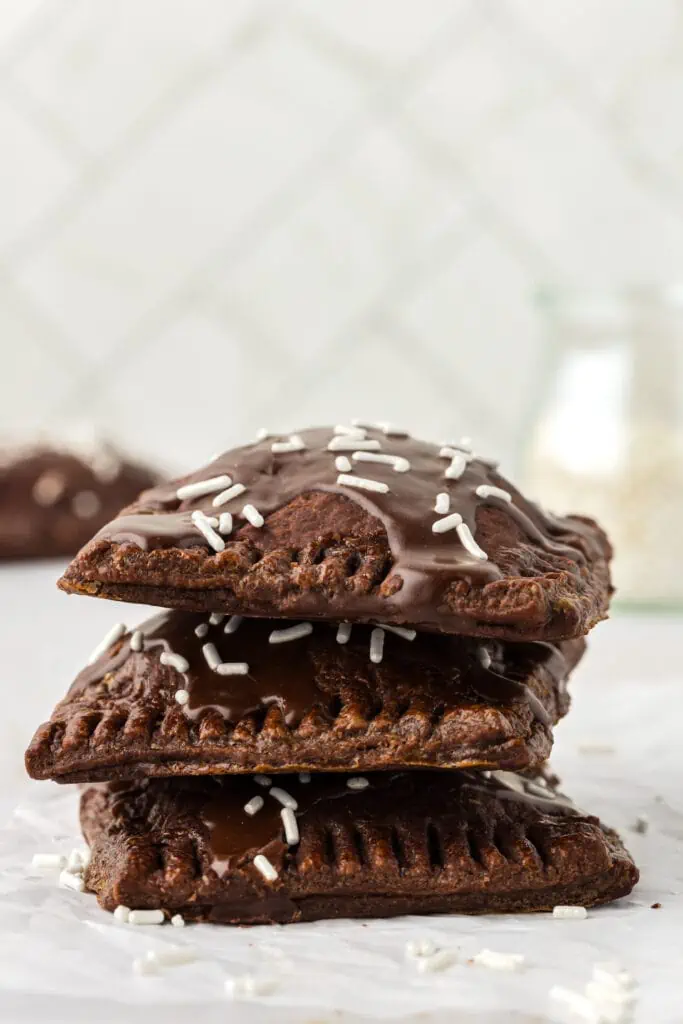
This chocolate fudge pop-tarts recipes starts with a homemade chocolate dough and has a chocolate fudge filling on the inside. Finished with a chocolate glaze and sprinkles! These triple chocolate pop tarts are way better than store-bought!

Growing up as a kid in the 80s and 90s I definitely enjoyed my fair share of pop tarts. I love a good frosted strawberry pop tarts and a brown sugar pop tart. But I have to say I never indulged in the chocolate pop tart version. Oh what I was missing out on!
Now as a kid I loved the convenience of them all. And of course they were tasty to boot. But as an adult I’ve definitely leaned away from those processed pastries.
Because homemade is always better- and better for you! Ok yes these are chocolate on chocolate on chocolate. But I like knowing that if I’m going to indulge I’m doing so with simple ingredients that I can pronounce. So if you like the store-bought pop tarts, then I know you are going to swoon over these homemade pop tarts.
For these homemade chocolate fudge pop tarts it starts with a buttery chocolate pie dough. I added cocoa powder into what’s basically a homemade pie crust. The fudge filling gets made on the stovetop with both cocoa powder and melted chocolate so it’s extra rich and fudgy. The key is to let the chocolate filling cool so it sets up and is perfectly spreadable. You don’t want the filling to run and leak out of the chocolate pie crust.
After you’ve assembled the homemade chocolate pop tarts I recommend chilling in the refrigerator. This will help firm up the dough so no butter leaks while they are baking and ensure they puff up all flaky and delicious. It will also help with the fudgy filling from not leaking out. Be sure to add an egg wash before you bake them so you get a crispy chocolate crust.
Then once they’re baked and cooled I spread on an easy chocolate icing and sprinkles! Homemade breakfast goodness.
See Also:
- Move over pumpkin! This butternut squash bread recipe is an easy loaf bread to make in the Fall.
- For more whole grain goodness, try my whole wheat blueberry muffins. These are the best breakfast treat!
- Sugar donuts are a fun breakfast treat to make with yeast! Dipped in sugar these donuts are light and fluffy.
- For a traditional Swedish breakfast treat during the holidays try making these St Lucia buns flavored with saffron!

Why You Will Love These Chocolate Pop Tarts
- 100% made from scratch
- Great to freeze!
- Chocolate in every bite
- Perfect for a Valentine’s day breakfast!
- Fun to make with the kids
My Recommended Tools
 Buy Now →
  Buy Now →
  Buy Now →
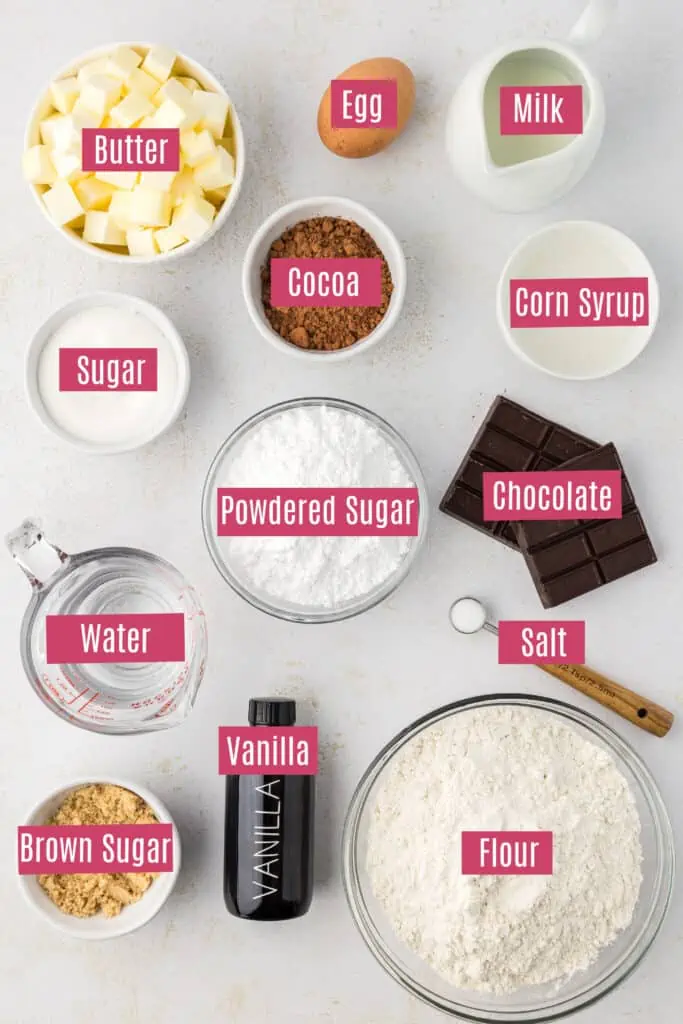
 Ingredients Needed
- Flour
- Cocoa powder – You can use either unsweetened cocoa powder or Dutch cocoa powder.
- Granulated sugar
- Salt
- Unsalted butter – If you’re using salted butter you can omit the added salt. You could also use vegan butter if need be.
- Water – Instead of just plain water, you can add 1-2 teaspoons espresso powder to the dough or use cold coffee as a fun alternative!
- Egg – This is used for the egg wash. If you want to make this recipe egg free, you can simply brush on a little milk or heavy cream instead. You can read my full tutorial on what is an egg wash?
- Brown sugar – If you don’t have any you can make your own brown sugar.
- Milk – Any type of milk will work here.
- Semisweet or bittersweet chocolate – Use baking chocolate you can chop or quality chocolate chips.
- Vanilla extract
- Powdered sugar – If you don’t have any try making your own powdered sugar!
- Corn syrup – This makes for a shiny crust that sets.
- White Sprinkles – You can use any type of sprinkles. Try rainbow sprinkles or chocolate sprinkles! You could even sprinkle on a little sea salt instead of sprinkles!
How To Make Chocolate Pop Tarts
Make the crust:
In a food processor, combine the flour, cocoa powder, granulated sugar, and salt. Pulse to combine. If mixing by hand, whisk until evenly combined.

Add the cold, cubed butter and salt. Pulse to combine until the butter is about pea sized. Butter pieces will be different pieces. I pulse about 10-12 times. Or you can mix by hand with a pastry cutter, or with your fingertips by squishing the butter into the flour mixture.
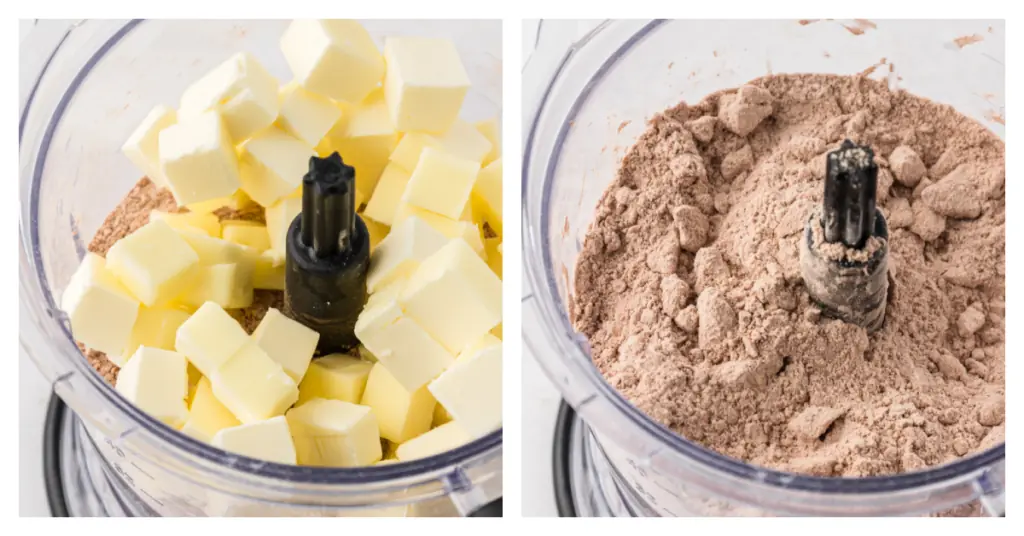
Add the water to the food processor and process just until the dough comes together to form a ball. Give the dough a squeeze it should stay together and there should not be any flour bits not incorporated. If the dough is still a little dry add 1-2 tablespoons a little at a time.
Remove the dough from the food processor and divide into two equal portions like to dump the dough into a tea towel, then bring up the towel edges and twist like a beggars purse, this brings the dough together into a cohesive mass.

Then I divide into two.. Then I like to pre-shape into a rectangle so it’s easier to roll out later. Wrap each dough portion in plastic wrap and chill for at least 2 hours. While the dough is chilling, make the filling.
Make the filling:
In a medium saucepan combine the cocoa powder, brown sugar, milk, salt, and 3 ounces of the chopped chocolate (doesn’t have to be exact you just need to add about half). Over medium heat, whisk the mixture until the chocolate is melted and the mixture is smooth.
Bring to a gentle boil, until the mixture is thick and silky, about 3 minutes.
Remove from the heat and add the remaining chocolate, butter, and vanilla and whisk until smooth. Allow to cool for about 90 minutes to firm up enough to use in the filling (do not refrigerate as it will harden too much). It should be thick but spreadable.

Assembly:
Line a baking sheet with parchment paper.
Remove one dough portion from the fridge and unwrap. Let the dough sit at room temperature for a few minutes to make rolling easier.
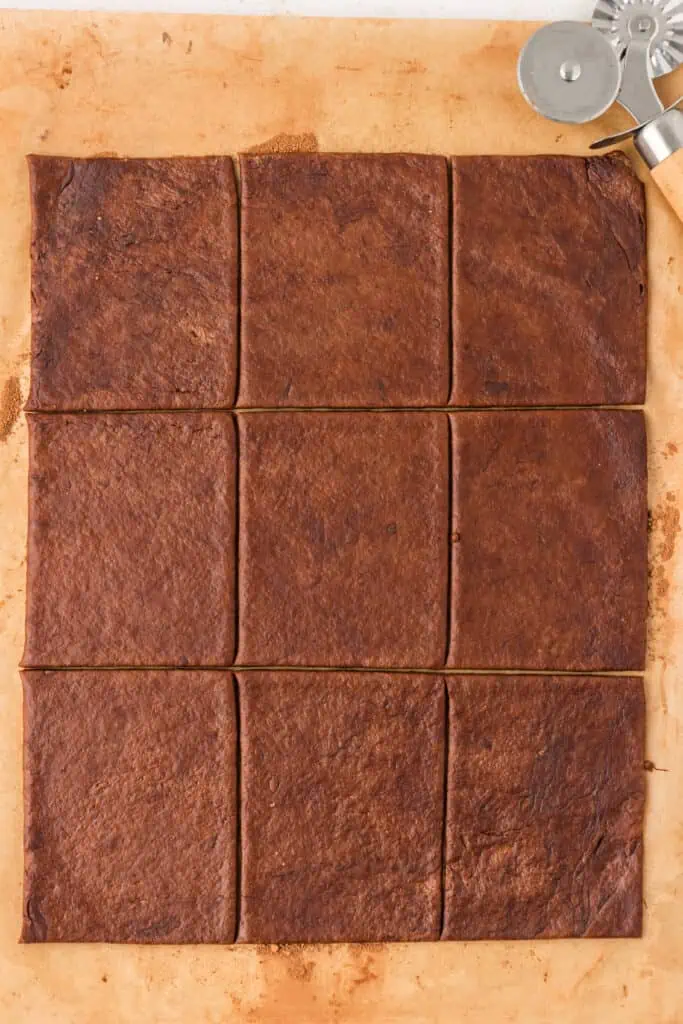
Between two sheets of parchment paper dusted with cocoa, or a clean surface dusted with cocoa powder, using a rolling pin, roll out the dough into a 9×12 inch rectangle. As I’m rolling I try to keep pushing edges together to keep in a perfect rectangle. Once rolled out, I like to trim the edges if need be to make for a neat rectangle. Repeat with the second dough portion.
Normally you would roll out pie dough on a floured surface but I didn’t want the white flour on the chocolate pie dough, so I used cocoa powder instead to keep the dough from sticking.
Cut the dough rectangle into 9 equal portions using a pizza cutter or sharp knife. Place the rectangles onto the baking sheet, spaced about 2 inches apart.
Fill the rectangles with filling. I used a small cookie scoop (2 tablespoons) and then I use an offset spatula and spread the filling on leaving a ½-inch border on all sides.
Roll out the second dough portion and cut into 9 rectangles.
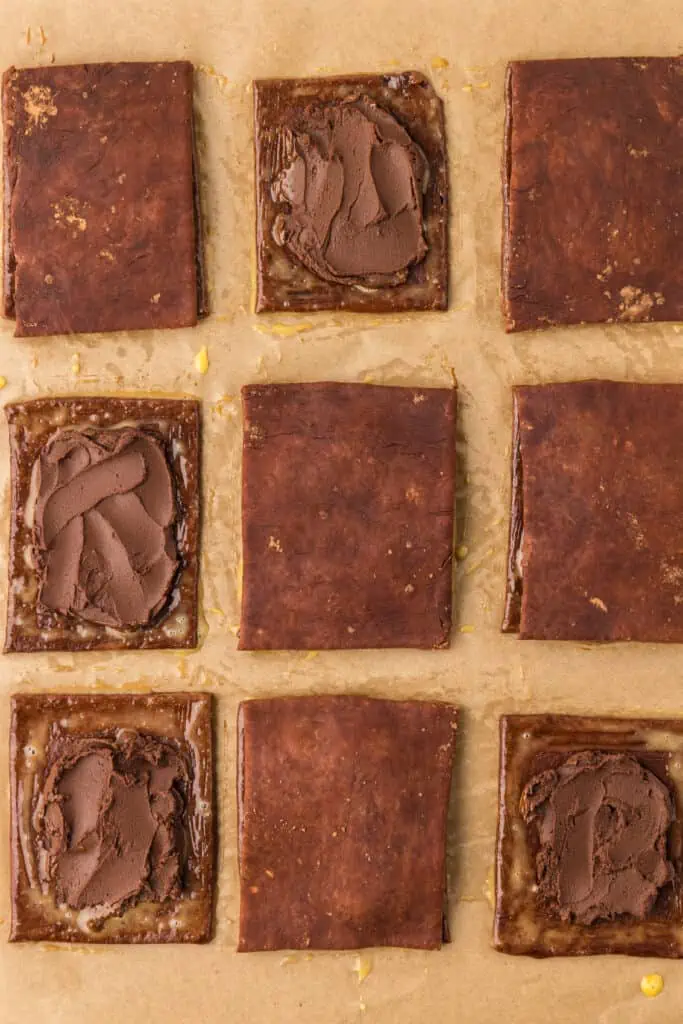
Place a second rectangle on top of each filled rectangle. Using a fork, crimp around the edges of each pop tart. I like to also then press down on the crimped edges slight to ensure they are sealed.
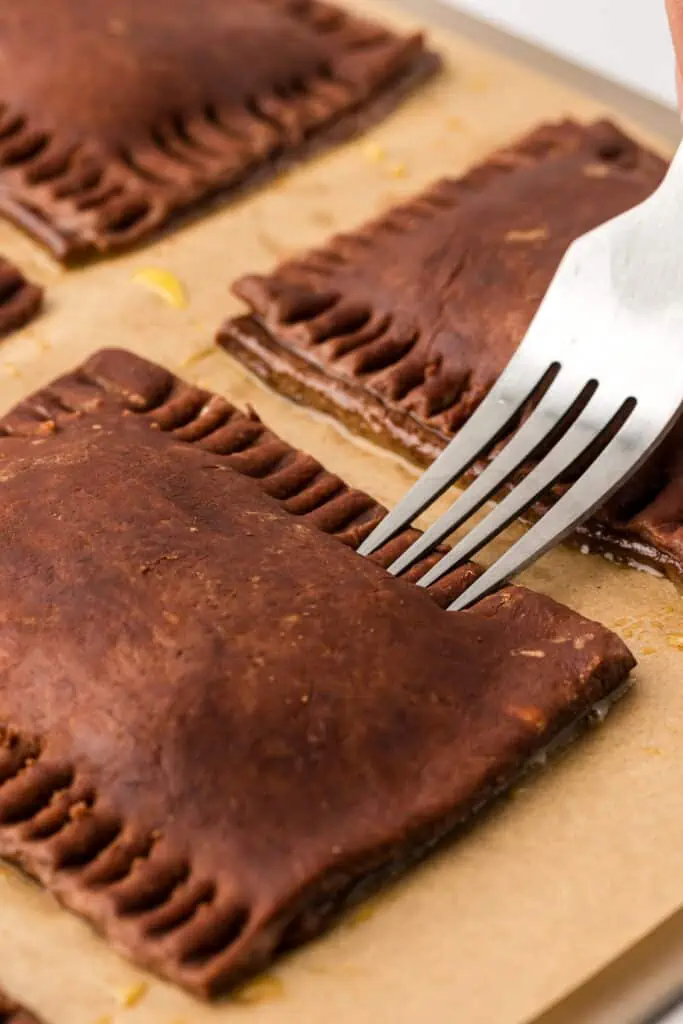
Poke the top of each pop tart with the fork in 4 places. This allows steam to escape.
Cover with plastic wrap and chill for 30 minutes before baking. Near the end of the chilling time, preheat the oven 375oF (190oC). And position a rack in the center of the oven.
When ready to bake, unwrap the baking sheet and using a pastry brush brush the top of each pop tart with the prepared egg wash.

Bake in the preheated oven for 25 minutes, until edges appear set. Remove from the oven and cool on the baking sheet for 5 minutes. Transfer to the wire rack to continue cooling. Meanwhile, make the glaze.

Make the glaze:
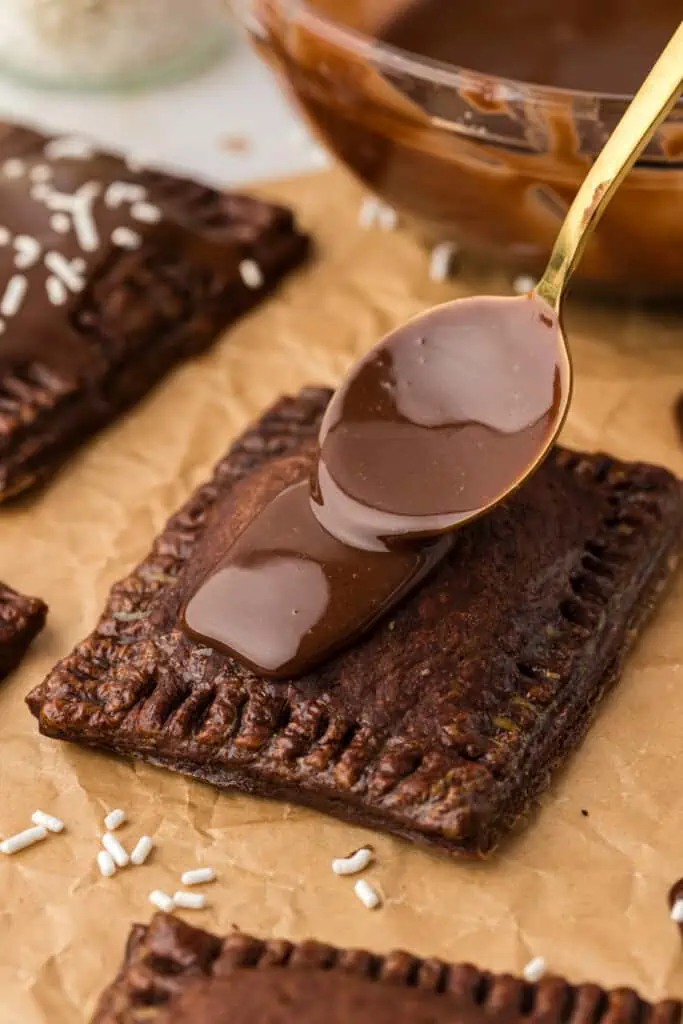
This sweet milk chocolate frosting is quick to mix up and I think is the perfect sweetness for the dark chocolate pie dough and filling. It’s a simple mix of cocoa powder, powdered sugar, vanilla, corn syrup and milk.
In a medium bowl, whisk together the powdered sugar, vanilla, cocoa powder, corn syrup, and milk. If the mixture is too thick, thin out with a little milk. If the mixture is too thin add a little additional powdered sugar.
Once the pop tarts are cooled, spread the chocolate glaze on. Add sprinkles. Allow to harden.
Recipe Tips:
- Use cold ingredients. Use very cold butter and ice cold water. You need the butter to stay cold and firm so you get a flaky crust.
- Chill the pie dough! This will make sure your dough isn’t overworked and the butter is firmed up.
- Leave A Border. You want to make sure to leave about 1/4-inch border from filling to edge of the pie crust. Otherwise it might leak out!
- Let the filling cool. If you try to use the filling right away it will be too thin and leak off the edges of the each pastry when you add it.
- Don’t Add Too Much Filling. I add about 1 to 2 Tablespoons MAX of filling. Too much and you risk it leaking out.
- Seal the pop tarts really well. Use the tines of a fork so the filling doesn’t leak out. I also like to then press down on the edges after crimping to really make sure the edges are sealed.
Recipe Variations
- Add chocolate chips – Instead of the homemade fudge filling you could add chocolate chips instead.
- Add mini marshmallows – For a sweet S’mores like experience try adding a few mini marshmallows to the inside of the pop tarts.
- Stir in peanut butter – You could stir in a little peanut butter to the fudge sauce!
Storage
Store these pastry tarts in an air-tight container at room temperature for 2-3 days. These are really best eaten fresh. If you can’t finish them within a few days, try freezing the leftover for a quick breakfast or snack in the future!Can I freeze homemade poptarts?
Yes! Once fully cooled, store the pop tarts in an air-tight container or zipper bag and freeze for up to 4 months. Easily reheat them in the toaster straight from frozen.
Yes the chocolate pastry dough can be made up to 3 days ahead of time and kept in the fridge. You could also assemble these pop tarts and keep the baking sheet wrapped in plastic wrap overnight and bake fresh the next morning.
More Recipes To Try
- Self Rising Flour Biscuits
- Lemon Cookies
- Brown Sugar Chocolate Chip Cookies
- 20 Self Rising Flour Recipes
- Milk Bar Cake

Chocolate Pop Tarts
Ingredients
Chocolate Crust & Assembly:
- 2 ½ cups plus 2 Tablespoons (325 g) all purpose flour spooned and leveled
- ⅓ cup (35 g_ natural cocoa (not Dutch), plus extra for rolling out dough
- ⅓ cup (67 g_ granulated sugar
- ½ teaspoon salt
- 1 cup (2 sticks, 226 g) unsalted butter, cubed and cold
- ⅔ cup 160 ml cold water (see note)
- 1 egg mixed with 1 tablespoon water for egg wash
Chocolate Filling:
- 2 Tablespoons natural cocoa powder
- 2 Tablespoons packed light brown sugar
- 6 Tablespoons milk
- Pinch salt
- 3 ounces (85 g) semisweet or bittersweet chocolate chopped and divided
- 1 Tablespoons (14 g) unsalted butter
- 1/2 teaspoon vanilla extract
Chocolate Glaze:
- 1 cup (120 g) powdered sugar
- 1 teaspoon vanilla extract
- 2 Tablespoons cocoa powder
- 1 Tablespoon corn syrup
- 2 Tablespoons milk
- White Sprinkles optional for garnish
Instructions
Make the crust:
- In a food processor, combine the flour, cocoa powder, granulated sugar, and salt. Pulse to combine. If mixing by hand, whisk until evenly combined.2 ½ cups plus 2 Tablespoons (325 g) all purpose flour ⅓ cup (35 g_ natural cocoa (not Dutch), ⅓ cup (67 g_ granulated sugar ½ teaspoon salt
- Add the cold, cubed butter and salt. Pulse to combine until the butter is about pea-sized. Butter pieces will be different pieces. I pulse about 10-12 times. Or you can mix by hand with a pastry cutter, or with your fingertips by squishing the butter into the flour mixture. 1 cup (2 sticks, 226 g) unsalted butter,
- Add the water to the food processor and process just until the dough comes together to form a ball. Give the dough a squeeze it should stay together and there should not be any flour bits not incorporated. If the dough is still a little dry add 1-2 tablespoons a little at a time. ⅔ cup 160 ml cold water
- Remove the dough from the food processor and divide into two equal portions. I like to dump the dough into a tea towel, then bring up the towel edges and twist like a beggars purse, this brings the dough together into a cohesive mass then I divide into two. Then I like to pre-shape into a rectangle so it’s easier to roll out later. Wrap each dough portion in plastic wrap and chill for at least 2 hours. While the dough is chilling, make the filling.
Make the filling:
- In a medium saucepan combine the cocoa powder, brown sugar, milk, salt, and half of the chopped chocolate. Over medium heat, whisk the mixture until the chocolate is melted and the mixture is smooth. 2 Tablespoons natural cocoa powder 2 Tablespoons packed light brown sugar 6 Tablespoons milk Pinch salt half of the 3 ounces (85 g) semisweet or bittersweet chocolate
- Bring to a gentle boil, until the mixture is thick and silky, about 3 minutes.
- Remove from the heat and add the remaining chocolate, butter, and vanilla and whisk until smooth. Allow to cool for about 90 minutes to firm up enough to use in the filling (do not refrigerate as it will harden too much). It should be thick but spreadable. 3 ounces (85 g) semisweet or bittersweet chocolate 1 Tablespoons (14 g) unsalted butter 1/2 teaspoon vanilla extract
Assembly:
- Line a baking sheet with parchment paper.
- Remove one dough portion from the fridge and unwrap. Let the dough sit at room temperature for a few minutes to make rolling easier.
- Between two sheets of parchment paper dusted with cocoa, or a clean surface dusted with cocoa powder, using a rolling pin, roll out the dough into a 9×12 inch rectangle. As I’m rolling I try to keep pushing edges together to keep in a perfect rectangle. Once rolled out, I like to trim the edges if need be to make for a neat rectangle. Repeat with the second dough portion.
- Cut the dough rectangle into 9 equal portions. Place the rectangles onto the baking sheet, spaced about 2 inches apart.
- Fill the rectangles with filling. I used a small cookie scoop (2 tablespoons) and then I use an offset spatula and spread the filling on leaving a ½-inch border on all sides.
- Roll out the second dough portion and cut into 9 rectangles.
- Place a second rectangle on top of each filled rectangle. Using a fork, crimp around the edges of each pop tart. I like to also then press down on the crimped edges slight to ensure they are sealed. Poke the top of each pop tart with the fork in 4 places. This allows steam to escape.
- Cover with plastic wrap and chill for 30 minutes before baking. Near the end of the chilling time, preheat the oven 375oF (190oC). And position a rack in the center of the oven.
- When ready to bake, unwrap the baking sheet and brush the top of each pop tart with the prepared egg wash. Bake in the preheated oven for 25 minutes, until edges appear set. Remove from the oven and cool on the baking sheet for 5 minutes. Transfer to the wire rack to continue cooling. Meanwhile, make the glaze.
Make the glaze:
- In a medium bowl, whisk together the powdered sugar, vanilla, cocoa powder, corn syrup, and milk. If the mixture is too thick, thin out with a little milk. If the mixture is too thin add a little additional powdered sugar. 1 cup (120 g) powdered sugar 2 Tablespoons cocoa powder 1 Tablespoon corn syrup 2 Tablespoons milk
- Once the pop tarts are cooled, spread the chocolate glaze on. Add sprinkles. Allow to harden.
Notes
- Storage: Store these pastry tarts in an air-tight container at room temperature for 2-3 days. These are really best eaten fresh. If you can’t finish them within a few days, try freezing the leftover for a quick breakfast or snack in the future!
- Freezing: Once fully cooled, store the pop tarts in an air-tight container or zipper bag and freeze for up to 4 months. Easily reheat them in the toaster straight from frozen.
- Make ahead: The chocolate pastry dough can be made up to 3 days ahead of time and kept in the fridge. You could also assemble these pop tarts and keep the baking sheet wrapped in plastic wrap overnight and bake fresh the next morning.
- Chocolate pie dough: Dough can be made up to 3 days ahead of time.
- Water: You can add 1-2 teaspoons espresso powder to the water before adding to the pie crust mixture. Or try using just cold coffee instead.
- Egg wash: You can always skip the egg wash and brush with milk, or heavy cream if there is an egg allergy.


Comments & Reviews
Type your question or comment below, and tap "Post Comment". I welcome constructive criticism, but please be respectful. Rude or inappropriate comments will not be published. Thank you!Baking isn't always easy! So if you had any issues, I'd appreciate the chance to help you troubleshoot before you rate.