This Post May Contain Affiliate Links. Please Read Our Disclosure Policy.
Learn how to make homemade everything bagels in this step by step tutorial! You will be amazed how easy it really is to make your own! And then make them plain, or with toppings if you like!
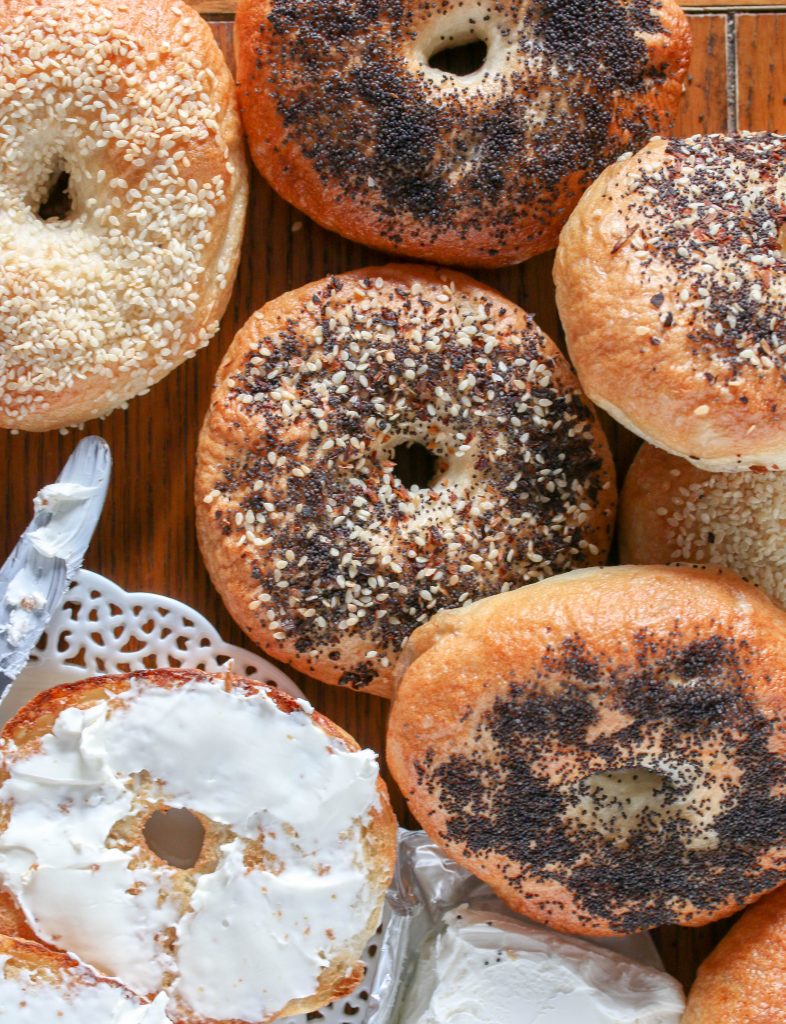
When it comes to breakfast, I think the everything bagel is just KING. I mean you can top them with cream cheese or turn them into (my personal fave) a breakfast sandwich. Now I have to admit that it’s pretty common on the weekends to indulge and run down to the local Dunkin’ Donuts and grab an everything bagel sandwich. However, these homemade everything bagels are 1000 times better than a grocery store bagel or one from a local bagel shop.
And if you’re like me having an authentic New York bagels isn’t exactly an option. So I decided it was time to try and make my own delicious homemade bagels. Um. Gamechanger my friend. Then all you need for a fresh bagel after it’s baked is some cream cheese to slather on
I took this online class from Craftsy on how to make bagels and I decided I needed to show you all how it was done! And I think with my step by step photos you will be running to your kitchen and rocking out your own homemade bagels.
This easy homemade bagel recipe I turned into everything bagels, but you can really use it to top however you want!
If you really love to bake and want to learn more, then I recommend joining Bluprint, which is Craftsy’s online classes all for one low membership price a month. I have taken several of their classes and they are all fantastic!
Everything Bagel Ingredients
Here’s the thing I bet you have them on hand.
- Bread Flour – I used bread flour, which I had. If you do use all purpose flour it might produce a softer bagel as opposed to that chewier NY style bagel. I do recommend using bread flour though if you can to achieve a chewy texture.
- Salt – This is important in helping the dough rise. I like to use fine sea salt but kosher or table salt will also work.
- Yeast – I used active dry yeast but instant yeast would also work. I do recommend Red Star Yeast if you can find it in your store, it has dough enhancers and is a superior yeast that yields great results! You can read more on yeast here.
- Water – You got that I assume right?
- Brown Sugar – Traditional bagel recipes will use barley malt syrup but since that is something I NEVER have on hand, I substituted brown sugar and it worked great. I tried substituting with honey and found it lacked in taste.
- Granulated sugar – To use in the water bath.
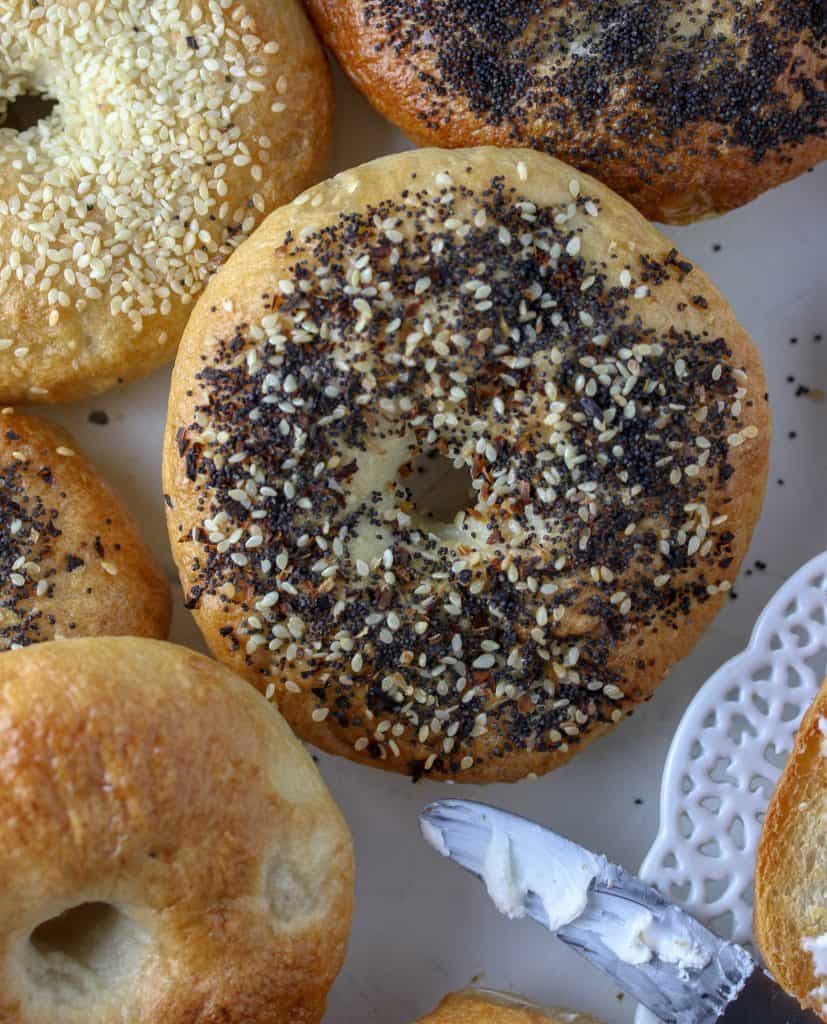
- Everything Bagel seasoning – You can make a homemade seasoning or buy an everything bagel seasoning blend. I made a combination of poppy seeds, white sesame seeds, black sesame seeds, flaky sea salt, garlic flakes, and onion flakes.
Everything Bagel Seasoning Recipe
To make your own seasoning blend, stir together the following seasonings:
- 1 1/2 teaspoons white sesame seeds
- 1 1/2 teaspoons black sesame seeds
- 1 Tablespoons poppy seeds
- 2 teaspoons dehyrdated garlic flakes (dried minced garlic)- I don’t recommend garlic powder as it’s too fine and doesn’t have the coarse texture we want.
- 2 teaspoons dried minced onion – Or onion flakes. I don’t like to use onion powder as it’s too fine in texture.
- 1 teaspoon sea salt flakes – You could also use kosher salt or coarse sea salt
Simple combine the spices and salt in a small bowl and stir together. You will then sprinkle on the plain bagels after they are boiled, and you brush on a egg wash and before they are baked.
You can easily double this recipe and use it for whatever you like! If you have leftover seasoning I love sprinkling it on a slice of avocado toast!
Why Do You Have To Boil Bagels?
To make a classic new york style chewy bagel requires boiling them before baking them. By boiling them it helps to develop a thick chewier exterior, which is essential to me when I bite into a bagel.
The longer you boil = thicker, chewy bagels.
I found that 1 minute on each side was perfect. If you want a softer crust, then you can try boiling for less (30-45 seconds on each side). I added brown and white sugar to the water to help it with browning in the oven and giving it more of that distinct bagel flavor. Typically barley malt extract is added, but I always have brown sugar on hand! And that was a great substitute.
How Do You Make Bagels At Home?
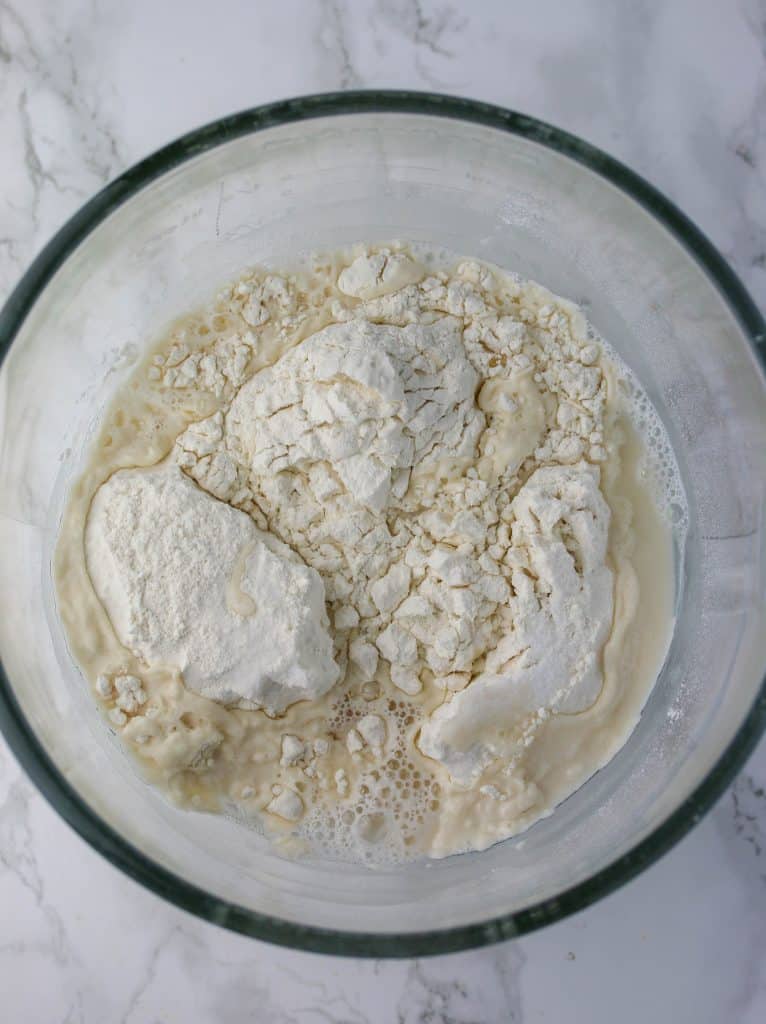
Step 1: Combine ingredients.
In a large bowl of a stand mixer combine the yeast, bread flour, salt, brown sugar, and warm water. You can also mix the ingredients together in a bowl if you’re making the bagel dough by hand.
Be sure to separate your yeast and salt. Salt will kill the yeast. So add your yeast to the bowl first, then the rest of the ingredients, and the salt last.
Step 2: Knead The Dough
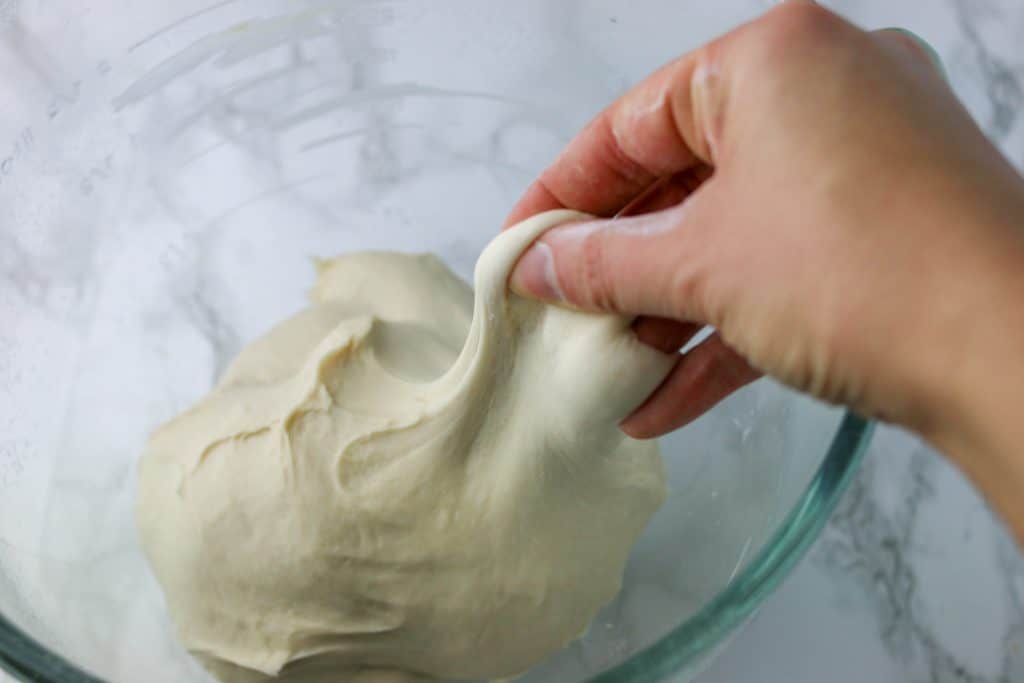
And knead the dough. If you are using a stand mixer this will take 10 minutes with your dough hook attachment. If you are kneading dough by hand, this will take about 15 minutes.
You want the dough to be very stretchy. I use the windowpane test where I take a piece of the dough and see if I can stretch it to be very thin and I can see through it (hence the name windowpane) without tearing.
Step 3: Let The Bagel Dough Rise
Most recipes will have you use a second bowl for this step, but I find it to be unnecessary. I simply spray the top of the dough with a non-stick cooking spray and flip the dough over. And then spray again. This is so the dough doesn’t dry out and develop a skin. You can also brush the bowl with a little olive oil.
Be sure to cover the dough with a towel and let rise in a warm place until doubled in size (about 1 to 1 1/2 hours).
While the dough rises I like to prepare the bagel seasoning mix.
Step 4: Make the everything bagel seasoning mix.
In a small bowl stir together the poppyseeds, black sesame seeds, white sesame seeds, dehydrated garlic, onion flakes,
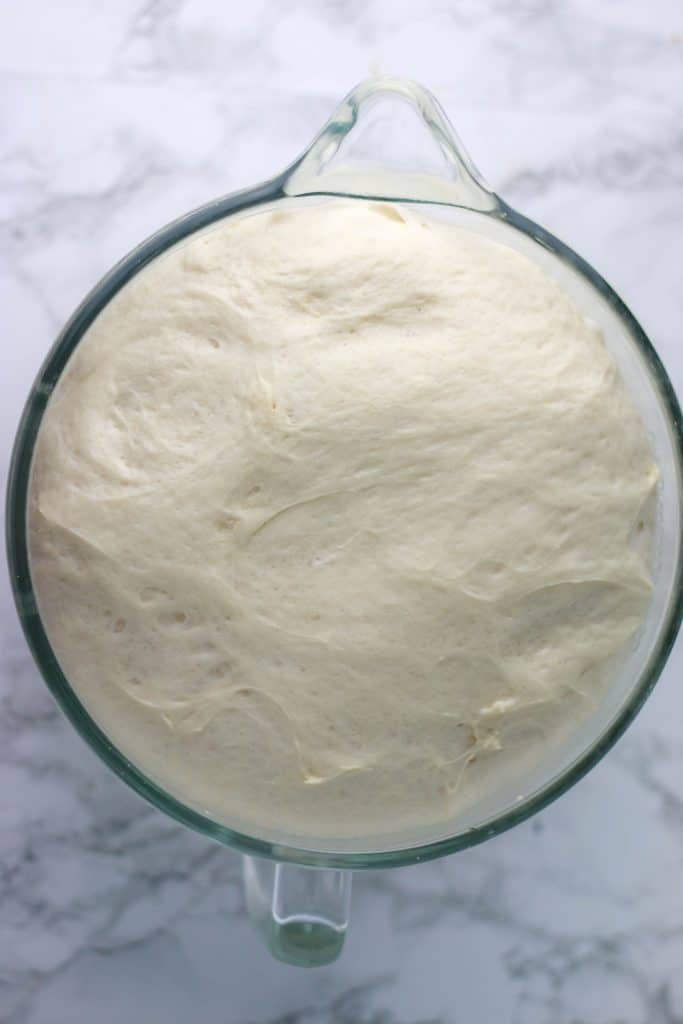
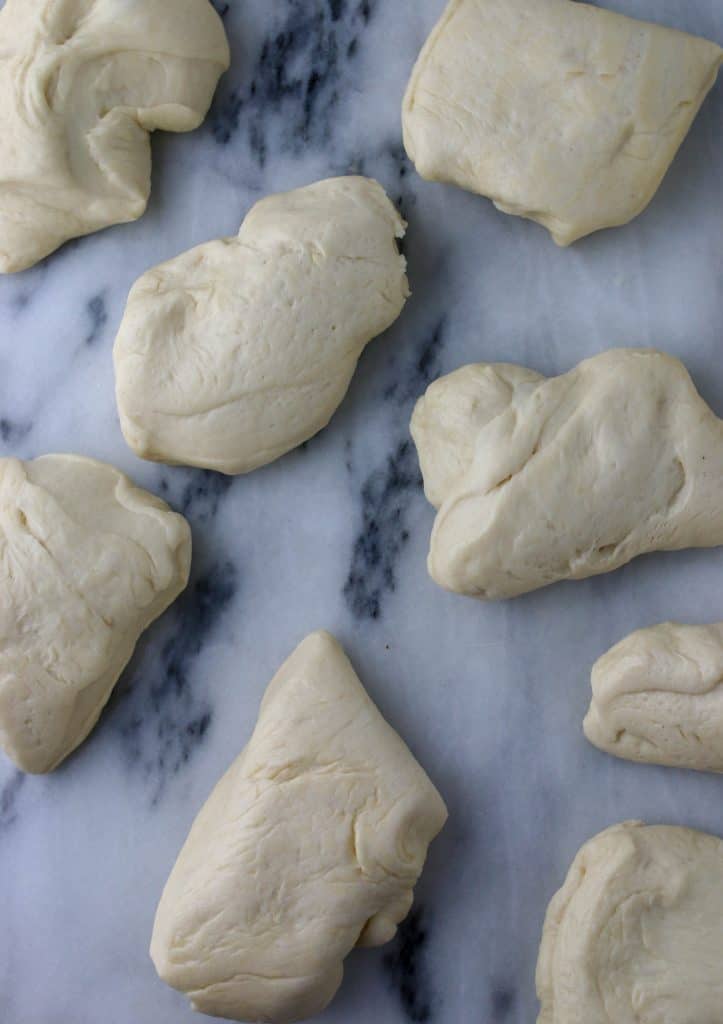
Step 4: Divide the dough into equal pieces.
You can eyeball this if you want. I like to use my kitchen scale to divide the dough up evenly.
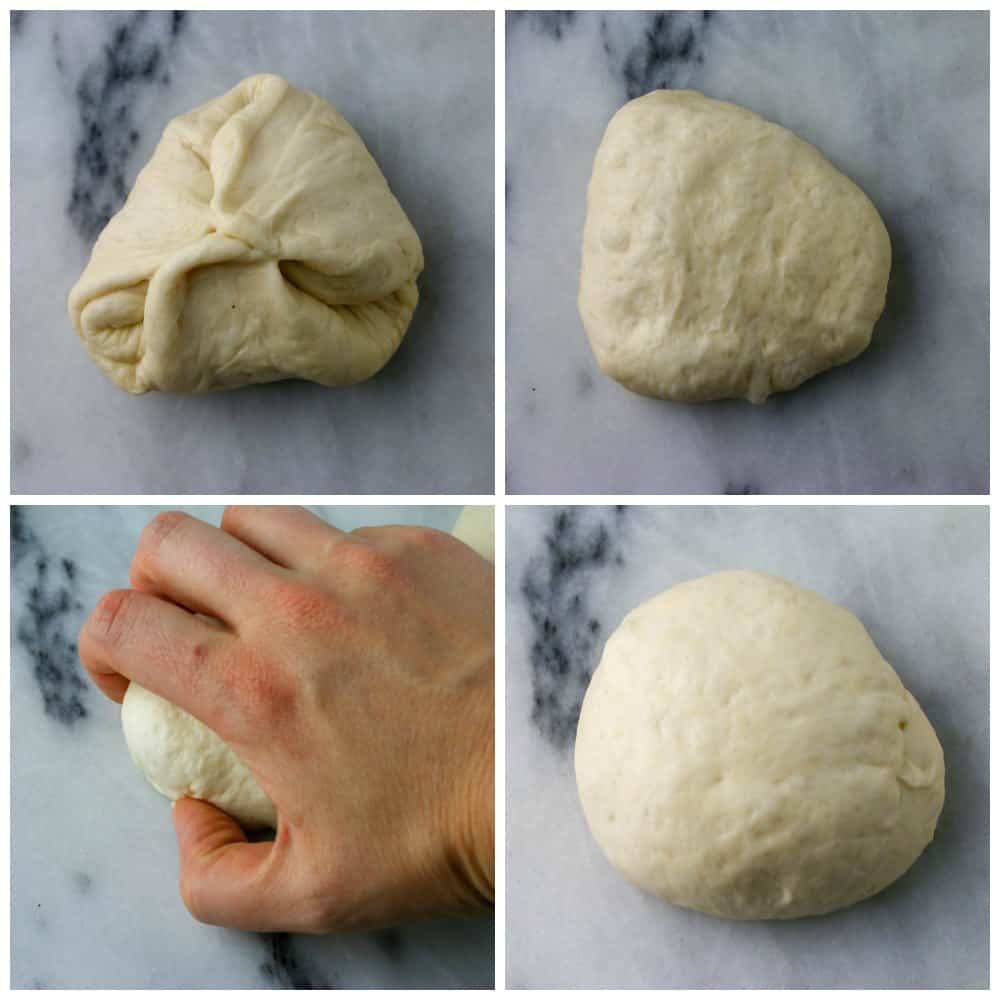
Step 5: Shape The Bagels Into Rounds.
To do this, I bring up the bottom edges and pinch them together (almost making like a little dough purse). Then flip the dough over and give it a slight squish with the palm of my hand. Then I cup my hand and roll the dough in a circular motion until it forms a dough ball.
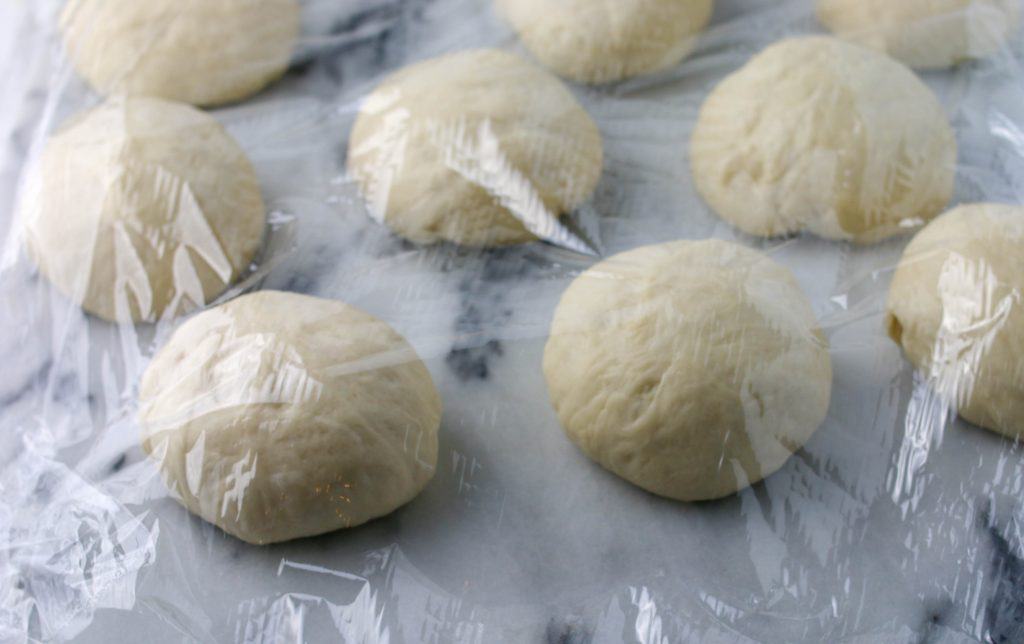
Step 6: Let The Bagels Rest
Once the bagels have been shaped into balls, place them on a parchment lined cookie sheet and cover them with plastic wrap. Allow the dough to rest.
Pro Tip: Sprinkle some cornmeal onto the parchment so the bottoms of your bagels have that classic cornmeal bottom!
Pro Tip: I spray the plastic wrap first with non-stick cooking spray so it won’t stick.
Step 7: Make The Water Bath
While the dough is resting, prepare the water bath by heating the water, brown sugar, and sugar to a very gentle boil in a large pot. Preheat your oven to 425°F.
Step 8: Shaping The Bagels, Part Two
Now the dough has risen again it’s time to give the bagels their iconic shape. (aka poke a hole in them!). And that’s literally what you are going to do. Simply press your index finger into the center of the dough to create a hole. Then you will stretch the hole into a 1 1/2 to 2-inch hole. It may shrink back on you that’s ok. To accomplish this, I twirled the bagel around my finger until it stretched out slightly.
Taking the class from Craftsy was a great way to watch this in action!

Step 9: Boil The Bagels
Transfer the shaped bagels, four at a time if possible, to the boiling water. Increase the heat under the pan to bring the water back up to a gently simmering boil, if necessary.
Cook the bagels for 1 minute, flip them over, and cook 1 minute more. Using a skimmer or strainer, remove the bagels from the water and place them back on the baking sheet. Repeat with the remaining bagels.
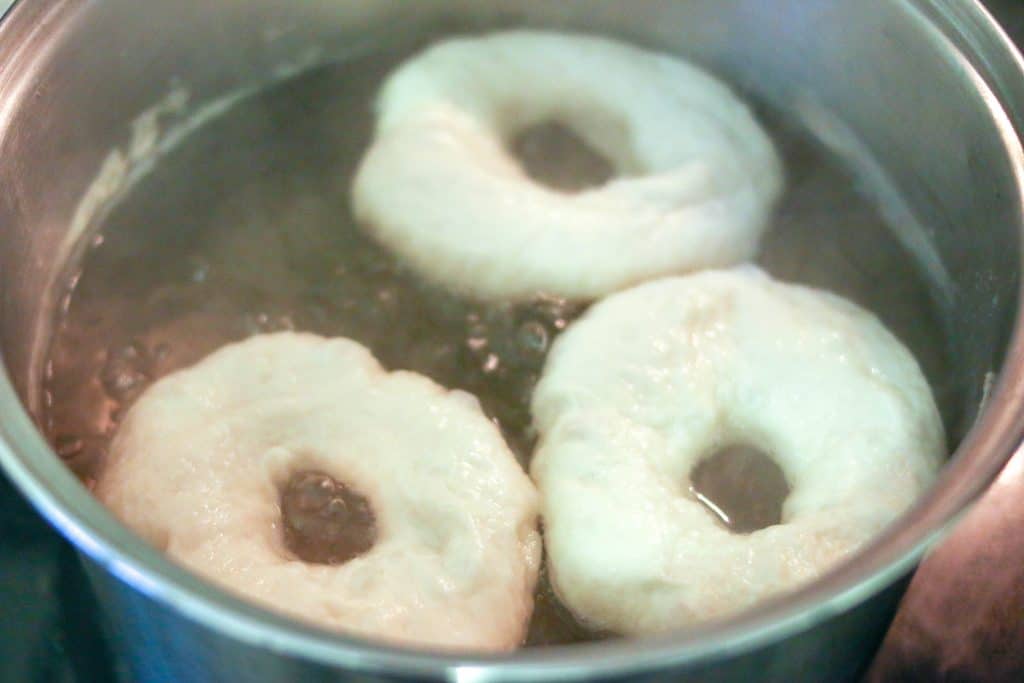
Step 10: Add Everything Bagel Seasoning
Now for the best part! Adding the everything bagel seasoning. First you want to egg wash the bagels to help them brown and for the seasoning to stick,
In a small bowl, mix together an egg white and 1 tablespoon of water. Brush the tops of each bagel and sprinkle on the everything bagel seasoning mix.
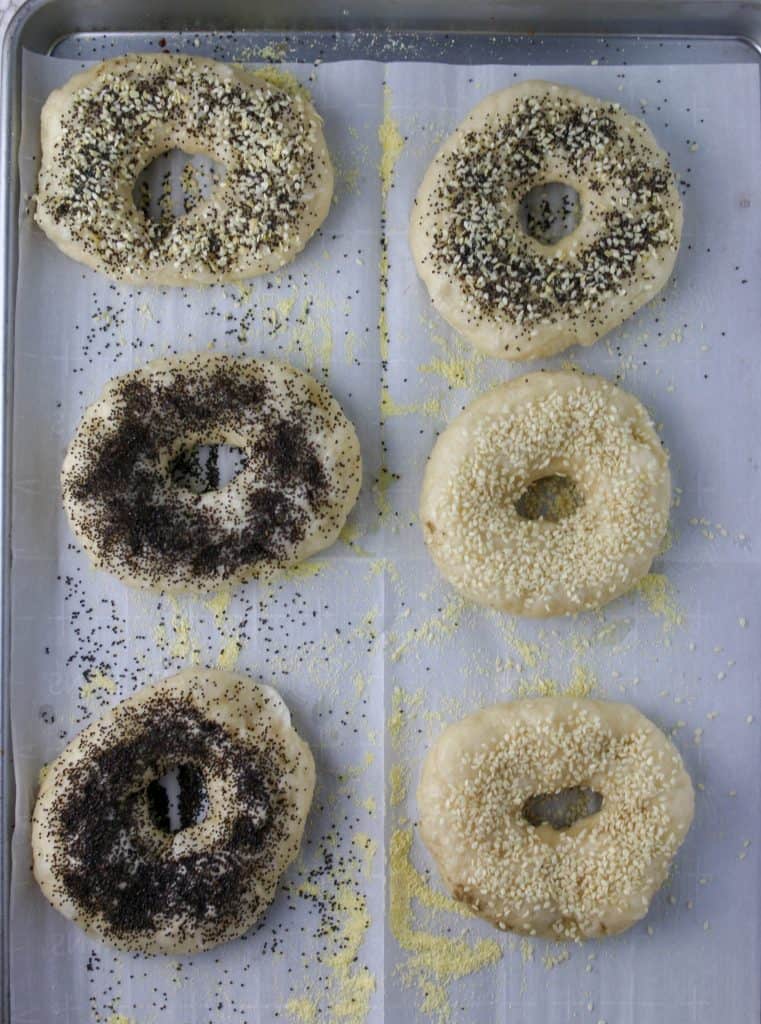
Step 10: Bake and Enjoy!
The best part is of course baking them and then slathering them with some cream cheese!
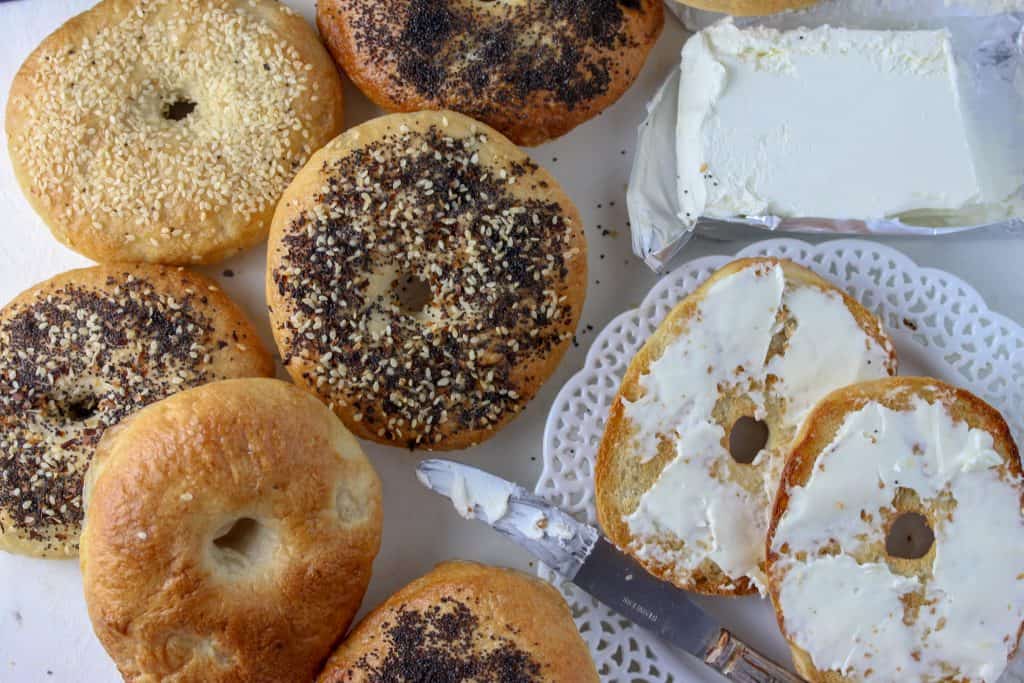
Recipe Tips
- Measure your flour accurately. Too much could result in a tough bagel, so I always recommend using a kitchen scale for best accuracy or use the spoon and level method method mentioned in the flour post!
- Watch that mixer! If kneading with a mixer, this is a dense dough that can really put your mixer through a work out! The dough will “thwap” the sides of the bowl. My mixer will even move across my counter so I just simply place one hand on top to keep it place.
- Rise in a warm draft free place (70 – 80 degrees is ideal). If your kitchen is cold, it may take longer for the dough to rise.
- Do not let the dough rise for too long. This is called overproofing and can result in flat bagels that do not rise.
- Boil only a few at a time. When boiling the bagels, be sure to no overcrowd and boil too many at once. I found that 3 was max.
- Set a timer for boiling each side. You do not want to leave them in the water for too long. I found that 1 minute on each side was perfect.
Recipe FAQ’s
Yes absolutely you can! And in fact, it will help the bagels to develop their flavor. The next day, let the dough rise at room temperature for 45 minutes before shaping the bagels. I don’t recommend letting the bagels rise overnight once shaped as it can easily become over-proofed.
Bagels freeze wonderfully! Freeze baked bagels for up to 3 months in an airtight container, then thaw at room temperature.
I used and recommend instant yeast, Red Star Platinum Yeast, but you can use an active dry yeast but this will increase the rising times.
Yes you can by you will knead the dough for about 10-15 minutes but will take some serious arm muscle!
Absolutely! You can use just garlic, make onion bagels, or sprinkle on just some sesame seeds or poppyseeds. Or just make plain bagels too.
More Recipes To Try

Homemade Everything Bagels
Equipment
Ingredients
DOUGH
- 1 tablespoon instant yeast
- 4 cups (480 grams) Bread Flour
- 2 teaspoons fine sea salt
- 1 tablespoon brown sugar
- 1 1/2 cups (360 ml) lukewarm water
WATER BATH
- 2 quarts water
- 2 tablespoons brown sugar
- 1 tablespoon granulated sugar
Everything Bagel Seasoning Mix
- 1 1/2 teaspoons white sesame seeds
- 1 1/2 teaspoons black sesame seeds
- 1 Tablespoons poppy seeds
- 2 teaspoons dried minced garlic
- 2 teaspoons dried minced onion
- 1 teaspoon sea salt flakes
Instructions
- Combine all of the dough ingredients and knead vigorously for 10 minutes (if you’re using an electric mixer) or up to 15 minutes (if you’re kneading by hand). Since we’re using a high-protein bread flour here, it takes a bit more effort and time to develop the gluten. The dough will be quite stiff; if you’re using a mixer it will “thwap” the sides of the bowl, and hold its shape (without spreading at all) when you stop the mixer.
- Place the dough in a lightly greased bowl, and set it aside to rise in a warm place until it's noticeably puffy though not necessarily doubled in bulk, 1 to 1 1/2 hours.
- Make the everything bagel seasoning mix. In a small bowl combine the poppyseeds, black sesame seeds, white sesame seeds, garlic, onion, and salt. Set aside.
- Lightly grease two baking sheets, or line them with parchment and grease the parchment. Transfer the dough to a work surface, and divide it into eight pieces.
- Working with one piece at a time, roll it into a smooth, round ball. To do this, I bring up the bottom edges and pinch them together (almost making like a little dough purse). Then flip the dough over and give it a slight squish with the palm of my hand. Then I cup my hand and roll the dough in a circular motion until it forms a dough ball.
- Place the balls on one of the prepared baking sheets. Cover the balls with plastic wrap, and let them rest for 30 minutes. They'll puff up very slightly.
- While the dough is resting, prepare the water bath by heating the water, brown sugar, and granulated sugar to a very gentle boil in a large stockpot. Preheat your oven to 425°F.
- Use your index finger to poke a hole through the center of each ball, then twirl the dough on your finger to stretch the hole until it’s about 1 1/2″ to 2″ in diameter. Place six bagels on each of the baking sheets.
- Transfer the bagels, four at a time if possible, to the simmering water. Increase the heat under the pan to bring the water back up to a gently simmering boil, if necessary. Cook the bagels for 1 minute, flip them over, and cook 1 minute more. Using a skimmer or strainer, remove the bagels from the water and place them back on the baking sheet. Repeat with the remaining bagels.
- If adding toppings: Mix together an egg white and 1 tablespoon of water. Brush the tops of each bagel and sprinkle on the everything bagel seasoning.
- Bake the bagels for 20 to 25 minutes, or until they're as deep golden brown color, turning them over about 15 minutes into the baking time (this will help them remain tall and round). Remove the bagels from the oven, and cool completely on a rack.
Notes
- Can I let the dough rise overnight? Yes absolutely you can! And in fact, it will help the bagels to develop their flavor. The next day, let the dough rise at room temperature for 45 minutes before shaping the bagels. I don’t recommend letting the bagels rise overnight once shaped as it can easily become overproofed. Can I freeze these bagels? Bagels freeze wonderfully! Freeze baked bagels for up to 3 months in an airtight container, then thaw at room temperature.
- Measure your flour accurately. Too much could result in a tough bagel, so I always recommend using a kitchen scale for best accuracy or use the spoon and level method method mentioned in the flour post!
- If kneading with a mixer, this is a dense dough that can really put your mixer through a work out! The dough will “thwap” the sides of the bowl. My mixer will even move across my counter so I just simply place one hand on top to keep it place.
- Rise in a warm draft free place (70 – 80 degrees is ideal). If your kitchen is cold, it may take longer for the dough to rise.
- Sprinkle some cornmeal onto the parchment so the bottoms of your bagels have that classic cornmeal bottom!
- When rising a second time, I spray the plastic wrap first before covering the dough balls with non-stick cooking spray so it won’t stick.
- Do not let the dough rise for too long, which is called overproofing and can result in flat bagels that do not rise.
- When boiling the bagels, be sure to no overcrowd and boil too many at once. I found that 3 was max.
- Set a timer for boiling each side. You do not want to leave them in the water for too long. I found that 1 minute on each side was perfect
- Adapted from King Arthur Flour

Kathy says
Heather, I so enjoyed reading your instructions for making bagels. They sound just like how I have made them for years. Before we had kids my husband and I developed a bagel recipe and sold them in a bagel cart. This was over 30 years ago, and I still love making them and enjoying new recipes. I look forward to trying yours this next week with my niece’s little girls I am visiting.
Heather says
aw that’s so cool Kathy! A bagel cart? I love that. Well I hope this recipe stands up to yours 🙂
Kim Ryan says
Made your bagels on a whim after looking a your brunching email. I have never made bagels before but your instructions seemed easy to follow and I had all the ingredients on hand. They are baking now and look and smell delicious! Can’t wait for them to cool to taste. If I made the dough the night before, would it be stored in the fridge overnight? Thanks for another great recipe.
Heather says
Hi Kim! I’m so glad you tried them and found them easy. Yes I think making the dough night before is fine. I would just let it rise at room temperature for about 45 minutes then continue with shaping, boiling and baking