
The Ultimate Guide To Baking Homemade Bread Recipes
Master homemade bread recipes with this ultimate guide to bread baking! From yeast, to bread baking must have tools, to different types of bread- everything is covered so you can master making homemade bread!

*This post contains affiliate links. You can read my full disclosure policy here.
There is something magical about making bread. It’s like part science. Part art. Part Harry Potter has gone to Hogwarts kind of magic going on in your kitchen.
But there is also that part of cowering in the corner type of fear. And there shouldn’t be. Making homemade bread is totally something I believe anyone can do. With the right knowledge and tools, of course. When people ask me what’s my favorite thing to bake. I have to reply, “bread”. And I want that for you too.
Let’s pull back the curtain on making homemade bread…
Types of Homemade Bread Recipes
Quick Breads – When you’re thinking homemade bread, you might skip right past quick breads. But let’s not skip over their simplicity. Quick breads are easy to make and require no yeast. They are made with either baking powder and/or baking soda. And baking powder and baking soda are NOT interchangeable.
They are usually free form or made in a loaf pan. If you’re new to bread baking, then give a quick bread recipe a try.

Quick Bread Recipes To Try:
- Whole Wheat Irish Soda Bread
- Flour’s Famous Banana Bread
- Whole Wheat Banana Bread
- Lemon Raspberry Bread
- Cream Cheese Filled Pumpkin Bread
- Blueberry Banana Bread
- Healthy Banana Bread Recipe
- Whole Wheat Irish Soda Bread Recipe
- Quick Jalapeno Cheddar Bread
- Easy Buttermilk Biscuits
- Easy Buttermilk Honey Cornbread
- 3 Ingredient Self-Rising Flour Biscuits (+ Video!)
- Easy Cornbread Muffins
- No Yeast Bread
- Lemon Zucchini Bread
- Blueberry Lemon Scones
Lean Dough Breads–
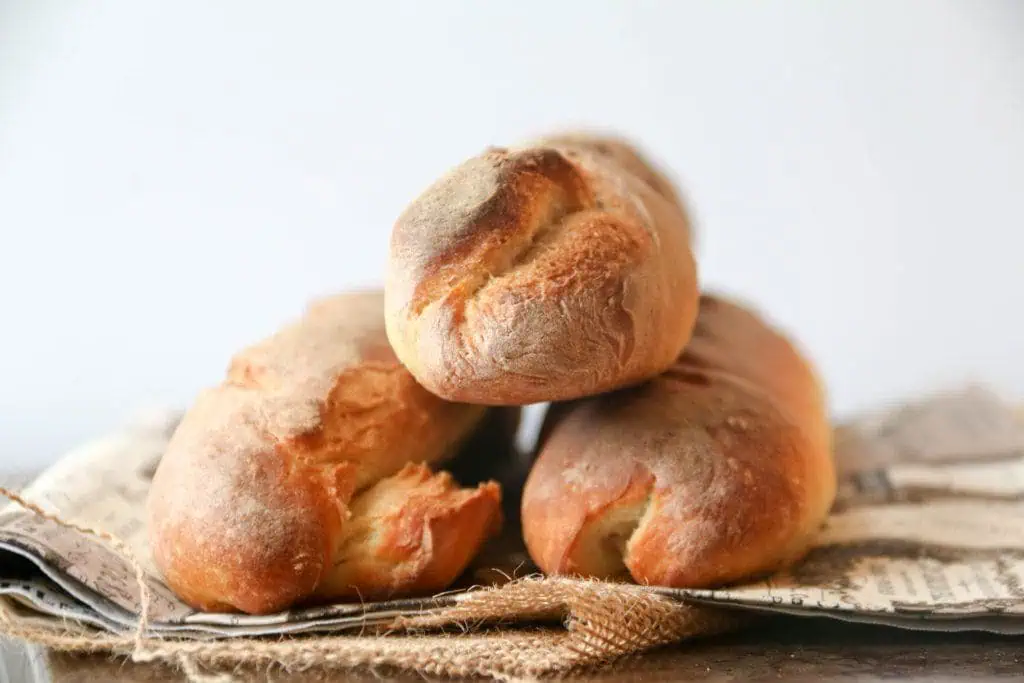
This type of homemade bread is low in fat and sugars. This is the type of crusty artisan bread that you want to rip off a hunk of and dip in a really good olive oil. Or maybe that’s just me. They have a crusty exterior and chewy interior with lots of holes. They are usually made with just 4 simple ingredients- flour, salt, water, and yeast.
Lean Dough Recipes To Try:
- French Baguettes
- Homemade Bagels
- Rosemary Focaccia (Once Upon A Chef)
- Ciabatta (Brown Eyed Baker)
- Easy Crusty French Bread (Life As A Strawberry)
- Whole Wheat Sandwich Bread
- No Knead Cranberry Walnut Bread
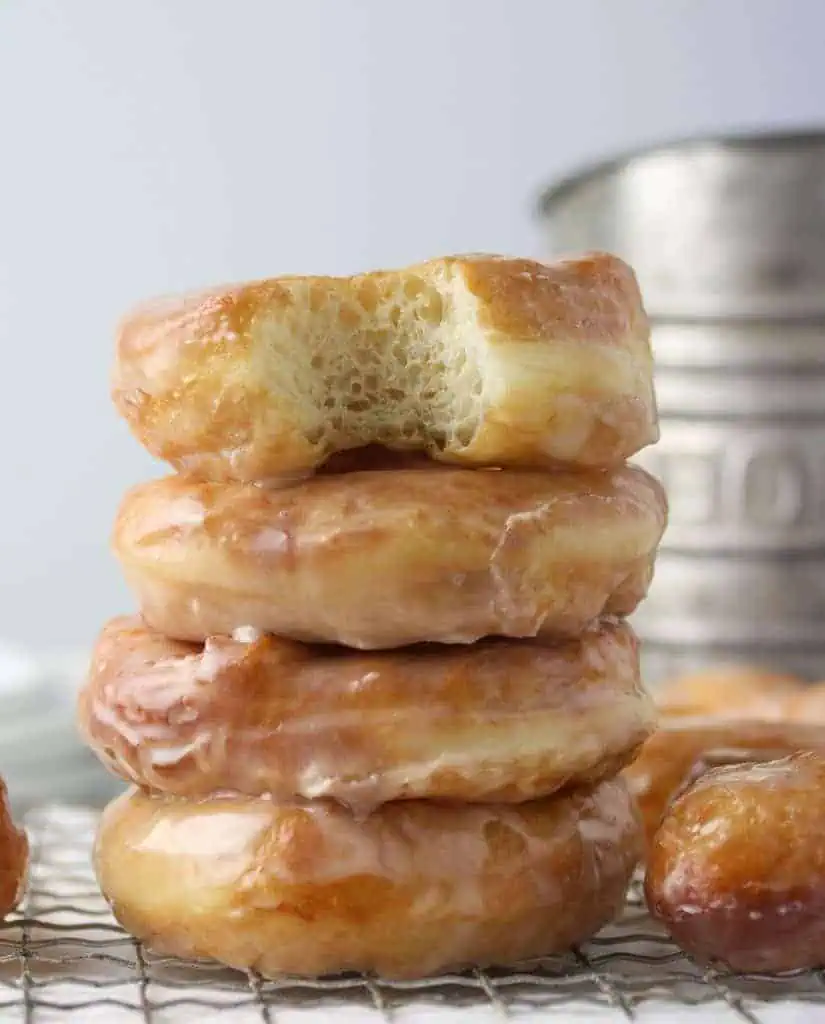
Rich Dough Breads – Or sweet breads, are similar to the lean breads but usually contain other ingredients like milk and eggs.
Rich Dough Bread Recipes To Try:
- 1- Hour Cinnamon Rolls
- Raspberry Lemon Sweet Rolls
- Challah Bread
- Easter Egg Bread
- World’s Best Dinner Rolls
- Brown Sugar Brioche Cinnamon Rolls
- Monkey Bread
- Nutella Bread
- St. Lucia Buns
- Best Homemade Bread Recipe
- Glazed Yeast Donuts Recipe
- Best Homemade Soft Pretzels
Sourdough Breads– Unlike most other breads that are made with commercially packaged yeast, sourdough breads are made from wild yeast. Wild yeast is captured by making a sourdough starter. This bread has noticeably tangier flavor than regular breads.
Once you have your sourdough starter going, you are going to need to feed and maintain your sourdough starter to keep it alive and ready to bake bread when you want!
And when you have your starter bubbly and active, it’s time to make bread. This is my go to Sourdough Bread Recipe (From Starter!)
More Sourdough recipes to try:
- Sourdough Cinnamon Rolls
- Sourdough Brioche Bread
- Whole Wheat Sourdough Sandwich Bread
- Sourdough Focaccia
- Sourdough Sandwich Bread
- Sourdough Blueberry Muffins
- Sourdough Cheddar Dill Bread
- Sourdough Rye Bread
Homemade Bread Recipes Vocabulary
When it comes to tackling homemade bread recipes, there is a whole slew of new vocabulary words you’re bound to come across. Here is a basic rundown of some bread vocabulary. Anyone else got a hankering to make some flashcards all of a sudden? No? Ok moving on…
- Pre-ferment: This is a starter made of flour, water, and yeast that is made in advance of making the bread itself. Kind of like giving the yeast a headstart. This pre-ferment is then mixed into the rest of the dough later. A pre-ferment is also known as a poolish, biga, levain or barm.
- Poolish: A French bread starter using the sponge method. It is very soft and batter-like.
- Biga: An Italian bread starter that has a high ratio of flour that makes it more similar to a dough.
- Levain: The French form of a sourdough starter.
- Barm: The English form of a sourdough starter.
- Autolyse: This is the resting period that takes place after the dough is mixed, before its kneaded.
- Lame: French for “blade”; a special curved razor attached to a handle, used for slashing bread dough to create those signature patterns
- Boule: French for “ball”; a round loaf.
- Gluten: Present in wheat, gluten is comprised of two proteins, glutenin and gliadin, which give bread dough its elasticity and the baked bread chewiness.
- Crumb: The pattern and size of holes inside of a loaf. Artisan breads made with high hydration dough typically have an open and irregular crumb.
- Proof: The final rise of bread dough after shaping the loaves and before baking.
- Hydration: The ratio of water to flour by weight in a bread recipe. Commercial typically has a hydration of 60%, while artisan breads have a higher hydration resulting in a chewier texture and more open crumb. The more hydration the wetter the dough.
- Fermentation: The leavening process in which yeast and bacteria in the dough convert carbohydrates to carbon dioxide gas and alcohol, creating the airy texture of bread and developing flavor in the bread.
- Oven Spring: The increase in volume of bread dough while in the oven, during which the yeast are still active. The greater the oven spring the airier the texture of the finished bread.
(Sources: Bon Appetit and The Kitchn)
Homemade Bread Recipe Ingredients
Flour– Bread wouldn’t be bread without this essential ingredient. Most recipes will use all purpose flour, or sometimes bread flour. When it comes to making bread, it’s important to measure your flour correctly. You can either use the scoop and sweep method, or a digital scale for complete accuracy. To learn how to measure your flour correctly, read this post. To read the differences on flours, read this post.
Yeast– Except the quick breads, homemade bread recipes require yeast in order to rise. Yeast is a living organism so it’s important that it’s treated carefully. Yeast should be added to a liquid that is between the temperatures of 105°F and 110°F . If the liquid is too hot, the yeast will be killed so be sure to use a digitial thermometer to take the temperature.
To learn more about the different kinds of yeast, read this post.
If you are using active dry yeast, you will need to proof your yeast first. Proofing is simply “waking up” your yeast by placing it in a warm liquid (usually water or milk) with a little bit of sugar.
Salt: Such a simple ingredient and such a small amount, might seem like salt’s role isn’t that big on the bread making stage. But to the contrary, salt plays some major parts in making homemade bread, besides adding flavor. All bread recipes call for about 2 percent salt compared to the weight of the flour. If you add too much salt and you kill the yeast, and if you add less or none at all the yeast and the yeast will grow without restraint. Salt also helps to strengthen the gluten, which just means awesome chewy bread for you in the end!
Pro Tip: Add the yeast and salt at different points in your mixing bowl- so they don’t come in direct contact with each other which can kill the yeast.
What type of salt to use? Uniodized salt is best, because iodized salt can give an unpleasant taste to the bread. Fine sea salt also is easier to measure and integrates more easily into the dough.
Water (and other liquids): Water is essential to the bread making process to hydrate the flour and activate the gluten. The temperature of the water is crucial in having success when making bread. The water should be somewhere between 105°F and 110°F. If the water is too cold, and the yeast won’t be activated fully. If the water is too warm, it could kill the yeast.
Besides water, some recipes will call for other liquids. For most rich bread doughs, milk is used. If the recipe doesn’t specify, I use whole milk for the added fat. Other recipes might call for other various liquids, such as beer or buttermilk.
Sugar (and other sweeteners): Most homemade bread recipes require a little bit of sugar (about 5% for lean doughs). A little bit of sugar is necessary to feed the yeast upon proofing. If you are making a rich sweet bread then more sugar is used (about 10% usually). Sugar is hydroscopic, which means it will attract the liquid in the dough making it harder for the yeast to hydrate. Because of the sugar’s hydroscopic nature, it will take longer for a rich dough to rise.
Besides sugar, other sweeteners can also be used- honey, malt syrup, molasses, and maple syrup. Honey is typical sweetener alternative to sugar that is used in bread recipes because of it flavor. It also can help develop a more golden brown crust than sugar because it caramelizes more readily. But honey is also antibacterial and can kill the yeast. If you’re replacing sugar with honey, you will need less honey. (if the recipe calls for 1 cup of sugar, use 3/4 cup honey).
Fat (Butter, Oil, Eggs): For the rich sweet breads, the recipe will need some sort of fat- either butter, oil, and usually eggs are added as well. The extra fat makes well rich breads, rich. But they also slow down the fermentation process. Basically, these extra ingredients = longer rise.
Bread Baking Essential Tools:
Like anything, a few good essential tools make things easier. Same thing goes for bread baking. Here is the list of tools I recommend to make the best homemade bread.
- Bread Lame– A bread lame (pronounced la-may) is use to slash through the top of a proofing bread. Right before baking your bread, you will need slash the top of it. This slashing creates a beautiful design in the top of your loaf but it is also necessary for those high hydration lean dough breads to allow steam to escape. I’ve tried NOT using a bread lame and tried to use a kitchen knife. I ended up simply tearing the top of the bread. This is the bread lame I own. It’s been a game changer.
- Dutch Oven– A Dutch oven helps to recreate those bakery style loaves you know and love with those crusty exteriors. A Dutch Oven holds a high temperature longer than an oven and contains the steam released by the bread. What’s this mean for your bread? A nice lift and crust. Of course, dutch ovens can be a bit of an investment. Le Creuset is probably the #1 seller, but also going to cost you a pretty penny. I found my Cuisinart dutch oven at a local Home Goods store, so keep an eye out!
- Rolling Pin– For some of your rich sweet breads, you will need to roll out your dough to form it into the desired shape. I prefer the type of rolling pin that has a tapered end and no handles.
- Kitchen scale– With any baking, measuring by volume can lead to inconsistencies. Investing in a kitchen scale will help with getting consistent results. Also, a scale will aid you in portioning out dough when making rolls, or multiple loaves.
- Digital Thermometer– I use my digital thermometer ALL the time when making bread. It comes in super handy when taking the temperature of your liquid before adding your yeast.
- Dough Container – Now you can definitely get away with using a large mixing bowl to hold your dough while it rises but a dough container with measurements on the side makes it much easier to tell when your dough has doubled in size. If you’re making large batches of dough, it also makes for easy storage in your fridge.
- Banneton– If you want to achieve those beautiful round boules of bread, the secret is in the basket. The banneton basket. The banneton basket is essentially a cozy place for the bread to proof. While it proofs, it will also give it a beautiful design on the outside. Some are lined with linen, some aren’t- it’s up to you which you prefer!
- Pastry Mat – This mat is essential whenever I’m making any type of bread where I need to roll out the dough to a certain size. No more guessing if the dough rectangle actually is “16×24” anymore. It also works double duty when making pies. So basically it’s out on my counter almost all year round.
- Loaf Pan – For quick breads, and other yeasted shaped loafs a loaf pan is essential.
- Bowl Scraper– When making your dough, this is a handy tool for getting your dough out of the bowl. It’s a flexible little piece of equipment that will ensure no dough is left behind.
- Bench Knife– When you need to divide your dough or simply get that sticky ball off the counter, a bench knife is your new best friend.
- Bread Knife– Ok I guess I could have just said “bare hands” as essential bread making tools. Because trust me, I’ve been there. But assuming you may want to serve the bread to others, there is nothing like a serrated bread knife for getting the job done.
- Stand Mixer – When it comes to making bread, I’d be nowhere without my stand mixer and the dough hook attachment. This makes quick work of some heavy duty lifting of kneading dough.
- Dough Whisk – If you want to go old fashioned and make your dough by hand. Then a dough whisk is essential. I have to admit I wasn’t convinced I really needed this, when I had a perfectly good whisk already. Then I finally caved and got this dough whisk. And it makes exceptionally quick work of making the dough by hand. I was an instant believer. I’ve seen the dough whisk light and it’s beautiful.
The Different Stages of Bread Making
In this section, we are going to cover the different stages of bread making- from mixing your dough, to kneading your dough, to shaping then of course baking your beautiful homemade bread!
Mixing Your Bread Dough
When making bread, many recipes will have you start with a sponge. Remember from your earlier vocab lesson, (time to bust out those flashcards!) a sponge is merely a starter of yeast, flour, a liquid (usually milk or water), and sometimes a bit of sugar. The sponge is usually left to sit overnight. This gives the time for the yeast to begin to multiply. Starting your bread this way will give your finished product great flavor and texture. A sponge can be made in just a simple bowl and a wooden spoon.
Once your sponge is ready, it’s time to mix the dough. You can do this by hand or in your stand mixer. When adding all the ingredients, just be sure to add your salt last so as not to kill the yeast.
To mix by hand: If you are mixing by hand, I recommend using a dough whisk. It’s super sturdy and works much better than just a spoon or regular whisk to incorporate all the ingredients.
To mix by mixer: I prefer mixing my dough with my mixer. For mixing the dough, I use my paddle attachment. Then when ready to knead the dough, you can switch to the dough hook attachment.
How To Knead Dough
According to Spruce Eats, kneading is what develops the gluten (or protein network) in your dough to help strengthen and stretch it. By properly kneading your dough, it’s able to trap the gas that is created by the yeast helping your dough to rise. It’s what creates an airy, light, and chewy bread in the end. Improper or insufficient kneading will lead to a tough bread that doesn’t rise properly. So it’s important to get this technique down properly.
3 Ways To Knead Your Dough
- With your stand mixer – this will be a bit faster then by hand. If kneading with a mixer, it will generally take about 8-10 minutes. Use your dough hook attachment for this method of kneading.
- Bread Machine – If you have a bread machine, then no need to worry the machine will take care of the kneading for you!
- By hand- Kneading dough by hand has been done ages. So mess with something when it’s not broken? Kneading dough by hand is easy to do and therapeutic if you ask me.
Step By Step Instructions
- Flour your work surface. Don’t over do it. Keep a cup of flour nearby if you need more. But just lightly sprinkle some onto your work surface. You don’t want to add more flour than is necessary here. And avoid washing your hands during the process. If they get super sticky take a little flour and just rub your hands together (not over your dough!) and remove all the build up dried dough on your hands.
- Turn the dough onto your board and gather into a shaggy mess. You can do this using your hands, or a bench scraper works wonders here during the process.
- Fold the dough in half towards you.
- Push the dough away by the heel of your palms. Be sure not to use your fingertips during this process. And be gentle while you do this, so you don’t push down to the sticky center requiring more flour
- Give the dough a quarter turn. And use a little more flour if you need to. And if the dough is sticking, use your bench scraper to help get the dough of your surface.
- Repeat this process- fold, push, turn- for about 10-12 minutes until the dough is smooth and elastic!
How can I tell if I have kneaded my dough long enough?
Kneading your dough long enough is important, but how do you know if you have worked your arm muscles long enough? In the end if you have kneaded your dough long enough the dough should be smooth and hold its shape. And if you are kneading by hand, you’re probably tired. If your arm muscles ache you probably can stop. But there are a few more ways to tell for sure besides sore arms.
The Poke Test – Give the dough a poke with your finger. Does it spring back? Then you’re good to go. If not, then keep kneading.
The Windowpane test– Take a small piece of dough and give it a stretch. If you have kneaded long enough it should create a little “dough window” – a small thin stretched piece of dough between your fingers that doesn’t tear. If you can’t stretch it and it tears. Keep kneading.

What Is Proofing?
Once your dough has been kneaded, it’s time to let the dough proof. Proofing basically is letting the dough rise. Your dough will usually go through two rises.
The first rise is also called the bulk fermentation because it’s proofed as one dough mass before it’s divided and shaped. This is also the time where most of the yeast will do its work.
To let the dough proof, place the dough into a lightly oiled bowl. And cover the bowl with plastic wrap and let it rise in a draft-free spot until it doubles in size. This usually takes 1 to 2 hours, depending on the temperature of your kitchen.

Shaping Your Dough
Once the dough has proofed, it’s time to punch down the dough, divide and shape the dough to let it go through it’s last rise.
Note: Punching down the dough is an aggressive term. Do not take our your bad Monday out on your dough. Simply push down the dough to deflate it.
Once the dough has been punched (pushed) down, it’s time to divide the dough if you need to. If your bread needs to be divided to make smaller loaves, or rolls use your bench scraper to make quick and easy work of this.
If you are shaping the dough, there are lots of different ways to shape your dough depending on what your final product will be. Here a few videos depending on what you are making:
How To Shape A Baguette
How Make Challah Bread
After shaping your bread, you may need to place it in a loaf pan or banneton basket
Baking Your Bread
Ok we’re almost there. Have you hung in there with me? Or fallen asleep on to a lovely artisan boule? Before we bake, we need to slash. Yes slash.
Note: Lean breads need to be slashed before they are baked. Rich (sweet) breads usually do not.
First of all, why slash? Slashing allows somewhere for the gases that built up in the dough to go. Slashing are just shallow cuts in the top of a proofed loaf. Oh and it helps to make your bread look pretty too.
A bread lame makes quick work of slashing. But a very sharp serrated bread knife will accomplish this.
Here are a few ideas on how to slash your bread. But really sky’s the limit on how to slash your bread.

When baking bread in a home oven, as compared to a commercial bakery oven it’s all about trying to re-create that volume and beautiful crust. This is done by two things: heat and moisture.
You will usually pre-heat your oven to a very high temperature. If you are using a baking stone, put your it in the oven to pre-heat before you place your bread on it.
To create the steam, you have a few options:
- Bake In A Dutch Oven: (this will trap any steam that is released and hold on to the high temperatures as well)
- Ice Cube Method: Pre-heat a pan in the bottom of your oven. Ideally a pan that retains heat like a cast iron pan. Then before putting your bread in the oven put about 5-6 cubes into the oven on the pre-heated pan. Then close that door. Immediately. Waste no time. This method though does not create as much steam or as quickly as the next method, the boiling water method.
- Boiling water method: Be careful with this approach! Use oven mitts. And be aware, steam will be created. When ready to bake, place your bread onto your stone or cookie sheet. Then pour 1 cup of boiling water into your pre-heated pan and shut the door immediately.
How Do I Tell When My Bread Is Done?
Now I’ve heard you can knock on the bottom of your bread and listen to if it’s hollow or not. Um, no thank you. I’m not willing to play around like that with my homemade bread. I want to rely on my handy dandy thermometer.
For lean breads: Bake until 200°F – 211°F
For rich sweet breads: 180-190°F
Troubleshooting Your Bread
Unfortunately with all the knowledge in the world, sometimes things just go wrong. So here a few problems you might encounter and how to fix them:
- Your Dough Is Rising Too Fast – Lucky you. You have a warm kitchen! Except now when you’re making bread. So just transfer your dough to a cooler location.
- Your dough is rising too slowly or not at all. – This could be a couple things. Either your water when proofing your yeast was too hot. Your yeast may have been expired. Or your kitchen (like mine!) is too cold.
- Your bread is browning too quickly. – Your oven may be too hot. Try covering the bread with aluminum foil.
- Your bread lacks flavor or tastes “yeasty”- You proofed your bread for too long. Simply try proofing your bread for less time ( a dough container helps in telling when your dough has doubled in size.)
- Your bread is dense and moist – You didn’t proof long enough. Again, a dough container might be your knight in shining armor when it comes to bread baking.
Source: Red Star Yeast
Freezing Your Bread
I love freezing bread. It’s such a game changer. And it’s honestly, easier than you think!
To freeze unbaked: Go through the recipe to the final shaping. Whether it’s rolls, a loaf, whatever it is. Shape. And place in your pan. Then freeze uncovered. Once frozen, then cover it completely with plastic wrap, foil or a plastic bag. When ready to bake, remove the plastic or foil and let them rise (this will take 45 minutes to 1 hour). Then you can bake as normally.
To freeze baked bread: Once the bread has cooled then wrap in plastic wrap (then in foil or a plastic bag) and freeze. You can allow the bread to thaw at room temperature when ready to enjoy.
You can read the full post here on how to freeze bread.
You can also get my FREE guide on how to freeze bread below!
For my full Freezer Guide, you can get that here.
Bread Cookbooks I Own And Love
I hope this page on making homemade bread recipes has give you the confidence to make your own bread at home!


