
Water Bath For Cheesecake
This Post May Contain Affiliate Links. Please Read Our Disclosure Policy.
Learn how easy it is to make a water bath for cheesecake recipes! If you ever made a cheesecake and wondered what a water bath is, why you need one, and what happens if you don’t use one the give this article a read!
A water bath may sound complicated but I promise you it isn’t. When it comes to certain desserts, such as a cheesecake, a water bath is a must. Don’t worry it’s not some sort of new piece of kitchen equipment you have to rush out to buy.
And a water bath is important so your cheesecake comes out perfect. But setting up a water bath can also be a little bit of a pain and sometimes scary!
But baking cheesecake doesn’t have to be painful and scary. I’m here to show you how easy it can be and all the tips so there’s no leaks.
Grab My Cheesecake Book Now!
Discover the joy of baking with my digital cookbook, ‘Cheesecake for All Seasons‘! This comprehensive eBook features over 50 delectable cheesecake recipes, organized by season to suit every occasion.
Each recipe comes with detailed, foolproof instructions, essential baking tips, and troubleshooting advice to ensure your cheesecakes turn out rich, creamy, and delicious every time. Whether you’re a seasoned baker or a novice, this e-book will help you create perfect, indulgent desserts all year round.
See Also:
- No crust needed for this San Sebastian cheesecake (aka Basque cheesecake) that’s baked at a high temperature to give it’s signature burnt top!
- Craving cheesecake but not looking for a giant portion? Try my small batch cheesecake recipe baked in a loaf pan!
- This chocolate mint cheesecake is cheesecake perfection! Made with an Oreo cookie crust, chocolate chips and mint flavoring.

What is a water bath?
A water bath, also known as a bain marie, pronounced Ban-ma-ree, is used in certain desserts like a cheesecake in order for the dessert to cook slowly.
Basically you want to use a larger container and then set your smaller dish that holds the dessert inside.
You fill the larger container with hot boiling water so it surrounds the smaller dish, which contain the dessert. The steam created from the water in the larger container helps to cook the dessert slowly.
When you need a water bath for cheesecake
You need a cheesecake water bath when you need to cook a dessert slowly.
Although I’ve made some cheesecakes without, like my chocolate cheesecake, most cheesecakes and other custard based recipes will call for one.
Why is it so important to bake cheesecake in a water bath?
Without a water bath and you run the risk of ruining your cheesecake! Yes it’s an extra step but setting up a proper water bath for cheesecake can create the best cheesecake recipe.
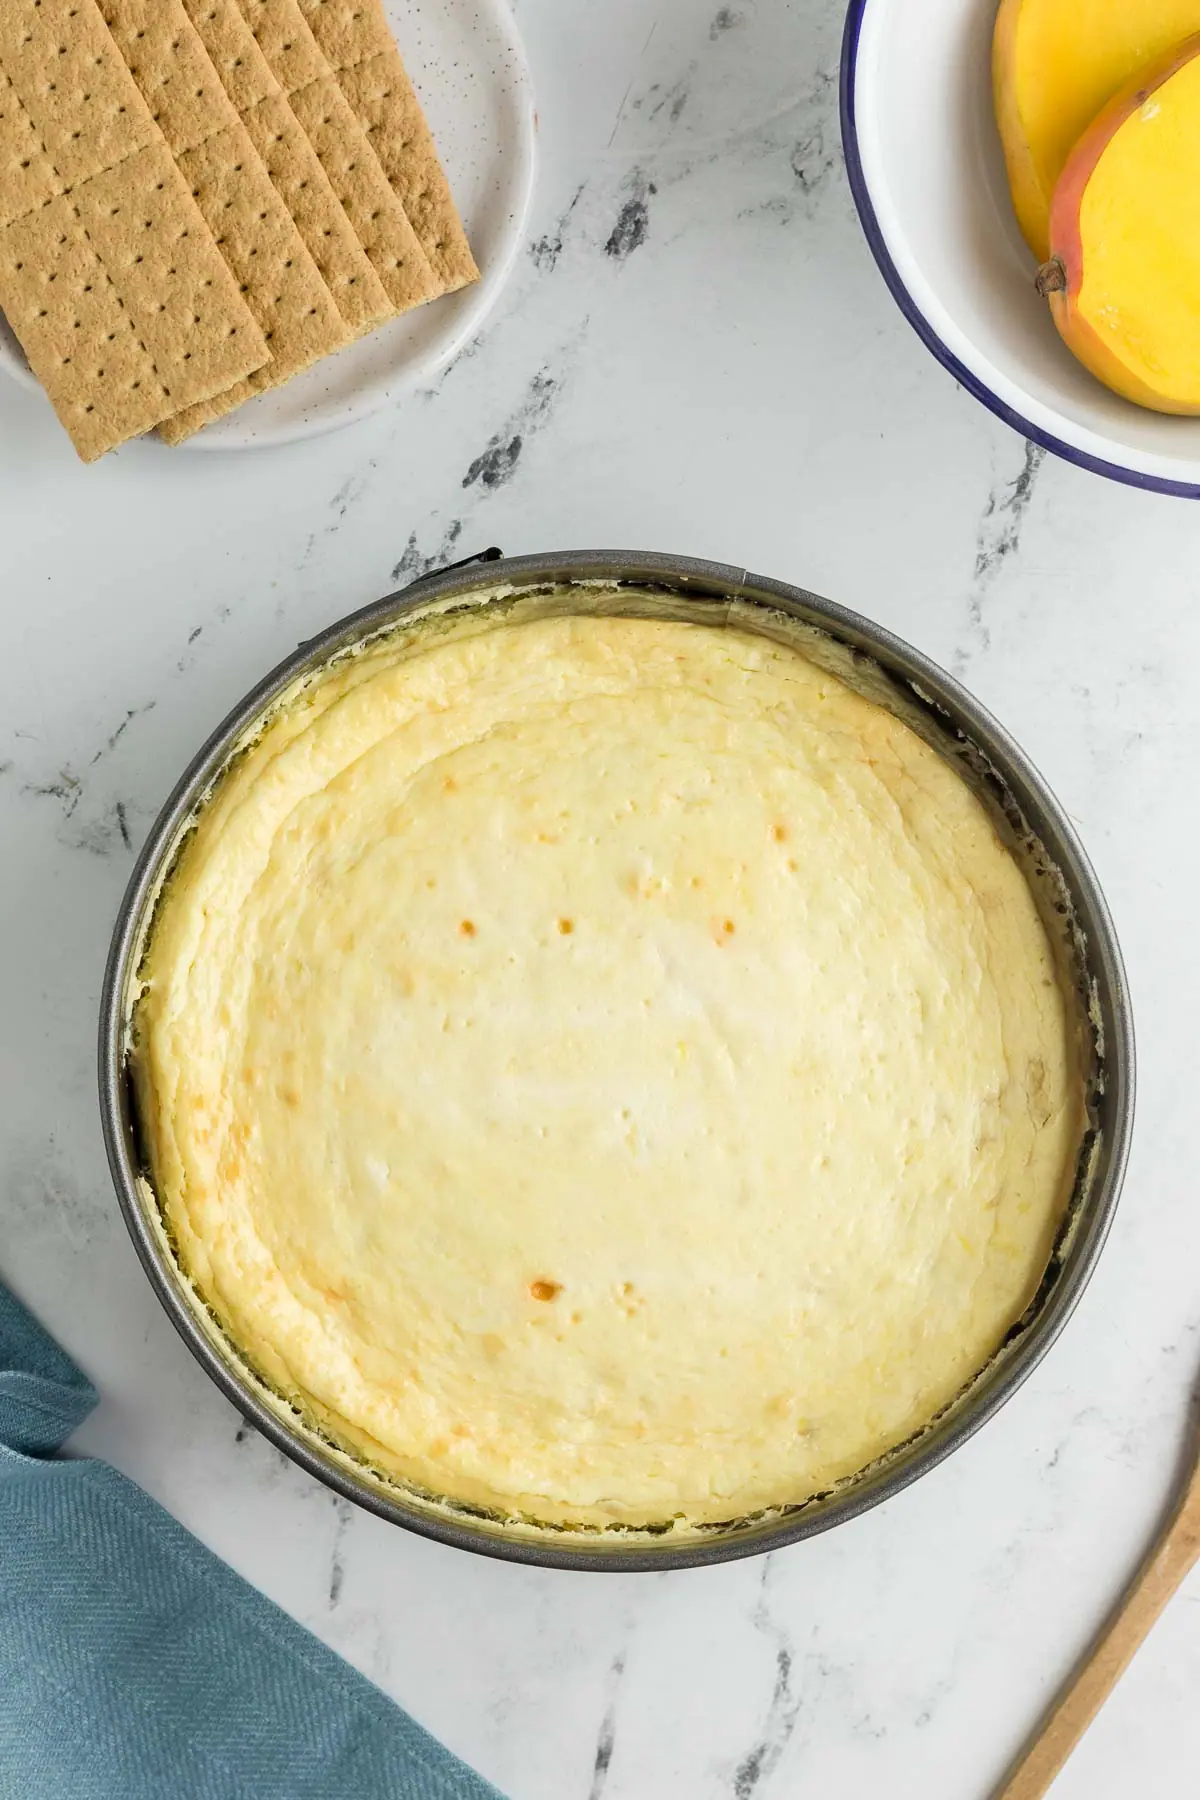
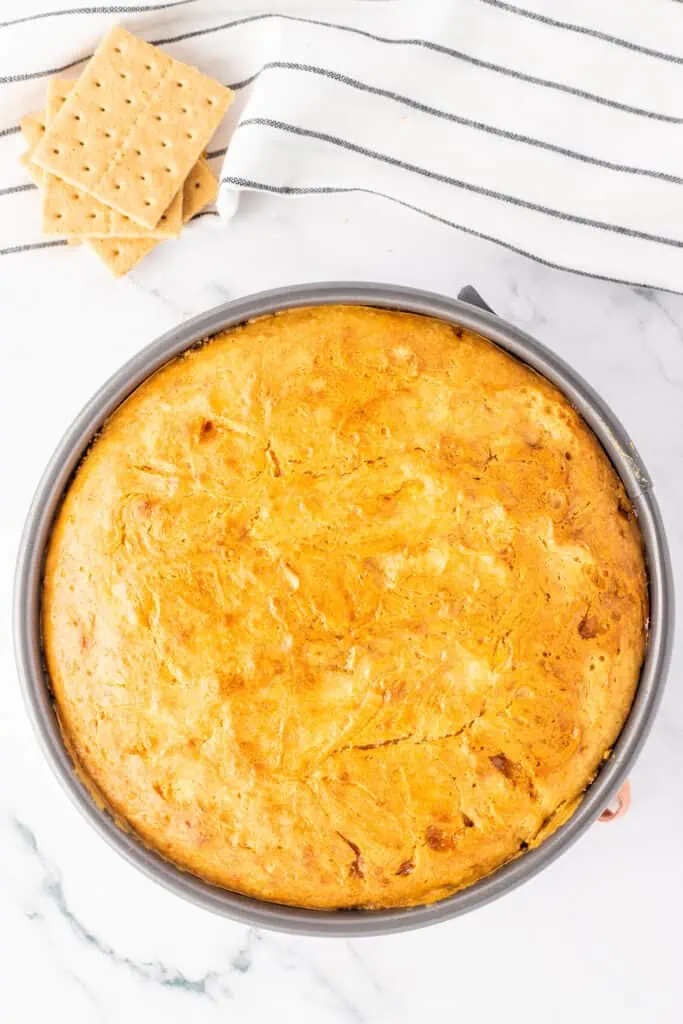
You can see what happens when you DON’T use a water bath below. These two cheesecakes were identical in ingredients and bake time, except one used a water bath and one didn’t

If you use a water bath you can help avoid some common cheesecake problems.
- No cracks. If you don’t use a water bath in your recipe, you are likely to end up with a cheesecake that is cracked, and not as creamy.
- No brown top. The top of the cheesecake will also be more browned if you don’t use one. The water bath’s moist environment will also the cheesecake to cook slowly so the top doesn’t brown.
- Creamy texture. The water bath creates a moist environment to let the custard cook slowly. Without one, your cheesecake may end up rubbery.
- Cheesecake will be taller if you use a water bath. As you can see below, the cheesecake on the left that was baked with a water bath rose much taller. The one on the right was baked without a water bath and was much shorter.

What do you need for a water bath
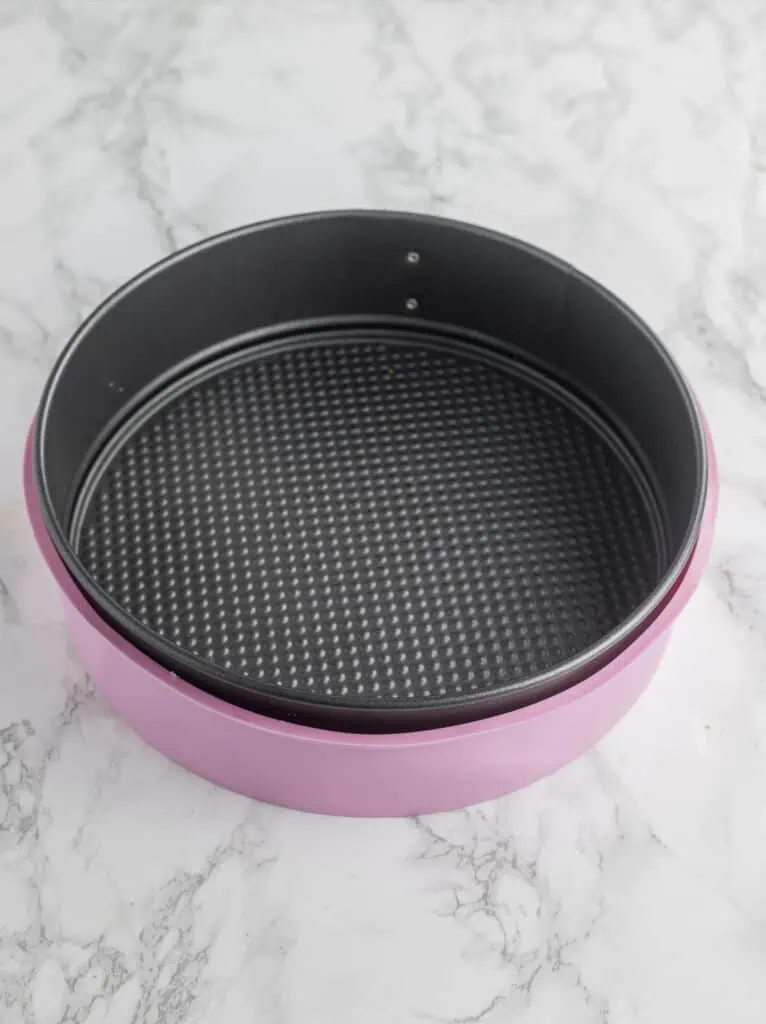
- Springform Pan – For most cheesecake recipes, you will need a 9″ springform pan.
- Heavy Duty Aluminum Foil – You will need to wrap the pan in several layers of aluminum foil to prevent leaks.
- Large Pan – You will need a water bath pan that is larger than your springform pan for the water bath. I like to use a large roasting pan. The springform pan sits inside the larger pan.
- Slow cooker liner – Optional water bath method, but I like to wrap my springform pan in a slow cooker liner first, then in two layers of foil to prevent leaks.
- Silicone cake pan – You could also use a silicone cake pan to place the springform pan inside.
- Water – You will need hot water to pour into the roasting pan to make your water bath.
How To Make A Water Bath
Setting up a water bath is easy! This is the traditional way to set up a water bath.
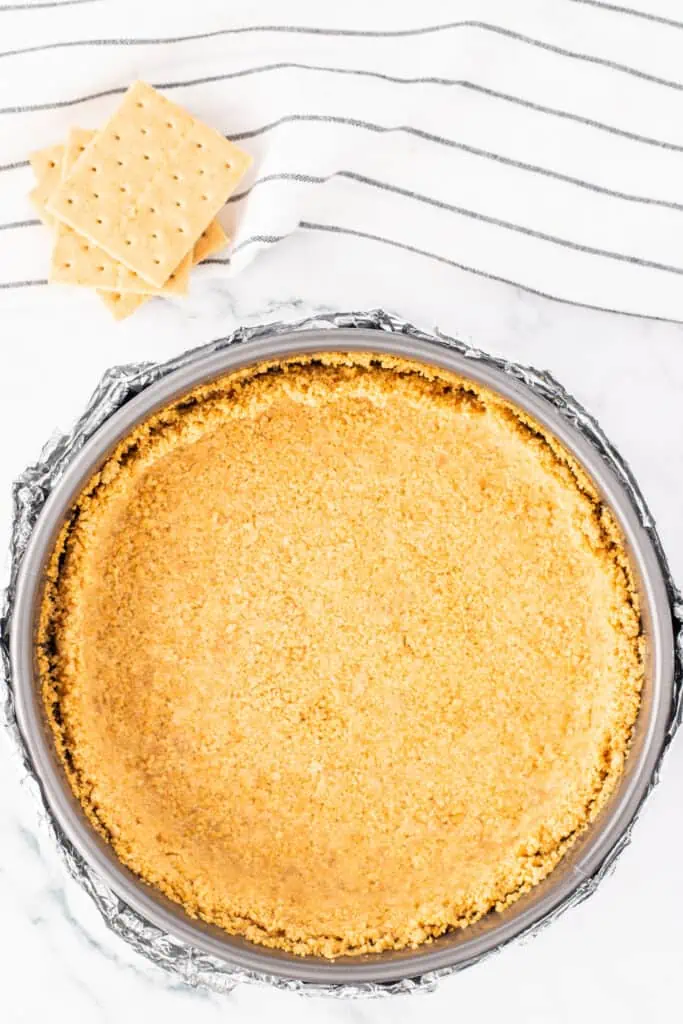
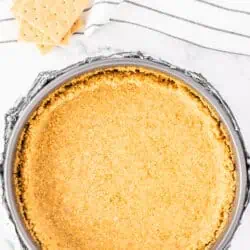
Make your graham cracker crust.
Most recipes will call for par-baking your crust. Assemble and par-bake your graham cracker crust on the middle oven rack as the recipe directs. Set it aside to cool while your prepare your cheesecake.

Wrap the springform pan.
You can wrap the pan in tinfoil or one of the other methods shown blow. Make sure none of the outside of the cheesecake pan is exposed.
Place pan into larger roasting pan.
Once the pan is covered, place the foil wrapped pan inside the larger pan.
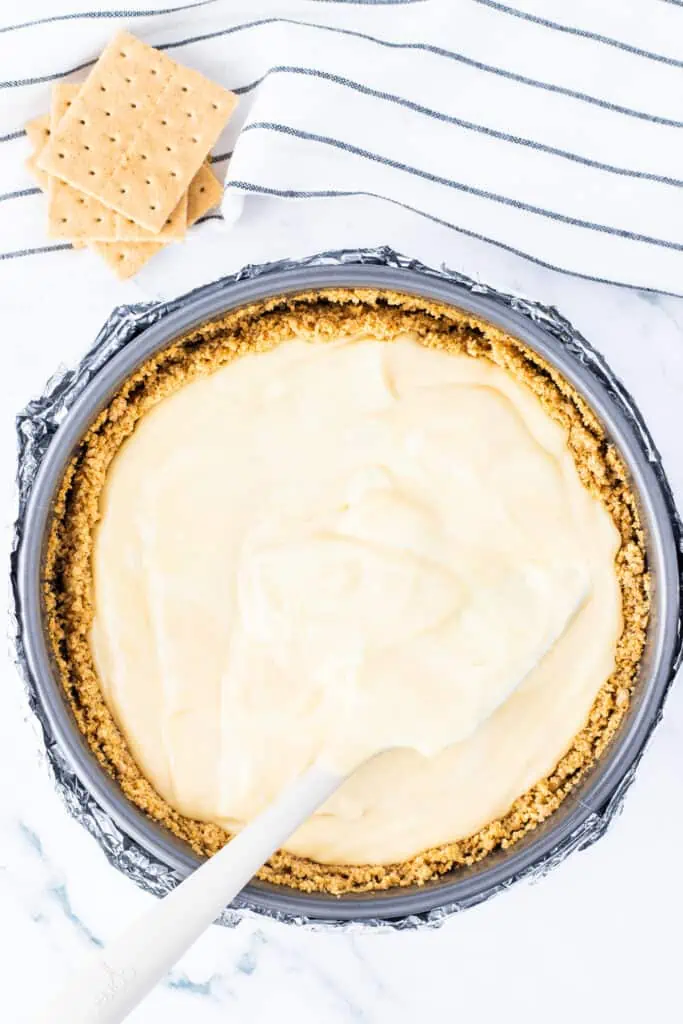
Add cheesecake filling.
Pour your cheesecake batter into the springform pan.

Add hot water.
Bring a teakettle or pot of water to a rolling boil. Before adding the hot water, transfer the pan to the oven. You could move it after but I find this more difficult and risk spilling the water into my springform pan.
Then carefully pour the hot water to the larger roasting pan, filling it up halfway.
Bake cheesecake.
Move the pan carefully to the oven and place on the oven rack and bake the cheesecake.
Cool cheesecake in cake pan.
Remove the cheesecake from the oven. Remove the springform pan from the water bath and allow to cool in the pan for 1 hour. Run a knife around the edges of the crust to loosen from the pan. This can help prevent cracks from forming, because as the cheesecake cools and contracts if the crust sticks it can cause the filling to crack.
Then cover and refrigerate. I like to place a paper towel over the cheesecake to prevent condensation. The cheesecake will need to remain in the fridge for several hours in order to set up.
3 Methods For A Water Bath
Here are three easy ways to set up a water bath.
1. Aluminum Foil
This is the most traditional water bath method for cheesecake. Wrap the springform pan in three layers of heavy duty foil. You want to make sure none of the pan is exposed or water can leak in.
Be careful to not crinkle the heavy duty aluminum foil too much which may cause the foil to tear creating holes for water to seep in.
2. Slow Cooker Liner
Wrap the outside of the springform pan in a slow cooker liner and then several layers of aluminum foil after. You want to tie a knot in the crockpot liner. I like to use these plastic oven bags, because the plastic layer can give a bit of extra added insurance of no leaks!
You have to pull the excess plastic over to one side, otherwise it can be a bit difficult to knot.

3. Silicone Cake Pan
I’ve just learned on this method myself and I think it’s kind of genius. You can place the sprinform pan inside a slightly larger silicone pan. And the place inside a larger roasting pan.
Be careful to not fill the roasting pan up more than half full of water so the water doesn’t splash into the cheesecake filling.
If you want to be sure your graham cracker crust doesn’t get ruined, you can wrap the springform pan in foil first then place inside the silicone pan. You will only be able to wrap the pan in one layer of foil.
Recipe Tips And Variations
- Use a slow cooker liner instead. I like to wrap the pan in the slow cooker liner, or plastic oven bag first to help prevent possible leaks. Then wrap the pan in two layers of foil.
- Use a silicone pan. Place the springform pan inside a larger silicone pan then inside a larger roating pan. Be careful to only fill the roasting pan half way with water. If too much water is used and it begins to boil the bubbling water could boil over into your cheesecake pan and ruin the crust.
- Only fill water halfway. You want to use enough water so it can surround the cheesecake and create a creamy texture. Too much boiling water in the large baking pan can boil over and ruin your cheesecake recipe.
- Keep the pan close to the oven before filling. Once the boiling water is inside the larger baking pan, it can be a bit tricky to move, so I like to keep the pan as close as possible to my oven so there’s less travel. Otherwise the water may splash into your cheesecake batter.

Recipe FAQs
Be sure your pan is wrapped well and has no holes or tears. Do not fill the larger pan more than halfway so water doesn’t boil over into your cheesecake filling and crust. Keep the pan close to the oven before you add the hot water, or you run the risk of jostling the water too much and have it spill over.
This doesn’t create the same warm, moist environment and you run the risk of overbaking your cheesecake and the cheesecake forming cracks in the top.

Best Cheesecake Recipes
Now that you are a master at making a water bath for cheesecake, let’s make some cheesecake!
Get My Cheesecake Book!
Don’t forget to grab a copy of my cookbook, Cheesecake For All Seasons! It’s an easy to download digital e-book with over 50 delicious cheesecake recipes, toppings, tips and tutorials for you to master making cheesecake at home!
Water Bath For Cheesecake
Ingredients
- Graham cracker crust
- Cheesecake Filling
- Hot Water
Instructions
- Make your graham cracker crust. Most recipes will call for par-baking your crust. Assemble and par-bake your graham cracker crust on the middle oven rack as the recipe directs. Set it aside to cool while your prepare your cheesecake.
- Wrap the springform pan. You can wrap the pan in three layers of tinfoil or one of the other methods mentioned in notes. Make sure none of the outside of the cheesecake pan is exposed.
- Place pan into larger roasting pan. Once the pan is covered, place the foil wrapped pan inside the larger pan.
- Add cheesecake filling. Pour your cheesecake batter into the springform pan.
- Add hot water. Bring a teakettle or pot of water to a rolling boil. Before adding the hot water, I like to move my roasting pan close to my oven so I don't have to move it far to get to the oven so there's less risk of sloshing water around and getting into my cheesecake. Then carefully pour the hot water to the larger roasting pan, filling it up halfway.
- Bake cheesecake. Move the pan carefully to the oven and place on the oven rack and bake the cheesecake.
- Cool cheesecake in cake pan. Remove the cheesecake from the oven. Remove the springform pan from the water bath and allow to cool in the pan for 1 hour, Run a knife around the edges of the crust to loosen from the pan. This can help prevent cracks from forming, because as the cheesecake cools and contracts if the crust sticks it can cause the filling to crack. Then cover and refrigerate. I like to place a paper towel over the top of the cheesecake to prevent condensation from forming. The cheesecake will need to remain in the fridge for several hours in order to set up.
Notes
- Slow cooker liner – Wrap the outside of the springform pan in a slow cooker liner and then several layers of aluminum foil after. You want to tie a knot in the crockpot liner. I like to use these plastic oven bags, because the plastic layer can give a bit of extra added insurance of no leaks. You have to pull the excess plastic over to one side, otherwise it can be a bit difficult to knot.
- Silicone cake mold – You can place the springform pan inside a slightly larger silicone pan. And the place inside a larger roasting pan. Be careful to not fill the roasting pan up more than half full of water so the water doesn’t splash into the cheesecake filling. If you want to be sure your graham cracker crust doesn’t get ruined, you can wrap the springform pan in foil first then place inside the silicone pan. You will only be able to wrap the pan in one layer of foil.


This post was a lifesaver! My grandma’s recipe just said ‘water bath’ and I didn’t know what to do!
I’m so glad this post was helpful for you! Grandma’s recipes are treasures, but sometimes a little extra guidance goes a long way, especially with techniques like the water bath. If you ever have any more questions or need tips, feel free to reach out. Happy baking! 🍰😊
This was so helpful. I’ve always avoided any recipe that calls for a “water bath” because I had no idea what it meant. Thanks for walking me through it!
You’re very welcome! I’m thrilled to hear that the tutorial helped demystify the water bath technique for you. Now you can tackle any recipe with confidence. If you ever have more questions or need assistance with anything else, just give me a shout! Happy baking! 🍰✨
Thanks for all the great tips! I’ve used a water bath before but water always seems to seep in to the crust. I’m going to try some of the other methods you recommend. Thanks so much!
You’re welcome! I’m glad you found the tips helpful. 😊 Dealing with water seeping into the crust can be tricky, but I’m confident the other methods will work better for you. Wishing you smooth cheesecake baking from here on out! 🍰✨
A great way to prevent cracks. But usually I use strawberries to cover my mistakes in the past. Thanks!
I’m glad the water bath method helped you avoid cracks! 🍓 Strawberries are always a tasty backup plan, but it sounds like you won’t need them anymore with your cheesecake skills perfected. Happy baking, and here’s to flawless cheesecakes every time! 😊🍰
Your water bath for cheesecake technique made all the difference. It resulted in a perfectly smooth and creamy texture without any cracks. The cheesecake was rich, velvety, and baked to perfection. This method is a game-changer for achieving that professional quality at home.
Thank you so much for your wonderful feedback! I’m thrilled to hear that the water bath technique worked wonders for your cheesecake, resulting in that dreamy smooth texture. Keep baking like a pro at home, and if you ever need more tips or recipes, I’m here to help! 🍰✨