This Post May Contain Affiliate Links. Please Read Our Disclosure Policy.
Learn what butter does in cookies in this cookie science experiment post. I test a chocolate chip cookie recipe with different temperature butters to see what the results much on you in this cookie science experiment!
I’ll be honest, baking wasn’t a big thing in my family growing up. My mother and grandmother passed on skills like how to ride a horse and barrel race, not baking. But like every American kid I baked up some classic chocolate chip cookies from the back of the yellow bag. But I remember how weird it was to me that this one recipe always yielded such different cookies. They never seemed to come out the same. Sometimes they were puffy, sometimes chewy, or sometimes spread into big old giant puddles. And yes these are actual memories! No lies, friends. Are you shocked to hear I went on to become a biology major and science teacher later in life?
Alright well fast forward to adult life. My love for science eventually did blossom into a full fledge passion for baking. And baking is a science, right? You’ve heard this before. But don’t you find it interesting that most recipes ask you to do this:
Bring your butter to room temperature.
Or maybe when you scroll down and check out the ingredients it looks like this…1 cup butter, softened
But what on earth does that mean? When you’re talking temperature “room temperature” can be pretty vague statement. I mean come over to my house and our version is of “room temperature” is pretty darn cold. Like hovering around the 60 degrees Fahrenheit mark (thank you very much electric heat). My friend’s house is more like 70. And head over to my grandparent’s and you better bring some flip flops with you and wear a t-shirt.
Room temperature can mean so many things. So if you have ever had your cookies spread too much, the culprit might lie in the temperature of your butter!
Flat cookies. Ugh, such a bummer right?
When I make chocolate chip cookies I want a perfectly thick, chewy cookie with crispy edges. Not flat puddles. But sometimes it does happen.
After years of making cookies I learned the big reason came down to the temperature of my butter. In this post you will learn butter affects your cookies.
What Is Room Temperature Butter?
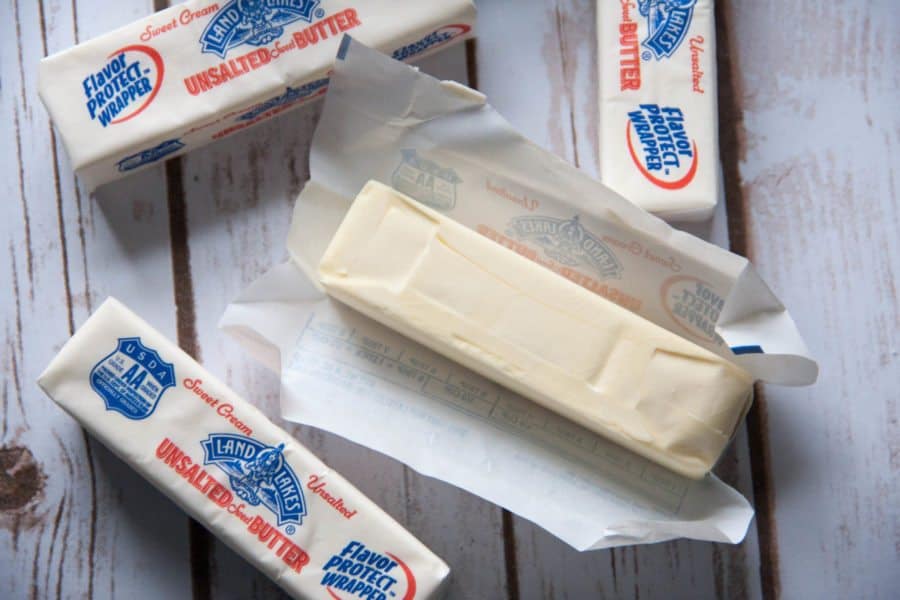
If your butter is actually at room temperature the temperature should fit into a very narrow range of 65 – 67 degrees Fahrenheit. To determine the temperature of your butter, actually cut your stick of butter in half and insert a thermometer. This is really the only way you can guarantee the butter is at the correct temperature. As you bake cookies more and more you might be able to by feel but to start I recommend you invest in a digital kitchen thermometer. If your butter has been brought to this temperature it should look something like this…
Your finger can indent into with some resistance, and there is no melting seen on the surface.
How Do I Bring My Butter To Room Temperature?
Ideally, you would plan ahead, take your butter out and let it sit on the counter for about an hour or longer before you plan to bake. If your kitchen is a bit warmer, it might take less time. I bake almost every day and I still find myself taking the butter just as I want to bake something. But skipping the softening butter step can drastically change your results.
I understand sometimes you don’t have an hour to wait around for that stupid stick of butter. So to bring your room temperature quickly, here is a post where I talk about the three easiest ways to do that. My favorite involves the microwave, and it’s not the defrost button.
Why Does The Butter Need To Be At Room Temperature?
Having your butter at room temperature means that the butter will incorporate into the rest of your ingredients. For cookies for instance the first step is to cream your butter and sugar. If your butter is too cold, like straight out of the fridge, below the 60ºF mark, the butter will not mix well with the sugar and enough air will not be incorporated into your cookies. Without not enough air into your cookies, your cookie yield drastically drop.
How Does Butter Affect Cookies?
So I decided to a test and make five different batches of cookies. Each batch I tested with a different temperature butter.
- Batch #1: Butter Straight From The Fridge (42ºF)
- Batch #2: Cool Room Temperature (60ºF)
- Batch #3: Room Temperature (65-67ºF)
- Batch #4: Above Room Temperature (72ºF)
- Batch #5: Melted Butter
For each cookie here is what I kept the same:
- I used the same recipe which I’ll link to at the bottom of this post
- I measured my flour using the scoop and level method, which you can read more about here.
- I creamed the butter and sugar for exactly 3 minutes each. Creaming for different amounts will also yield entirely different cookies due to the amount of air that gets incorporated.
- I used the same cookie scoop for these cookies so they were all the same size. I used a 1-inch cookie scoop.
- I baked them for the same amount of time on the middle oven rack with parchment paper.
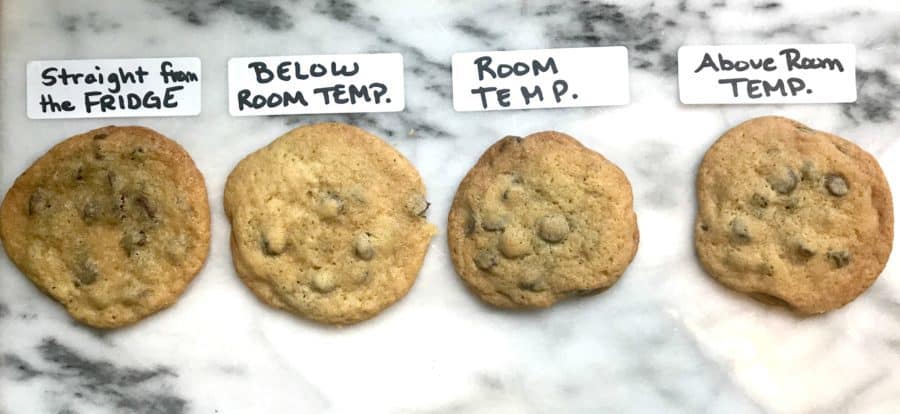
Here are the results that I got for the first four batches of cookies…
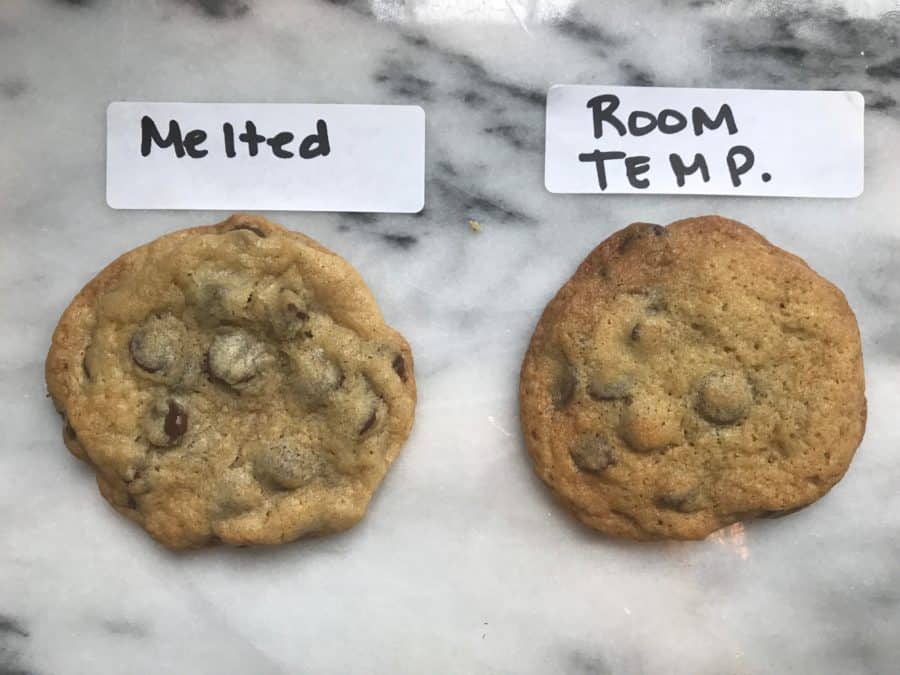
Melted Butter Vs. Creamed Butter
Ok let’s look break down each a little further…
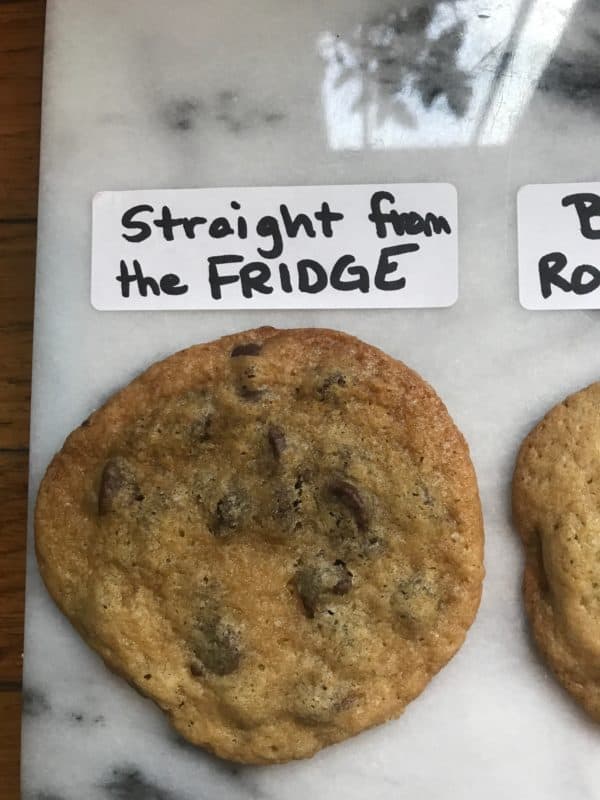
Cookie Test #1:Cold Butter (straight from the fridge)
Temperature: The temperature of this butter was 42ºF. I took it straight from my fridge and added it to my stand mixer.
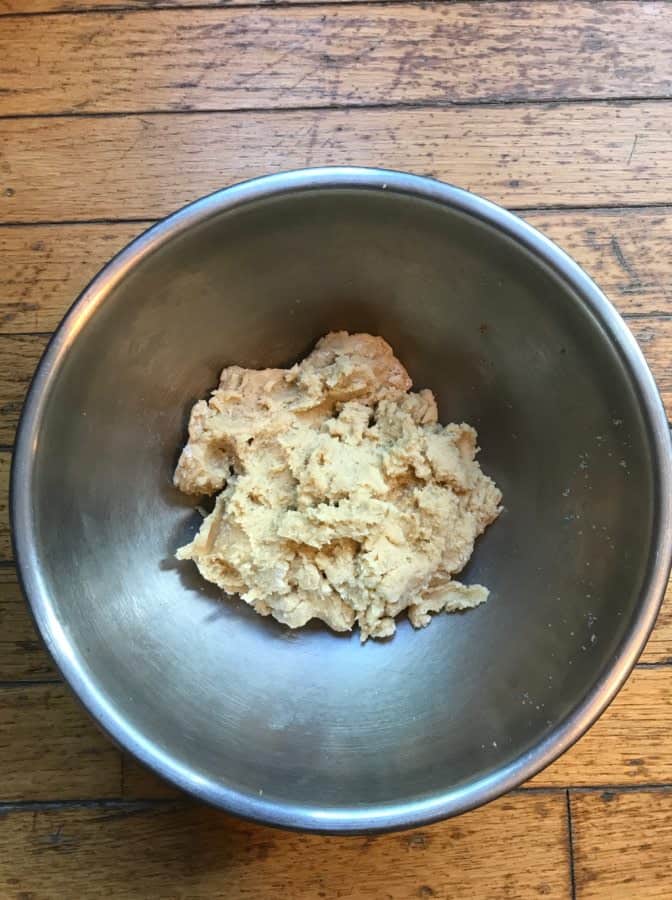
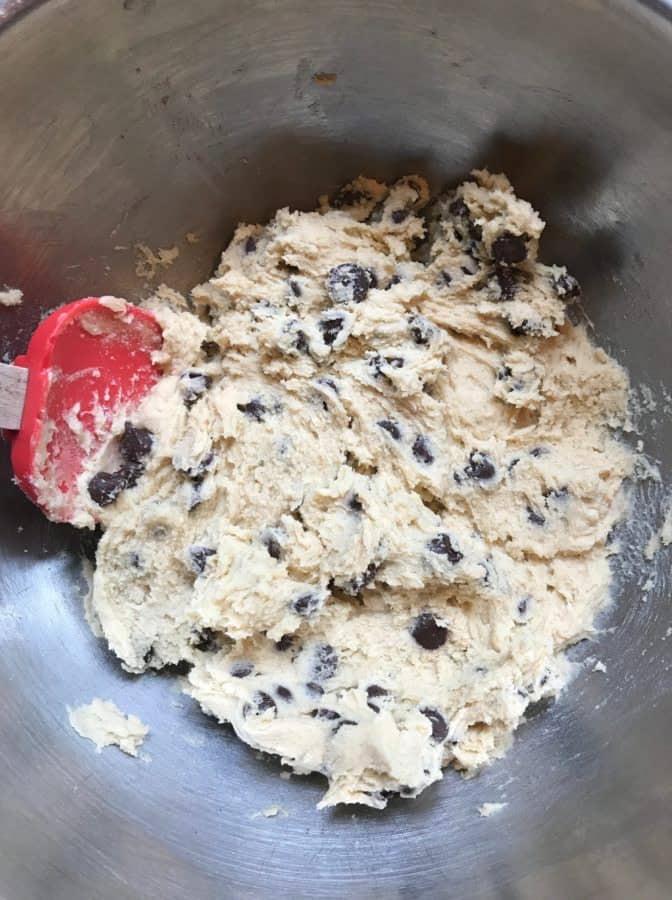
Dough: This was by far the stiffest dough of all five batches. Here is what the dough looked like before baking…
Spread: These cookies spread the most out of all five batches.
Pros: If you like big flat cookies then this may be something you want to try. Also there is no waiting for the butter to soften.
Cons: Well for starters because the butter was so cold, the butter and sugars were trying to fly out of my mixer. So if you do attempt butter straight from the fridge, be careful and start as slow as possible. Because less air is incorporated, your cookie yield is also decreased.
Taste: These had nice crisp edges from spreading so much but I found them to also be very greasy.
Why Did This Happen?: Because you’ve added cold butter to your sugar during the creaming process not enough air is able to be incorporated into the dough. The sugar’s job (among many) is to basically punch holes into the butter and create air pockets. Those air pockets will help to create some lift with your cookies when they bake. Because the butter was so cold, the sugar wasn’t able to punch through as easily and so not as much air was incorporated. Without that air to help lift up the cookies, they spread like crazy in the oven!
Overall: This was by far my least favorite out of the all the cookies. One because of trying to make the dough without ingredients flying around my kitchen. And the big flat greasy cookie in the end. If you want to use cold butter, add a few extra tablespoons of flour to help the cookie from spreading and prevent it from being so greasy.
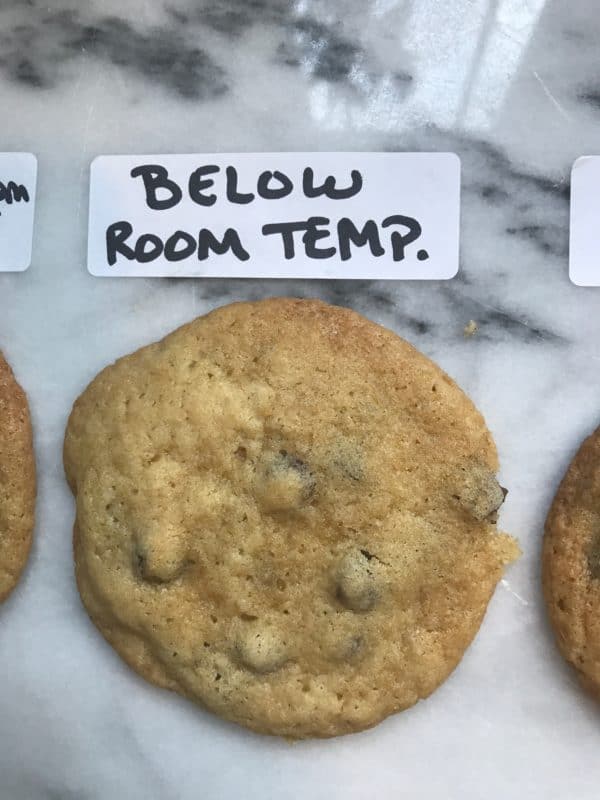
Cookie Test #2: Cool Room Temperature Butter. Temperature = 60ºF
Temperature: I let this butter warm to 60ºF before creaming it with the sugar.
Dough: The dough was still a bit firm to scoop.
Spread: These still spread pretty significantly. But a little less than straight from the fridge.
Pros: These did make nice giant cookies and that’s not necessarily a bad thing.
Cons: Still a bit greasy for my liking (again you can add a bit of extra flour to counteract this). And I like mine a bit more chewy. Because not as much air was incorporated, you end up with a few less cookies as well.
Taste: Pretty good, but not my favorite. Some nice crisp edges, a little thicker in the middle than the first batch, but still a little greasy.
Why Did This Happen? I had read a different article that stated you should cream your butter when it reaches 60ºF because the creaming process will warm up the butter even further. I guess it’s the same thinking as taking a roast out of the oven before it reaches temperature because the temperature will continue to rise. I wanted to see for myself. I personally didn’t like the results and found they still spread in the oven more than I would have liked. Again, because the butter wasn’t at room temperature not enough air was able to be incorporated during the creaming process so they still spread a bit.
Overall: These came in second to last for me. Still not a bad cookie, with some nice crisp edges. But I think we can do better…
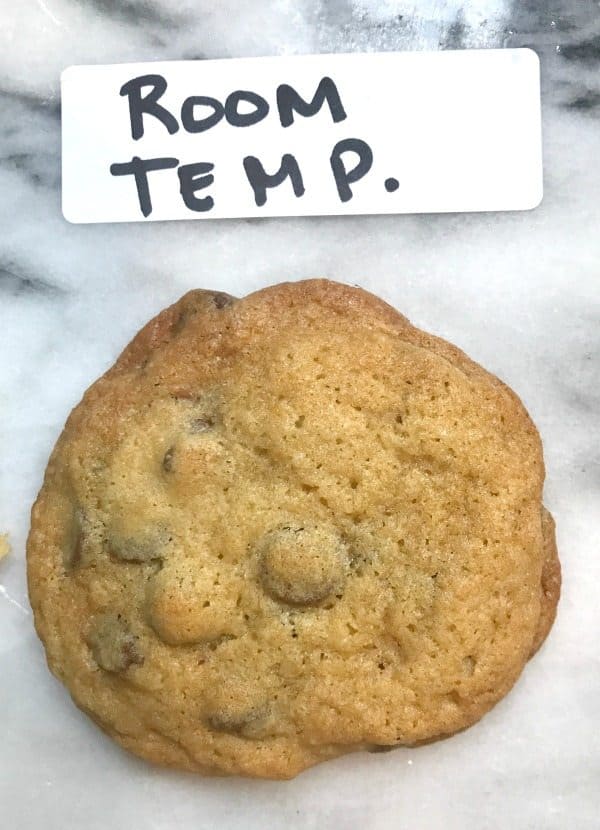
Cookie Test #3: Room Temperature Butter. Temperature = 65ºF
Temperature: For these cookies I did wait for the butter to completely soften to that 65-67 narrow temperature range as to where “room temperature” is said to be.
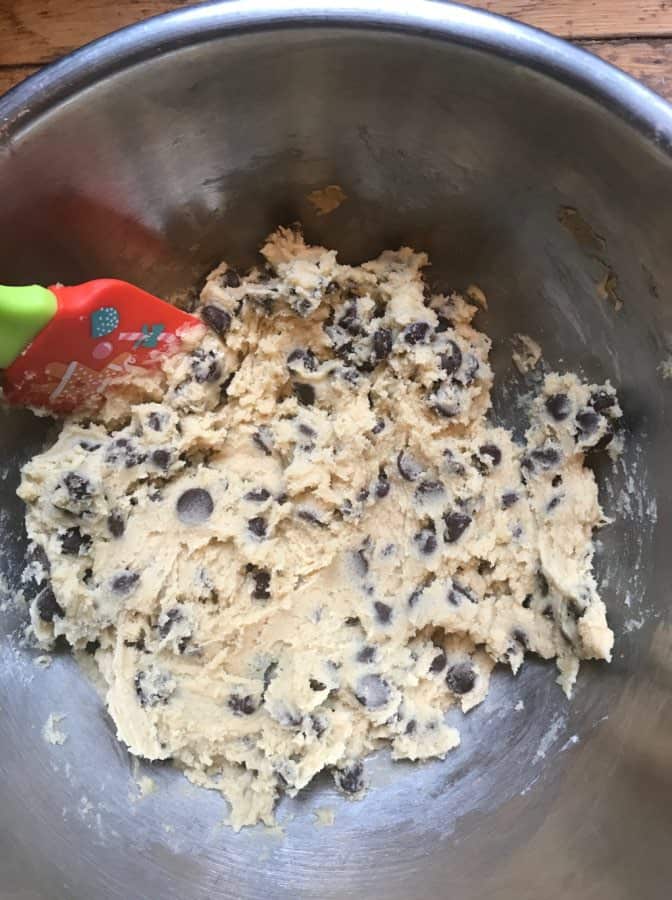
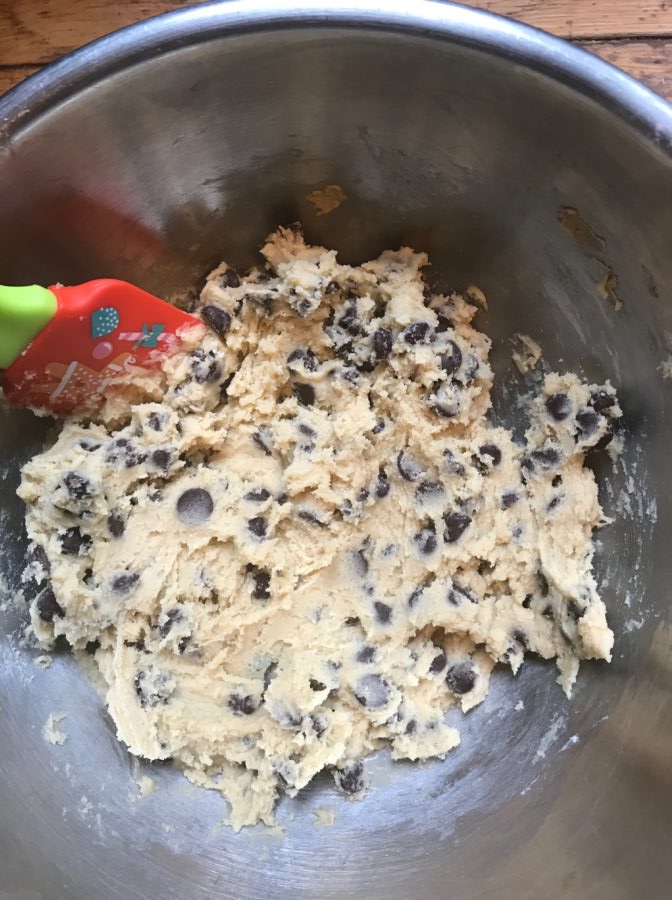
Dough: This dough was fairly easy to scoop and took up more of the bowl.
Pros: These definitely had more lift and spread less. And they were easy to scoop.
Cons: Of course, actually waiting for the butter to be in that narrow temperature. Patience not my virtue. You can relate right?
Taste: Definitely enjoyed these cookies. Nice crisp edges. Not at all greasy! This is the temperature the recipe was designed for clearly!
Why Did This Happen? Because the butter was actually at room temperature, the sugar was able to punch holes into the butter and allow air to come join the party. Those air bubbles then help to give the cookie lift and prevent spreading.
Overall: Out of the 4 batches of different temperatures, room temperature was my favorite! It had a little lift to them, still had some chewiness as well.
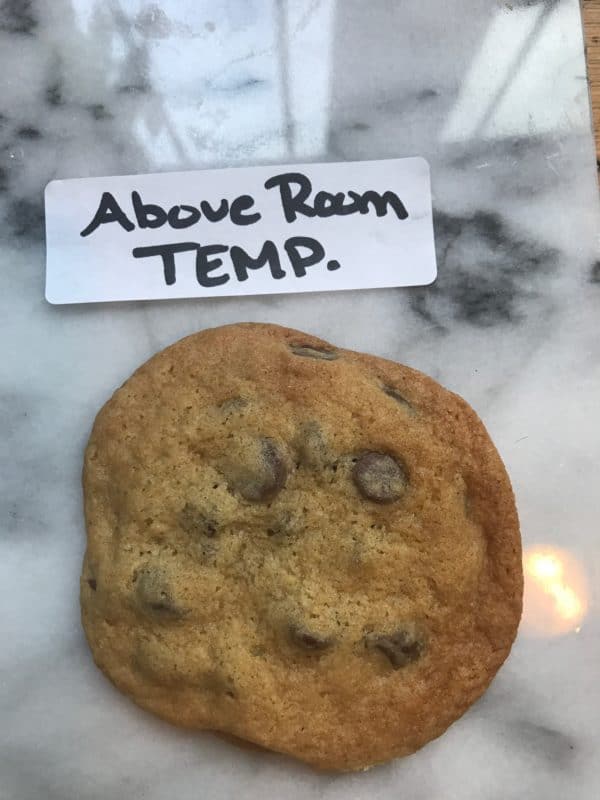
Cookie Test #4: Way Too Soft Butter. Temperature = 72ºF
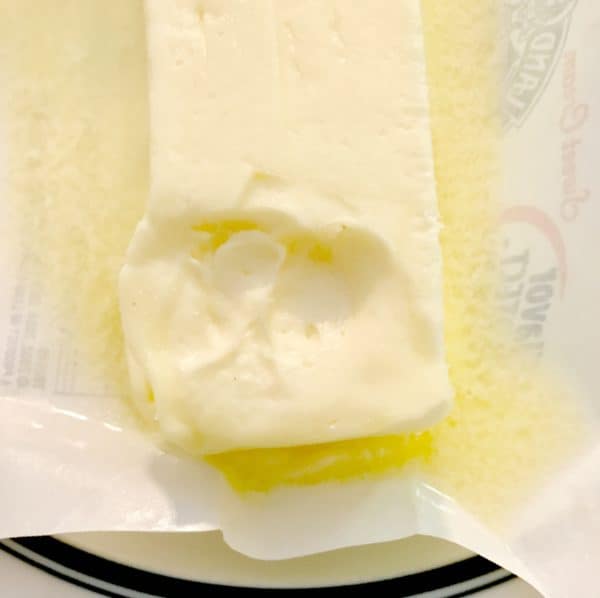
Temperature: This butter I softened in the microwave and had some melting going on. Take a look…
Dough: This dough was a bit looser as well compared to the others and yielded a few extra cookies as well compared to the other batches. Very, very easy to scoop.
Pros: These were easy to scoop, spread still but not as much as the butter that was below room temperature.
Cons: Because they still spread, they had less lift and crispier edges.
Taste: Less greasy than the first two batches, but a little less chewy but had nice crispy edges.
Why This Happened: Because the butter was too warm during the creaming process, the cookies spread more than if the butter was room temperature. If you used butter that was way too warm, you can chill the dough for 24 hours to help firm up the butter and prevent the cookies from spreading.
Overall: This cookie wasn’t bad at all, with it’s crisp edges. Less cakeiness, which you might prefer. But harder to control the temperature of this cookie as I just popped it into my microwave and called it done when it was above the 67ºF- so your results if a different temperature then what I tested it at may be different.
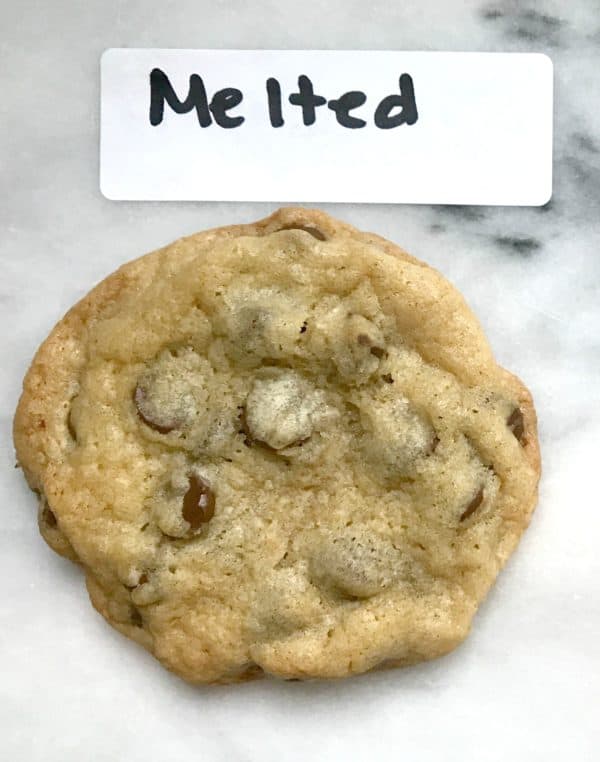
Cookie Test #5: Melted Butter In Cookies
Temperature: For this I completely melted the butter in my microwave and then let it cool slightly.
Dough: This dough was the loosest out of all the dough. It was a little too easy to scoop.
Spread: This cookie spread a little bit more than the room temperature.
Pros: I actually really liked this cookie with the melted butter. It was a breeze to throw together because of using melted butter, too.
Cons: The dough was a bit looser so a bit harder to scoop.
Taste: I loved the texture of this cookie. It didn’t have as much lift as the room temperature cookie and spread a bit more.
Overall: If you’re in a hurry, melted butter worked well for this recipe. But all cookie recipes can be a bit different. So keep in mind if you find a recipe that calls for softened butter, and you decide to melt it it will spread more. How much depends on the rest of the ratio of the ingredients.
Why This Happened: Melting the butter first means it will mix more easily with the flour making the gluten form more than softened butter. More gluten = more chew. So a melted butter cookie will have a bit more chew. But they will spread more since the butter was already a liquid. If you want to use melted butter to get that chewiness but don’t want them to spread as much then just add an extra tablespoon or two of flour or try chilling the dough for 24 hours.
So if you find your cookies are spreading too much in the oven, the #1 culprit might be the temperature of your butter! If your butter was at room temperature, and you still find your cookies spread too much in the oven, here are 7 more reasons that could be the culprit.
And if you liked this post, then subscribe to Boston Girl Bakes and I will send you my 5 foolproof cookie tips to help your cookies from spreading!
For More Baking 101 Check Out These Posts:
- Baking 101: Getting To Know Your Oven
- How and Why You Need To Measure Your Flour Accurately
- What Are The Different Flours and How To Use Them
- How To Soften Butter (3 Easy Ways!)
For More Cookie Science Check Out These Posts:
- Cookie science- King Arthur Flour
- The Science Of The Chocolate Chip Cookie
- The Ultimate Guide To Chocolate Chip Cookies
If you love the science behind baking and want to learn more, then be sure to enroll in my Ultimate Baking Bootcamp!
Classic Chocolate Chip Cookies
Ingredients
- * 1 1/4 cups flour
- * 1 teaspoon salt
- * 1/2 teaspoon baking soda
- * 1/2 cup butter 1 stick, softened to room temperature
- * 1/2 cup brown sugar
- * 1/4 cup granulated sugar
- * 1/2 teaspoon vanilla
- * 1 egg
- * 1 cup chocolate chips
Instructions
- Pre-heat oven to 350 degrees Fahrenheit. Line a cookie with parchment paper and set aside.
- In a small mixing bowl, combine your flour, baking soda, and salt. Whisk and set aside.
- In a stand mixer, combine your butter and sugars. Cream on medium speed for 2-3 minutes.
- Add in your egg and vanilla. Mix to combine , about 1 minute.
- Add your dry ingredients. Mix just until combined. Stir in your chocolate chips.
- Using a 1-inch cookie scoop, scoop your cookies and place on your prepared cookie sheet.
- Bake for about 12 minutes until golden brown.
- Remove cookies and place on a cooling rack.
Notes




Stine Mari says
Hi Heather!
This was highly valuable content! I used some of it in my newest recipe post on Peanut Butter Chocolate Chip Cookies. Very interesting to see the difference butter can make in cookies.
Thank you!
Stine Mari from Ginger with Spice
Andrea Ongstad says
Here’s my question! If I bring the butter to room temp as described, should I bake the cookies immediately? Can I put the remaining dough in the refrigerator. If I do, should I bring the dough to room temp again before baking them? Thank you!
[email protected] says
You can bake immediately. But if you find they are spreading too much then pop them in the oven. It will depend on how much you creamed and other factors as well to the spreading. I always like to refrigerate my dough regardless. I never bring back to room temp just bake the cookie dough balls straight from the oven! Hope that helps!!
Jere Cassidy says
This explains it all on how to use butter. I think I have used everyone of your methods with similar results. I know many times I want to bake cookies right now and don’t want to wait on the butter to softened, or I have left the butter out all day and finally got to the cookies only to find it beyond soft, but of course I still use it and bake some weird looking cookie. Great post!!!!
Heather | Boston Girl Bakes says
Thanks Jere! So glad you found it helpful! I know I’m the same way sometimes with waiting for the butter to soften…I love softening quickly in the microwave…check out this post for 3 ways to soften https://www.bostongirlbakes.com/2017/01/16/3-ways-soften-butter-quickly/