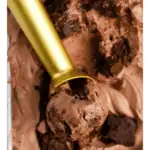
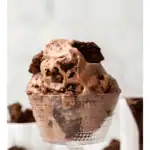
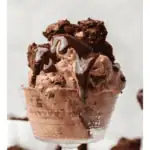
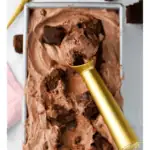
Chocolate Fudge Brownie Ice Cream
This Post May Contain Affiliate Links. Please Read Our Disclosure Policy.
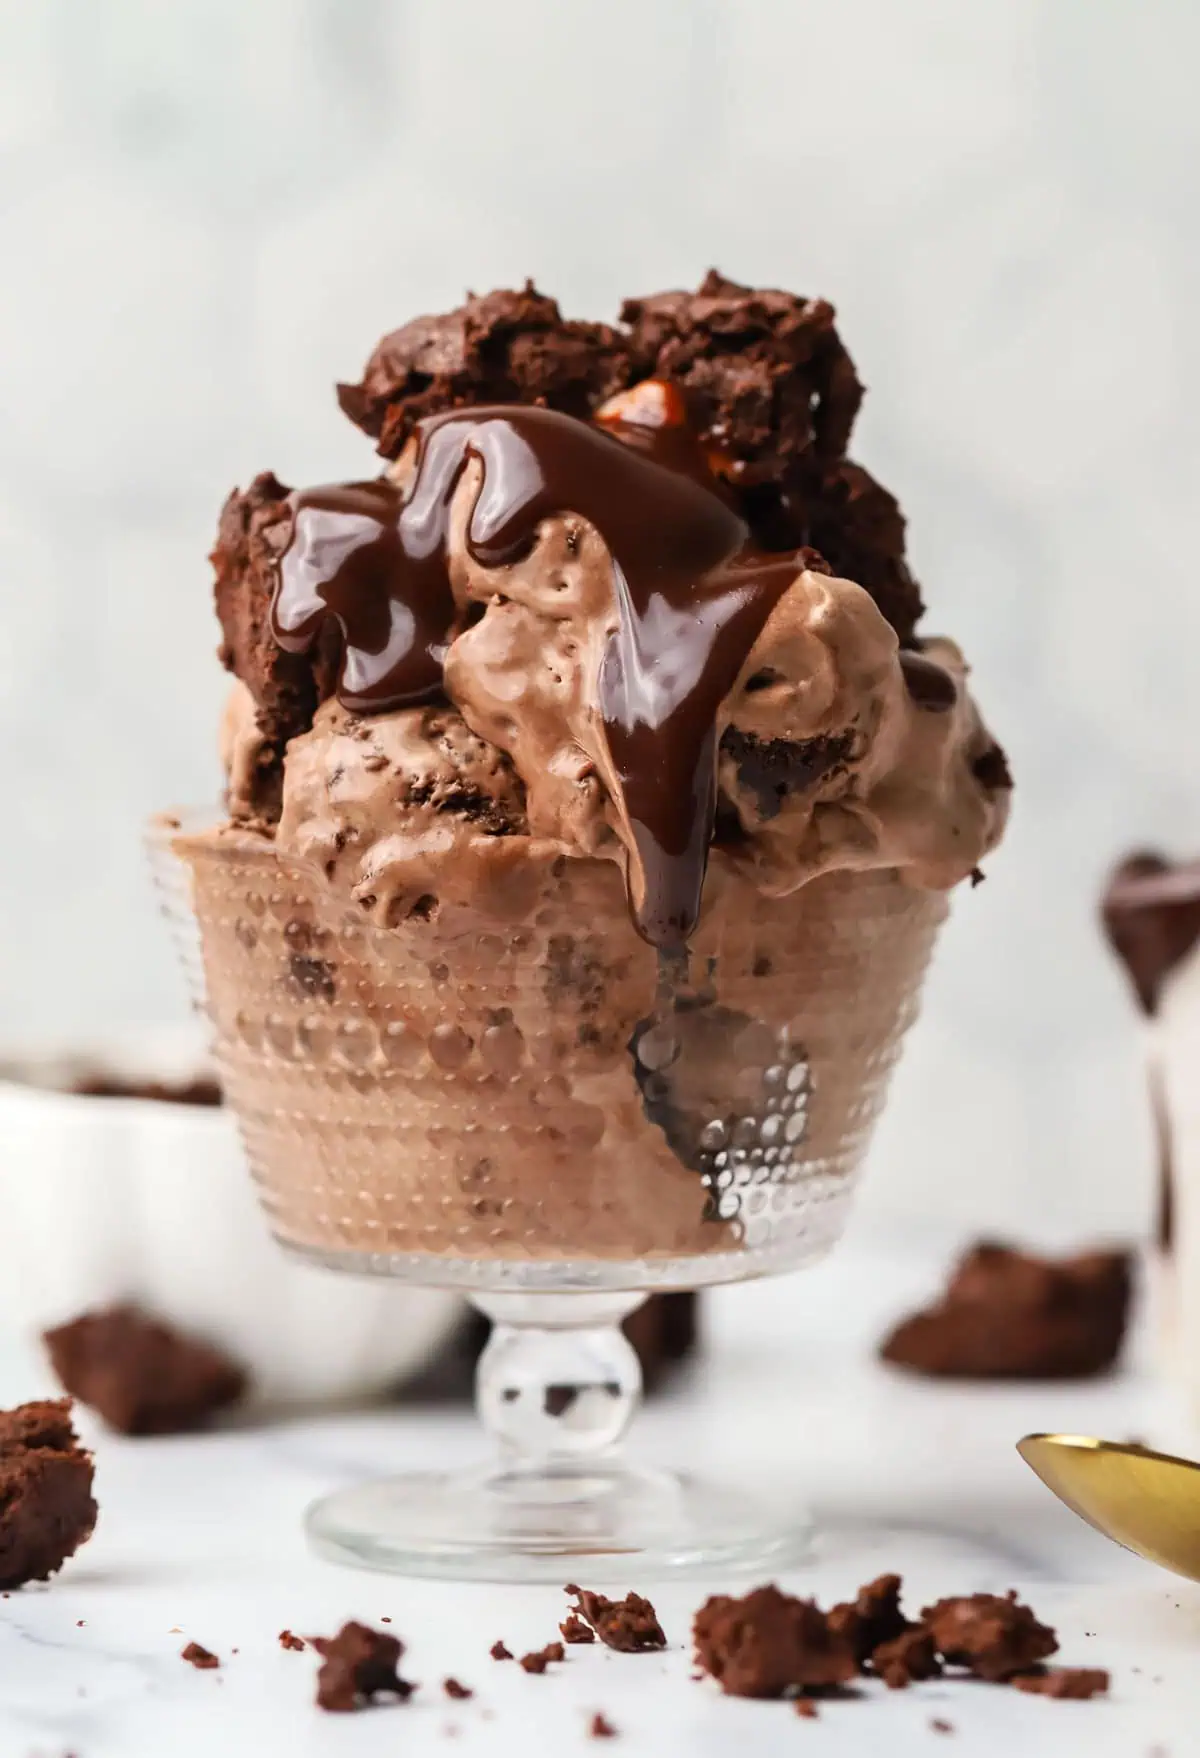
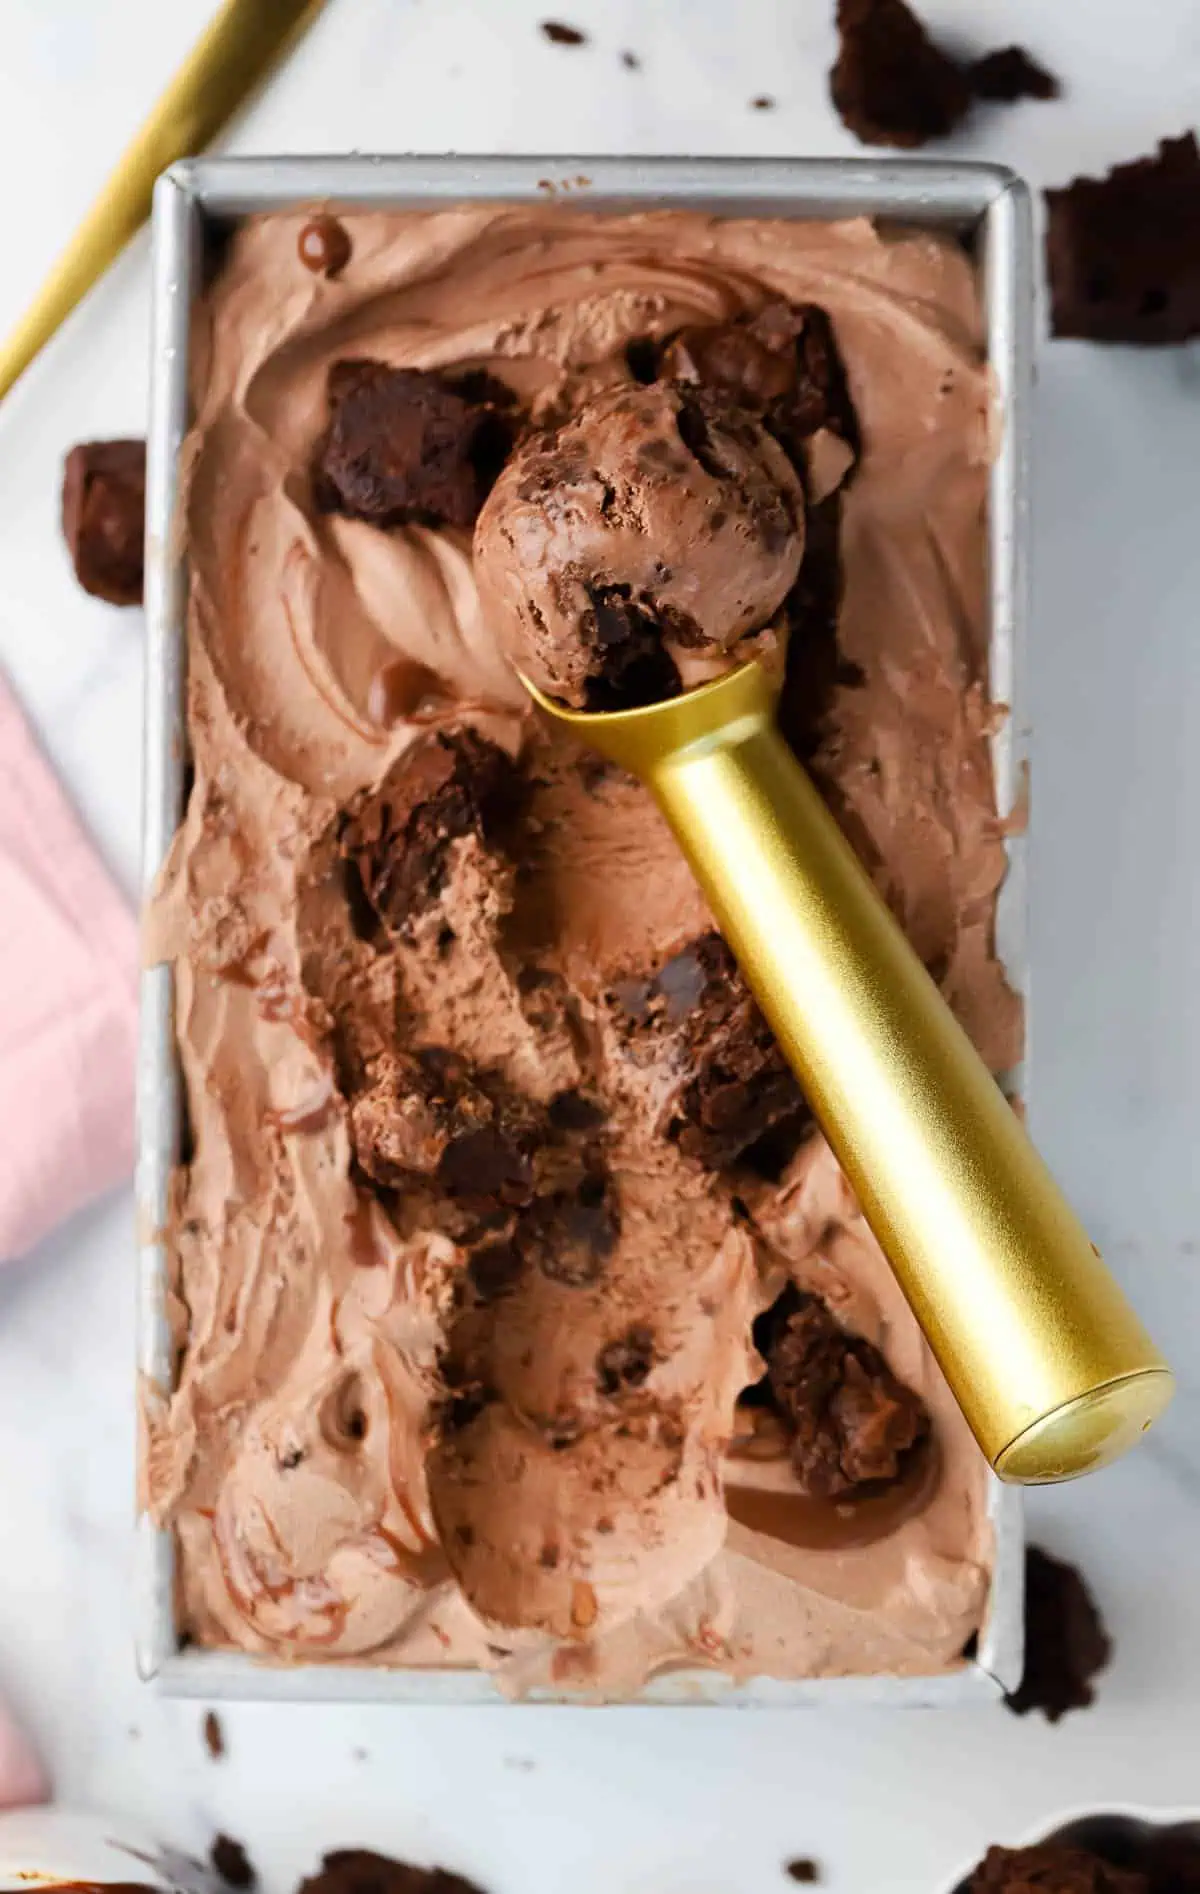
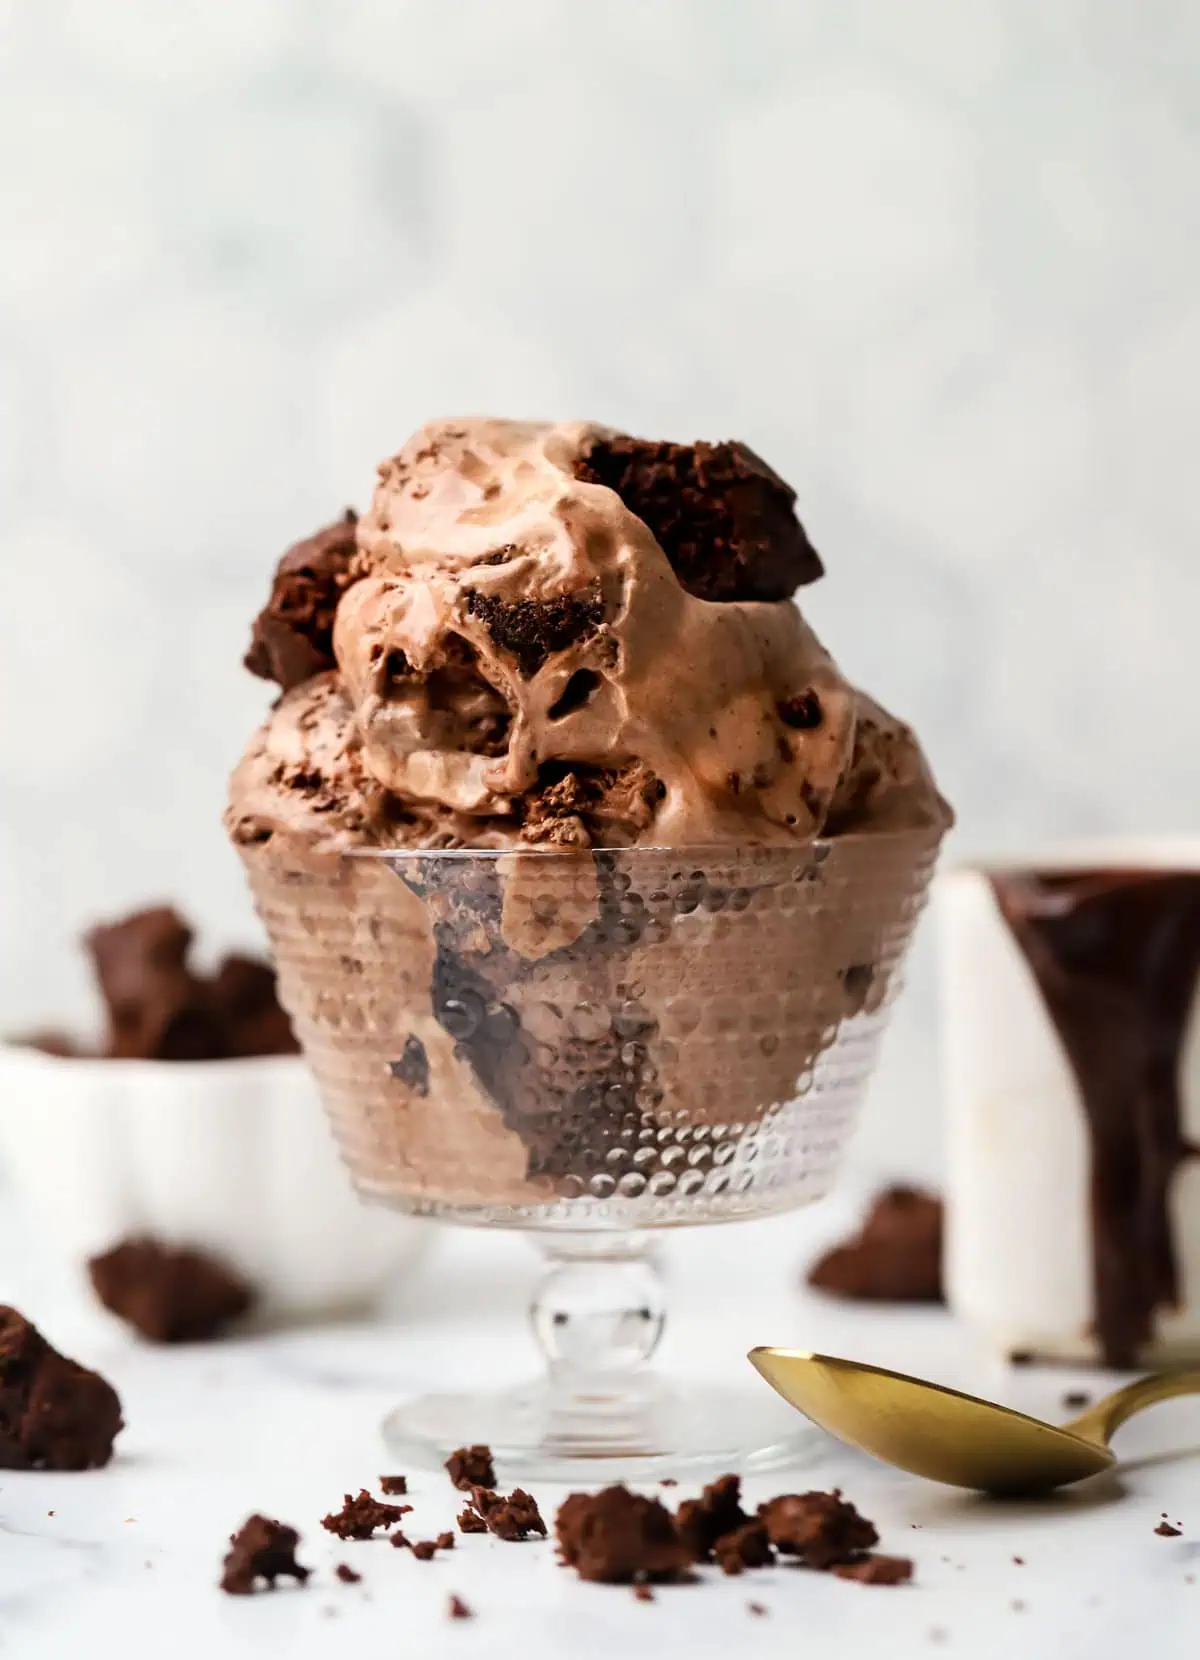
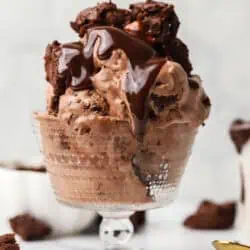
This Chocolate Fudge Brownie Ice Cream is the ultimate dessert for chocolate lovers. A rich chocolate no-churn ice cream base is swirled with hot fudge and loaded with chunks of fudgy brownies for a frozen treat that tastes like your favorite brownie sundae. Best of all, there’s no ice cream maker required.
I love a good no churn ice cream in the summertime. Like my mint chocolate chip ice cream (my husband’s favorite!), or maybe a kid favorite cotton candy ice cream. But my favorite? Always chocolate. And this brownie fudge ice cream is a chocolate lover’s dream.
What makes this ice cream different is the combination of textures. You get creamy chocolate ice cream, chewy brownie chunks, and thick ribbons of hot fudge running throughout. Instead of using melted chocolate in the base, I opted for cocoa powder. It dissolves easily into the sweetened condensed milk, creates a rich chocolate flavor, and keeps the recipe simple.
As someone who loves no-churn ice cream recipes, I also wanted this one to be easy enough to make on a weeknight. The hardest part is waiting for it to freeze.
Ingredients
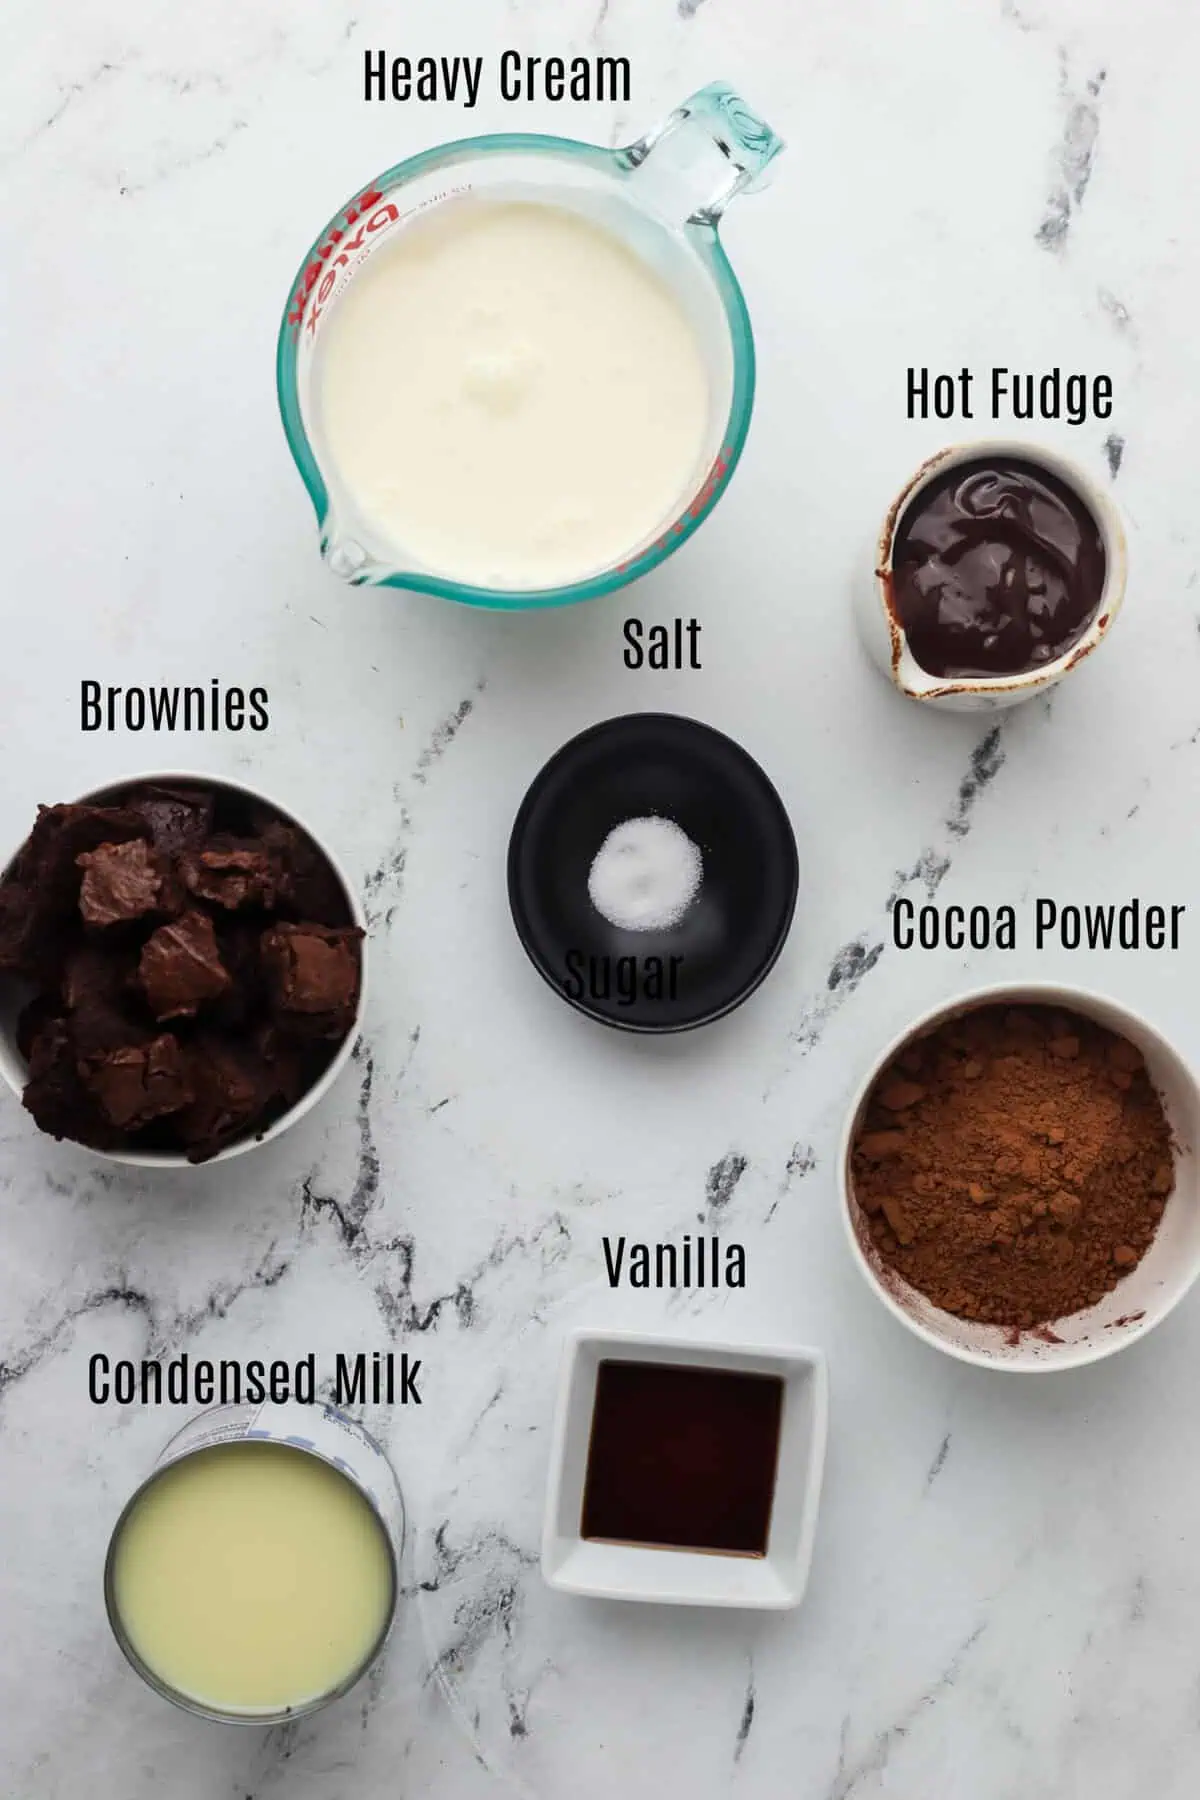
For the Ice Cream Base
- Sweetened condensed milk
- Unsweetened cocoa powder: Use Dutch-process cocoa powder for an even richer chocolate flavor.
- Vanilla extract
- Salt
- Heavy whipping cream: Make sure it’s very cold before whipping.
For the Mix-Ins
- Brownie chunks: Homemade brownies work great, but store-bought brownies will save time. I used my cocoa powder brownies.
- Hot fudge sauce: Let it cool until thick but still pourable before adding it to the ice cream.
How To Make Brownie Fudge Ice Cream
Make the chocolate base
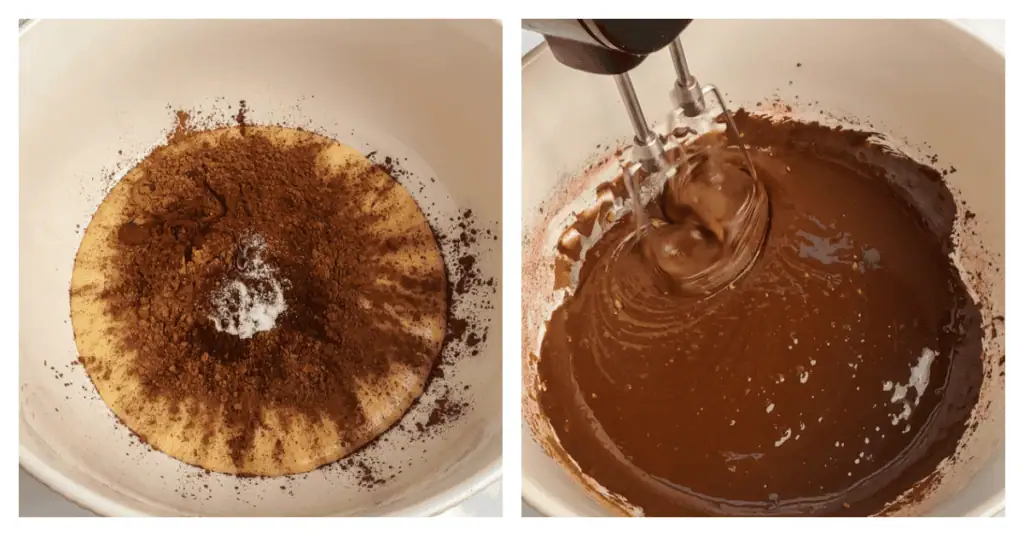
In a large mixing bowl, whisk together the sweetened condensed milk, cocoa powder, vanilla extract, and salt until smooth.
Take a minute to break up any cocoa powder lumps. Starting with a smooth base ensures the finished ice cream has a creamy texture and evenly distributed chocolate flavor.
Whip the cream
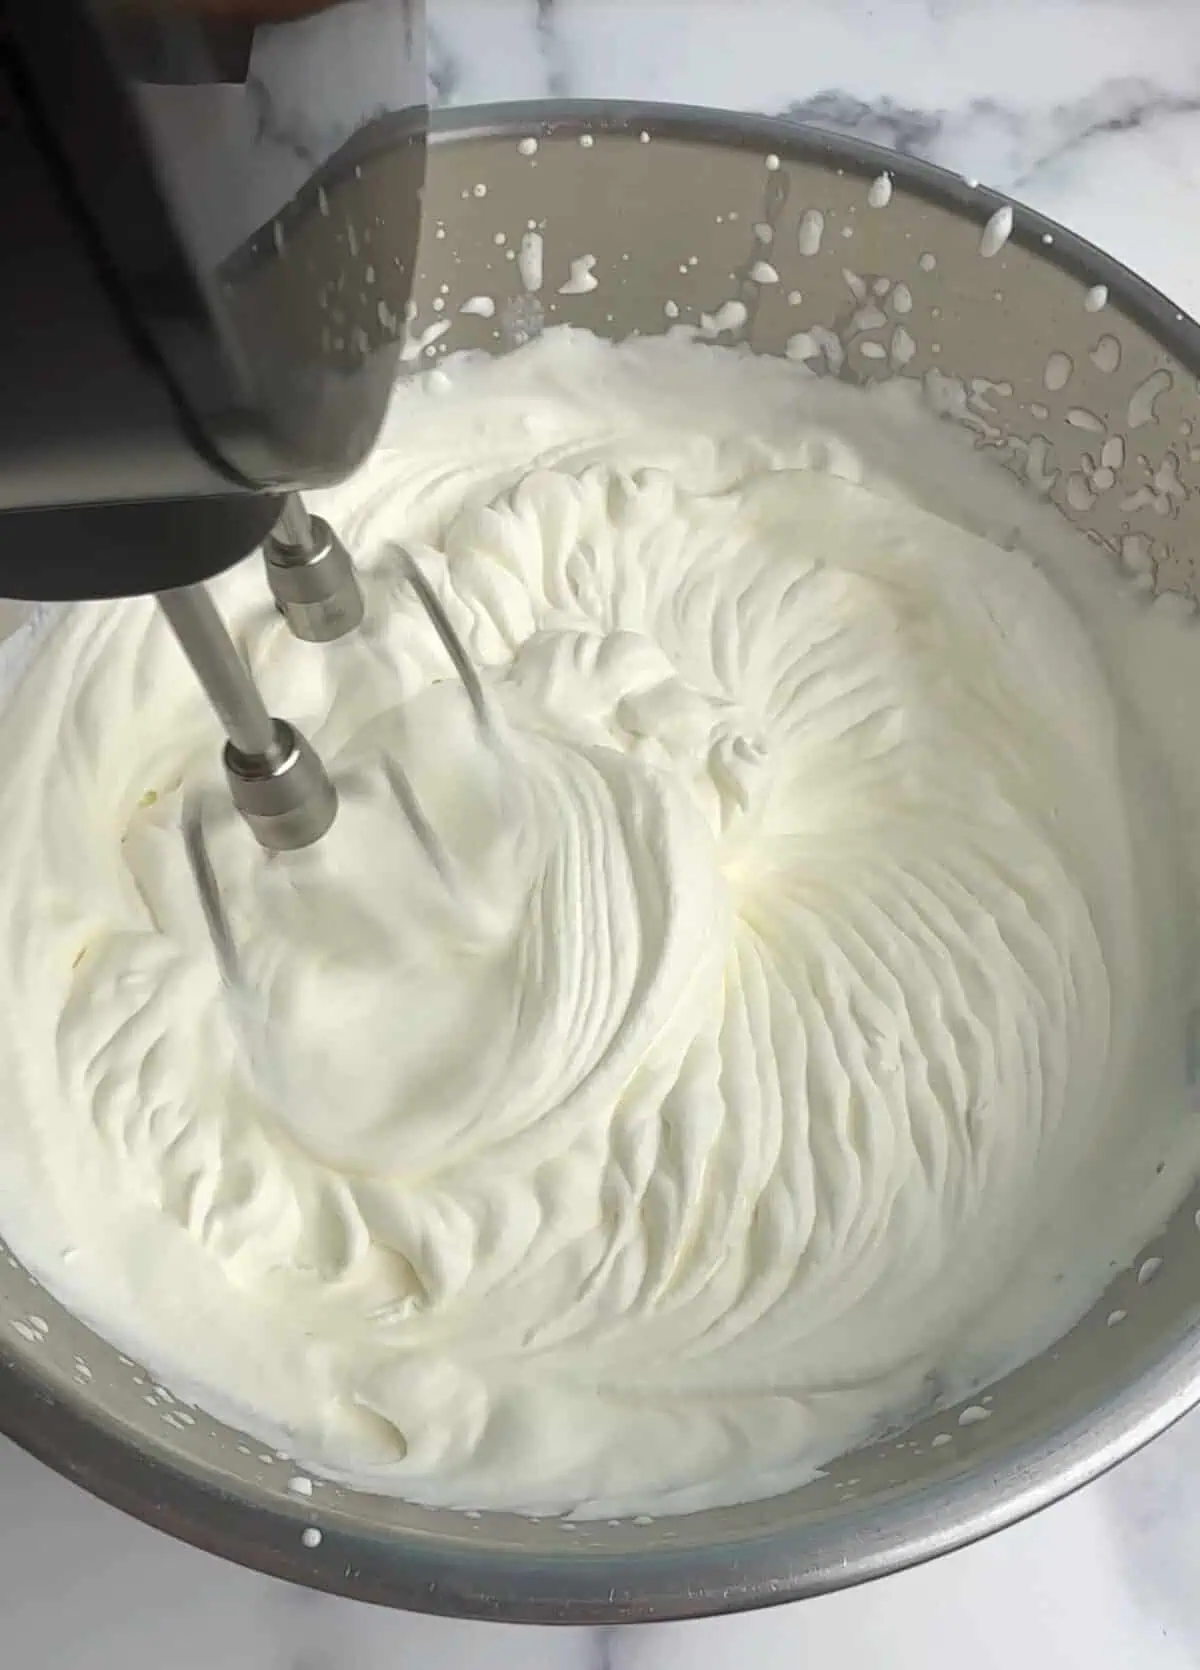
In a separate large bowl, beat the cold heavy cream with an electric mixer on medium-high speed until firm peaks form, about 3 to 5 minutes.
You’ll know you’ve reached firm peaks when the whipped cream holds its shape when you lift the beaters. Be careful not to overwhip, or the cream can become grainy.
Fold the mixtures together
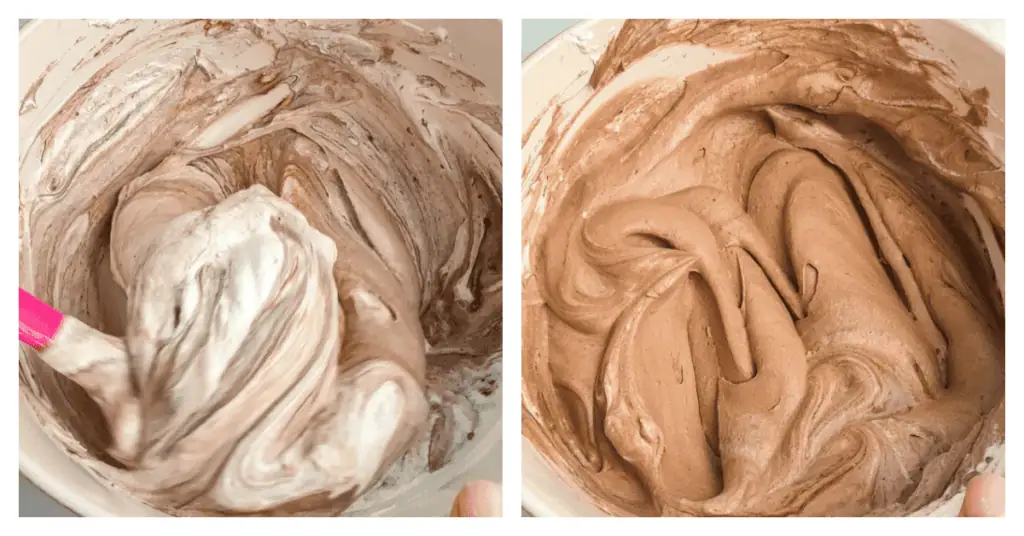
Add the whipped cream to the chocolate mixture.
Using a rubber spatula, gently fold everything together until no white streaks remain. Folding instead of stirring helps preserve the air you just whipped into the cream, which is what gives no-churn ice cream its light texture.
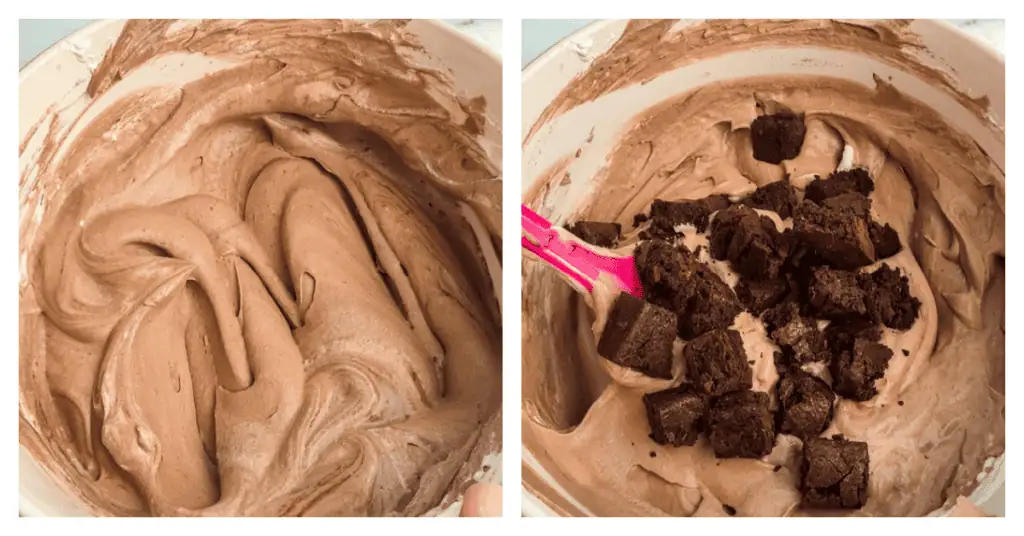
Add the brownies
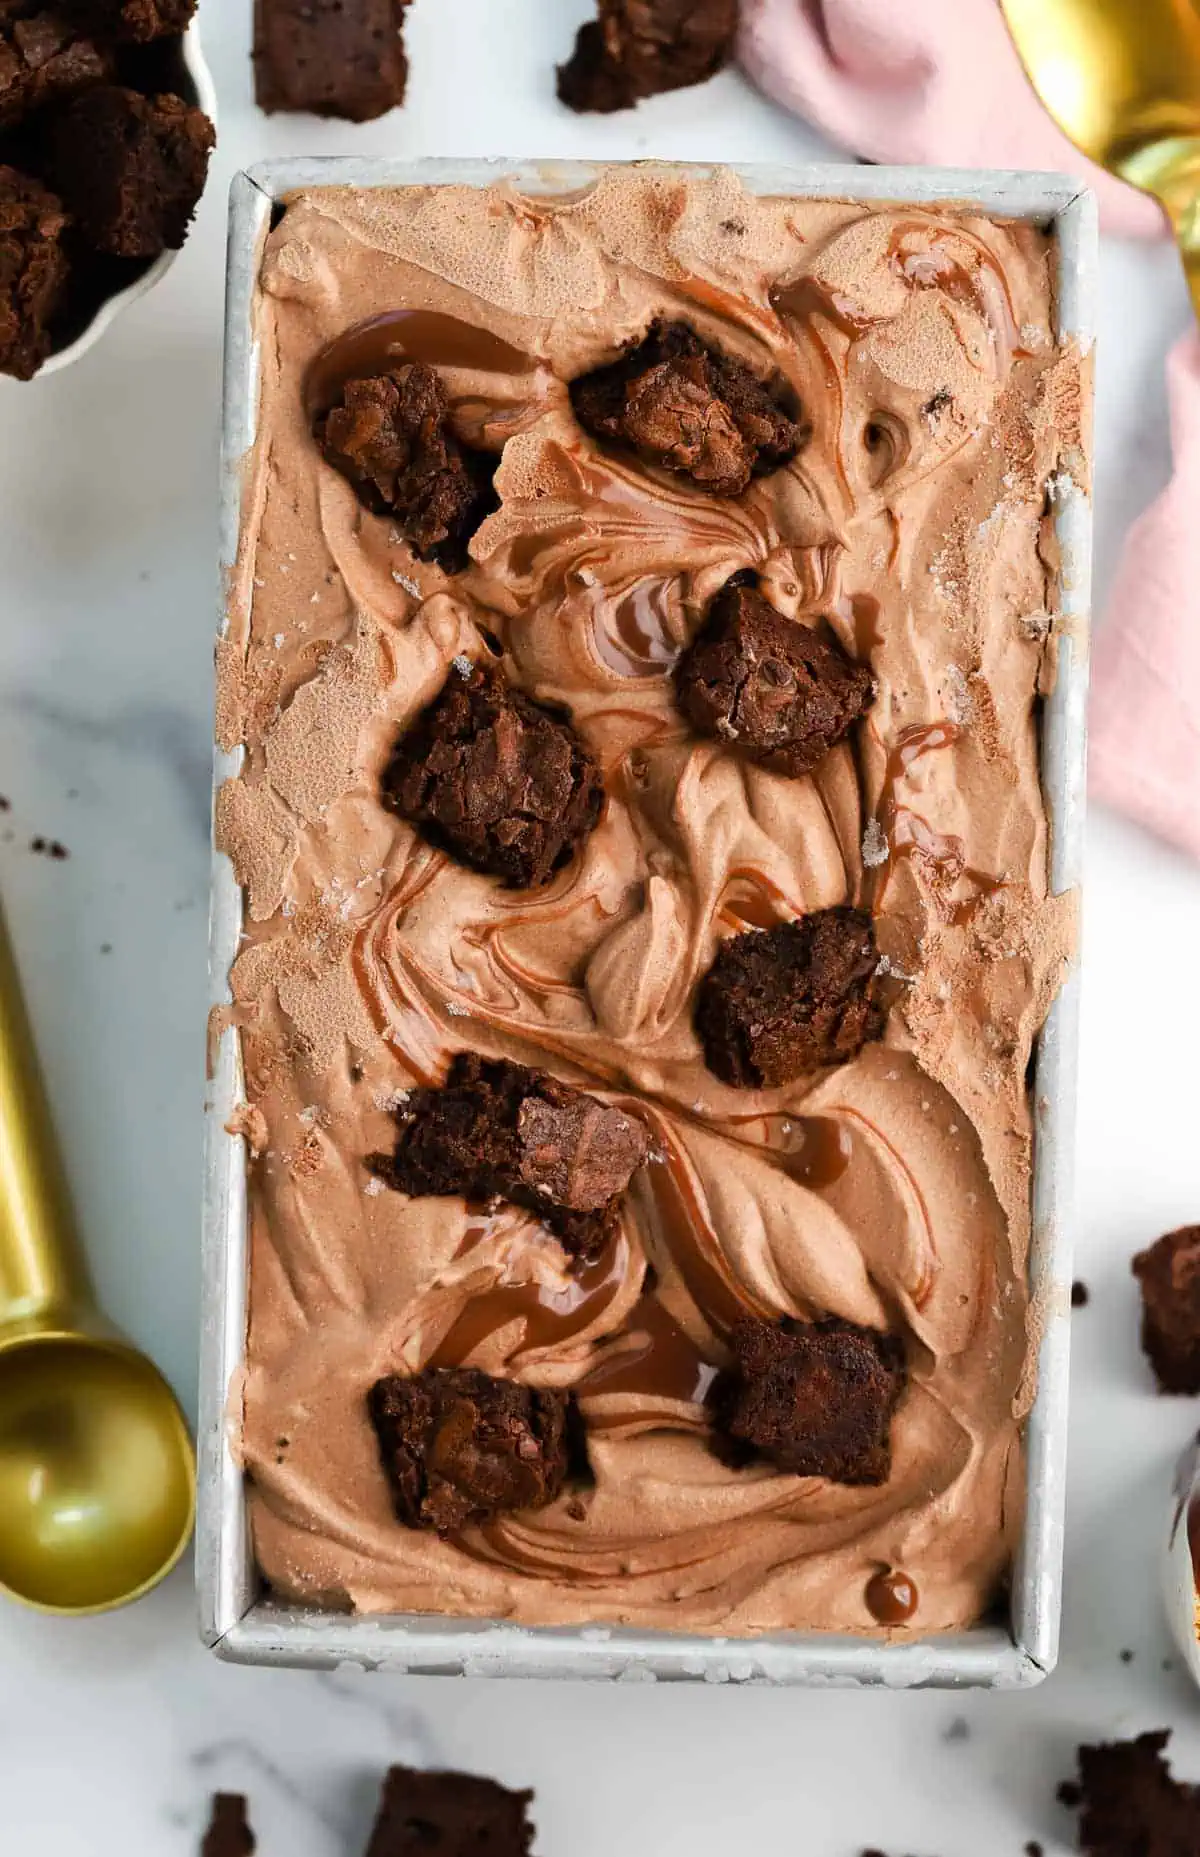
Fold in the brownie chunks, reserving a handful for the top if desired.
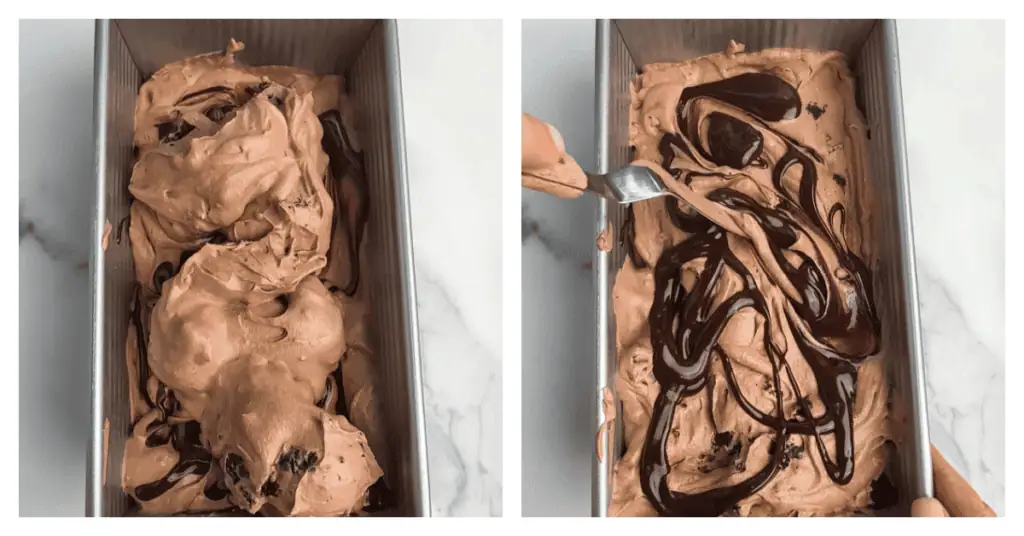
Layer and swirl
Transfer half of the ice cream mixture into a chilled 9×5-inch loaf pan.
Dollop half of the remaining hot fudge over the top and gently swirl with the tip of a knife.
Add the remaining ice cream mixture and repeat with the rest of the hot fudge. Sprinkle the reserved brownie chunks over the top.
Layering the fudge instead of mixing it all at once helps create distinct swirls throughout the entire container.
Freeze
Cover the loaf pan tightly with plastic wrap or foil.
Freeze for at least 6 hours, but overnight is even better for the firmest texture.
Recipe Tips
- Start with very cold heavy cream. Cold cream whips faster and creates a lighter, creamier ice cream.
- Let the hot fudge cool first. If it’s too warm, it can melt the ice cream base and make the swirls disappear.
- Don’t overmix after adding the fudge. Fold just a few times to keep those thick ribbons of fudge throughout the ice cream.
- Reserve some brownie chunks for the top. It makes the finished ice cream look extra tempting and gives every scoop plenty of brownie pieces.
- Freeze overnight for the best texture. While 6 hours will work, an overnight freeze gives the ice cream time to fully set up.
Storage
Store the ice cream tightly covered in the freezer for up to 2 months.
For the best texture, press a piece of plastic wrap directly against the surface before covering the pan. This helps prevent ice crystals from forming.
If you have extra brownies, freeze them in a zip-top freezer bag for up to 3 months. Label the bag with the recipe name and date so they’re ready for your next batch of ice cream.
If the ice cream is very firm, let it sit at room temperature for 5 to 10 minutes before scooping. This makes it easier to serve and gives you the creamiest texture.
More Recipes To Try
If you love homemade ice cream, be sure to try my No-Churn Cookies and Cream Ice Cream, or my butter pecan ice cream.
My Small Batch Brownies, Peanut Butter Brownies, are all perfect candidates for turning into your next batch of ice cream.
And if you’re a true chocolate lover, don’t miss my cookies and cream cookies or my S’mores Brownie Cookies.
Chocolate Fudge Brownie Ice Cream
Ingredients
For the ice cream base
- 14 ounces (1 can) sweetened condensed milk
- ½ cup (42 g) unsweetened cocoa powder
- 2 teaspoons vanilla extract
- ¼ teaspoon salt
- 2 cups (480 ml) cold heavy whipping cream
Mix-ins
- 2 cups brownie chunks about ½-inch pieces
- 1 cup hot fudge sauce cooled until thick but still pourable
Instructions
- Mix together the ingredients. In a large bowl, beat together the condensed milk, cocoa powder, vanilla, and salt until smooth and combined. 14 ounces (1 can) sweetened condensed milk ½ cup (42 g) unsweetened cocoa powder 2 teaspoons vanilla extract ¼ teaspoon salt
- Whip the cream. In a separate bowl, with an electric mixer beat the heavy cream on medium-high speed until firm peaks form about 3 to 5 minutes.. 2 cups (480 ml) cold heavy whipping cream
- Fold together. Fold the whipped cream into the condensed milk mixture until smooth and combined.
- Add the brownies. Fold in the brownie chunks, reserving a small handful for the top if desired. 2 cups brownie chunks
- Layer and swirl. Transfer half of the ice cream mixture to a chilled 9×5-inch loaf pan. Dollop half of the hot fudge over the top and swirl with the tip of a knife. Add the remaining ice cream and top. Add remaining hot fudge. Use a knife to gently swirl. Sprinkle the reserved brownie pieces over the top. 1 cup hot fudge sauce
- Freeze. Cover tightly and freeze for at least 6 hours, or overnight, until firm.
Notes
- Store the ice cream tightly covered in the freezer for up to 2 months. For the best texture, press a piece of plastic wrap directly against the surface before covering the pan. This helps prevent ice crystals from forming.
- If you have extra brownies, freeze them in a zip-top freezer bag for up to 3 months. Label the bag with the recipe name and date so they’re ready for your next batch of ice cream.
- If the ice cream is very firm, let it sit at room temperature for 5 to 10 minutes before scooping. This makes it easier to serve and gives you the creamiest texture.