
Cotton Candy Ice Cream
This Post May Contain Affiliate Links. Please Read Our Disclosure Policy.
Making homemade ice cream has never been this easy! To make this fun and flavorful cotton candy ice cream, you will only need 5 ingredients. No ice cream maker involved in this easy no churn ice cream recipe! Just a stand mixer and in 10 minutes of prep time, you have a cooling snack and dessert you can enjoy!

Making homemade creamy ice cream sound very difficult and requires fancy equipment. But not this homemade ice cream recipe! Unlike my homemade vanilla ice cream and other ice cream recipes, this cotton candy ice cream doesn’t include raw eggs or egg yolks. That’s why it’s easier and quicker to make, like my no-churn mint Oreo ice cream.
And the best part is that this cotton candy ice cream recipe is made with simple ingredients. If you were to buy a carton at the store, it’s going to have some weird ingredients like high fructose corn syrup, guar gum, and artificial flavor. Um, no thank you. So I say make your own ice cream and know what’s in it!
Ready To Take Your Baking To The Next Level?
Join the Ultimate Baking Bootcamp and master essential techniques like mixing methods and the why behind every recipe! Whether you’re a beginner or looking to refine your skills, this step-by-step class will help you bake with confidence and create flawless desserts every time. Start your baking journey today!
I only used my electric mixer, bowls, loaf pan, and a rubber spatula for this recipe. In 15 minutes of prep time and just a few ingredients, you will have a flavorful and perfect ice cream!
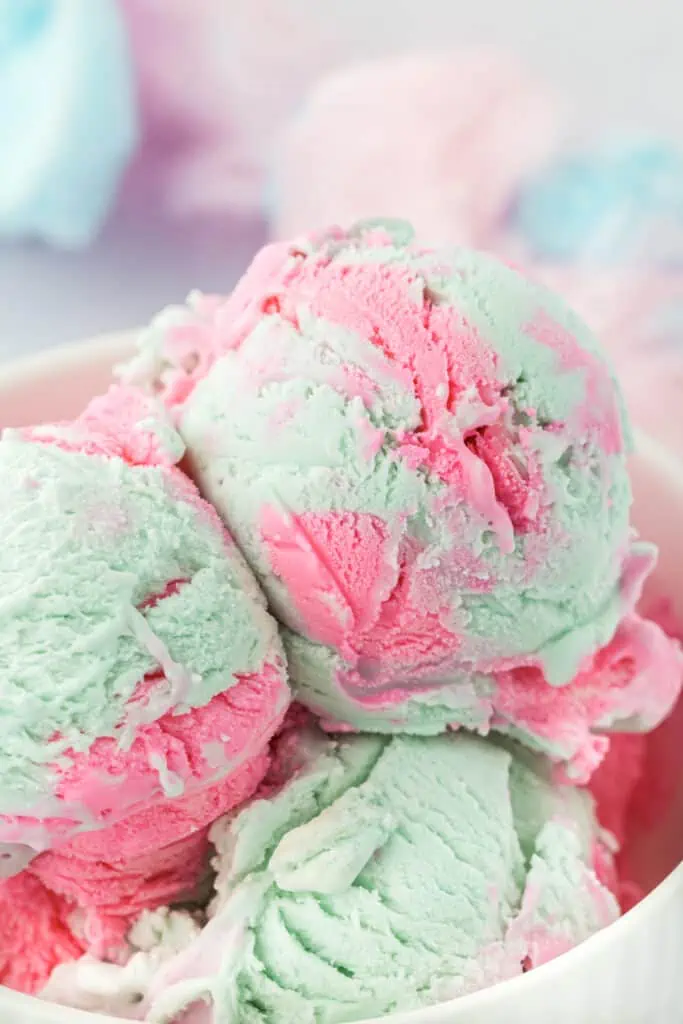
Plus, it’s colorful and looks perfect in my fridge! All the children in my family love it! This will be your new favorite ice cream, for sure.
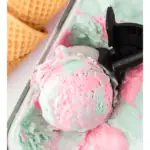
Grab a waffle cone and let’s make some ice cream!
See Also:
- Do you love candy bars? Then you’re going to love this easy no churn Snickers ice cream recipe!
- Peanut butter cup ice cream is the perfect dessert for those peanut butter lovers in your life!
- This easy no churn mint chocolate chip ice cream recipe is full of mint flavor and loaded with chocolate.
- Looking for an impressive dessert that’s easy to make? Then you have to try this Mexican fried ice cream!

Why You’ll Love This Cotton Candy Ice Cream
- No Ice Cream Maker Needed – This no-churn ice cream recipe requires no ice cream machine. I only used a stand mixer with a whisk attachment to make cotton candy ice cream! You could also use a hand mixer if needed.
- Perfect For Parties – The lovely pink and blue colors is very festive and perfect for parties and gatherings. Children will surely love this bright and delicious homemade ice cream.
- Easy Ice Cream Recipe – Just toss all the simple ingredients in a bowl and mix well using a stand mixer. There’s no ice cream maker, raw eggs, or churning involved in making this cotton candy ice cream. It looks fancy but is very easy to make!

Ingredients Needed
For this homemade ice cream recipe, you will need the following ingredients:
- Heavy Whipping Cream – This is the ice cream base for this cotton candy ice cream. The heavy cream should be cold before making ice cream.
- Sweetened Condensed Milk – It makes the cotton candy ice cream rich and sweet. Also, the sweetened condensed milk gives the perfect texture to this no-churn ice cream.
- Cotton Candy Extract – It gives the cotton candy flavor.
- Vanilla Extract – I used pure vanilla extract for making this flavorful cotton candy ice cream. This recipe is not baked or cooked. That’s why the vanilla extract flavors shine. But you can also imitation or homemade vanilla extract.
- Food Coloring (Optional) – I used pink and blue food coloring for this homemade ice cream recipe. The pink and blue food coloring is the signature color of cotton candy. But you can skip this ingredient all together.

How To Make Cotton Candy Ice Cream
1. Freeze And Chill Kitchen Tools
Place a 9 x 5-inch loaf pan in the freezer, 30 minutes before making the dessert.
10 minutes before you start, place a large bowl and whisk attachments in the freezer. This will help you make whipped cream faster without deflating. Check out Homemade Whipped Cream Guide.
2. Beat Heavy Whipping Cream
In the cold large bowl, beat heavy whipping cream on medium-high speed using your electric mixer with the cold whisk attachment for 3 minutes or until stiff peaks form.

3. Mix Remaining Ingredients
In a small bowl, combine sweetened condensed milk, cotton candy extract, and vanilla extract. Mix well.

4. Fold Ingredients
Fold in your sweetened condensed milk mixture to the whipped cream, gently and slowly. Be careful not to deflate your whipped cream.

5. Add Food Coloring
Separate the cotton candy ice cream mixture into two bowls. Color cotton candy ice cream with a few drops of pink and blue food coloring, one food coloring color for each bowl. I used pink food coloring but you can also use red, just don’t add a lot or it will turn your cotton candy ice cream bright red.
Stir the food coloring gently with a spatula or wooden spoon. Do this carefully and slowly.

6. Freeze And Serve
Remove your chilled loaf pan from the freezer. Scoop or drop ice cream mixture into the loaf pan alternating colors to make a mixed effect. Cover with plastic wrap and place in the freezer. Freeze overnight and enjoy.

Recipe Tips:
- If you’re using gel food coloring, you’ll only need a few drops to get the desired consistency and color of your cotton candy ice cream.
- Chill heavy whipping cream, condensed milk, and loaf pan before preparing your cotton candy ice cream.
- Cotton candy ice cream with higher fat content melts quicker. Before serving, prepare your serving cups and cones ahead.
- Serve cotton candy ice cream mix with sprinkles. Or add sprinkles to the cotton candy ice cream before freezing.
- This cotton candy ice cream is soft ice cream and melts quickly. Don’t leave this no-churn cotton candy ice cream at room temperature that long or it will melt quickly.

Recipe FAQs
Cotton candy flavoring is a blend of different artificial flavorings. Usually, it contains strawberry, vanilla, and ethyl maltol flavorings. However, some manufacturers replace or add different ingredients to their cotton candy flavoring. Check the label to know what are the ingredients used to make the cotton candy flavor.
This homemade cotton candy ice cream can last for up to one month in the freezer. Unlike your store-bought ice cream, this cotton candy ice cream doesn’t contain any preservatives. That’s why it doesn’t have a long shelf life. It’s best to consume it as soon as possible to prevent ice crystals from forming.
You can’t store this cotton candy ice cream in the fridge. Transfer cotton candy ice cream into an airtight container and place parchment paper on top or wrap the whole loaf pan with plastic wrap. Place in the freezer.
If you use a regular milk, you will need to add sugar because sweetened condensed milk contains both milk and sugar.
I always like to use gel food coloring, but liquid food coloring from the grocery stores can also be used, since it’s only a few drops of each. The extra liquid won’t change the texture that much.
More Ice Cream Recipes To Enjoy
Master The Art Of Baking!
Don’t miss out on the chance to elevate your baking skills! Join the Ultimate Baking Bootcamp today and unlock the secrets to creating perfect desserts every time. With expert guidance, step-by-step lessons, and insider tips, you’ll be baking like a pro in no time. Sign up now and start mastering your baking!

Cotton Candy Ice Cream
Ingredients
- 2 cups (480 ml) heavy whipping cream cold
- 14 ounces sweetened condensed milk
- 2 teaspoons cotton candy extract
- ½ teaspoon vanilla extract optional
- Pink or red and blue food coloring optional
Instructions
- Place a 9×5-inch loaf pan in the freezer 30 minutes before starting the recipe. Place the mixing bowl and whisk attachments for the mixer in the freezer 10 minutes before starting the recipe.
- In a large mixing bowl with an electric mixer (I like to use my stand mixer with whisk attachment, but a hand mixer will also work), beat heavy cream on medium-high speed for about 3 minutes until stiff peaks form.
- Stir cotton candy flavoring and vanilla into the condensed milk. You can do this in a small bowl or directly in the can.
- Fold the condensed milk into the whipped cream gently. Be sure to do this step slowly and gently so as not to deflate the whipped cream.
- Place half of the mixture into a second mixing bowl. Color one bowl with a few drops of pink food coloring (or if using red, use sparingly so a light pink color is achieved) and the second bowl with a few drops of blue food coloring. Stir the food coloring into the mixtures gently with a spatula or wooden spoon.
- Remove the loaf pan from the freezer, and spoon the two bowls into the loaf pan. Dollop the two bowls alternately so you get a mixed effect.
- Place loaf pan in the freezer overnight or until firm. Scoop and serve!
Video
Notes
- Storage: This homemade cotton candy ice cream can last for up to one month in the freezer. It’s best to consume it as soon as possible to prevent ice crystals from forming. Keep covered.
- Vanilla: Optional, but I like the extra flavor.
- Food coloring: Optional. I like to use gel food coloring but liquid food coloring will also work. Use sparingly until desired color is achieved.


Where can you buy cotton candy extract
You can find it on Amazon.
This cotton candy ice cream is so FUN! My kid loved helping me make AND eat it!
So glad that you all had fun making and eating it! Thank you so much for letting me know!
I didn’t know about cotton candy extract, what a fun ingredient for desserts! Can’t wait to try this ice cream, especially now that the weather is warming up!
It’s such a fun flavoring, please be sure to let me know how it turns out for you! Thank you!
The sweet and creamy flavor is absolutely irresistible. It’s like a carnival in a cone. I can’t get enough of it! Definitely a must-try.
Thank you so much, Gianne, I’m so happy to hear that you enjoyed it!
Wow – this cotton candy ice cream is so good! I can’t believe you can make this at home! It tastes just like real cotton candy!
Great, I am so glad that you enjoyed it, it’s such a fun summer treat! Thank you!
My granddaughter loved this ice cream. I know I’ll be making this recipe all summer. Thank you!
Wonderful to hear, thank you so much, Colleen!
I can’t believe how easy it was to make this ice cream. The hardest part was definitely waiting for it to firm up in the freezer. Love the flavour and it just looks so pretty as well.
Yay! So glad that you enjoyed making and eating this Cotton Candy Ice Cream, it’s such a fun treat!