
Easy Croissant Recipe
This Post May Contain Affiliate Links. Please Read Our Disclosure Policy.
This easy croissant recipe gives you flaky, bakery-style results without the normal two day hassle of traditional croissant recipes. The dough is easily made in your stand mixer and no butter block required!

Croissants might seem like one of those pastries that are best left to bakeries, but with a little patience you can absolutely make flaky, buttery croissants at home.
Traditional croissant recipes can take days and require a precise butter block and lamination process. This recipe simplifies things by folding slices of butter directly into the dough and rolling it several times to create layers. It’s a more approachable technique that still produces beautiful flaky croissants with a crisp exterior and soft interior.
The repeated rolling and folding creates thin layers of dough and butter that puff up beautifully in the oven. So you get flaky bakery style results without the hassle of the butter block.
If you’ve ever wanted to try making croissants but felt intimidated, this easy croissant recipe for beginners is a great place to start.

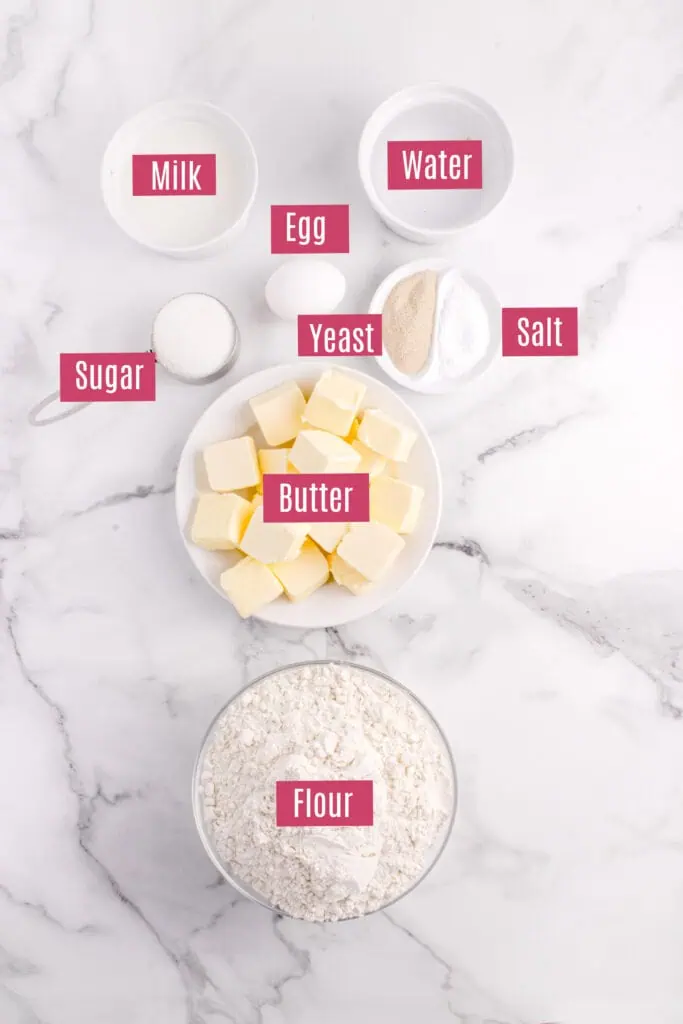
Ingredients Needed
- All-purpose flour: Weigh your flour for the best results.
- Instant yeast: If using active dry yeast, you will need to increase the rising time slightly, from 15 to 25 minutes.
- Granulated sugar
- Salt
- Milk: Whole milk enriches the dough and adds tenderness. Cold milk works best so the butter stays firm during the mixing and folding process.
- Cold water
- Unsalted butter, cut into thick slices: Cold butter is essential for creating flaky croissants. Use good-quality butter if possible. European-style butter works especially well because of its higher fat content. If using salted butter reduce the salt slightly.
- Egg Wash- Helps create the shiny golden crust croissants are known for. Here is my full tutorial on what is an egg wash.
How to Make Easy Croissants
Make the Dough
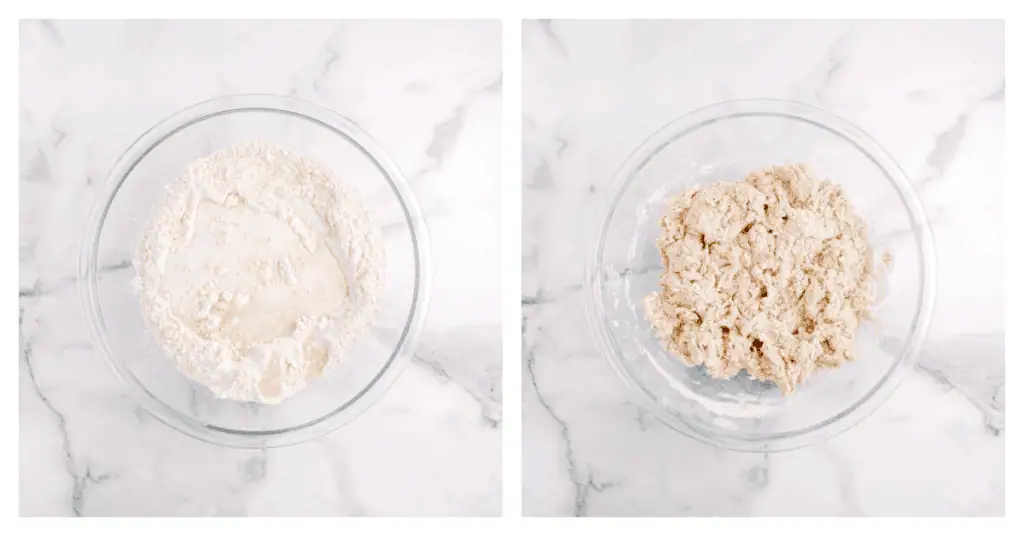
Start by combining the flour, yeast, sugar, and salt in a large mixing bowl, stirring them together so the ingredients are evenly distributed.
You can make this by hand but I love making the dough in my stand mixer fitted with a paddle attachment.

Add the milk and most of the water and begin mixing until a rough dough starts to form. The dough should look slightly shaggy at this stage rather than smooth, which is perfectly normal and actually helpful for creating layers later.
Once the dough begins coming together, add the slices of cold butter and gently mix them into the dough. The butter should remain in visible pieces rather than blending completely into the dough. These pieces will flatten as you roll the dough and create the layers that make croissants flaky.
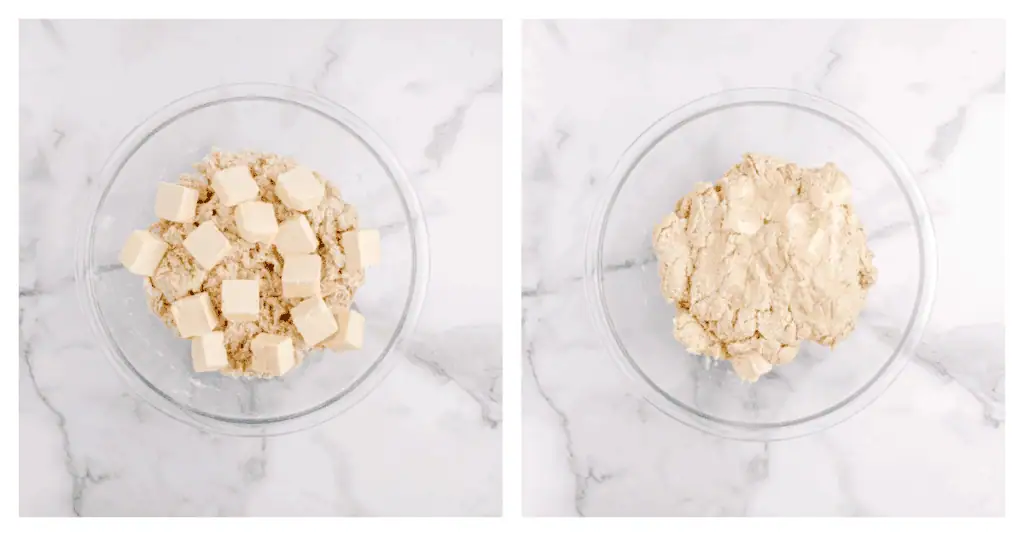
If the dough feels too dry or crumbly, add a small splash of additional water until the dough comes together into a soft but slightly firm dough that holds its shape.
Roll and Fold the Dough
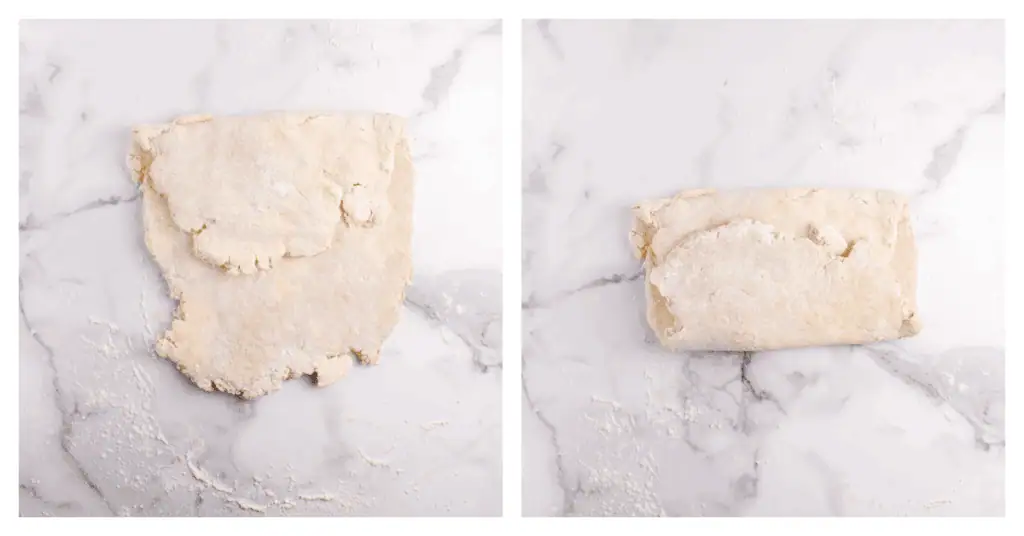
Turn the dough out onto a lightly floured surface and roll it into a large rectangle. As you roll, the butter pieces will begin flattening into thin sheets within the dough, which begins the lamination process that forms the flaky layers.
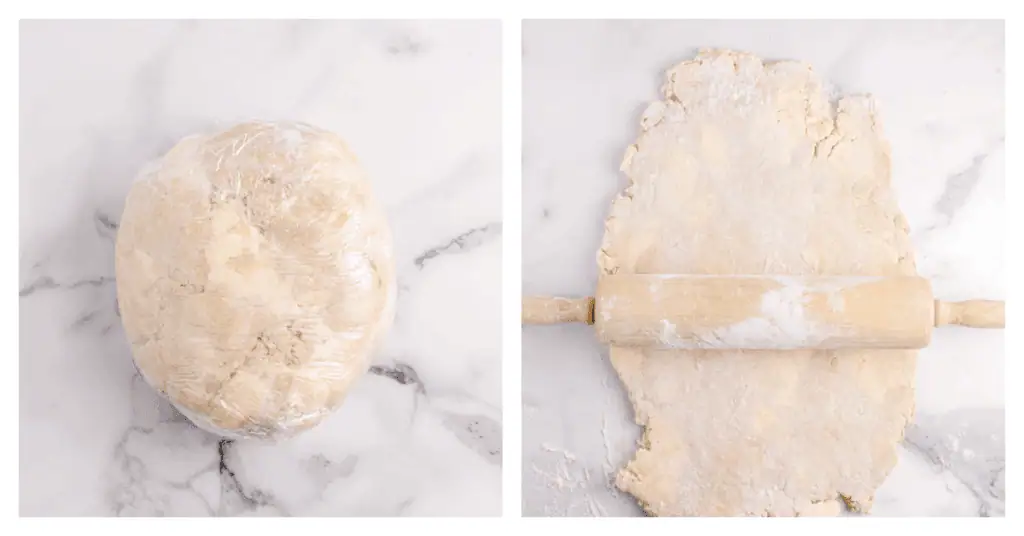
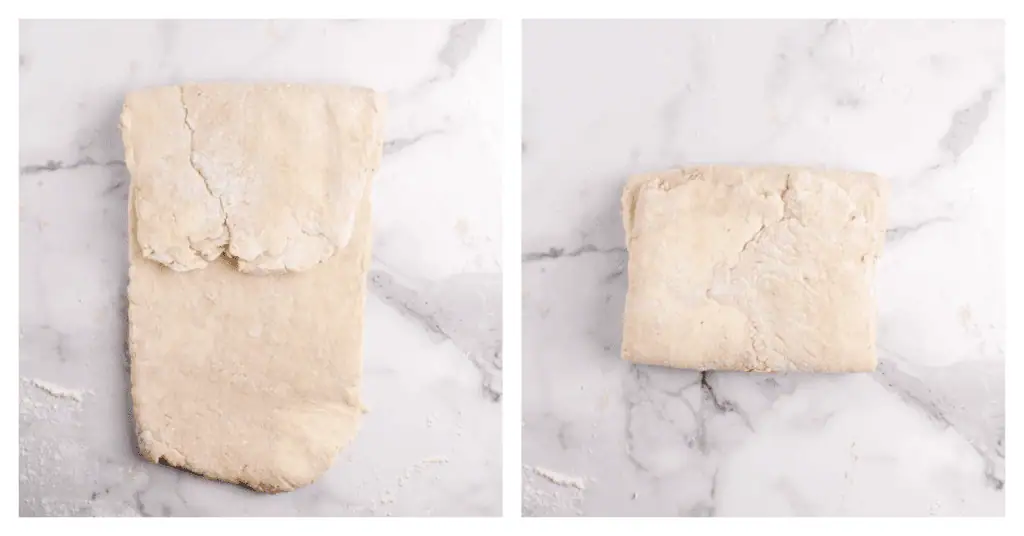
Fold the dough like a letter by bringing the top third down toward the center and then folding the bottom third up over it. This creates the first set of layers.
If the butter starts to feel soft or greasy while working with the dough, wrap it and refrigerate it for about 30 minutes before continuing. Keeping the butter cold is one of the most important parts of making croissants.
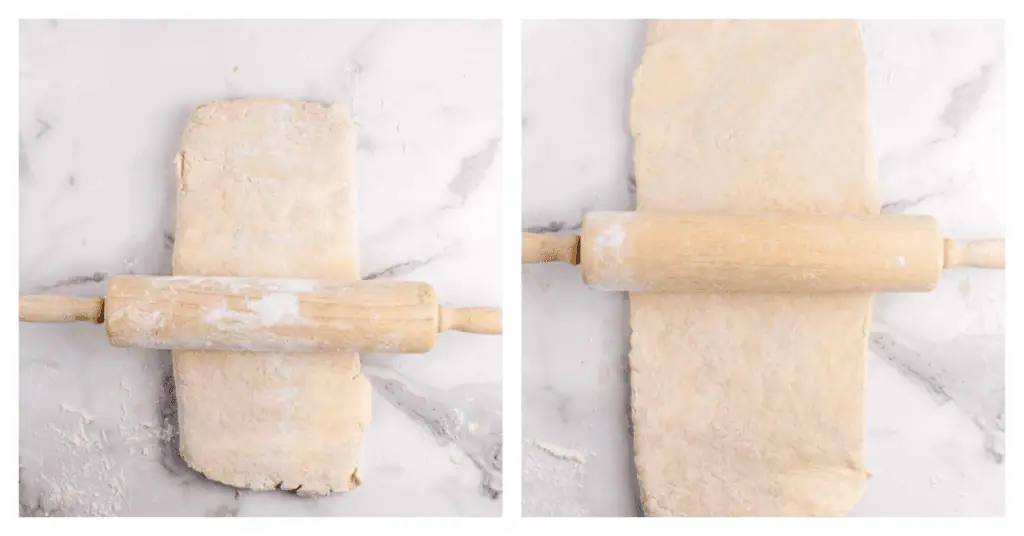
Roll the dough out again into a rectangle and repeat the folding process. Repeat this rolling and folding process a total of three times, chilling the dough for 30 minutes between each fold. These folds create the alternating layers of dough and butter that puff up beautifully in the oven.
After the final fold, wrap the dough and refrigerate it for at least an hour before shaping.
Shape the Croissants
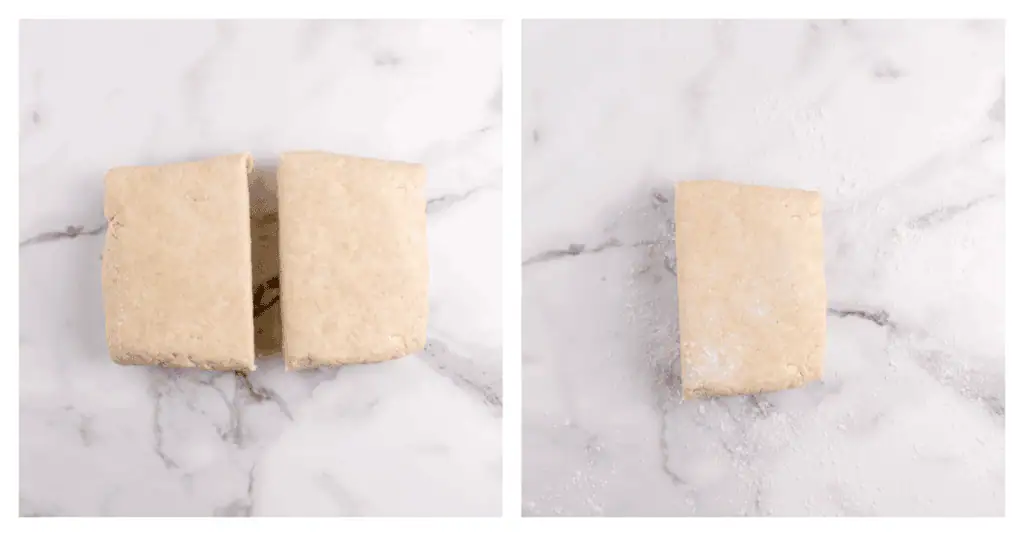
Once the dough has chilled, cut it in half and keep one portion in the refrigerator while working with the other. Roll the dough into a long rectangle and trim the edges if necessary so the sides are straight.
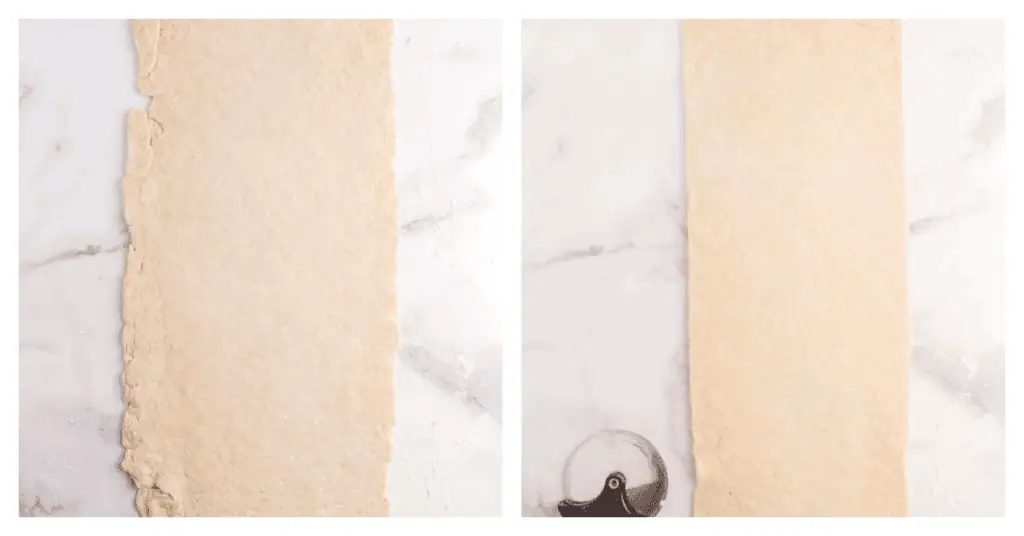
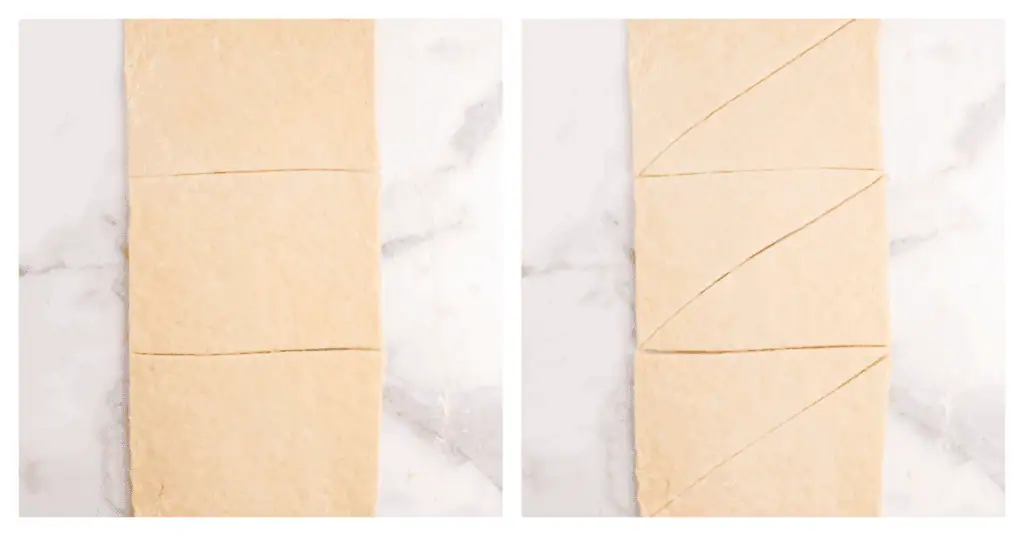
Using a sharp knife or pizza cutter, cut the dough into long triangles. First cut the dough into 3 rectangles. Then cut each rectangle into two triangles.
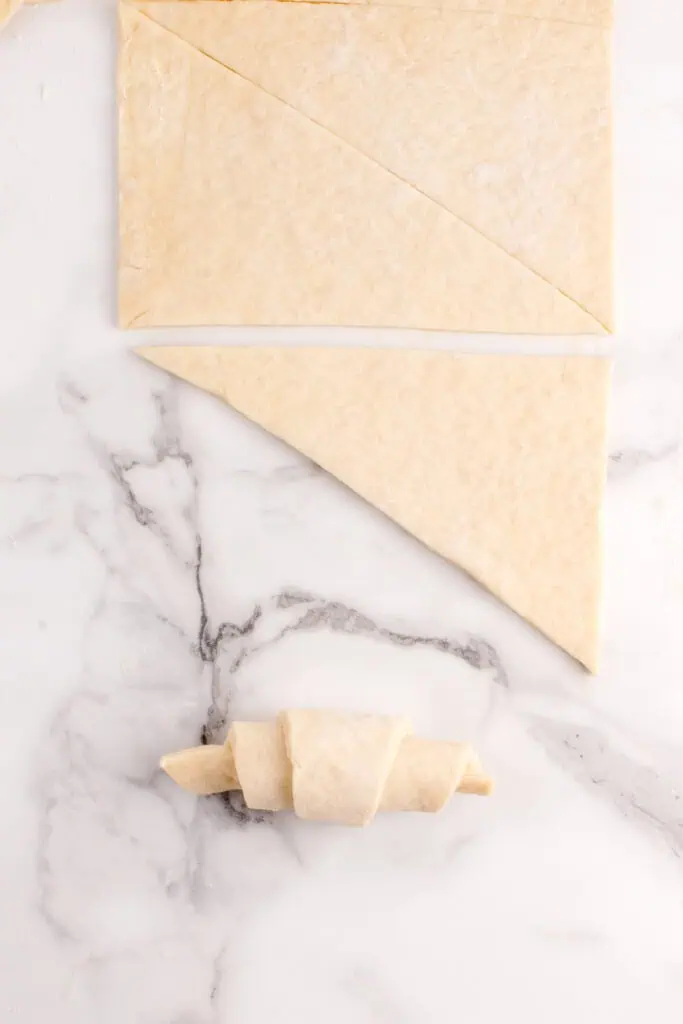
Cutting a small notch at the base of each triangle helps the dough stretch slightly and encourages the croissants to curve into their traditional crescent shape.
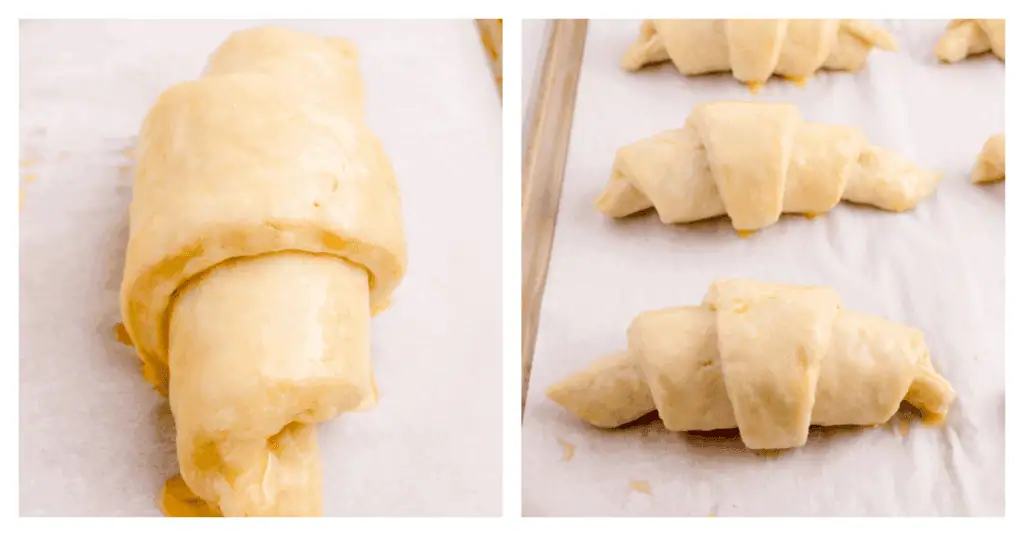
Starting at the wide end, roll each triangle toward the tip while gently stretching the dough slightly as you roll. This technique helps create taller croissants with more defined layers.

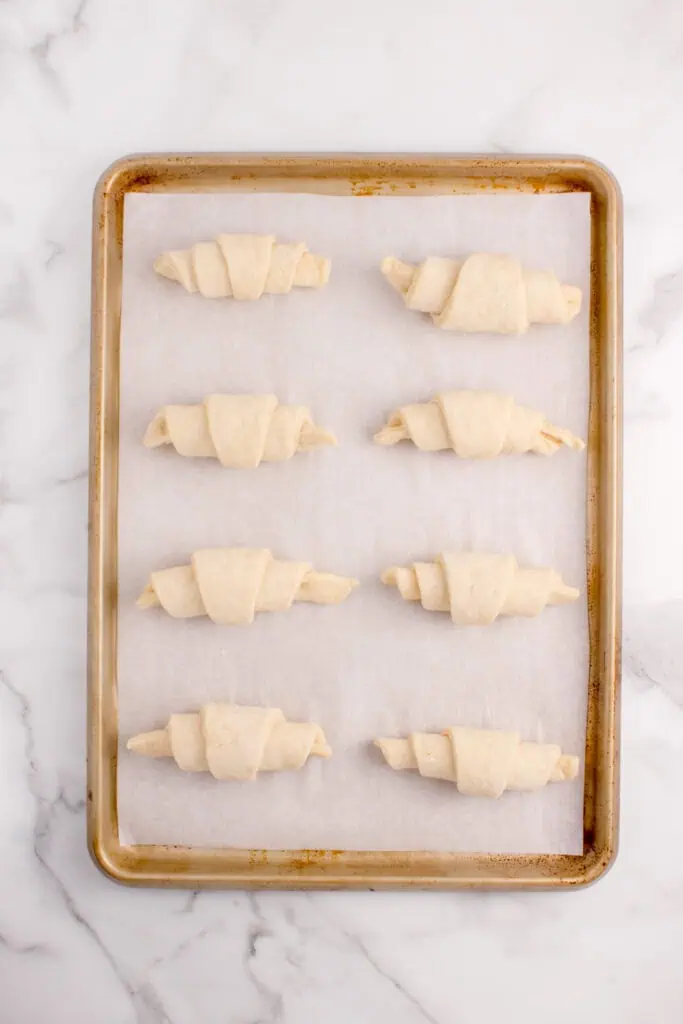
Place the shaped croissants onto a parchment-lined baking sheet, leaving enough space between them so they can expand as they rise.
Proof the Croissants
Cover the croissants loosely with plastic wrap or a clean kitchen towel and allow them to rise at room temperature until they become noticeably puffy and airy. Depending on the temperature of your kitchen, this typically takes about one and a half to two hours.
Properly proofed croissants should feel light and slightly jiggly when you gently shake the baking sheet. If they still feel dense or firm, give them a little more time to rise before baking.

Bake the Croissants
Preheat the oven while the croissants finish proofing so the oven is fully heated when they are ready to bake. Whisk together the egg and milk to create the egg wash, then gently brush the tops of the croissants.
Bake the croissants until they turn a deep golden brown and the layers become crisp and flaky. As they bake, the butter between the layers will create steam, which is what gives croissants their signature airy texture.

Cool and Serve
Allow the croissants to cool for a few minutes before serving so the layers have time to set. They are best enjoyed the day they are baked when the exterior is crisp and the inside is soft and buttery.
Croissants are best eaten fresh, but leftovers can be stored in an airtight container at room temperature for a couple of days.
To refresh them, warm the croissants in a low oven for several minutes until the exterior becomes crisp again. Croissants can also be frozen after baking and reheated straight from the freezer.
Storage Instructions
Refrigerator: Store your baked croissants in an airtight container at room temperature for 1–2 days or in the fridge for up to 5 days. Reheat them in a 300°F oven for 5–8 minutes to restore crispness.
Freezer (Before Baking): After shaping, freeze your unbaked croissants on a tray until they turn solid. Transfer them to a zip-top bag and store them for up to 2 months. When you are ready to bake, place frozen croissants on a baking sheet, cover loosely, and let them thaw in the refrigerator overnight, then proof at room temperature for 2-3 hours before baking.
Freezer (After Baking): Cool them fully, then freeze them in airtight containers or freezer bags. Reheat them from frozen at 350°F for 10–15 minutes. Wrap them in foil to prevent over-browning.

Frequently Asked Questions
Yes. The dough can be refrigerated overnight before shaping, which can actually improve the flavor and make the dough easier to handle.
A small amount of butter leakage is normal, but excessive leakage usually means the dough became too warm during folding or the croissants were under-proofed.
Properly proofed croissants should look puffy and feel light when gently touched. When you gently shake the baking sheet, they should have a slight jiggle.
More Recipes To Try
If you’re craving more yummy breakfast treats try my kolaches with three different fillings! Or try my reader favorite monkey bread with a vanilla icing. You can’t go wrong with my no knead brioche either (makes great French toast!).
Or for an easy shortcut treat try my Rhodes Rolls monkey bread recipe.

Easy Croissant Recipe
Ingredients
- 4 cups (480 g) all-purpose flour spooned and leveled
- 2 ¼ teaspoon (7 g) 1 packet of instant yeast
- ⅓ cup (67 g) granulated sugar
- 2 teaspoons fine sea salt
- ½ cup (120 ml) cold milk
- ¾ cup (180 ml) cold water
- 1 ½ cups (335 g, 3 sticks) cold unsalted butter cut into thick slices
- 1 egg+ 1 Tablespoon milk
Instructions
- In a large mixing bowl, mix flour, yeast, sugar, and salt. Add cold milk and ¾ cup cold water. Stir the ingredients so as to form a rough dough. Add the cold butter slices and gently mix them in. You should still see big chunks. If the dough is too dry, add a little more water (1 tbsp at a time). 4 cups (480 g) all-purpose flour 2 ¼ teaspoon (7 g) 1 packet of instant yeast ⅓ cup (67 g) granulated sugar 2 teaspoons fine sea salt ½ cup (120 ml) cold milk ¾ cup (180 ml) cold water 1 ½ cups (335 g, 3 sticks) cold unsalted butter
- On a lightly floured work surface, roll the dough using a rolling pin into a long rectangle (about 10×14 inches). This begins the lamination process that creates those buttery layers. Fold it like a letter: top third down, bottom third up. This completes your first turn. If the butter seems soft, wrap the dough in plastic wrap and refrigerate for 30 minutes.
- On a lightly floured work surface, roll the dough using a rolling pin into a long rectangle (about 10×14 inches). This begins the lamination process that creates those buttery layers. Fold it like a letter: top third down, bottom third up. This completes your first turn. If the butter seems soft, wrap the dough in plastic wrap and refrigerate for 30 minutes.
- Remove the dough from the refrigerator and roll it again into a 10×14 inch rectangle and complete your second letter fold. Wrap and refrigerate for another 30 minutes.
- Repeat the process one more time for your third letter fold, then wrap the dough and refrigerate for at least 1 hour before shaping.
- Remove the dough from the refrigerator. Cut the pastry in half using a sharp knife or pizza cutter. Keep one half in the fridge and roll the other half into a long rectangle (about 8×15 inches).
- Cut the pastry sheet into triangles with a 5-inch wide base and approximately 8 inches in height. Cut a small ½-inch notch at the base of each triangle. Roll from the wide end to the tip to create the traditional crescent shape.
- Note: Gather any dough scraps, gently knead them together, and follow the rolling and shaping process (Steps 2 and 3) again to avoid waste.
- Place the shaped croissants on a parchment-lined baking sheet or silicone mat with at least 1 inch between each one and cover them loosely with plastic wrap. Let them rise at room temperature (68-72°F is ideal) until they become noticeably puffy and slightly have increased in size, about 1½ to 2 hours. The croissants should jiggle slightly when the baking sheet is gently shaken.
- About 20 minutes before baking, preheat your oven to 400°F (200°C). Mix 1 egg + 1 tbsp water for the egg wash. Gently brush the tops of the croissants with the egg wash being careful not to deflate them. Bake them in the preheated oven for 15 to 20 minutes, until they turn golden brown and flaky. 1 egg+ 1 Tablespoon milk
- Let your buttery croissants cool for 10 minutes. Eat them warm or at room temperature. Store any leftovers in an airtight container for the best shelf life.
Video
Notes
- Refrigerator: Store your baked croissants in an airtight container at room temperature for 1–2 days or in the fridge for up to 5 days. Reheat them in a 300°F oven for 5–8 minutes to restore crispness.
- Freezer (Before Baking): After shaping, freeze your unbaked croissants on a tray until they turn solid. Transfer them to a zip-top bag and store them for up to 2 months. When you are ready to bake, place frozen croissants on a baking sheet, cover loosely, and let them thaw in the refrigerator overnight, then proof at room temperature for 2-3 hours before baking.
- Freezer (After Baking): Cool them fully, then freeze them in airtight containers or freezer bags. Reheat them from frozen at 350°F for 10–15 minutes. Wrap them in foil to prevent over-browning.
- Instant yeast: If using active dry yeast, you will need to increase the rising time slightly, from 15 to 25 minutes.


love your recipes!!??
Thank you so much.
That is so kind of you to say! Thank you so much for being here and for your support!
Can this dough be used to make chocolate croissants?
Great question! Yes, you can definitely use this dough to make chocolate croissants. Just place a few pieces of dark chocolate or chocolate batons at the wide end of each triangle before rolling them up. Bake as directed and enjoy!