
No Knead Dinner Rolls
This Post May Contain Affiliate Links. Please Read Our Disclosure Policy.
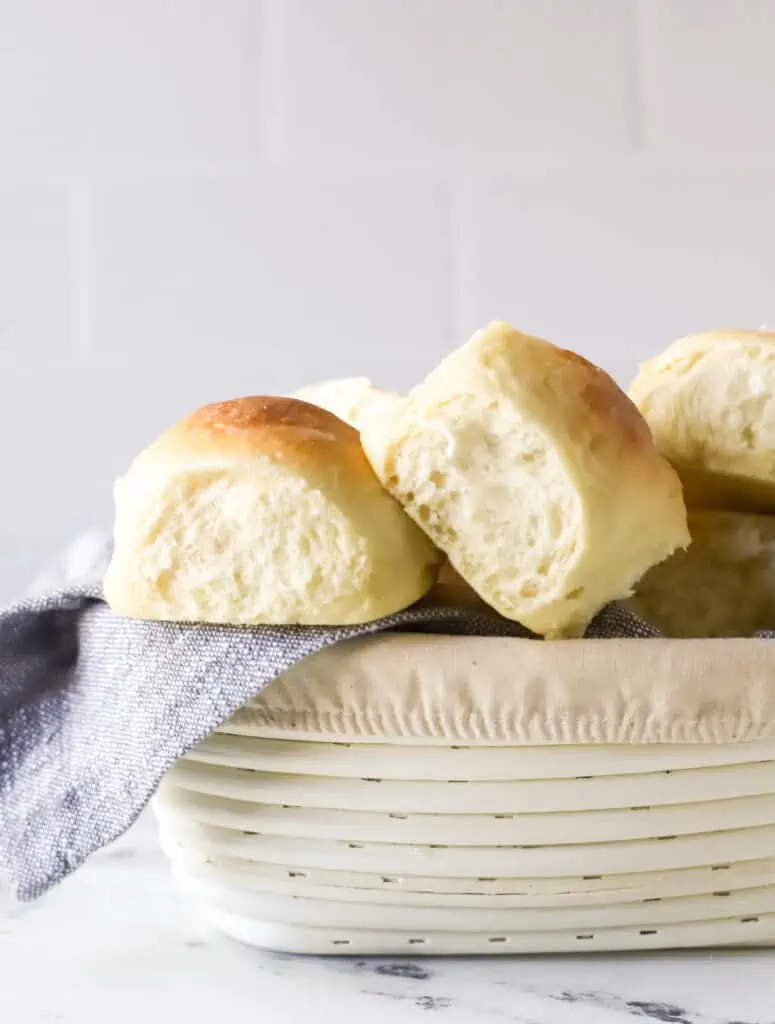
These are the best dinner rolls ever! Soft, fluffy and perfect for your holiday table. This is an easy no knead yeast dough that then gets shaped into the most amazing yeasted bread rolls. This dinner roll recipe can also be made and shaped the day before and refrigerated overnight so you can bake these no yeast dinner rolls the next day!
Now I know that’s quite the statement to make. World’s. BEST. Ok, no I haven’t tried them all, I’m working on it. Trust me. Like these Salted Honey Parker House Rolls (another amazing roll for your bread basket!) But so far, with the ones I have tried and made over the years, these are by the far the best and most consistent, and yes, even (dare I say) and easy yeasted roll.
They were so good in fact, my sister in law the day after Thanksgiving said, “Yea I think you need to make more rolls”. That’s how good they were.
Tell me more about these rolls…
- No Knead – This is a very soft dough, and after you mix the dough together so after it’s mixed, you don’t need to knead it. Just let it rise and rest and it will firm up a bit during the rising process.
- Makes 2 dozen – Yes 2 dozen rolls! I love baking a dozen, and freezing the second batch after it’s been shaped into rolls. And then I have another dozen rolls ready to be baked when I need them. This is great for Thanksgiving and Christmas, because you only need to make this recipe once!
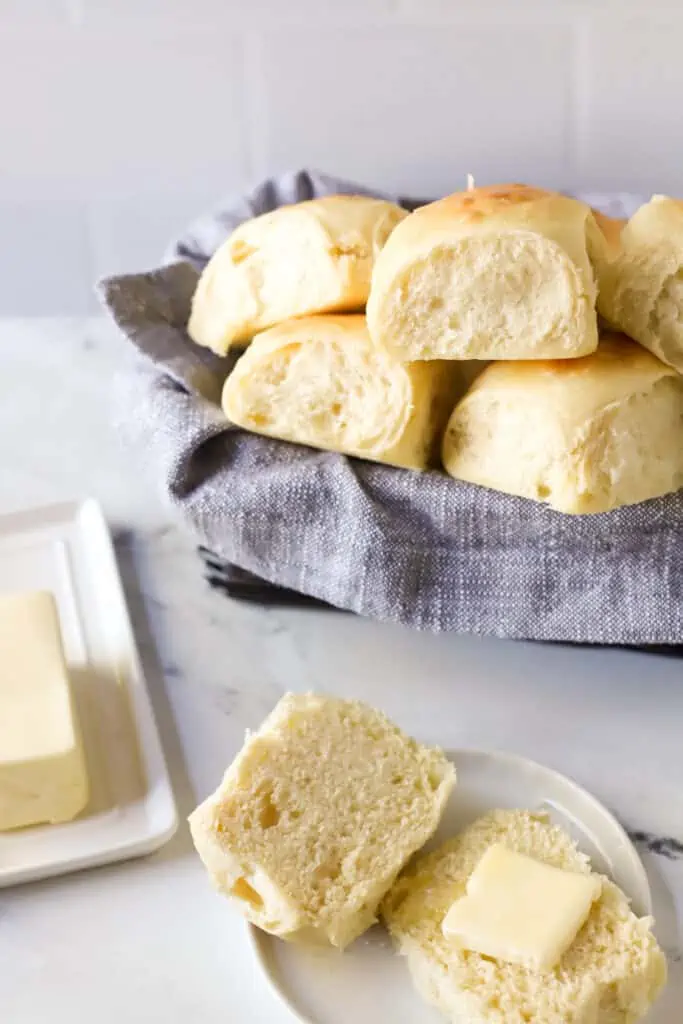
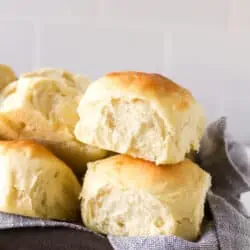
- Buttery, Soft Fluffy Goodness – These rolls are so light, fluffy and buttery. I can’t get enough of them and I think you’ll agree!
If you’re new to baking bread, I highly recommend checking out my 14 bread baking tools for beginner bakers!
Ingredients Needed
The best thing about making your own rolls is you know what’s in them! Pre-packaged store-bought rolls are full of some not so fun preservatives that I’m just not into. Making them homemade means I get to choose the best possible ingredients, no preservatives, all real and natural.
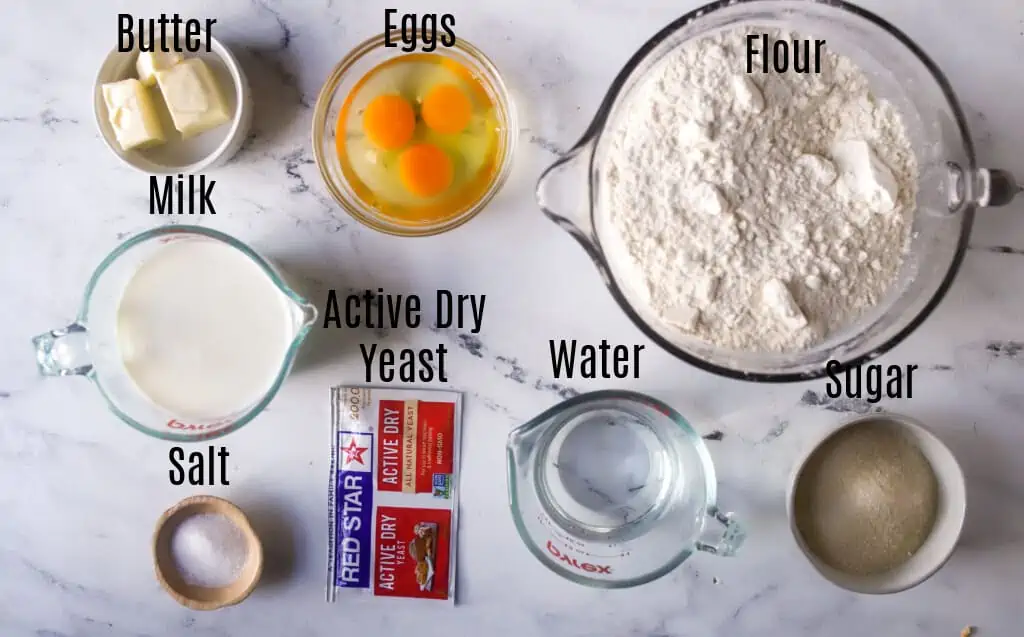
Ingredient Notes
- Milk – Whole milk is best, but I think low-fat or a non-dairy milk would also work.
- Sugar – I tested this with sugar, but I think honey would also work.
- Yeast – I used Active Dry yeast, but you can also use Instant Yeast, but it will take less rising time.
- Butter – I recommend using unsalted butter vs. salted butter. It’s fresher and you can control the amount of salt.
- Flour – I used regular all-purpose flour for this recipe.

How To Make These No Knead Dinner Rolls
Make the dough – part 1
- Heating in a saucepan your milk, sugar, butter and salt. Allow it to cool down. You don’t want this to be too hot once you add it to the yeast, or you will end up killing your yeast!
- Proof your yeast. You want to sprinkle your yeast into the warm water. Let it sit for 10 minutes and let it become foamy.
- Combine the flour and milk mixture together in a stand mixer (or you can do this by hand with spatula). Stir this together (takes about 30 seconds).
- Add yeast. Then add the yeast mixture and turn the mixer on high and beat for 3 minutes. Start slow just so you know you won’t have flour and yeast all over your counter.

Making the dough – part 2
- Add room temperature eggs. Room temperature eggs are key. If you forgot to take them out, like I do 9 times out of 10 don’t fret. Just place them in a bowl with warm water for about 10 minutes.
- Add remaining flour. You want to then add in the remaining 5 cups of flour. Now, the dough will be very soft and be coming away from the sides of the bowl, but it will still be quite sticky. Don’t worry about this. It will firm up a little during the rising process. I promise.
- Cover the dough rise. You want to cover the dough and let it rise in a warm place.
- Let the dough rise for an hour. This will take about an hour. To see if the dough is done rising, push your finger into the dough. The dough should bounce back slowly. If it springs back too quickly it needs more time. If it stays indented, it’s overproofed so quick make those rolls!

Dividing The Dough
- Punching down the dough. Flour your hand and then gently push your fist into the dough to deflate it.
- Divide the dough in half. This batch actually makes two 9×13 pans of rolls in the end. You want to divide the dough in half.
- Roll out each portion into a rectangle (about 15×9 inches) – I don’t worry so much about the size since they will all be divide evenly. You could also weigh the dough and then divide the dough by weight into 12 equal portions.
- Cut the dough rectangle into 12 equal pieces.

Shape The Rolls
- Work with one portion of dough at a time.
- Bring the edges of the dough up into the center.
- Then pinch them together
- Roll each piece into a nice round ball. Turn each dough ball over and then cup your hand around the dough ball, making like a claw, then roll the ball around on the counter.

Let The Dough Rise Again And Bake
- Continue shaping all 12 portions of dough.
- Transfer those rolls to a buttered dish.
- Then cover and let them rise again for about 30-45 minutes.
- The rolls should be slightly puffy. Push your finger into one roll, to make an indent. If the indent slowly rises back out again, they are ready to be baked. If it springs back quickly, they are not ready. If it stays indented, that means they may be overproofed and be sure to bake them right away. Bake the rolls.

Recipe Tips
- Make sure your water is the correct temperature for the yeast. The yeast is a living thing and too hot of water will kill it. And too cold will never wake it up, leaving you with rolls that don’t rise! Major kitchen bummer. Check out my yeast 101 post to learn more.
- Let rise in a warm place. Because these are no knead dinner rolls, they will take some patience to let rise. You want to let these rise in a warm draft free place. Again try the oven trick by placing a pan of boiling water in the bottom of your oven and then the bread bowl covered on a higher rack above.. The oven even if turned off will still be the warmest place in your kitchen. For more on baking homemade bread at home, read this post!
- Use a kitchen scale. For best accuracy use a kitchen scale to measure your flour. Adding too much flour can result in a dry dinner roll not a soft fluffy one!
- Bake in a glass pan. I prefer to use a glass pan as I find it browns a bit slower than a metal pan. Also I can tell if they are browned on the bottom.

Recipe FAQ’s
Many bread recipes should rise at “room temperature” but that is super vague! So let’s be specific – bread should be rising at nice warm 75-78oF temperature. If your house is cold like mine, your bread may take longer to rise than normal. You can beat the cold by placing a pan of boiling water in the bottom of your oven and then the bread bowl covered on a higher rack above. Keep the oven closed and let the warm water do its thing. Even just keeping the bowl of dough in your oven will be the warmest place in your house to keep it.
Unbaked: You can always freeze your no yeast dinner rolls unbaked before the final rise. (after they are shaped). You can freeze in the pan, or once frozen transfer to a bag. You can freeze them, but just be sure to cover them well with plastic wrap and a final layer of tin-foil. When ready to bake, you need to let them thaw and rise at room temperature (about 4 hours). When you are ready to bake, all they need is about 15 minutes in the oven. Slather with butter. Eat. Repeat as many times as needed.
Baked: You can also freeze baked dinner rolls for up to 3 months. When ready to enjoy, let them thaw at room temperature or in the fridge. Then reheat and enjoy!
Yes make and shape the no knead dinner rolls, then refrigerate the rolls overnight. When ready to enjoy, they need to rise at room temperature for 1-2 hours. Then bake as normal.

More Bread Recipes To Check Out
- No Knead Cranberry Walnut Bread
- Butternut Squash Bread
- Easy Buttermilk Honey Cornbread
- 1 Hour Cinnamon Rolls
- Pumpkin Dinner Rolls
Ready to Bake Bread with Confidence?
If you’re excited about this recipe but still feel unsure working with yeast, that’s exactly why I created Confident Bread Baker.
Inside the class, you’ll learn how to properly knead, proof, and troubleshoot dough so you get soft, fluffy, reliable results — not guesswork.
Because once you understand your dough, bread baking stops feeling intimidating and starts feeling doable.
No Knead Dinner Rolls
Ingredients
- 2 cups (454 grams) Whole Milk you could also use 2%, but whole is best
- 1/2 cup + 1 Tablespoon (112 grams) Sugar divided
- 1/3 cup (5 1/3 Tablespoons, 75 grams) unsalted Butter
- 2 teaspoons Salt
- 2 packages (14 grams) Active Dry Yeast or 4 1/2 teaspoons
- 2/3 cup (149 grams) Warm Water (105-110oF/40-43oC)
- 8 cups (960 grams) All-Purpose Flour
- 3 large Eggs lightly beaten
Instructions
- Combine milk, 1/2 cup (99 grams) sugar, butter and salt in a medium saucepan. Heat over medium heat until butter melts. Remove from heat and allow to cool until lukewarm. (This step is important because if the mixture is too hot, it will kill the yeast.)
- While the milk mixture is cooling, dissolve the yeast and 1 tablespoon of sugar in the warm water (105-110oF/40-43oC). Let stand about 10 minutes. (after the 10 minutes, the yeast should be very bubbly and foamy)
- In a large mixing bowl, combine 3 cups flour and milk mixture. Beat on low for 30 seconds, scraping sides of bowl. Add yeast mixture and beat on high for 3 minutes. Add in beaten eggs. Then stir in remaining 5 cups of flour to make a soft dough.
- *NOTE- The dough will be very soft and coming away from the sides of the bowl, but it will still be quite sticky. Don’t worry about this. It will firm up a little during the rising process*
- Place the bowl in a warm place (I aim for about 75°F) and cover with a clean kitchen towel. Allow to rise for 1 hour.
- With a floured hand, I punch down dough, and turn dough onto a lightly floured clean surface. Divide in half. Spray two 9×13 glass pans with cooking spray or grease with butter.
- With a lightly floured rolling pin, roll first portion of dough into a rectangle and then cut into 12 equal-sized pieces. To shape the rolls, I dust my hands with flour (again the dough can be sticky!) and bring up the edges into the center and pinch them together. And then turn it over, and roll into a ball on the counter. To roll them, I make a claw with my hand, and roll the ball around underneath my hand. Repeat with remaining dough in the second pan.
- Cover pans with clean kitchen towels, and let rise 30-45 minutes. They are ready to be baked when you can make an indent with your finger into a roll, and the indent slowly rises back out (if it bounces back quickly it needs more time, if it stays indented it's likely overproofed so be sure to bake immediately).
- Preheat oven to 375oF/190oC degrees. Bake for 15-18 minutes or until golden-brown.
- When done baking, remove rolls from oven and then rub a stick of cold butter all over the tops!
Notes
- Make Ahead: Yes make and shape the rolls, then refrigerate the rolls overnight. When ready to enjoy, they need to rise at room temperature for 1-2 hours. Then bake as normal.
- Freezing: Unbaked: You can always freeze your rolls unbaked before the final rise. (after they are shaped). You can freeze in the pan, or once frozen transfer to a bag. You can freeze them, but just be sure to cover them well with plastic wrap and a final layer of tin-foil. When ready to bake, you need to let them thaw and rise at room temperature (about 4 hours). When you are ready to bake, all they need is about 15 minutes in the oven. Slather with butter. Eat. Repeat as many times as needed.
Baked: You can also freeze baked rolls for up to 3 months. When ready to enjoy, let them thaw at room temperature or in the fridge. Then reheat and enjoy! - Milk and Water temperature: Make sure your water and milk is the correct temperature for the yeast. The yeast is a living thing and too hot of water will kill it. And too cold will never wake it up, leaving you with rolls that don’t rise! Major kitchen bummer. Check out my yeast 101 post to learn more.
- Dense rolls: This dough can be a bit sticky even after rising, so I do like to keep my counter, hands and rolling pin well floured, but only just enough so it doesn’t stick. Adding too much flour will result in a dense dough. For best accuracy use a kitchen scale to measure your flour. Adding too much flour can result in a dry dinner roll not a soft fluffy one!
- Adapted from Life in The Lofthouse, adapted from Our Best Bites


Made today. They came out more like biscuits than rolls, more crumbs than desired. Not sure what I did wrong, maybe over-proofed? Or not enough mixing? They are good and I’ll enjoy for breakfast with jam, but not the Thanksgiving dinner rolls I had hoped for. Certainly baker’s error not the recipe
Hi Jean, sounds like too much flour was use if they are more biscuits than rolls and crumbly. I always recommend weighing your flour especially when it comes to breads. And be mindful of how much you add when kneading and shaping. The more flour you work in the denser, crumblier, drier they will be.
I made the dough last night, shaped into rolls, refrigerated, allowed them to rise this morning, baked ’em, and viola, soooooooooooo good! Thank you for your wonderful recipe with CLEAR directions and tips. I am the world’s worst baker, but I did it this time! Yes!!!! Thank you again!
Hi Dee! I’m so glad you were successful in making these. Glad the recipe and tips were helpful. And if you’re making rolls from scratch you are clearly quite the baker 🙂
These are absolutely THE BEST dinner rolls! We will be making them again for Thanksgiving!
Yay!!! love to hear it
These turned out perfectly! Light, fluffy, and delicious!
Fabulous news!
I am always for easy recipes. I love baking bread and these turned out pretty good. The tips and pictures were so helpful.
Excellent !
No kneading and you get soft pillow-like rolls?! Heck yeah!
🙂🙂 Yay for no knead!
These were so easy! We’re definitely going to make them again for the holidays!
glad to hear!
I’ve never worked with yeast before, is there any chance you could add a picture to the above pictures of what proofed yeast looks like?
Allison,
Of course I can! Not a problem!
Heather
Made these for Christmas and they really are the best yeast rolls! Thanks & Happy Holidays!
So wonderful to hear! Happy Holidays and Happy New Year!
Those biscuits look so soft and flavorful!
Hi! Thanks for reading and I ate way too many to say yes, yes they are!
-Heather