This Post May Contain Affiliate Links. Please Read Our Disclosure Policy.
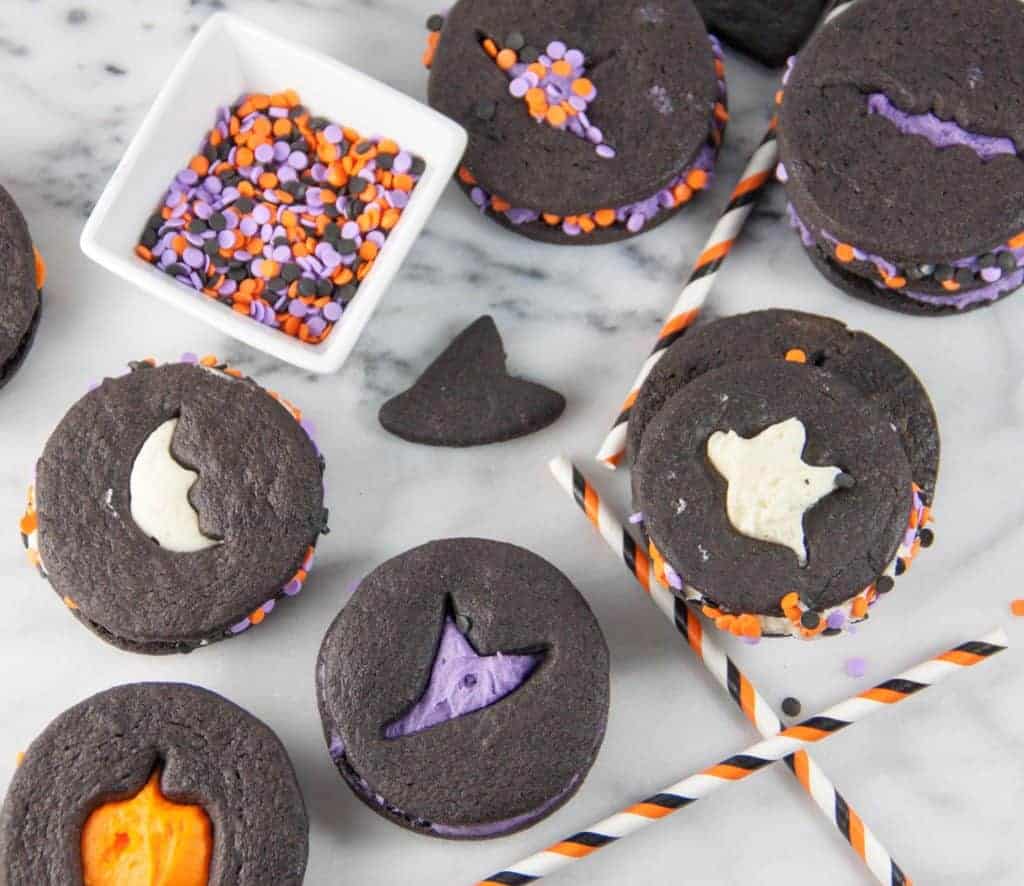
Chocolate Halloween Sugar Cookies – Get all Dressed Up For Halloween! Bust out your rolling pin and cookie cutters for these adorable tasty cookie sandwiches!
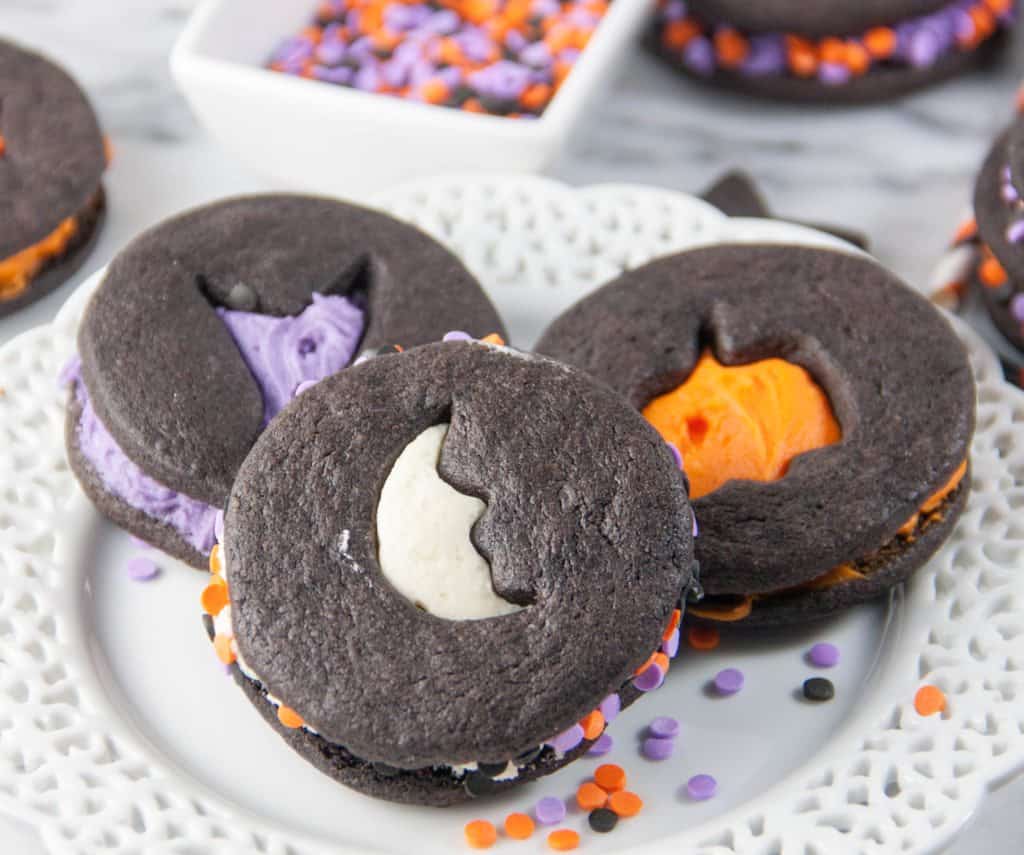
Oh happy almost Halloween everyone! I’m so tickled pink orange to be sharing these cookies with you today. What is about sprinkles? I love sprinkles. When I have a bad day, I’ve been known to go to Home Goods and peruse the kitchen aisles. I always walk out with jars of sprinkles. I have a problem. I know. Moving on.
So when I found these sprinkles I knew I had to make something fun for Halloween. And these Halloween chocolate cookie sandwiches were born.
Ingredients For These Cookies
For the cookies:
- Dry Ingredients: Flour, cocoa powder, salt, baking soda
- Wet Ingredients: sugar, egg, vanilla, melted chocolate
- Vanilla Buttercream Frosting
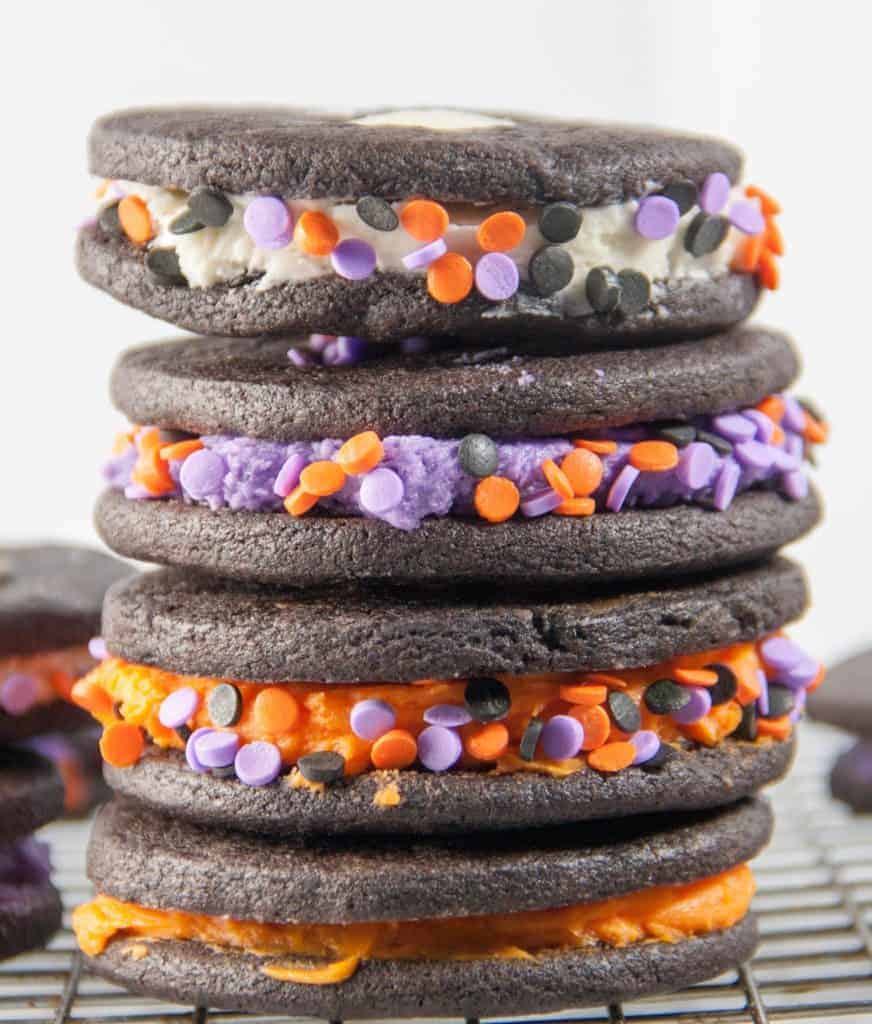
How To Make These Halloween Sugar Cookies
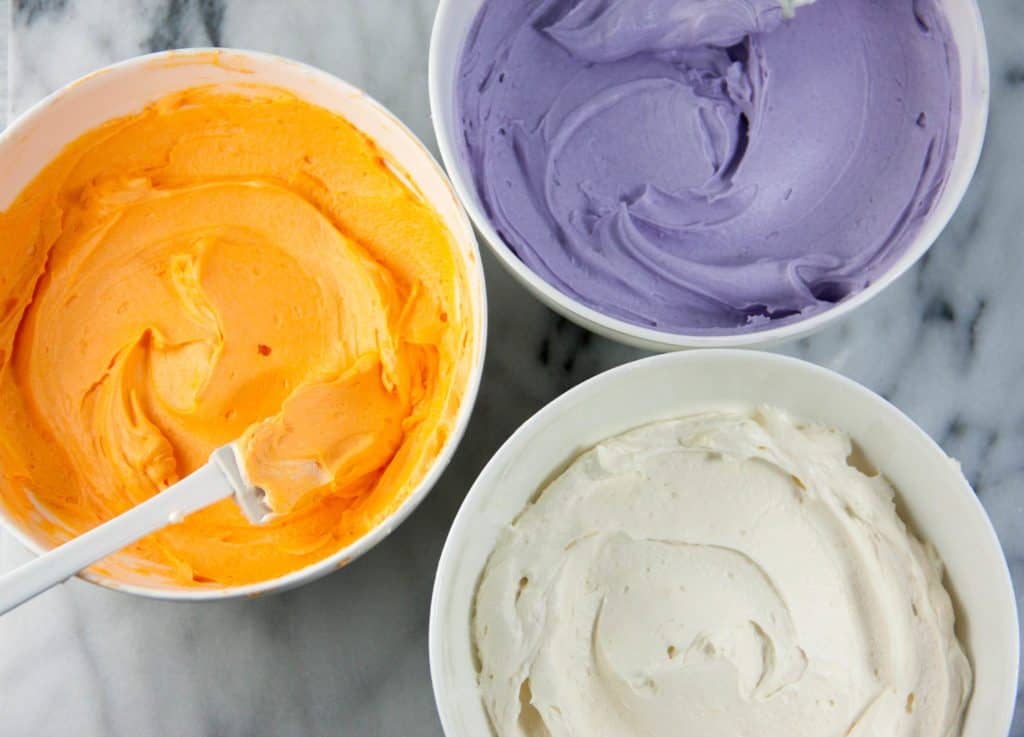
You will start by making my vanilla buttercream frosting and then I seperated the frosting into three different colors- white, purple, and orange.
Of course, you can choose one color or skip making white and just purple and orange!
Once the frosting is made go ahead and make the cookies. You want to whisk together your dry ingredients. And then cream your butter and sugar together.
When making this dough, I used extra dark cocoa powder or black onyx cocoa powder. You could use regular cocoa powder but your cookies will not come out as dark. To make these cookies, you need chill the dough before you roll it out.
Add in your egg, vanilla and melted chocolate. Then stir in the dry ingredients. The dough will be thick and you want to seperate into two discs that you will chill. Once the dough is chilled, you will roll it out and use your favorite Halloween cookie cutters.
If you find that you have overchilled your cookie dough (which I totally did) then leave your cookie dough on the countertop to soften a bit before rolling it out.
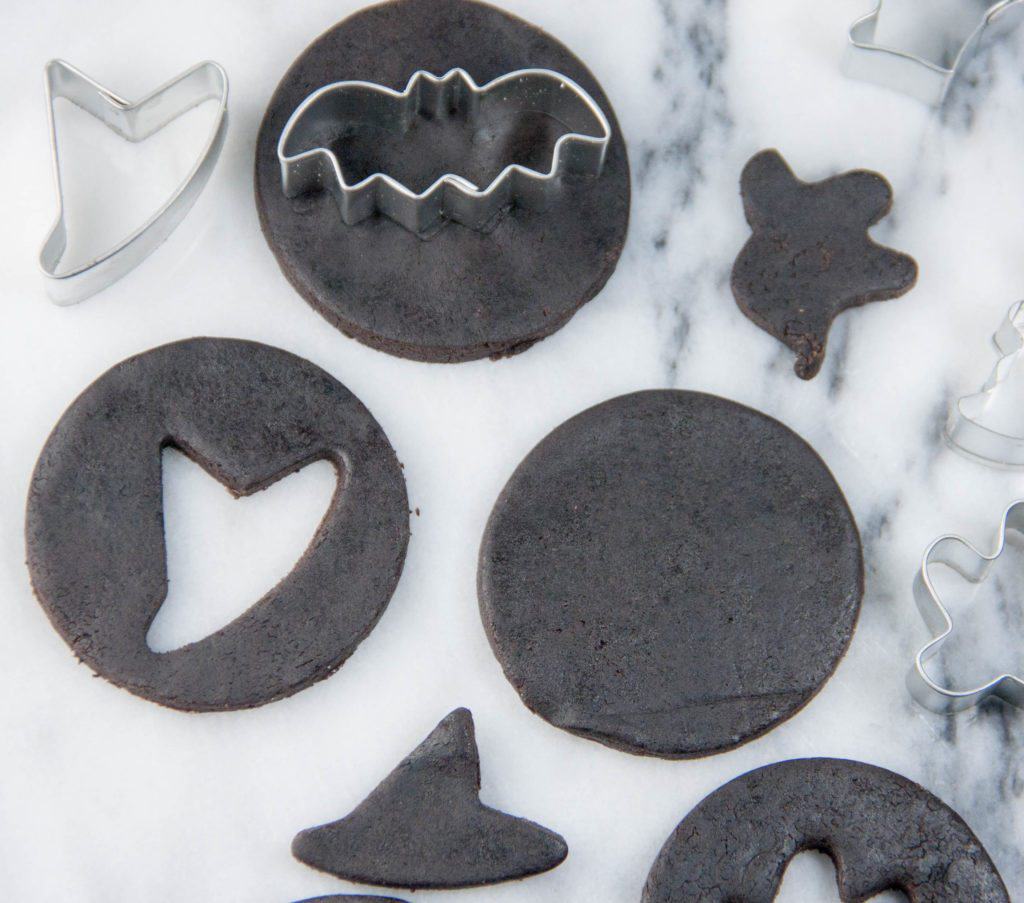
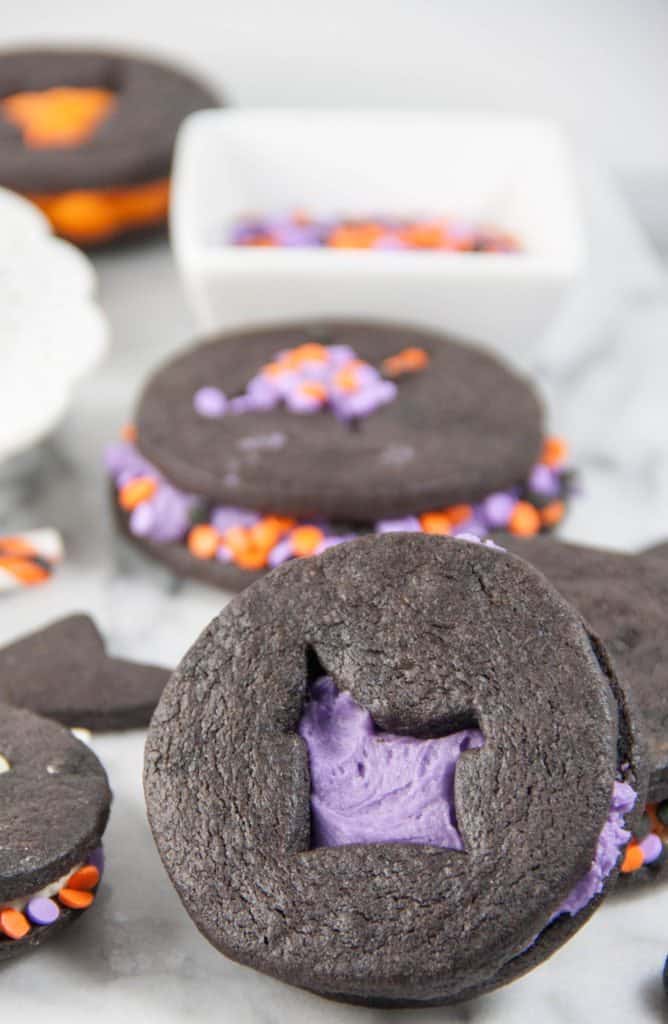
Or you can cut them into circles and use smaller Halloween shaped cutters to cut out the center of half of the cookies.
Then go ahead and bake the cookies. Once they are cooled go ahead frost one cookie and turn into a cookie sandwich.
Recipe Tips
- Use Room Temperature Ingredients. You always want to make sure you use room temperature eggs, dairy, and butter. This allows the dough to trap enough air allowing for perfect texture.
- Don’t Overmix. It’s best to leave a little flour left behind in the bowl to ensure you don’t over mix and end up with tough cookies.
- Bake On The Middle Rack. This will ensure the top and bottom of your cookies bake at the same time and you don’t end up with burnt cookies on one side.
With only Halloween a few days away, it’s not too late to make these cookies! I made these cookies over a few days to cut down on the hassle of it all. Here is how I made these cookies with no fuss:
Baking Timeline:
Day One: Make the Frosting. I made the frosting and placed in an airtight container. I knew I would need to re-whip the frosting to get it back to the right consistency, so I held off on dividing the frosting and adding the food coloring. If you plan on using just one color, then add your food coloring now to save yourself time later!
Day Two: Make the Cookie Dough. I then divided the dough into 2 discs, and wrapped in saran wrap and stored them in the fridge.
Day Three: Bake and assemble the cookies. Bring your frosting to room temperature and re-whip in your mixer until light and fluffy again. Divide into 3 bowls and add food coloring (you can skip this step if you are short on time and just use white frosting!). Roll out your cookie dough (if it’s too stiff to roll out, allow to sit at room temperature for about an hour until it softens). Cut your cookies out. For sandwiches, every other cookie I used small festive cookie cutters in the center of them. Bake on a center rack then allow to cool completely before frosting and assembly.
Make Ahead Tip: I actually FROZE these cookies after assembly. They hold up very well! Just bring to room temperature before serving!
Recipe FAQ’s
Yes, you can freeze these cookies baked or unbaked for up to 3 months. I like to freeze the cookies solid on a baking sheet, then transfer to a plastic bag, or you can wrap these up individually as well. When ready to eat, or frost, let thaw at room temperature uncovered for a few minutes.
The dough can be made up to 3 days ahead of time. Just know that it will take longer for the cookie dough to soften before you can roll it out. You can also make the frosting up to 5 days ahead of time, and store covered in the fridge. Simply re-whip it again so it’s spreadable. You can also bake these cookies up to 2 days ahead of time when you plan to decorate and serve.
Store these cookies at room temperature, covered, for up to 3 days.
This might be because your butter was too soft during the creaming process, or your dough warmed up too much. Try to not handle the dough too much when rolling out as well. Read my 10 Reasons Your Cookies Spread Too Much for more help!
This is probably because you added too much flour when you made the dough or when rolling out the dough. Make sure to spoon the flour into your measuring cup and level it off. Do not pack it down or scoop from the bag. And make sure to only lightly flour your surface when rolling out the dough.
More Recipes To Try

Halloween Chocolate Sugar Cut Out Cookie Sandwiches
Ingredients
For the cookies
- 2 1/4 cups (270 g) all-purpose flour spooned and leveled, plus more for dusting
- 1/2 cup (42 g) unsweetened cocoa powder
- 1/2 teaspoon salt
- 1/4 teaspoon baking soda
- 3/4 cup (1 1/2 sticks, 170 g) unsalted butter at room temperature
- 1 1/4 cups (250 g) granulated sugar
- 1 large egg room temperature
- 1/2 teaspoon vanilla extract
- 3 ounces semisweet or bittersweet chocolate melted
For the frosting:
- 1 1/4 cups (2 1/2 sticks, 283 g) unsalted butter softened to room temperature
- 2 1/2 cups (283 g) confectioner sugar
- 2 Tablespoon heavy cream
- 2 teaspoons vanilla extract
- pinch of salt
- food coloring optional
- sprinkles. optional
Instructions
- Whisk together the flour, cocoa powder, salt and baking soda in a medium bowl and set aside.
- Put the butter into the bowl of a stand mixer fitted with a paddle attachment (or a large bowl if using a hand mixer) and beat on medium-high speed until smooth. Add the sugar and beat until light and fluffy, scraping down the sides of the bowl and paddle as needed, about 4 minutes more. Add the egg and vanilla and beat until smooth. Add the melted chocolate and beat until smooth.
- Reduce the mixer speed to medium-low and add the flour mixture in two batches, scraping down the sides of the bowl and paddle as needed. Mix until incorporated.
- Divide the dough in half and shape into two flattened disks. Wrap in plastic wrap and refrigerate until firm at least 1 hour or up to 3 days. Remove the dough from the refrigerator for 20 to 30 minutes before rolling, to soften.
- Position oven racks to the upper and lower third of the oven and preheat to 350 degrees F. Line two baking sheets with parchment. Now flour parchment for rolling: Dust a piece of parchment with flour, place a disk of dough on it, dust the disk with flour, then cover it with a second piece of parchment. Roll out the dough about 1/4 inch thick.
- Using a round cookie cutter (2-inches in diameter) cut out shapes. For every other cookie, use a small Halloween cookie cutter and cut out the center of each cookie (don’t throw these away! Bake these too for a quick snack or top a cupcake with them!) Gather up the scraps, re-roll and cut out. (Chill the scraps if the dough becomes too soft.) Roll and cut out the remaining disk of dough. Working in batches, arrange the cookies 1 inch apart on the prepared baking sheets.
- Bake the cookies until the tops look dry and no indentation is left when pressed with your finger, 10 to 12 minutes. Let the cookies cool for a few minutes on the baking sheets, then use a metal spatula to transfer them to a rack to cool completely.
- Meanwhile, make your frosting. In a stand mixer, cream your butter until light and fluffy. Add in your powdered sugar 1 cup at a time with the mixer on low. Add in your heavy cream and vanilla extract and combine. Mix on high for 8 minutes until light and fluffy. Divide into 3 bowls, and add food coloring to 2 of them (I used orange and purple. You could leave it white or just use one color and skip the dividing part). Spread the frosting on the cookie without the center cut out. Top with the cut out center half. Roll the sides in sprinkles if you so choose. Store at room temperature in an airtight container for up to 3 days.
- *this recipe was adapted from Food Network
Notes
- Freezing: You can freeze these cookies baked or unbaked for up to 3 months. I like to freeze the cookies solid on a baking sheet, then transfer to a plastic bag, or you can wrap these up individually as well. When ready to eat, or frost, let thaw at room temperature uncovered for a few minutes.
- Storage/Make ahead: Store these cookies at room temperature, covered, for up to 3 days. The dough can be made up to 3 days ahead of time. Just know that it will take longer for the cookie dough to soften before you can roll it out. You can also make the frosting up to 5 days ahead of time, and store covered in the fridge. Simply re-whip it again so it’s spreadable. You can also bake these cookies up to 2 days ahead of time when you plan to decorate and serve.
- Cookies spreading: This might be because your butter was too soft during the creaming process, or your dough warmed up too much. Try to not handle the dough too much when rolling out as well. Read my 10 Reasons Your Cookies Spread Too Much for more help!
- Cookies are tough, cakey, or dry: This is probably because you added too much flour when you made the dough or when rolling out the dough. Make sure to spoon the flour into your measuring cup and level it off. Do not pack it down or scoop from the bag. And make sure to only lightly flour your surface when rolling out the dough.







Donna says
These are very cute 🙂 This was the first year my kids were old enough to get into baking for Halloween, and it was so fun!
Heather @Boston Girl Bakes says
Thanks Donna! Aw I bet they had a blast! A mess I’m sure 😉 but fun!
Amanda | My Gluten-Free Miami says
What a fun cookie! I can see how it could be adapted to any holiday or occasion. It is a winner!
Heather @Boston Girl Bakes says
Thanks Amanda! I definitely plan on making these again just dressed up for Christmas 🙂
foodhuntersguide says
super fun idea! I love the colors too
Heather @Boston Girl Bakes says
Thank you! I thought the colors made them extra fun 😉
Kate Veggie Desserts (@veggie_desserts) says
These are so cute and perfect for Halloween!
Heather @Boston Girl Bakes says
Thanks Kate! They were super fun to make and I feel could get dressed up for any holiday with the right cookie cutters 🙂
Kumiko Ehrmantraut says
These look amazing and fun to make! Thanks for the recipe! I’m so making these with my son!
Heather @Boston Girl Bakes says
Thanks Kumiko! Let me know how they turn out..I know your son will love them 🙂
Paige Strand says
These remind me of childhood 🙂 I love these
Heather @Boston Girl Bakes says
Thanks Paige..and you can’t help but feel like a kid when you make them too with the cookie cutters and rolling pin out!
certifiedpastryaficionado says
I am not even kidding when I say this…I saw those exact same sprinkles at Home Goods over the weekend! How crazy is that?! You cookies look out-of-this-world fantastic. I can’t believe those aren’t store-bought. Well done!
Heather @Boston Girl Bakes says
Awww thank you!! That’s so sweet…and that’s too funny that you saw these sprinkles. What’s said is it’s now the 3rd container of Halloween sprinkles that I own #bakersproblems
Ayanna says
These are so cute and look delicious! I love the idea of freezing them, so i can make them ahead of time and not stress when I need them. I may have to try something similar this Christmas.
Heather @Boston Girl Bakes says
Thanks Ayanna! Yes I froze them just so I wouldn’t eat them all! But they held up beautifully..just let them thaw before diving in or you’re bound to break a tooth 😉
Cathleen says
These cookies are so adorable!! I LOVE Halloween desserts.
Heather @Boston Girl Bakes says
Thanks Cathleen..there is just always something fun about Halloween desserts!