
Hostess Cupcake Recipe
This Post May Contain Affiliate Links. Please Read Our Disclosure Policy.
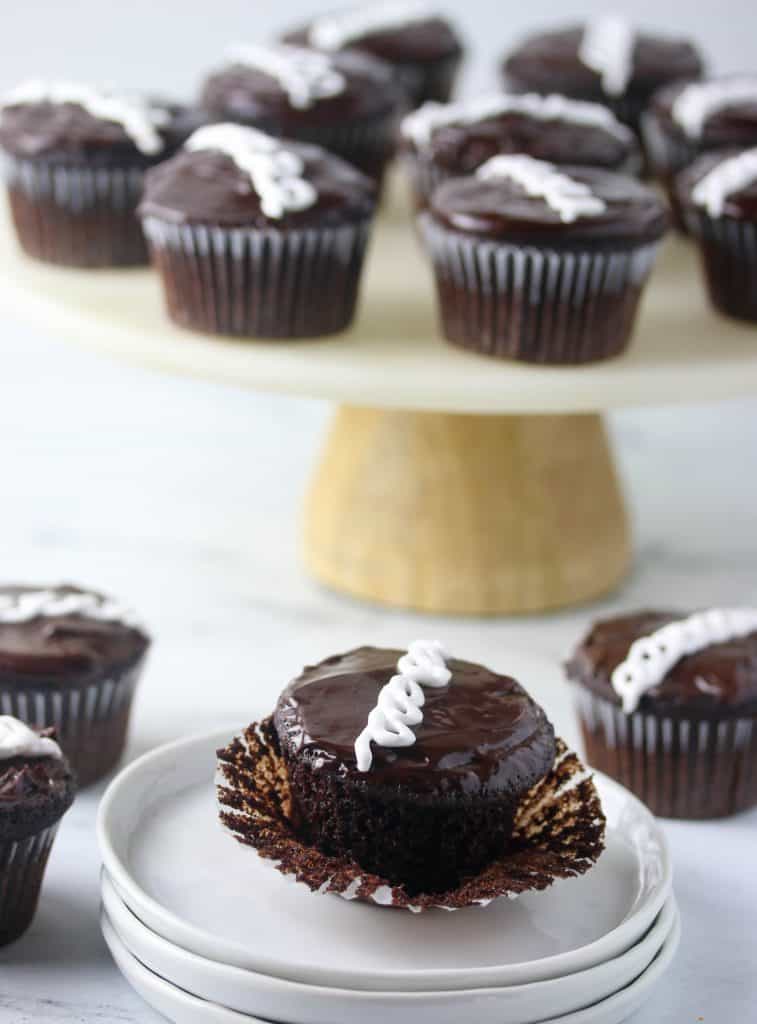
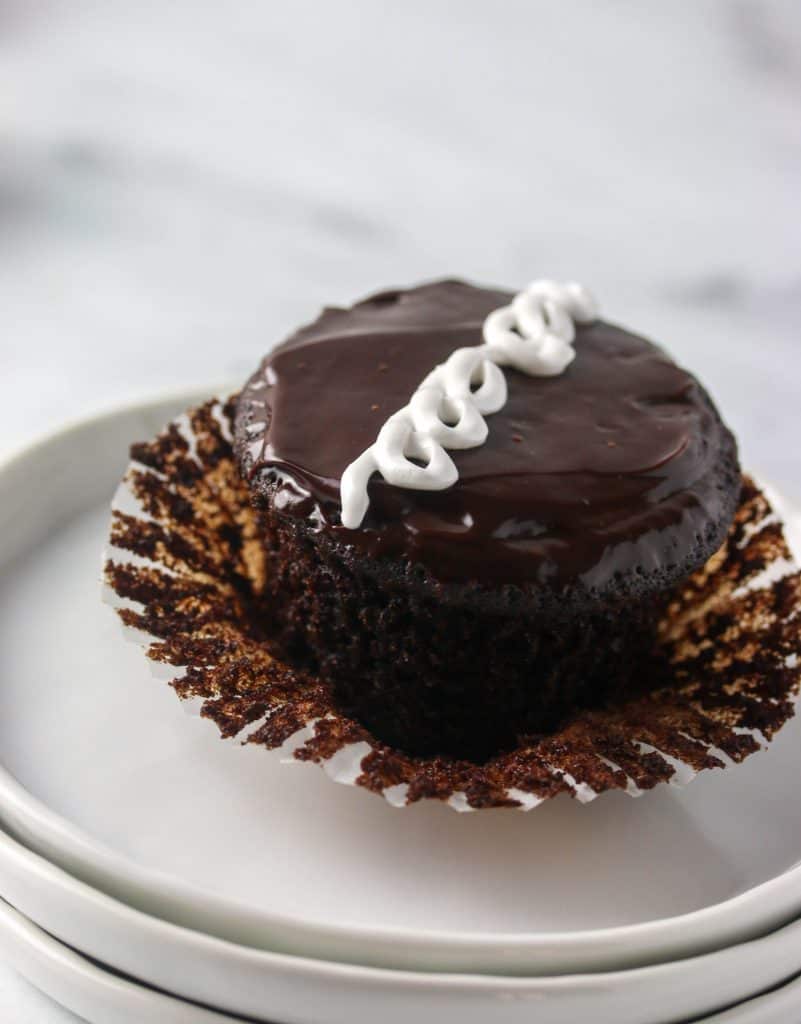
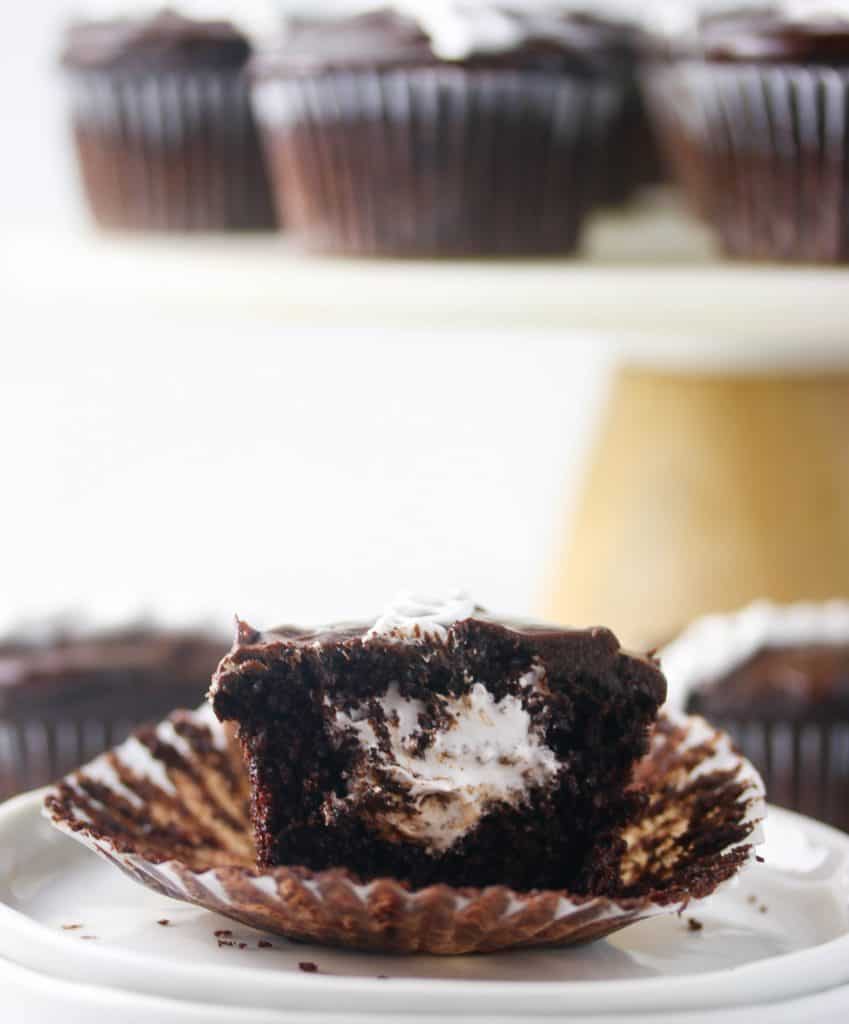
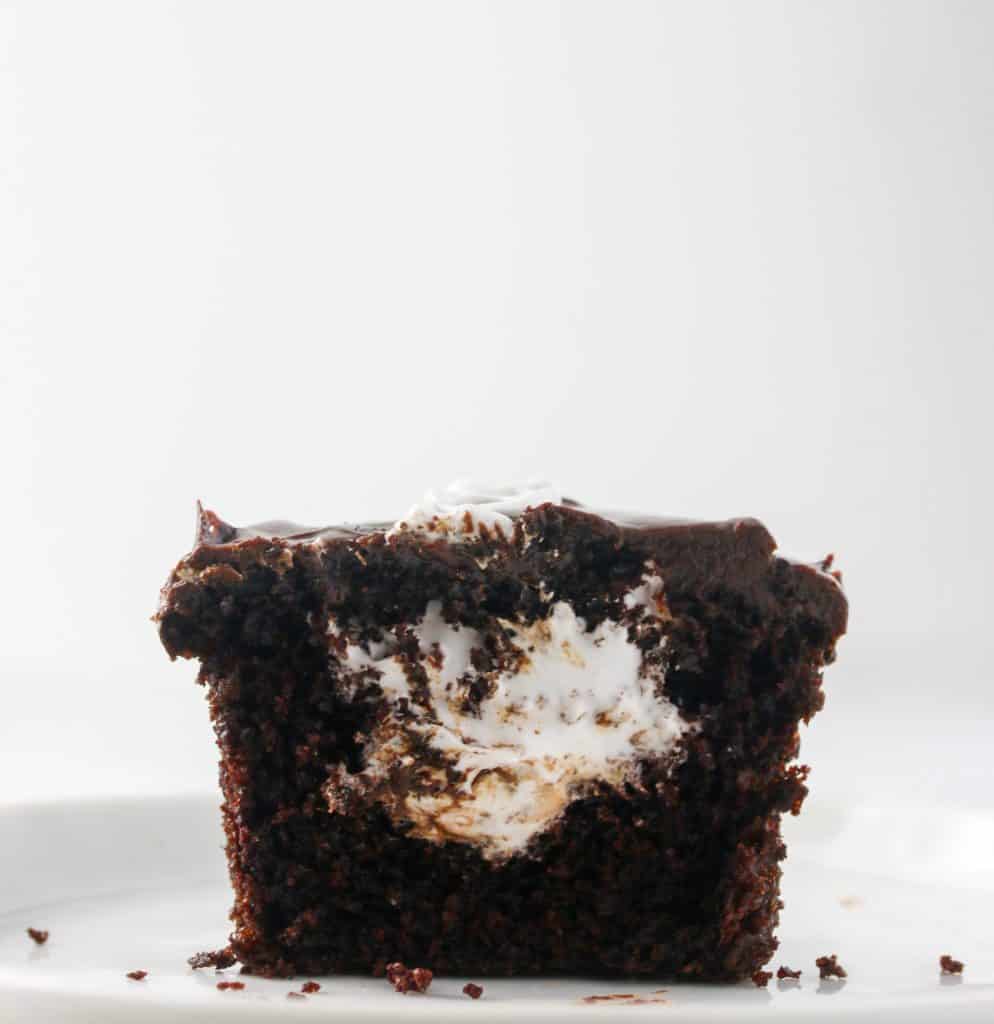
Forget the grocery store. This homemade Hostess cupcake recipe is way better. Perfect chocolate cupcake, filled with homemade marshmallow crème, dipped in chocolate ganache, and topped off with the classic vanilla swirl!
Recipe Updated: 6/4/2020 with new photos, helpful tips, and simpler recipe!
Ok as a child of the 80’s or simply a child at all I guess, a Hostess cupcake was right up there with…well Hostess cupcakes. I mean those little snack cakes with their little vanilla icing swirl and secret hidden marshallow filling hiding under that chocolate ganache. Oh. MY. HEAVEN.
I seriously thought nothing could be better.
Then I decided to make them myself.
Oh. My. Word. Homemade beats store-bought crinkly cellophane kind every time.
These cupcakes do have a few components, but trust me, totally worth it. I used my homemade marshmallow fluff I recently made to fill them with.
Oh hello homemade fluff. Nice to see you again.
Ready To Take Your Baking To The Next Level?
Join the Ultimate Baking Bootcamp and master essential techniques like mixing methods and the why behind every recipe! Whether you’re a beginner or looking to refine your skills, this step-by-step class will help you bake with confidence and create flawless desserts every time. Start your baking journey today!
Ingredients For These Hostess Cupcakes
This recipe (both the cupcakes, ganache, and icing) comes from my very own cookbook that came out last year, Beginner’s Baking Bible. I love this recipe because it uses simple ingredients and comes together very easily. Here is what you need to round up:
- Dry ingredients: I used all purpose flour, unsweetened cocoa powder, baking powder, baking soda, table salt, and instant espresso powder in these cupcakes.
- Wet ingredients: For these I used sugar, oil (a neutral-tasting one such as vegetable or canola), sour cream, eggs, and pure vanilla extract.
- 7-Minute Icing: For the filling and piping I made a 7-minute icing that is made from sugar, cold water, egg whites, cream of tartar, salt, and vanilla extract.
- Ganache: For this you just need good quality dark (or semi-sweet) chocolate and heavy cream.
How To Make These Homemade Hostess Cupcakes
First things first. Prepare your pans and pre-heat that oven. If your oven is not pre-heated properly, your cupcakes could bake unevenly. And once your batter is made you want to be able to scoop and bake them immediately because your baking soda has already gone to work. If your batter sits out while you are getting your pans ready you are losing precious lift and this could result in a flat cupcake!
My Favorite Go To Cupcake Liners Are These.
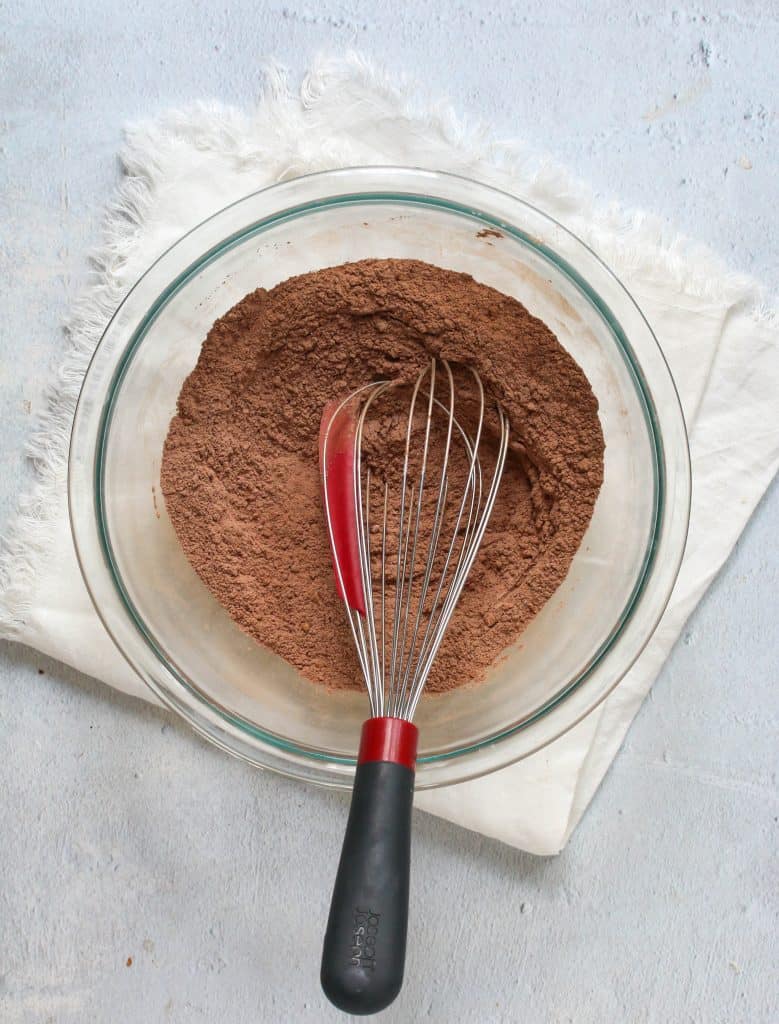
In a large bowl you need to combine the dry ingredients (flour, sugar, baking powder, cocoa powder, baking soda, and salt) and simply whisk to combine. Be sure to measure your flour correctly by scooping and levelling.
In a second mixing bowl you then combine your wet ingredients- milk, vegetable oil, vanilla, and eggs. And whisk, whisk, whisk again.
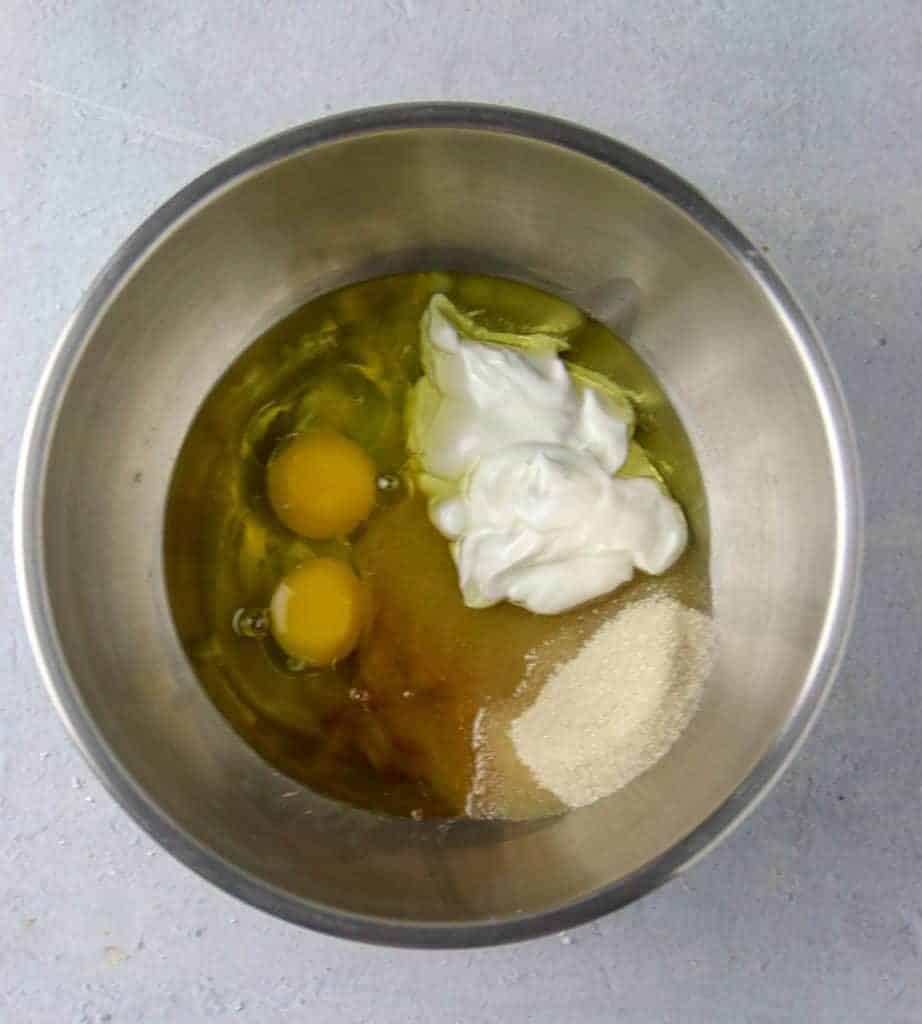
And then combine the dry and wet ingredients. Be sure to not overmix, which can cause tough cupcakes in the end. I make sure to stop mixing once the last of my flour has been stirred in.
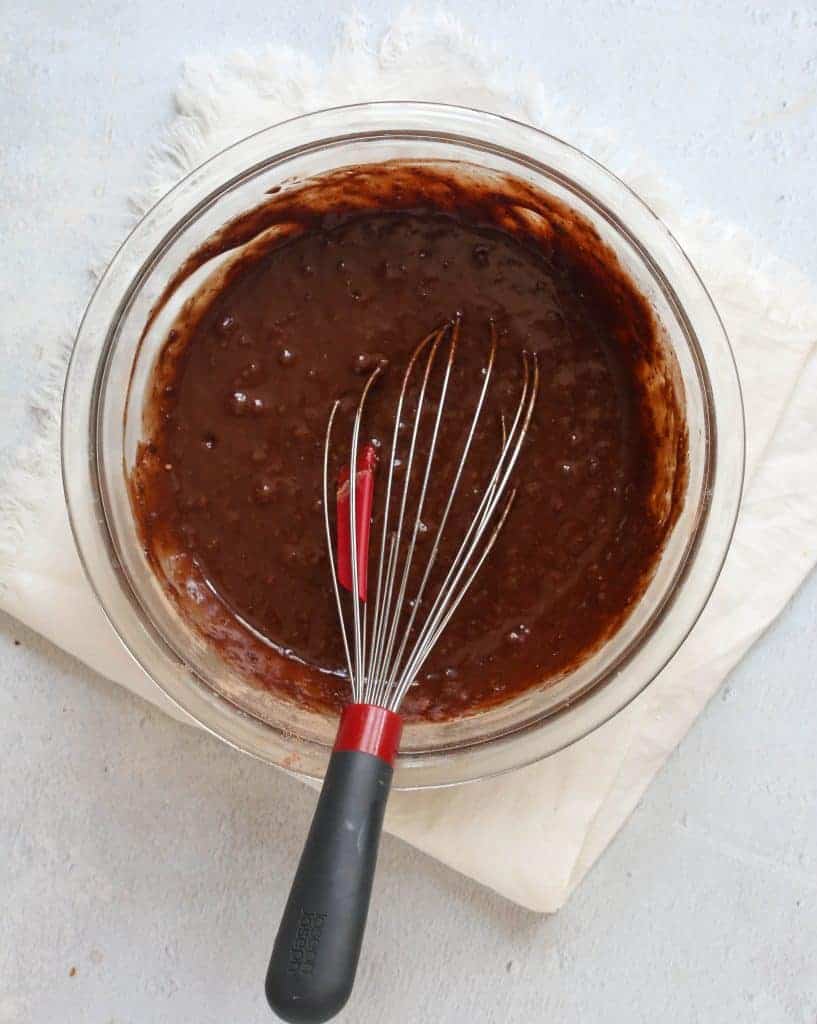
To fill your cupcake pans, I find it easiest to pour the batter into a liquid measuring cup and pour then into my cupcake pans. You want to fill these up about 3/4 of the way to leave a bit of room for them to rise and create that beautiful domed cupcake.
When baking these, it’s best to rotate the pans halfway through their baking time. Every oven can have hot spots so they may not bake evenly. Give them a turn in the oven, so they all bake up pretty. For more oven 101, check out this post.

Once they are baked, then give these chocolate cupcakes a fighting chance and be sure to take them out of the pans and cool on a cooling rack. Leaving them in your pans means they will continue to bake and could end up dry.
For more tips on making cupcakes, read this!
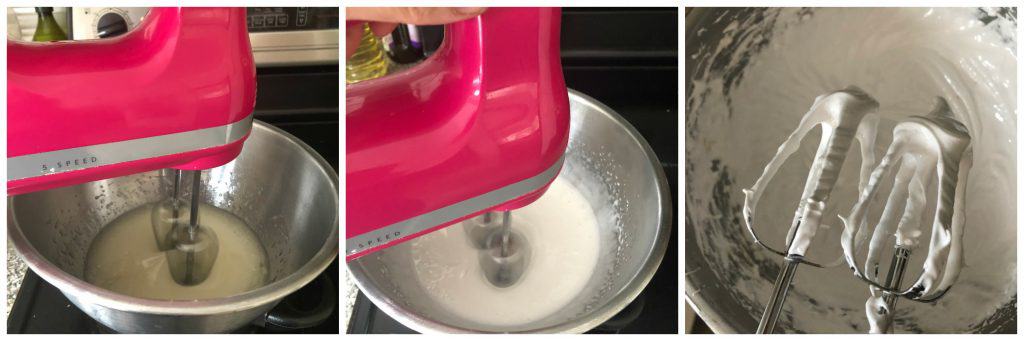
Making The 7-Minute Icing
Next up is the icing. We are going to use this the filling and also the piping on the end. I used to make a second icing for the piping, but I found there was enough icing to use for both. And this means one less thing to make! Woo hoo!
To make this icing you are going to be using a double boiler – aka a heatproof bowl set over a small saucepan that has a few inches of simmering water in it. Be sure the water doesn’t touch the bottom of your bowl which could heat the mixture up too much causing it to curdle or burn.
You want to beat the sugar, water, egg whites and cream of tartar together. I used a hand mixer, but a whisk (and a lot of arm muscle!!!) can also work. You will continue to beat this until the mixture has formed stiff, glossy peaks (around 7 minutes, hence the name). Then take it off the heat and add the vanilla and then continue to mix until cool. So yes it will take longer than 7 minutes to make.
Filling The Cupcakes
Once all perfectly baked, go ahead and cut the center out. I use the cone method for filling my cupcakes. Here are 4 easy ways to core your cupcake if you have never done it. I promise you have at least one of the tools I use!
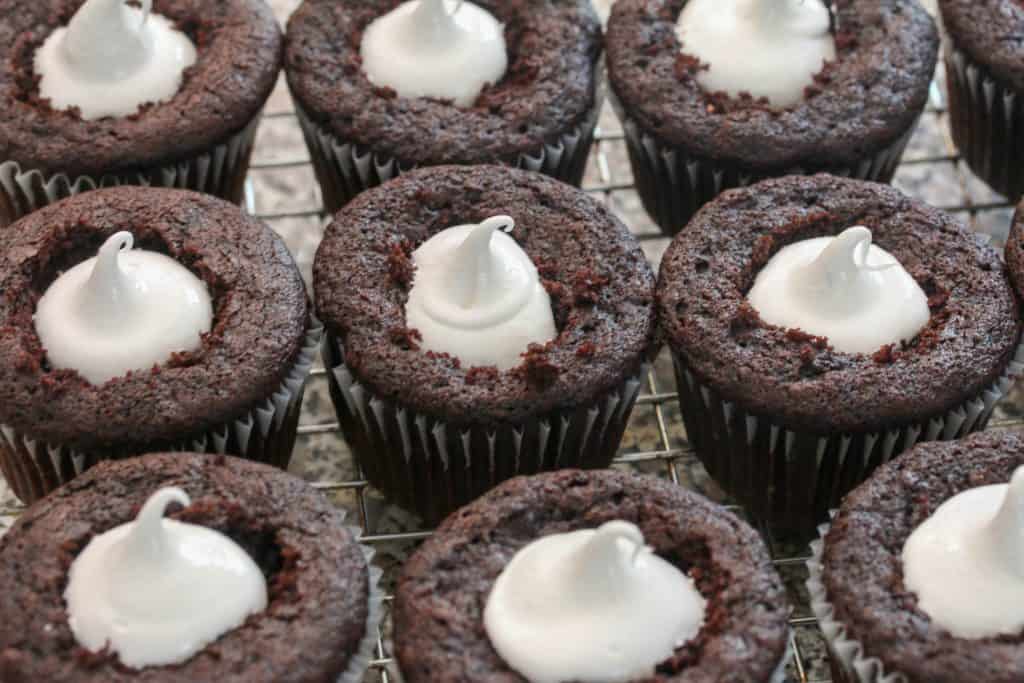
Here is a video on how to core your cupcake as well!
Making The Ganache
These cupcakes after filled and topped, get dipped in homemade ganache. Ganache is no more than heavy cream and good quality chocolate. That’s it. Sounds so fancy right?
And then of course more 7-minute icing to swirl on top. The swirl is what I think truly makes it a Hostess cupcake. A true Hostess cupcake has exactly 8 swirls.
Ok so I guess mine aren’t perfect. Oh well 5, 6, however many swirls you make. Trust me no one is going to notice or care. Not once they take a bite.
Tips For Making These Hostess Cupcakes
- Be sure to measure your flour accurately. For a full tutorial on how and why, read this post.
- Be sure to use natural unsweetened cocoa powder not dutch process. They are not the same. You can read about the differences here.
- When baking these, it’s best to rotate the pans halfway through their baking time. Every oven can have hot spots so they may not bake evenly. Give them a turn in the oven, so they all bake up pretty.
- Do not overfill. They make a perfect 15 cupcakes. If you have less, then you probably overfilled some which will results in your cupcakes sinking in the middle
- Once they are baked, be sure to take them out of the pans and cool on a cooling rack. Leaving them in your pans means they will continue to bake and could end up dry.
How Far In Advance Can I Make These Hostess Cupcakes?
You can make the chocolate cupcakes up to 2 days in advance, unfrosted. Just wrap in plastic wrap and keep at room temperature. You can also make the cupcakes and freeze for up to 2 months. Learn how to freeze your cupcakes here.
If the cupcakes are frosted, it can stay fresh at room temperature for 1 to 2 days, according to Spruce Eats.
Can You Substitute Dutch Process For Regular Cocoa?
No unfortunately you can’t. You can read the differences between natural cocoa and dutch process cocoa.
So when it comes to swapping out these cocoa powder you will be upsetting that chemical balance that was originally achieved when the recipe was written. So save yourself the headache and use the cocoa powder called for.
More Recipes To Try:
To Make This Hostess Cupcake Recipe You Will Need:
- Cupcake pans (I’ve been loving these non-stick ones lately)
- Greaseproof cupcake liners
- Kitchen-aid mixer (I stand by using one, to make the icing that much easier!)
- Dry measuring cups and measuring spoons
- My new favorite whisk (it’s a 2-in-1 whisk and bowl scraper!)
- Metal bowls (plastic tends to retain odors and can warp, metal is best)
If you like this recipe let me know and leave me a comment and star rating below!
Master The Art Of Baking!
Don’t miss out on the chance to elevate your baking skills! Join the Ultimate Baking Bootcamp today and unlock the secrets to creating perfect desserts every time. With expert guidance, step-by-step lessons, and insider tips, you’ll be baking like a pro in no time. Sign up now and start mastering your baking!

Homemade Hostess Cupcakes
Ingredients
For the cupcakes
- 3/4 cup (90 g) all-purpose flour
- 3/4 cup (149 g) granulated sugar
- 1/2 cup (42 g) unsweetened cocoa powder
- 1-1/4 teaspoons baking powder
- 1/2 teaspoon baking soda
- 1/2 teaspoon salt
- 2 eggs
- 1 1/2 teaspoons vanilla extract
- 1/2 cup (120 ml) vegetable oil
- 1/2 cup (120 g) sour cream
For the marshmallow fluff (7-minute icing)
- 1 1/2 cup (297 g) granulated sugar
- 1/3 cup (80 mL) cold water
- 2 egg whites room temperature
- 1/4 teaspoon cream of tartar
- 1/4 teaspoon salt
- 1 1/2 teaspoons vanilla extract
For the Chocolate Ganache
- 4 ounces dark (or semi-sweet) chocolate chopped (or chips is fine as well)
- 1/4 cup (60 mL) heavy cream
Instructions
- Heat oven to 350°F. Prepare two muffin pans with cupcake liners.
- Stir together sugar, flour, cocoa, baking powder, baking soda and salt in large bowl.
- In a second bowl, whisk together eggs, oil, vanilla, and sour cream.
- Add dry ingredients to wet ingredients, mixing just until combined. Fill each cupcake well with 2/3 batter.
- Bake for 12-14 minutes, until wooden pick inserted in center comes out clean, rotating pans halfway through baking. Remove cupcakes from pans and allow to cool on a wire rack. Cool completely.
- For the 7-minute icing, in a medium-sized saucepan combine the water, sugar, egg whites, cream of tartar, and salt.
- Using an electric mixer set on low, beat the egg white mixture for 30 seconds. Set the bowl over the saucepan of simmering water. Be sure the bottom of the bowl does not touch the simmering water. Continue beating at high speed for about 7 minutes, or until the egg whites are stiff and glossy.
- Remove from the heat, and add the vanilla and beat for an additional 2-3 minutes until bowl feels cool to the touch. Use frosting right away as it tends to set quickly.
- To fill the cupcakes: use the cone method by cutting out the center out of the cupcake at an angle about two-thirds of the way down. Save the top of the cupcake and simply trim off the bottom so you can replace the top of the cupcake once you have filled them with the marshmallow creme. Using a piping bag or a Ziploc bag with a corner snipped off, fill the center of each cupcake with the marshmallow creme. Just be sure not to overfill. If you fill above the cupcake, simply use a small spatula to scrape off the top. Place the trimmed top that you saved back on the cupcake. You will need some of this icing to pip swirls on top.
- To make the ganache: Cook the chocolate chip and heavy cream over a double boiler over simmering water until smooth and warm, stirring occasionally. Allow to cool slightly, then dip the top of each cupcake into the ganache so that ganache covers all the way to the liner. Allow any excess to drip off. Place each one back onto the cooling rack.
- Use remaining white icing to pipe swirls on top of cupcake.
Notes
- Be sure to measure your flour accurately. For a full tutorial on how and why, read this post.
- Be sure to use natural unsweetened cocoa powder not dutch process. They are not the same. You can read about the differences here.
- When baking these, it’s best to rotate the pans halfway through their baking time. Every oven can have hot spots so they may not bake evenly. Give them a turn in the oven, so they all bake up pretty.
- Do not overfill. They make a perfect 15 cupcakes. If you have less, then you probably overfilled some which will results in your cupcakes sinking in the middle
- Once they are baked, be sure to take them out of the pans and cool on a cooling rack. Leaving them in your pans means they will continue to bake and could end up dry.
Nutrition


Thanks for sharing.. loved your recipe. Had a lot of creamy filling left so next time I will reduce it by half.
Thank you so much—I’m so glad you loved the recipe! 😊 Reducing the filling by half next time sounds like a perfect plan. Thanks for sharing your feedback, and happy baking!
These are great and very yummy. Just a few things to clarify; in the directions, sugar is mentioned twice in both wet and dry ingredients.
Also, the directions for the icing, some clarification of putting ingredients into saucepan, no mention of boiling water etc.
thanks so much
Hi Crystal! Thank you so glad you loved them 🙂 and thank you for catching those errors! I’ll be sure to fix them!
These cupcakes look absolutely scrumptious! I am making these with my friends tomorrow morning! Thank you for sharing!
that’s awesome let me know how they turn out!
Hello, can this filling be used to fill a layer cake? If so, do I need to make a dam to hold the filling in place?
Hi Mary Diane, yes you can definitely use filling as a layer cake. I would definitely make a dam – I do this with any kind of filling just to be safe.
I know my boys will love these cupcakes… because of the marshmallow fluff! And chocolate. 🙂 I can’t wait to make this. Thanks for lovely recipe!
Thanks Natalie! I know they will love them 🙂
These cupcakes look outstanding. Planning to make this tomorrow as a surprise for my daughter. Do you have any tips?
Hi Gunjan! I always recommend breaking up the different components if you can over a few days since it can be a lot! Have fun making them!
This homemade Hostess cupcake recipe was so fun to make the other day with the children! They had a blast making them, and I loved watching them smile the whole time. Everything turned out perfect, and we all loved the Hostess cupcake recipe so much we will be making them again!
Happy Sunday, have a great day.
H
OH I’m so happy to hear they enjoyed making these Heidy 🙂
Thanks for sharing Such delicious cupcakes recipe. I tried it last night and we loved it. Making it again.
Thanks Kushigalu so glad you liked it!!
You’re about to put Hostess out of business because these are so, so good! So delicious, and we already can’t wait to make them again.
Such sweet words Candice thank you!!
Is it wrong I am drooling loosing at the screen? While I adore hostess cupcakes homemade is always better. I have these on my list to make with my nephew, he loves to bake. That homemade marshmallow fluff sounds fabulous.
Not wrong at all Debbie 🙂
Welp! There goes my diet! I’ve been able to avoid hostess cupcakes because the ingredients list grosses me out, but with your recipe, I have no reason not to make them!
I agree Marta grosses me out too! Sorry about the diet thing though 😉
These are darling! They really do look just like store-bought Hostess cupcakes, but OMG so much yummier! (You’re totally right that homemade beats the store-bought crinkly cellophane kind every time LOL!) And thanks for the great info on natural cocoa powder vs. dutch … as I was reading through this wonderful cupcake post, I absolutely had to click over and read that, too, and it was so helpful – thank you!
Double YUM! I have always wanted to make my own hostess cupcakes but thought it would be challenging. You make it seem so easy, and even tastier than store bought! That marshmallow fluff looks so delicious, hopefully I’ll be able to save some for the filling!
Thanks Aleta~ Let me know how it goes 🙂
I am drooling. This is so yum. My kids would love the Marshmallow creme. Chocolate is just delicious. I love it.
Thanks Veena!
OK, I’ll admit that I love a Hostess cupcake, but these are way better! The homemade filling really makes these cupcakes something special. I’m so glad you shared this fun recipe.
Thanks Amanda 🙂
I made these tonight and it came out amazing! Hubby said it was the best thing I’ve ever baked! The cream filling wasn’t too sweet and it was so easy to make. Next time, I want to try to make this recipe with monk fruit sweetener. I’m hoping it will work. Thank you so much for the recipe! I can’t wait to try your other recipes.
Oh my gosh that’s wonderful to hear Kim!! I’m so excited your husband loved them. And if you make it with monk fruit sweetener let me know 🙂