
Reese’s Peanut Butter Cup Cookies
This Post May Contain Affiliate Links. Please Read Our Disclosure Policy.
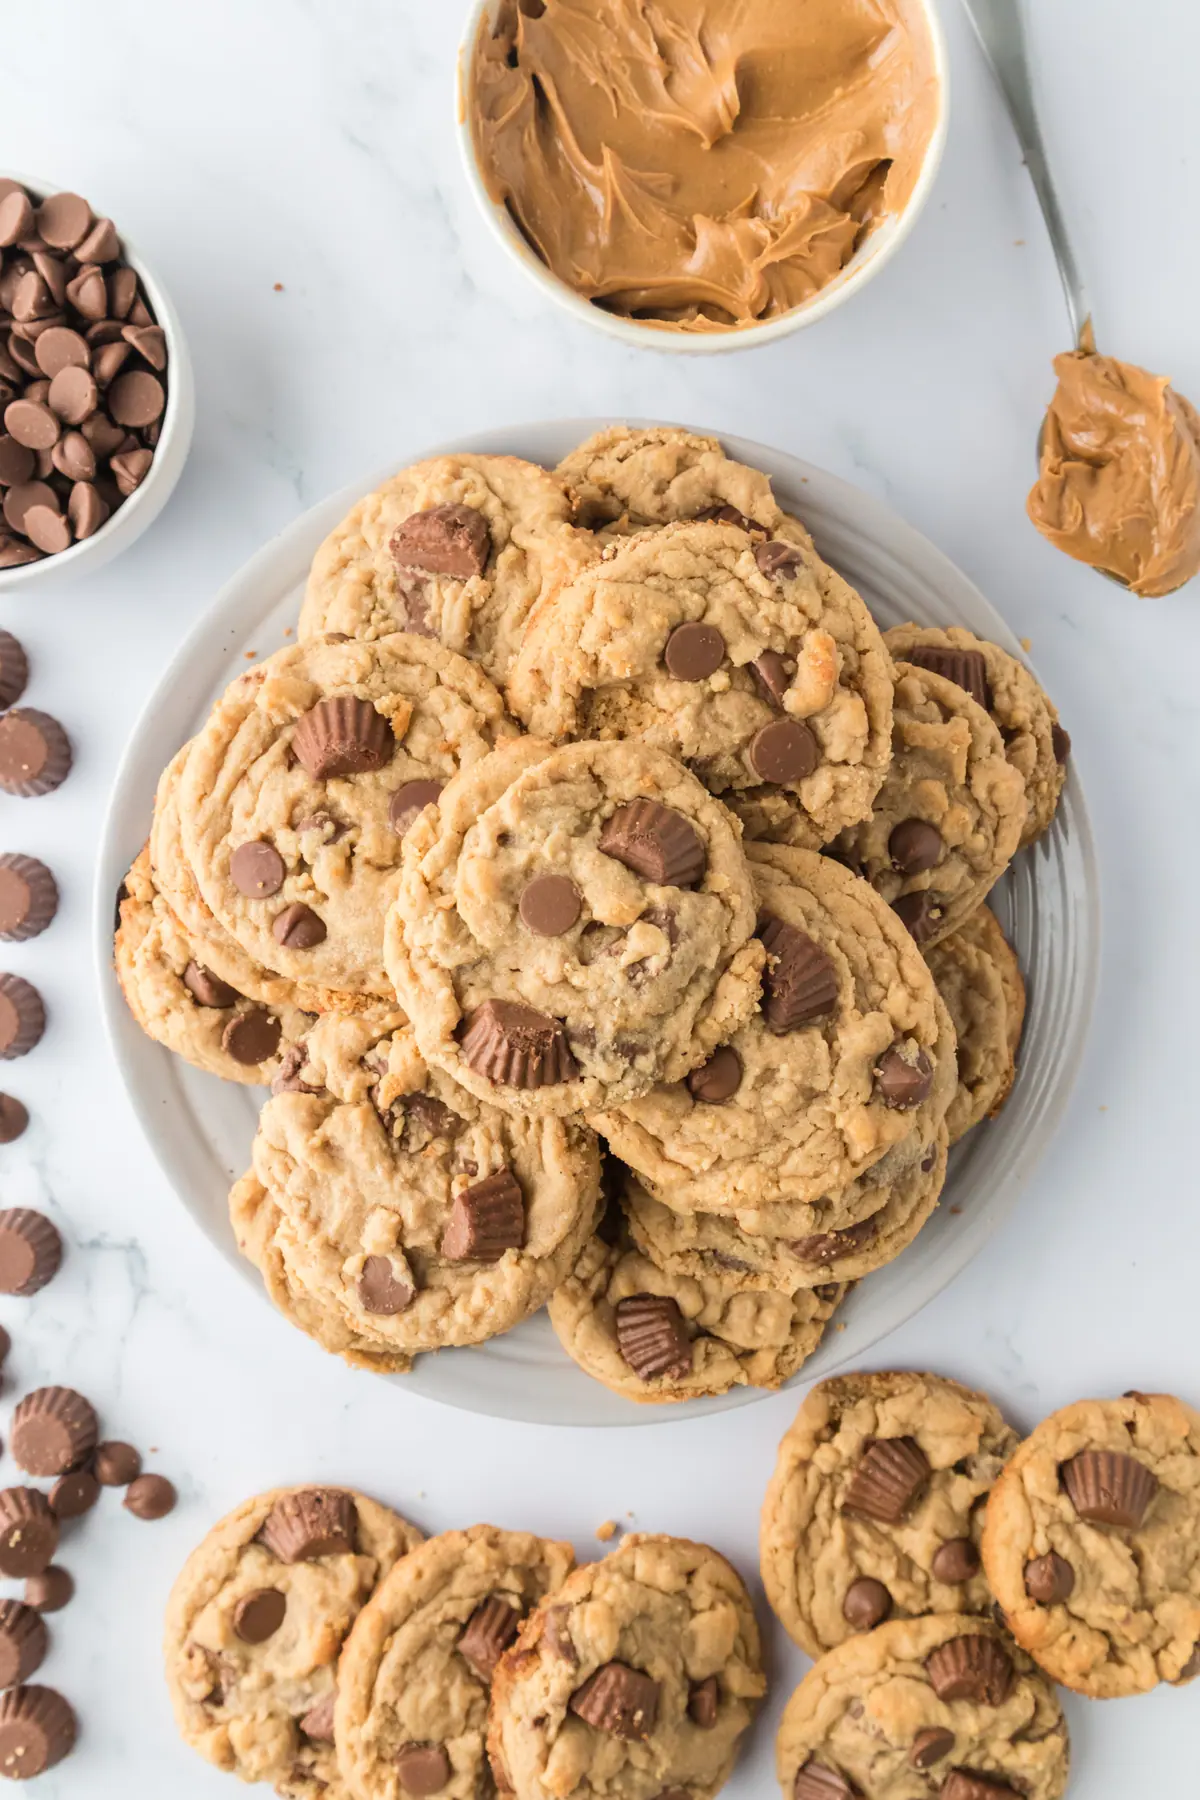
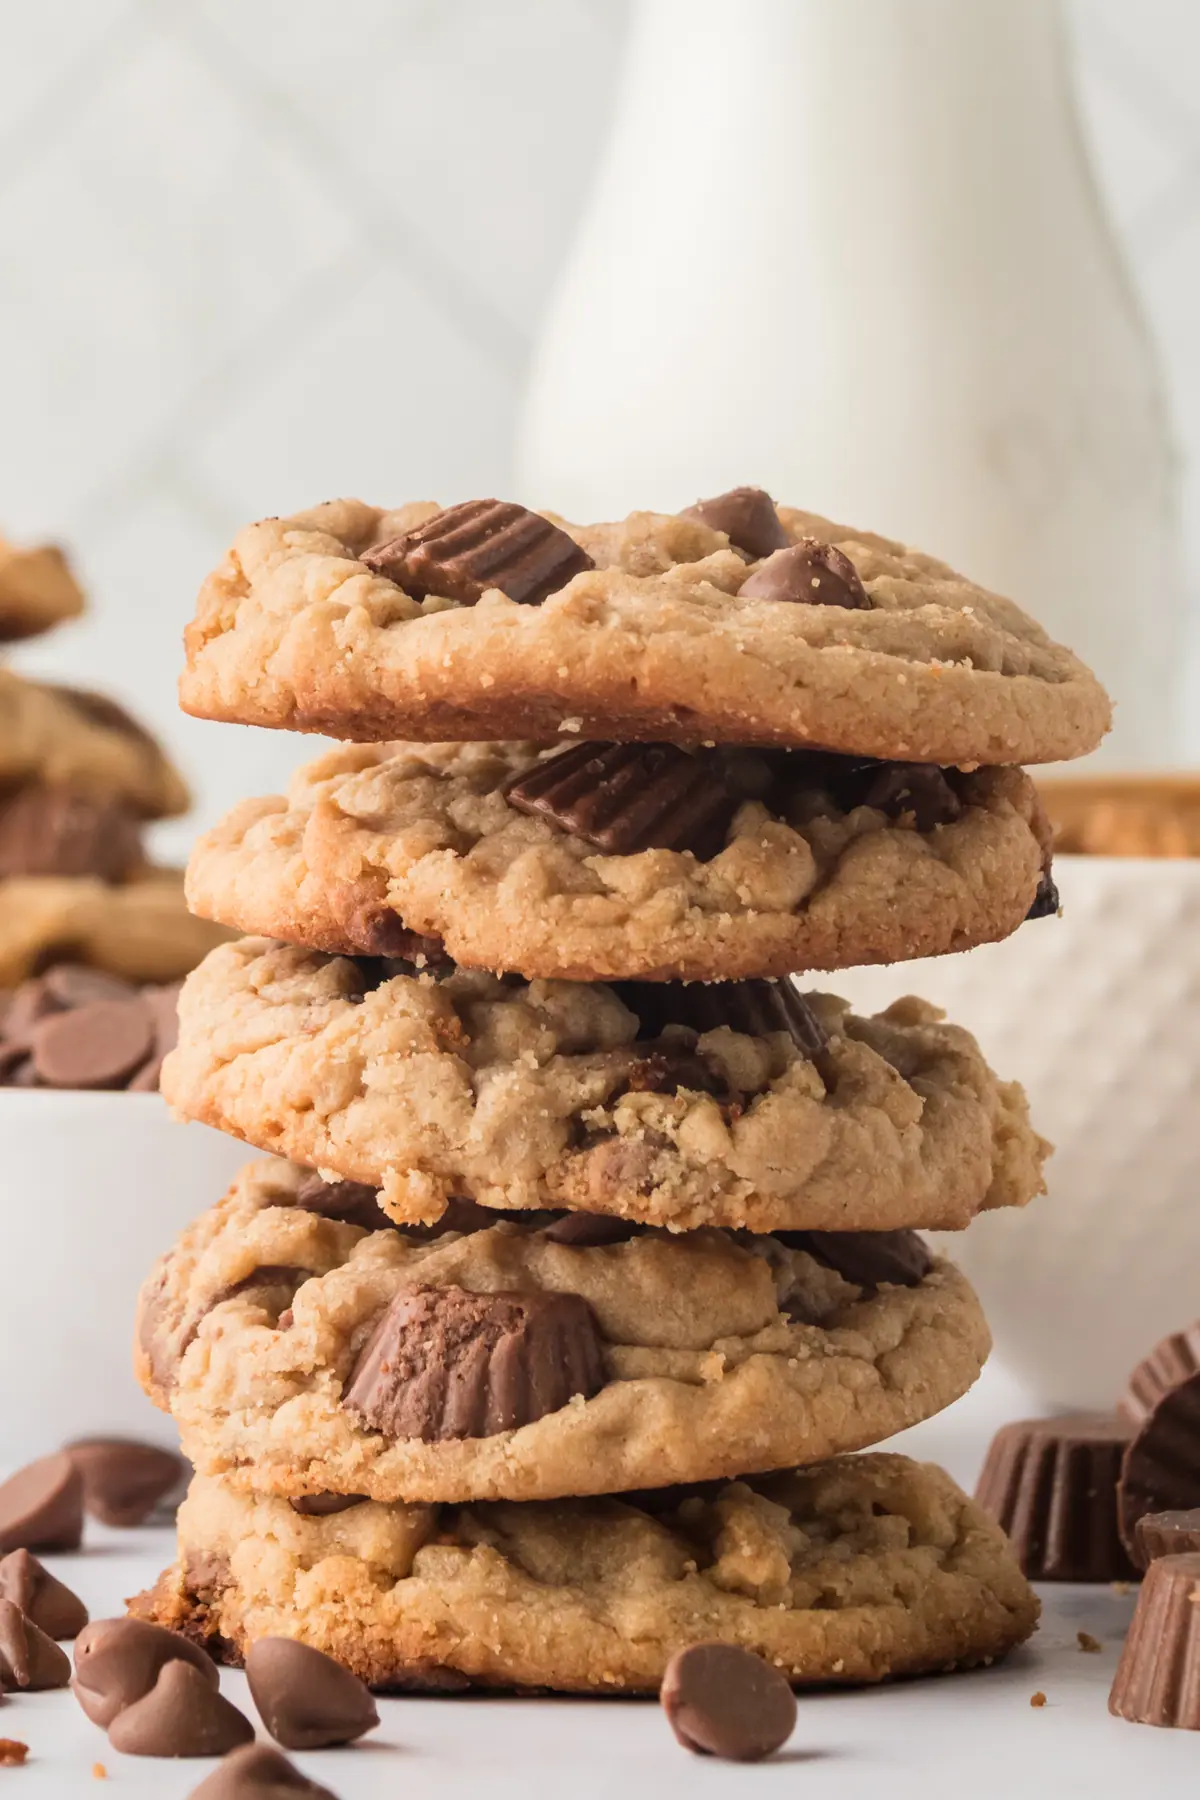
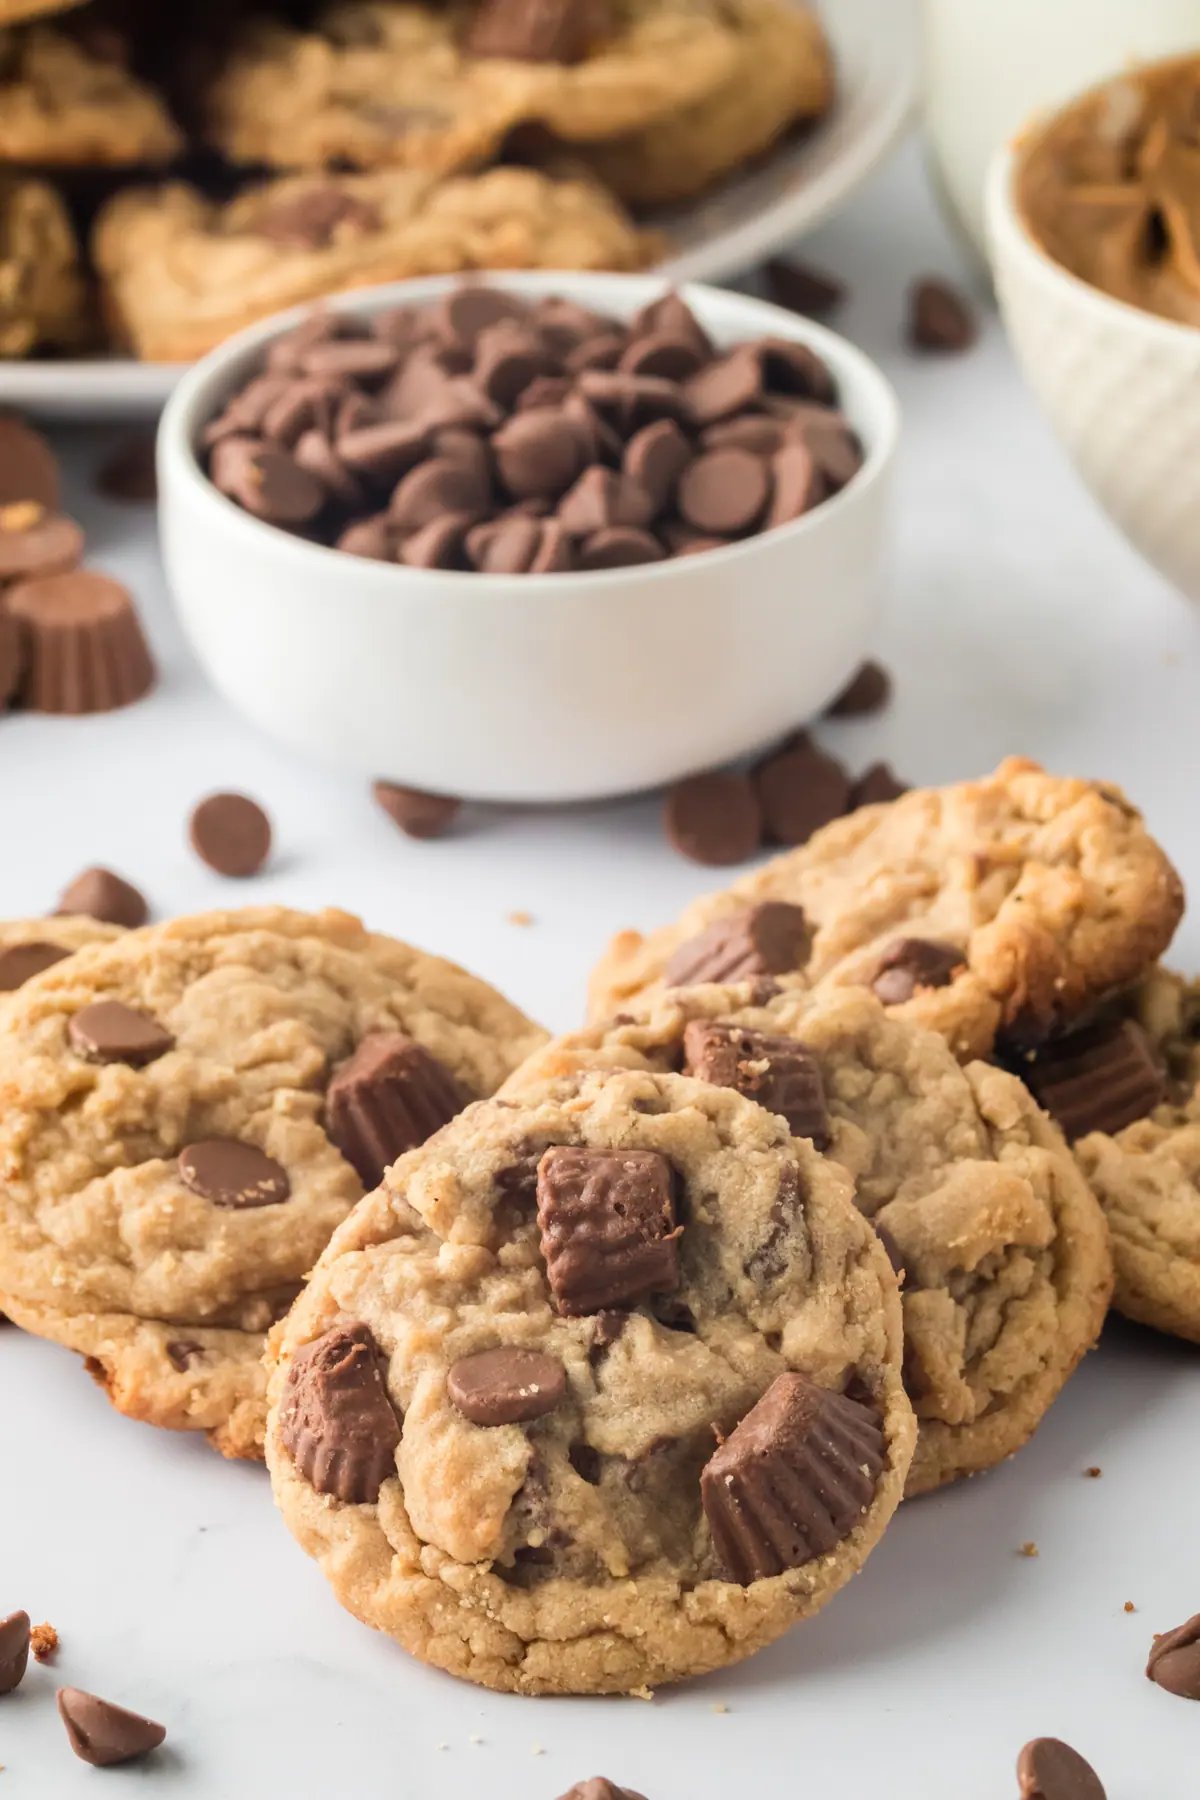
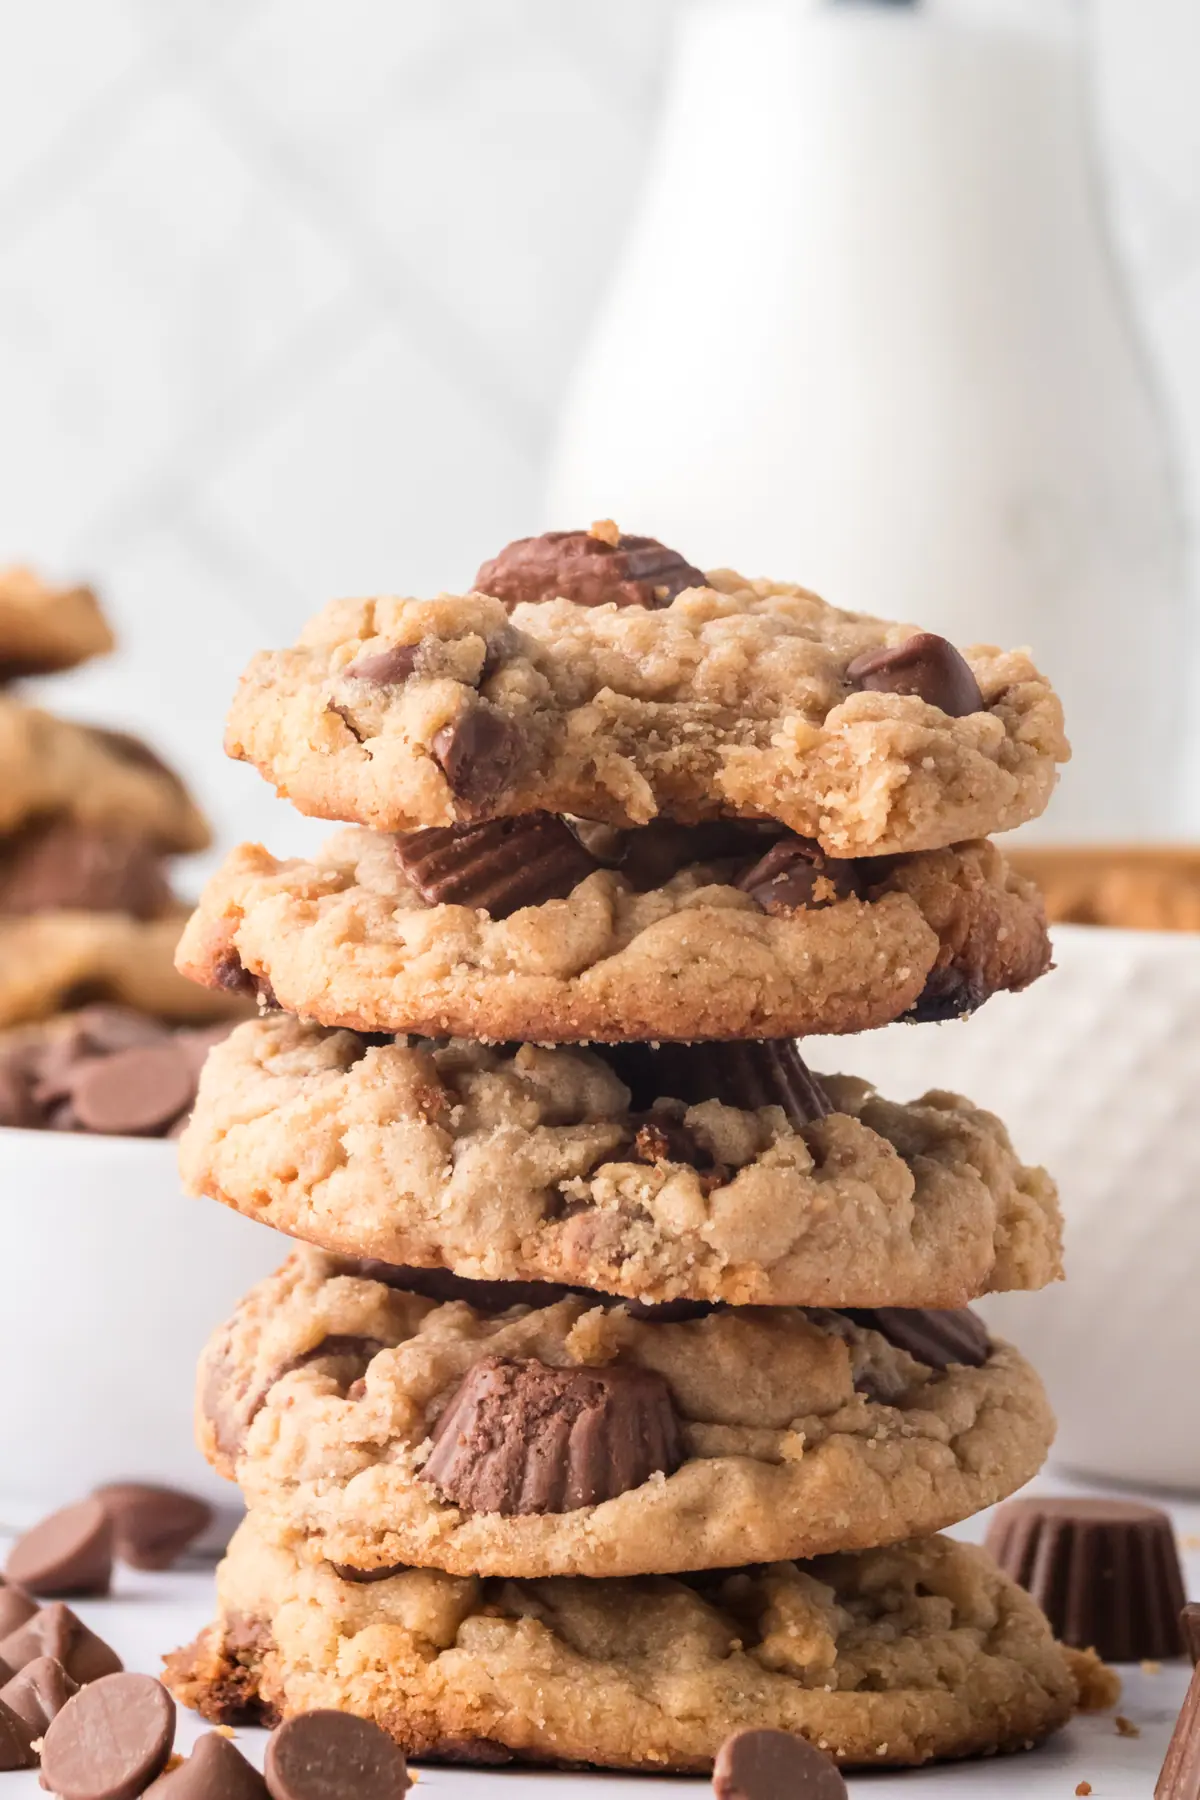
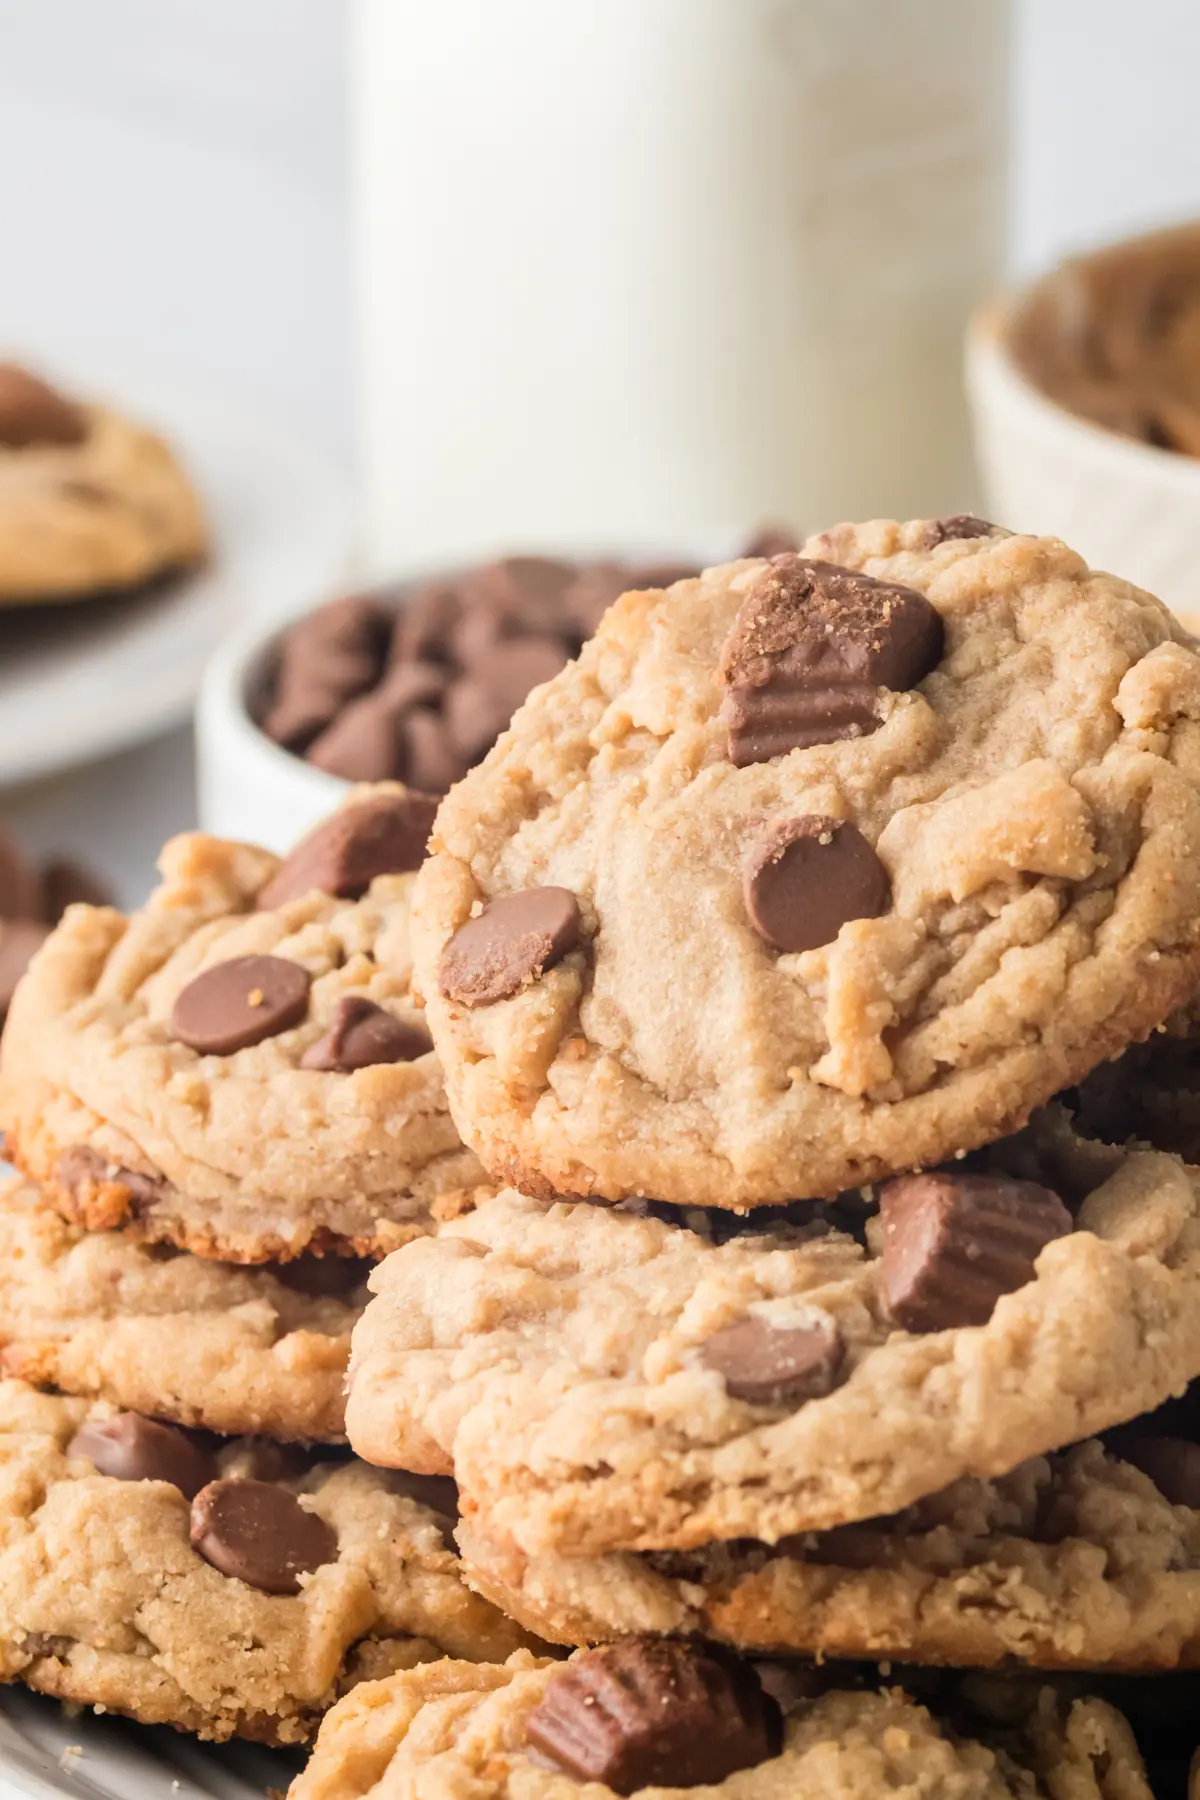
Calling all peanut butter lovers and cookie connoisseurs with these peanut butter cup chocolate chip cookies! These soft, chewy Reese’s peanut butter cup cookies are where dreams of peanut butter cookie dough and chocolate collide in the most magical way possible. These peanut butter chocolate chip cookies with peanut butter cups are ready in less than an hour and ready to be devoured.
When it comes to desserts, believe it or not, I can have pretty good restraint. Maybe it’s because I’m around them all day. By the end of a long day of recipe testing, I seriously don’t want to look at sugar. I know…(insert gasp here) but it’s true! I crave all things salty. Give me a bag of potato chips, please!
But when it comes to cookies, self-restraint sort of goes out the window. And when it’s peanut butter cookies made with Reese’s peanut butter cups- well just forget about it. I’m eating them all. Well, maybe all. I’m a nice wife and will share one or two with my husband.
Yes, these cookies have peanut butter going on two ways – creamy peanut butter added to the cookie dough, and then chopped peanut butter cups stirred into the dough as well. This is a twist on my Old Fashioned Peanut Butter Cookies.
Indulge your peanut butter cravings with every delectable bite, as the rich peanut butter cookie dough takes center stage. So if you love peanut butter then picture biting into a soft, chewy cookie with creamy peanut butter throughout that melts in your mouth. It’s a flavor explosion that will leave you weak in the knees and reaching for seconds. Or thirds. Fourths. Hey, no judgment here.
So trust me when I say, these peanut butter cup cookies are a peanut butter lover’s dream come true. Let’s get stop talking about these cookies and let’s start baking shall we?
See Also:
- Pucker up and enjoy one of these homemade lemon cookies with easy lemon glaze drizzled over them!
- Coconut macaroons are an easy gluten free chewy coconut cookie. Dip in chocolate for an easy chocolate treat!
- Grab a jar of peanut butter and make these wonderfully easy old fashioned peanut butter cookies with criss cross pattern on top!
- Make these brown sugar chocolate chips cookies made with 100% brown sugar making them wonderfully chewy!
Why You Will Love These Reese’s Peanut Butter Cup Cookies
- Perfect for holiday baking: These peanut butter cup cookies are a delicious addition to your festive baking lineup, especially during the Christmas season.
- Easy to make: Even novice bakers can tackle this recipe with confidence. The prep time for these cookies is 15 minutes and the bake time for these cookies is only 10-12 minutes.
- Crowd-pleaser: Whether you’re serving these peanut butter cup cookies at a party, sharing them with loved ones, or giving them as gifts, they are sure to be a hit. It is always one of my top favorite recipes.
Ingredients Needed
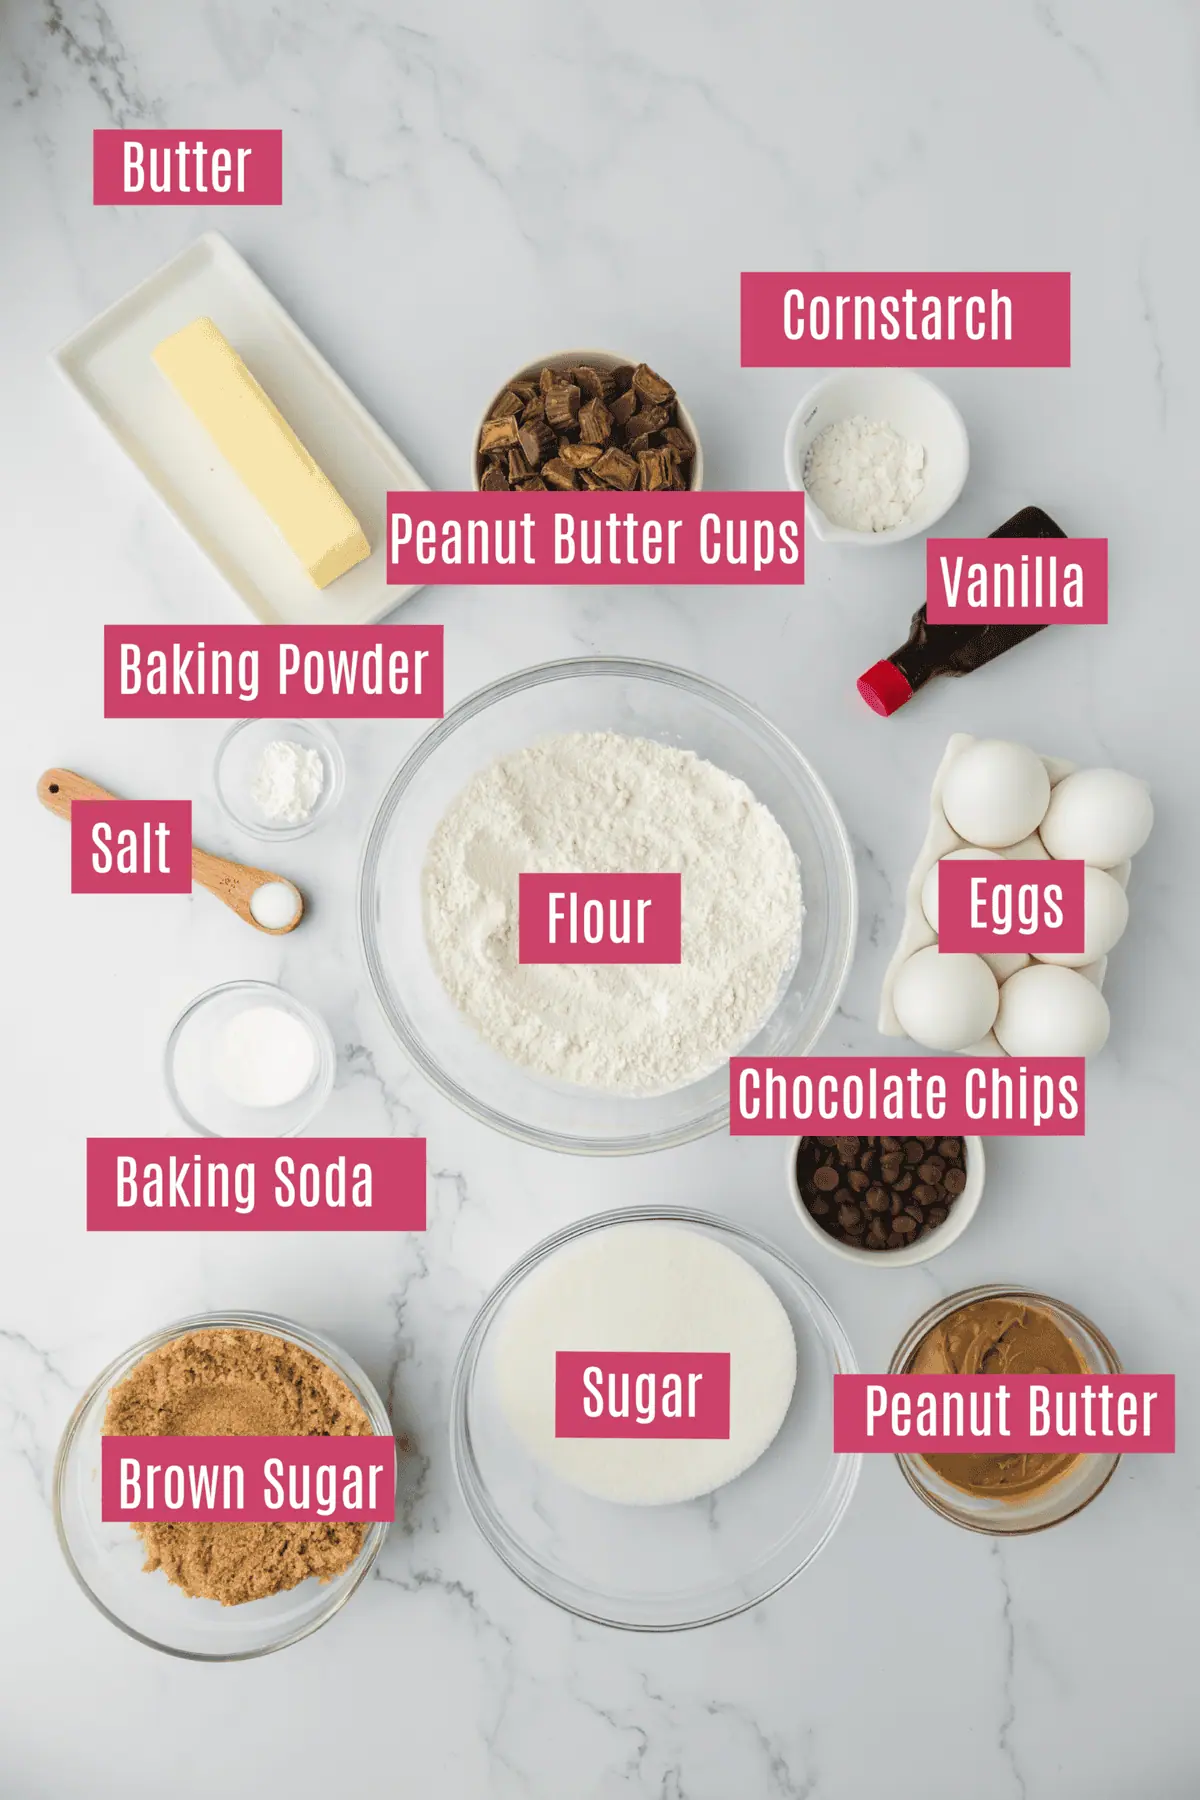
- Butter – I recommend unsalted butter but salted butter can still be used, but you may want to reduce the salt. I prefer unsalted butter because it contains less water, so your cookies will spread less in the oven.
- Granulated sugar – Adds sweetness but also makes for a crispier, chewier cookie.
- Brown sugar – Use light or dark brown sugar. Be sure to pack the brown sugar into your cup. If you have run out, you can make your own homemade brown sugar!
- Egg— Be sure to use a room temperature egg so it blends in easily and do not seize up the butter in the bowl.
- Vanilla – You can use pure or imitation. Or try making your own homemade vanilla!
- Flour – Be sure to measure the flour correctly. Stir it first, then scoop into your cup and level it off. Do not pack it down. You can also measure by weight with a kitchen scale for the best accuracy.
- Baking soda– Baking soda helps with the browning and spreading of the cookies, so they aren’t too cakey.
- Baking powder – This helps the cookies rise.
- Salt – To balance the sweetness. I recommend fine sea salt, but can also use table salt (use a little less) or kosher salt (use a heaping teaspoon)
- Corn starch – Makes for a softer cookie, don’t skip it!
- Peanut Butter– You will need creamy peanut butter to make the peanut butter cookies. But you could use crunchy peanut butter flavor for texture.
- Mini Reese’s Peanut Butter Cups– I like to chop mini Reese’s peanut butter cups in half to help them mix in. Or use regular peanut butter cups and chop them into small pieces.
- Chocolate Chips– I like to use semi-sweet chocolate chips, but you can also swap and use milk chocolate chips, or chocolate chunks, mini chocolate chips, or chop up a chocolate bar!
How to Make Reese’s Peanut Butter Cup Cookies
Prep oven and pan.
Preheat oven to 350oF (180oC). Line a cooking sheet with parchment paper.
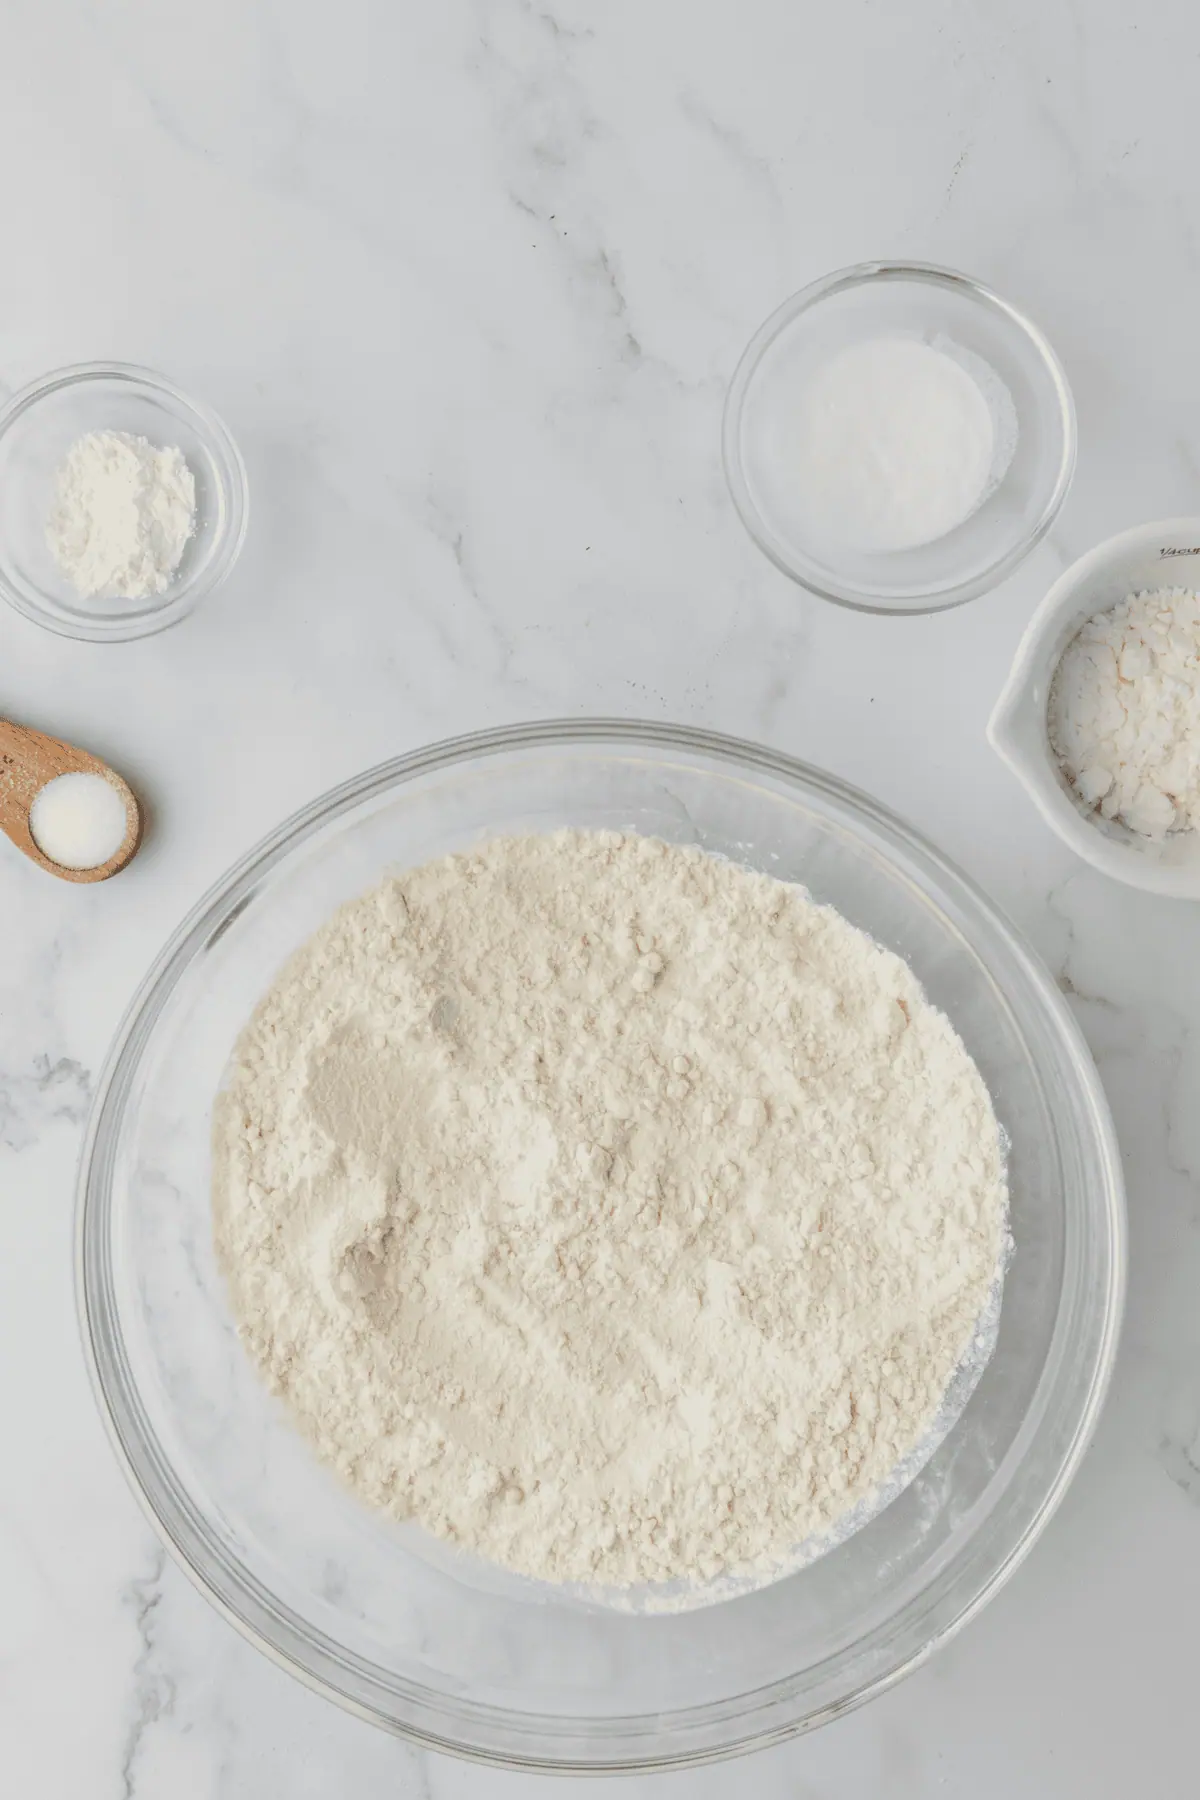
Combine dry ingredients.
In a medium bowl, whisk together flour, baking soda, baking powder, corn starch, and salt.
Mix butter and sugar.
Using a stand mixer with a paddle attachment, or a hand mixer, beat butter, brown sugar and granulated sugar together on medium-high speed, until light and fluffy, about 2 minutes.
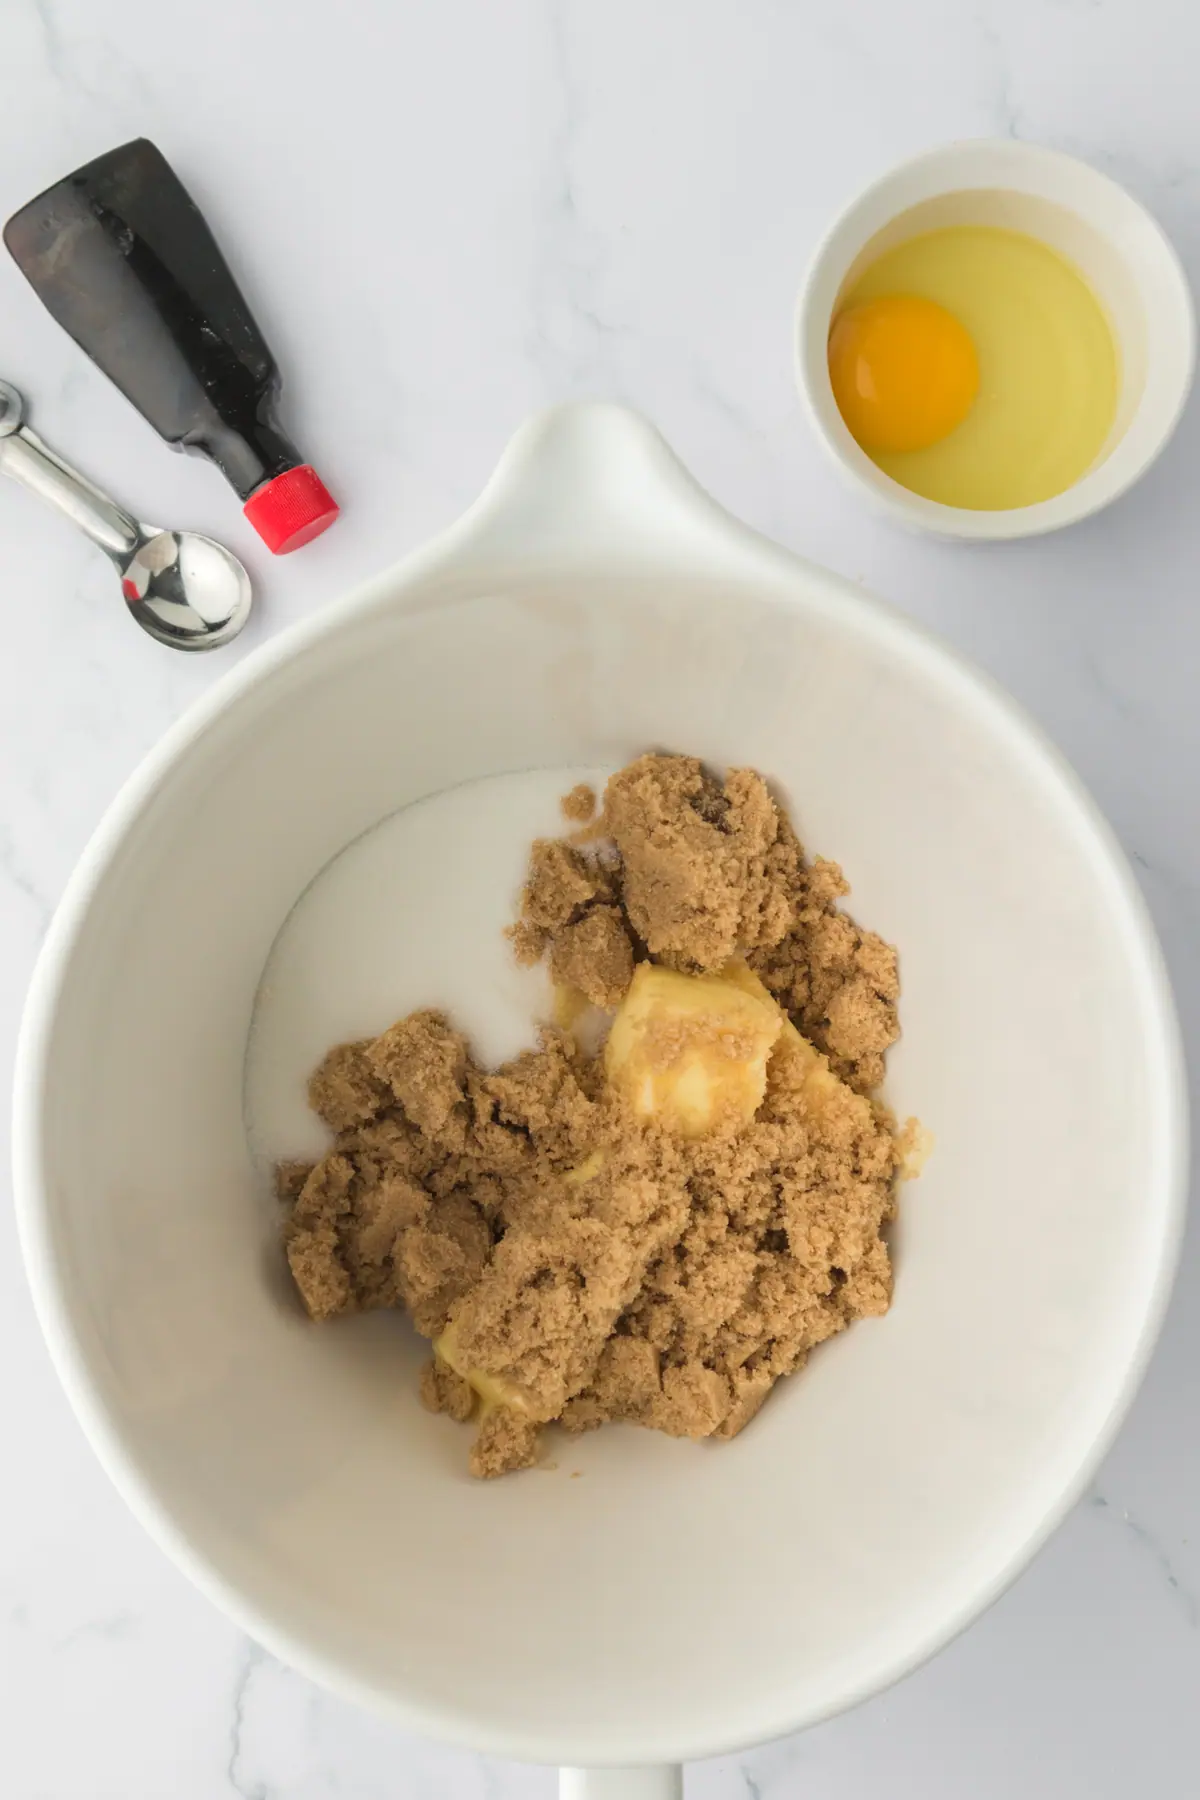
Add in eggs, vanilla, and peanut butter.
Add eggs, vanilla, and peanut butter, and mix until completely combined.
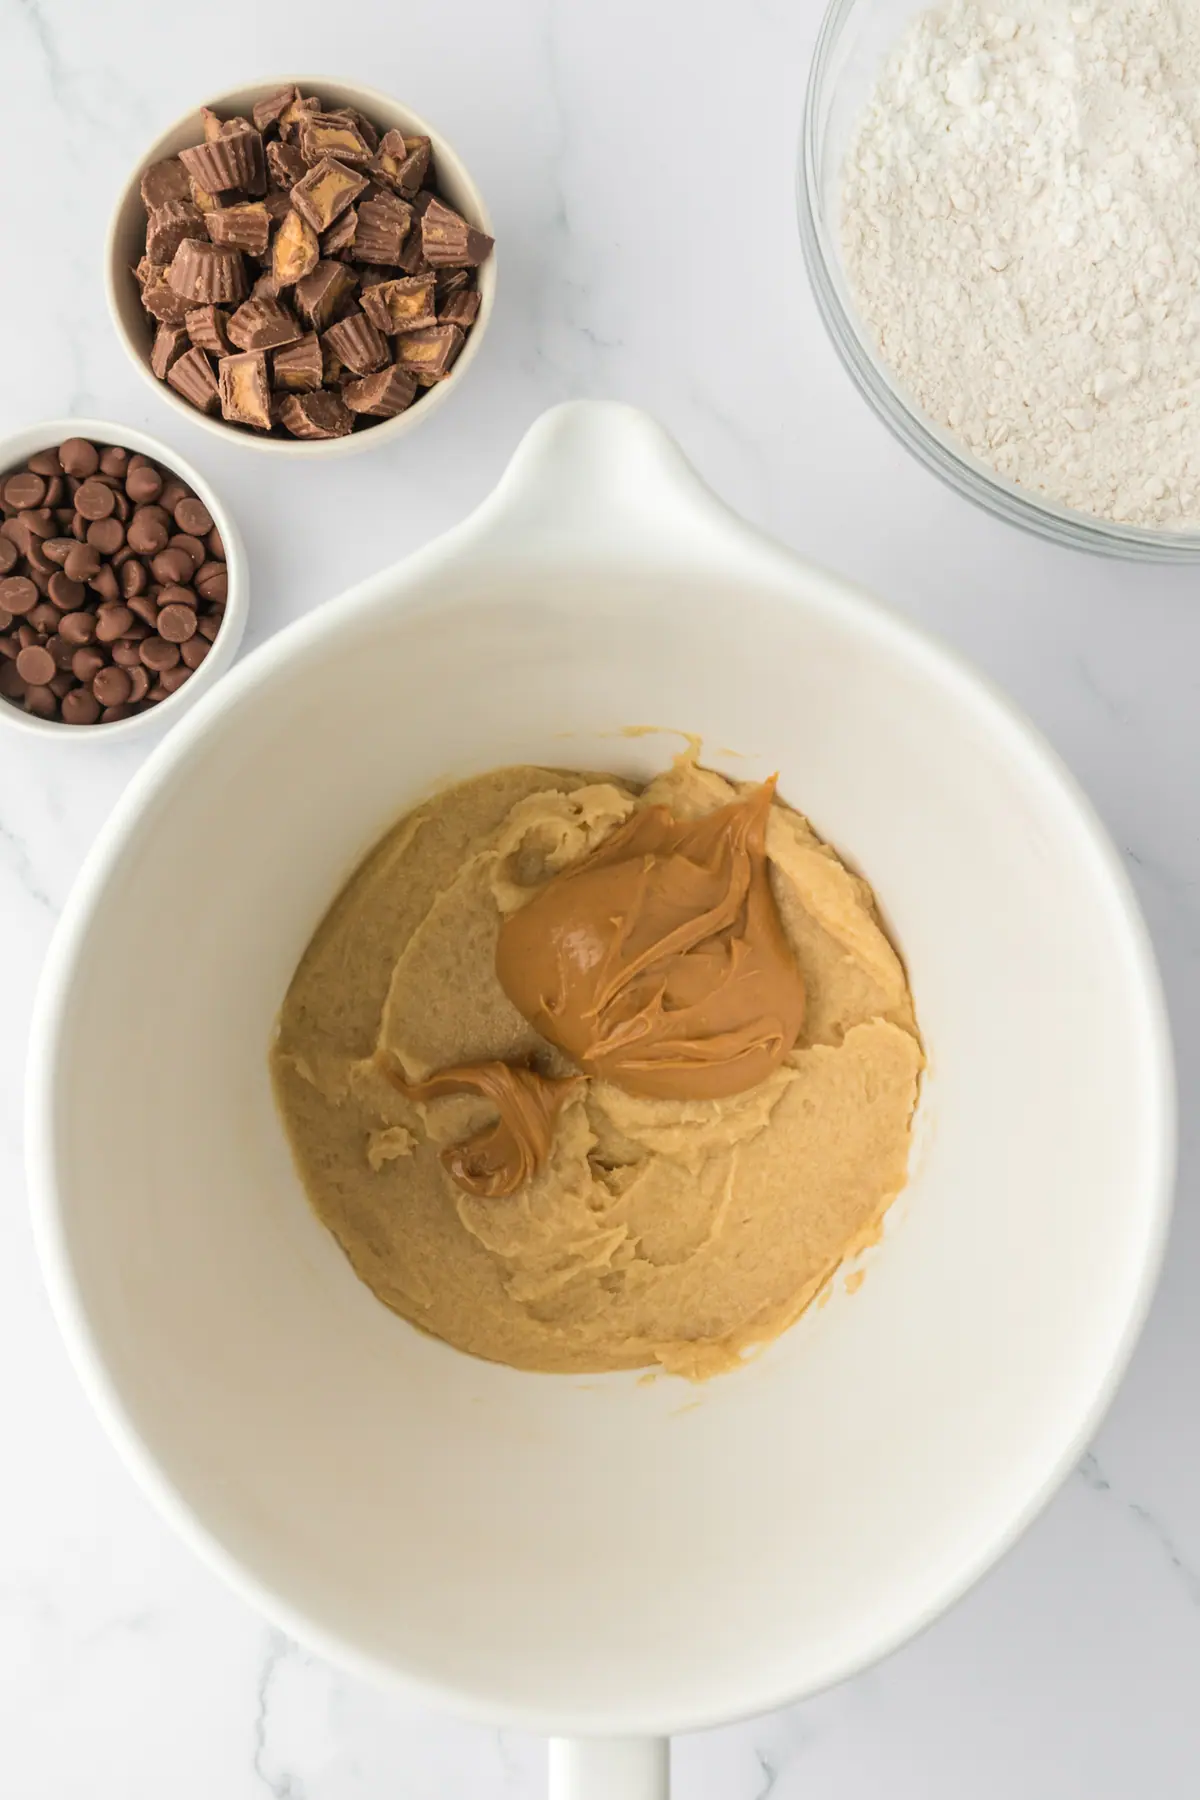
Combine wet ingredients and dry ingredients.
Gradually add flour mixture until well blended. Stop mixing up once the last of the dry mixture has been incorporated.
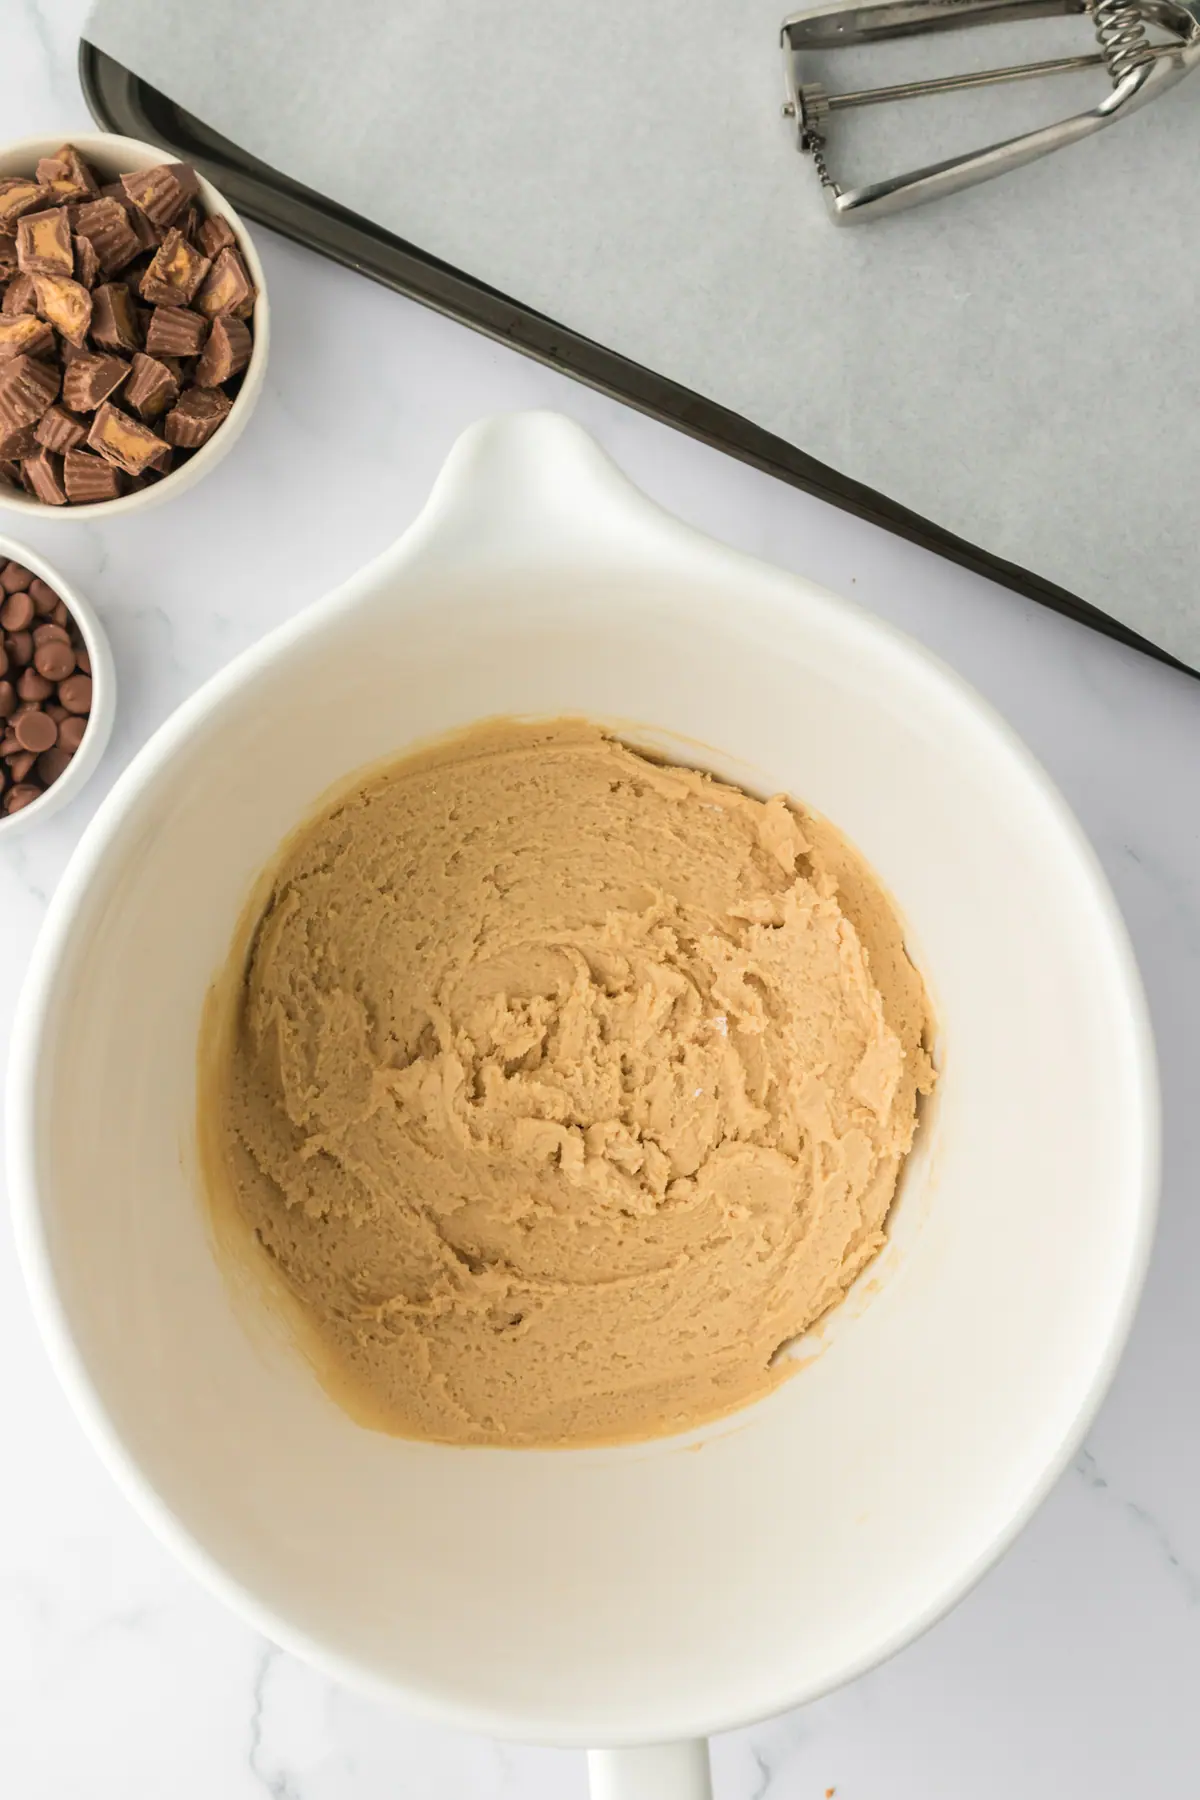
Add Reese’s peanut butter cups and chocolate chips.
Using a rubber spatula or wooden spoon, fold in the chopped Reese’s peanut butter cups and chocolate chips
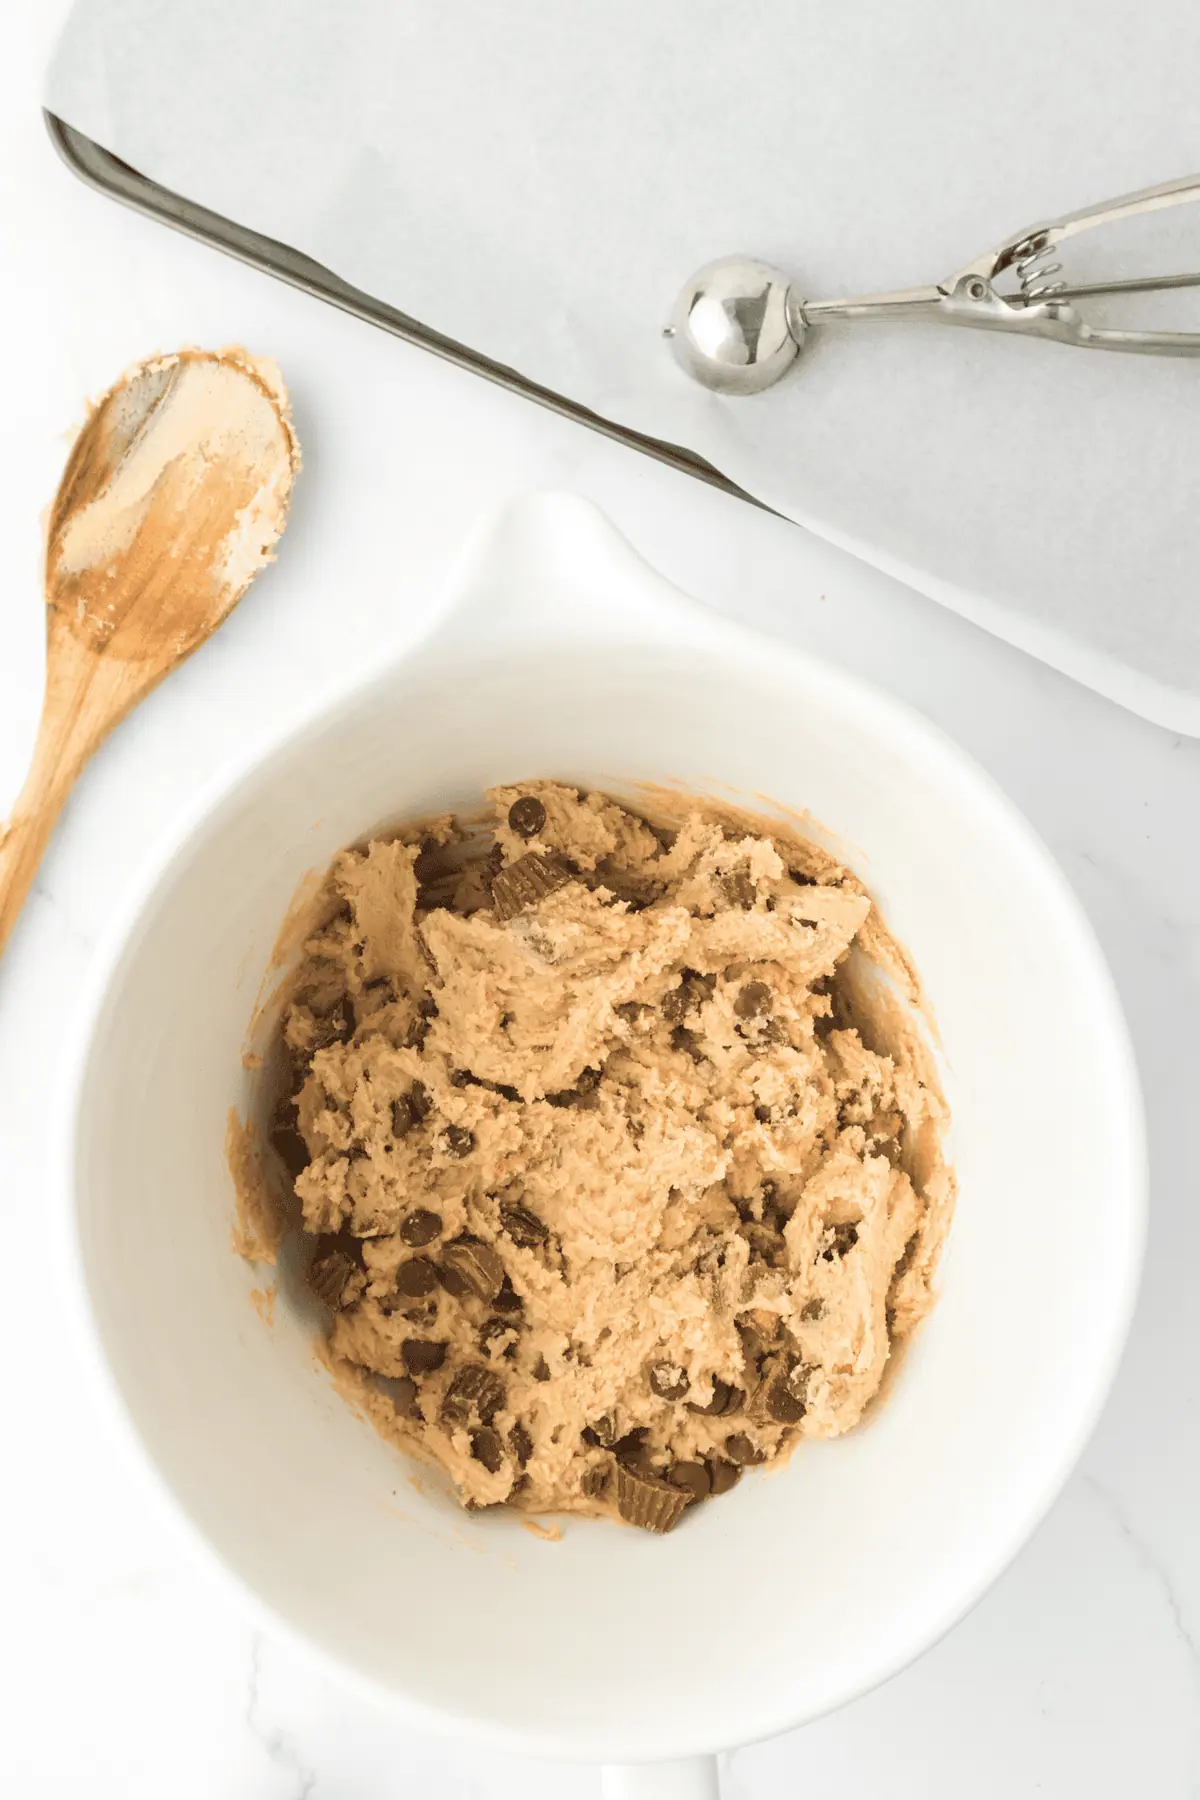
Place dough in freezer.
Place the peanut butter cup cookie dough in freezer and chill dough for 15-20 minutes or in the fridge for 30-40 minutes to help firm up the cookie dough. This will help the cookies from spreading.
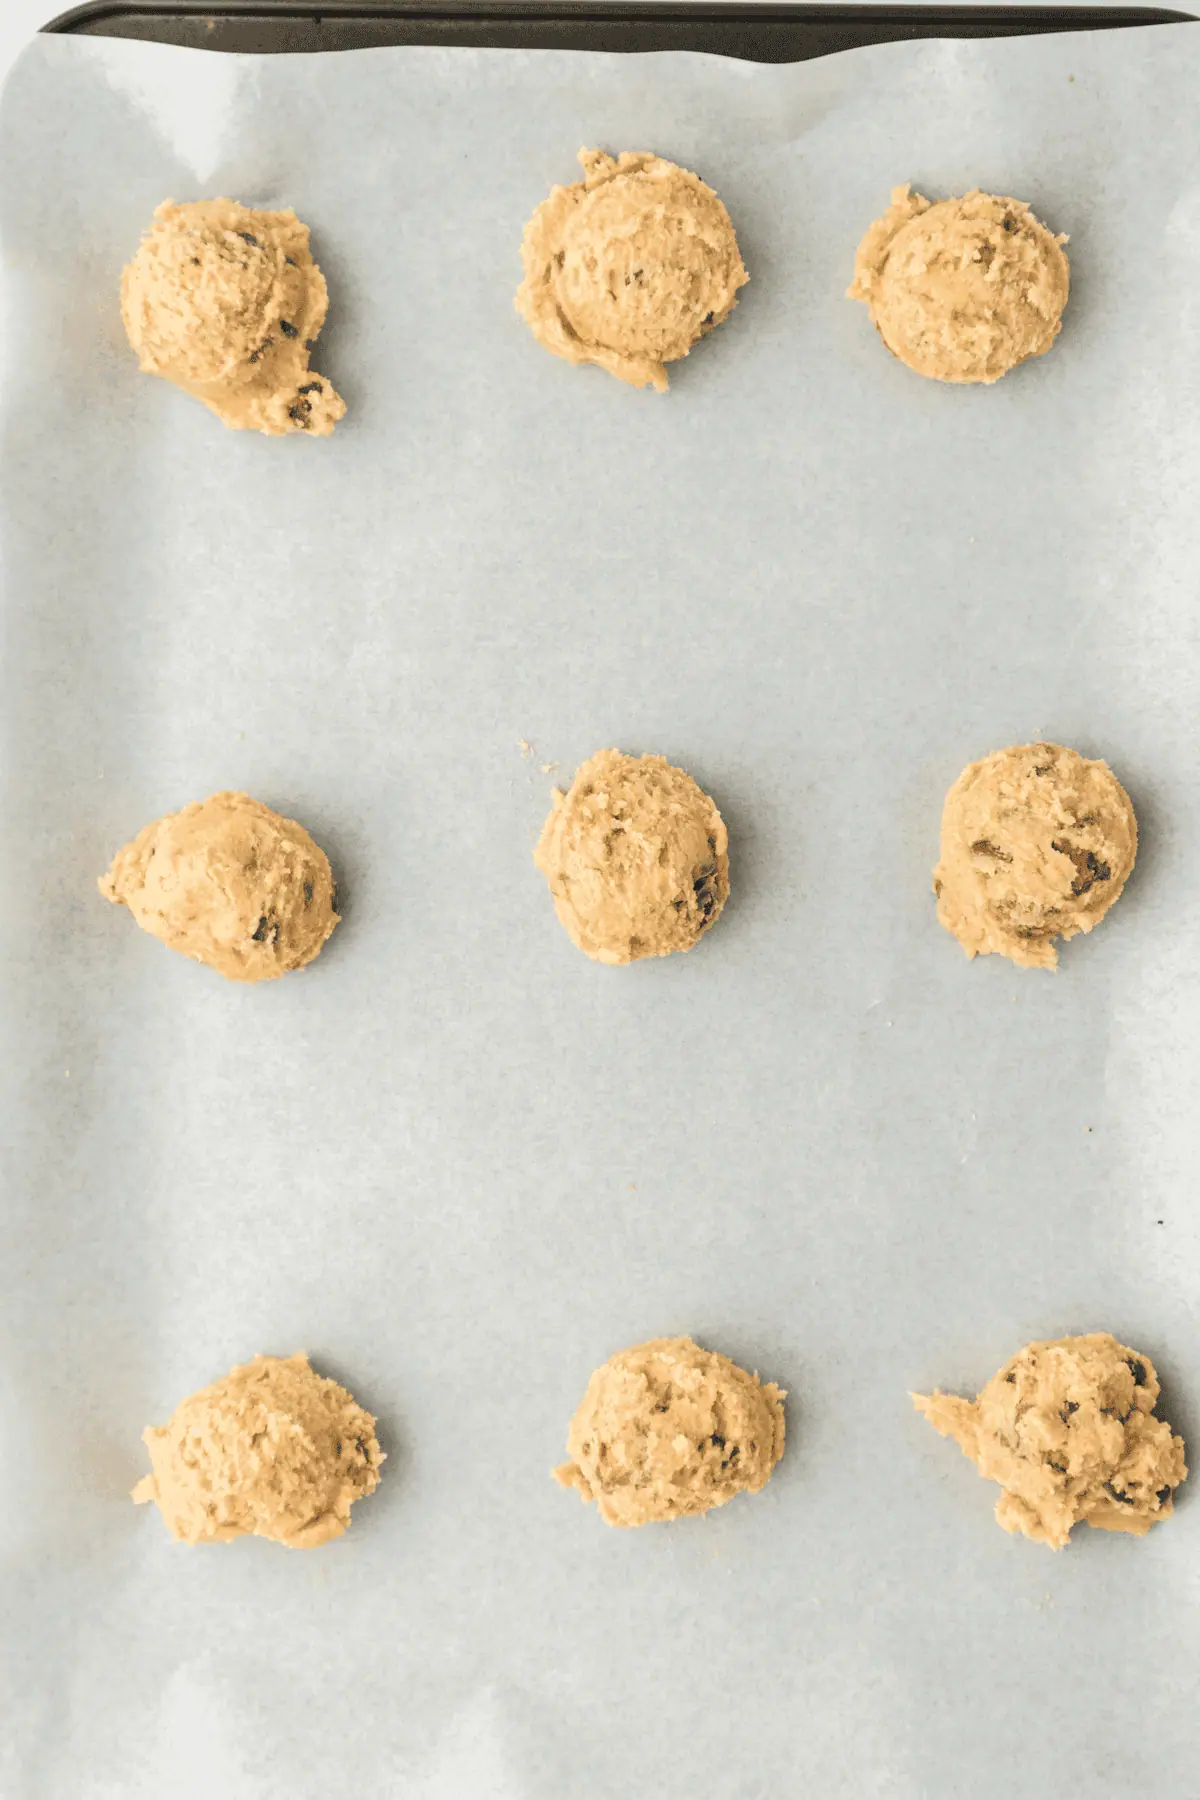
Scoop dough onto baking sheet.
Remove dough from fridge or freezer. Using a 1 inch cookie scoop, scoop dough onto cookie sheet 2 inches apart. Use a fork to lightly press down on the dough and make a crisscross pattern on each cookie. You can use a mini muffin tin instead to prevent your peanut butter cup cookies from melding together.
Bake.
Bake in the oven for 10-12 minutes until edges are set, and tops are puffy and soft.
Allow cookies to cool.
Remove cookies from the oven. Cool on baking sheet for 5 minutes before transferring to wire rack for cooling. Allow them to cool completely before serving.

- Measure your flour correctly. I prefer to weigh my ingredients for best accuracy, but if using measuring cups, then spoon the it into your cup and level it off. Do not pack it down or it will end up with too much flour making for a dry cakey cookie that doesn’t spread at all like it should.
- Make sure butter isn’t too soft. This will cause for your cookies to flatten too much while baking. Your butter should be at cool, room temperature. You should be able to press your finger into the butter with some resistance. The butter should not be melted, or so soft you can push your finger straight through. If your cookies are spreading too much, then try with your next batch chilling your cookie dough, for an hour.
- Don’t skip chilling the cookie dough first. it is important to put them in the refrigerator first. This will help firm up the dough to ensure the cookies don’t spread too much. This is an essential part of the recipe instructions.
- Bake the cookies on the center rack – Make sure your cookie sheet is placed onto the center rack of your oven and set to 350oF. If the cookies are baked on the top rack or lower rack of the oven, the tops or bottoms of the cookies may burn.
- Use a cooling rack. You do not want to let your cookies continue to sit on the baking sheet to cool. After five minutes be sure to transfer them to a cooling rack.
Recipe Variations
- Different flavored chips. To add extra peanut butter flavor, you could use peanut butter-flavored chips instead of chocolate chips. You could also use white chocolate chips as a substitute for a white chocolate flavor.
- Use different-sized peanut butter cups. Instead of using mini peanut butter cups, you could use normal-sized peanut butter cups. You will need to chop them into smaller pieces though since they are bigger candies.
- Use a muffin pan. Instead of using a plain parchment-lined cookie sheet, you can use a muffin tin or a mini muffin tin. Using a mini muffin pan will prevent your peanut butter cup cookies from melding together in the oven and will also help your cookies come out in perfect circles and similar in size. Be sure to grease your muffin tin before adding the cookie dough.
Recipe FAQs
Creamy peanut butter works best for this and helps make the cookies chewy, but crunchy peanut butter can also be used.
These Reese’s peanut butter cup cookies will stay fresh in an airtight container for up to 7 days.
Yes, you can freeze these baked cookies in an air tight container for up to 3 months. You can also freeze unbaked cookies. Scoop the cookies onto a parchment lined baking sheet and freeze solid, about 1 hour, and then transfer to a plastic freezer bag. When ready to bake, transfer to a cookie sheet and bake. There’s no need to thaw. Add on a few additional minutes of baking time.
Yes, you can use a regular peanut butter cup instead of mini peanut butter cups, but you will need to chop it up into smaller pieces.
This probably means your butter was too soft. Your butter should be at cool room temperature. You should be able to press your finger into the butter with some resistance. The butter should not be melted, or so soft you can push your finger straight through. If your cookies are spreading too much, try chilling this particular cookie dough with your next batch for an hour. For best results, refrigerate your cookie dough overnight!
Yes, you can make the dough up to 72 hours ahead of time. Simply cover in a large bowl and put in the fridge overnight. Let the dough soften for several minutes before scooping.
More Recipes to Try
Here are some more of my favorite peanut butter desserts to make during the holiday season or whenever the craving strikes! Like my peanut butter oatmeal cookies made with peanut butter chips, or this easy stovetop peanut butter fudge (perfect for gifting!)
And I’m in the mood for peanut butter but don’t want to turn the oven on the I love mixing up a batch of these peanut butter rice krispie treats or my decadent no bake peanut butter pie!

Reese’s Peanut Butter Cup Chocolate Chip Cookies
Ingredients
- 1 ¾ cups (210 g) all purpose flour spooned and leveled
- 1 teaspoon baking soda
- ½ teaspoon baking powder
- ½ teaspoon salt
- 1 Tablespoon Cornstarch
- 1 cup (2 sticks, 226 g) unsalted butter softened to room temperature
- 1 cup (213 g) packed light brown sugar
- 1 cup (200 g) granulated sugar
- 1 large egg room temperature
- 1 ½ teaspoons vanilla extract
- 1 cup (270 g) smooth peanut butter creamy
- 1 cup mini Reese’s Peanut Butter Cups chopped in half
- ½ cup (85 g) semi-sweet chocolate chips
Instructions
- Preheat oven to 350°F (177°C) degrees. Line a cooking sheet with parchment paper.
- In a medium size bowl, whisk together the flour, baking soda, baking powder, cornstarch and salt. Set aside.
- Using a stand mixer with a paddle attachment, or a hand mixer, on medium high speed cream butter, brown sugar and granulated sugar together until smooth, about 2 minutes.
- Add the egg, vanilla and peanut butter, and mix until completely combined.
- Gradually add dry ingredients until well blended.
- Using a rubber spatula or wooden spoon, fold in the chopped Reese’s cups and chocolate chips.
- Place in freezer and chill dough for 20 minutes (or in the refrigerator for 40 minutes).
- Using a 1 inch cookie scoop, scoop dough onto cookie sheet 2 inches apart. Use a fork to make a crisscross pattern on each cookie.
- Bake for 10-12 minutes until edges are set and golden brown. Remove from the oven. Cool on baking sheet for 5 minutes before transferring to wire cooling rack to finish cooling completely.
Notes
- Make ahead/Storage: They should be stored in an airtight container for up to 7 days. You can make the dough up to 72 hours ahead of time. Simply cover in a large bowl and put in the fridge overnight. Let the dough soften for several minutes before scooping.
- Freezing: These cookies can be frozen up to 3 months. You can also freeze unbaked cookies. Scoop and freeze until solid for an hour then transfer to a plastic bag. When ready to bake, do not thaw, and bake as directed. Add on a couple minutes of bake time.


