This Post May Contain Affiliate Links. Please Read Our Disclosure Policy.
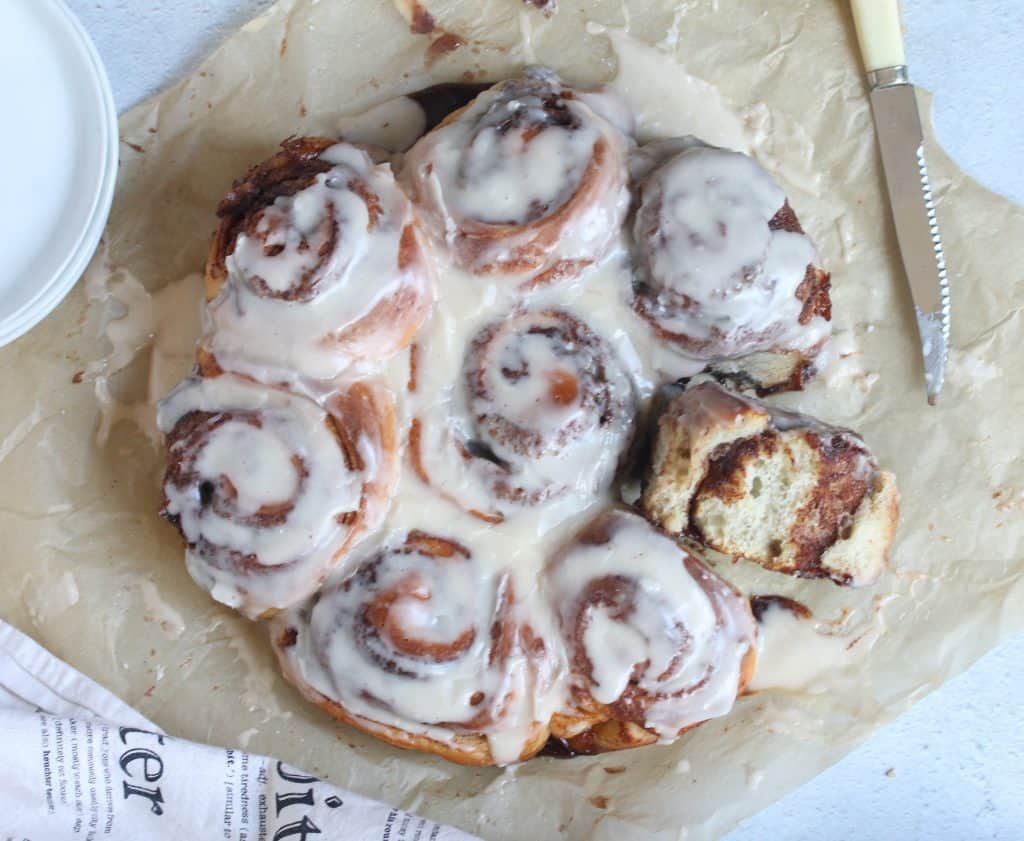
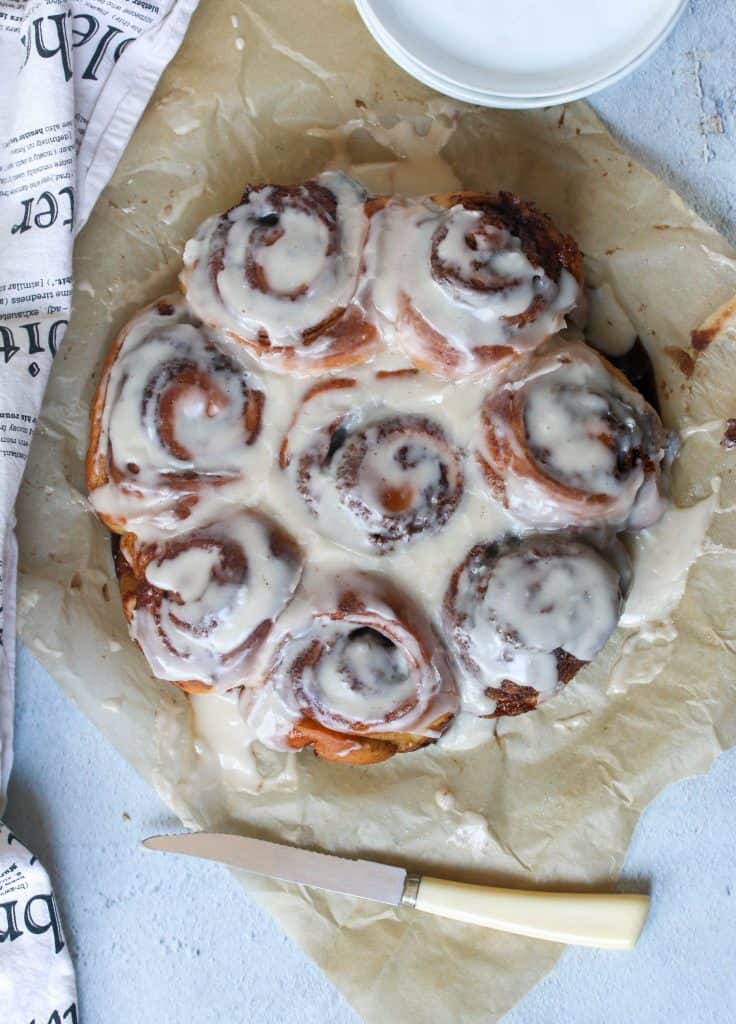
These sourdough cinnamon rolls are hands down the best cinnamon buns I have ever eaten. Light and fluffy cinnamon rolls that use a sourdough starter. Perfect recipe for breakfast or hosting a brunch!
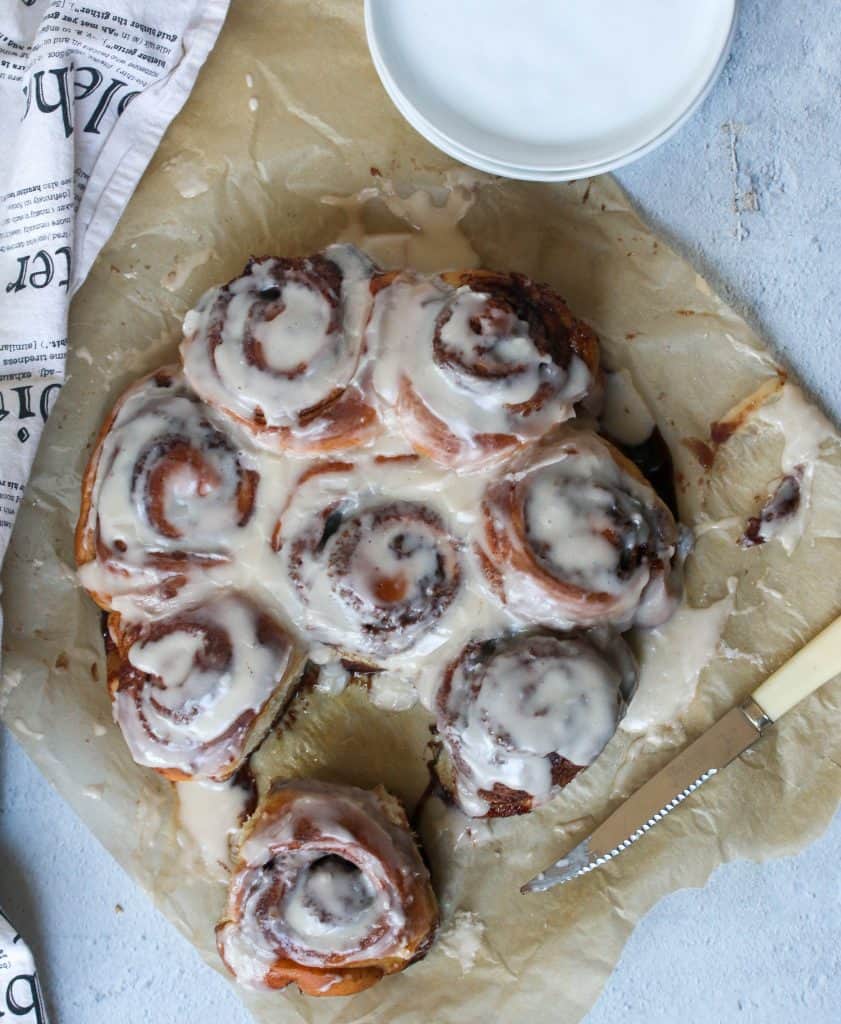
Listen I’ve had a few cinnamon rolls in my day. I’ve made them, bought them, devoured. But I might just declare these the best cinnamon rolls I’ve ever had.
They are sourdough cinnamon rolls so they do take some time and a nice bubbly active sourdough starter. But in the end every minute you spend making these will be SO worth it. Seriously. Light, fluffy, Cinnamony (not a word but it’s cool). Finger licking. Save the last one for yourself and don’t feel guilty kind of amazing.
You’ll see. Trust me…
Table of contents
What Is Sourdough?
Ok let’s back things up a bit….
Sourdough is basically an ancient way of making bread. Sourdough doesn’t rely on commercial yeast, but on wild yeast. By simply combining flour and water, you create a live fermented culture from the wild yeast found on the grains of the wheat that the flour is made from. The more it is “fed”, meaning fresh flour and water, allows the wild yeast to multiply.
Because sourdough relies on wild yeast, the process can take much longer than commercial yeast bread recipes. But the complex flavor and texture is far superior of any other bread you will ever eat.
For more Sourdough 101: What Is Sourdough?<– click here.
Is Sourdough Bread Better For You?
Yes. 1000% yes. Sure at first glance, the nutrition label might look the same to conventional bread. But the long fermentation process is what has sourdough sailing past the conventional bread loaves by a mile for its health benefits.
- No weird stuff! Sourdough bread of any kind is made with just a few simple ingredients compared to store-bought bread that has added chemicals and preservatives.
- More nutrients unlocked. Whole grains, in general, that bread is made with can contain lots of great minerals. But the body can have a hard time absorbing those minerals due to phytic acid that is present in grains. But the lactic acid created from the fermentation process helps to break down the phytic acid allow your body to be able to absorb more of those minerals than you would be able to with bread made from commercial yeast.
- More easily digested. Also, sourdough bread can be much more easily digested and enjoyed, especially those with a gluten sensitivity. The long fermentation process helps to already start the process of breaking down the gluten in the bread making it much easier to digest.
So more vitamins, minerals, and it’s easier to digest. Basically, sourdough is awesome.
Make Your Sourdough Starter…
If you haven’t gotten around yet to making your sourdough starter then let’s get going! What are you waiting for? It will take about 5 days to make your starter before you can attempt this bread. But it will be worth it. Here is the full guide on How To Make Sourdough Starter From Scratch.
Once you have your starter raring to go then you will need to feed and mantain your starter.
Ingredients Needed
This sourdough recipe uses the sweet dough recipe from Clever Carrot‘s cookbook, Artisan Sourdough Made Simple.
For the dough:
- Your bubbly, active starter – you’ve got that ready to go right? 🙂 Good.
- All Purpose Flour – my preference is King Arthur Flour, organic if you can.
- Egg – One large, room temperature egg. Place your egg in a bowl of warm water for 10 minutes.
- Sugar – I used granulated white sugar, this will help sweeten the dough.
- Milk – I like to use full fat milk, but I think a lower fat milk would be fine. I haven’t tried this with alternative milks.
- Warm water – Warm is best to keep that yeast alive and happy.
- Salt – Salt is very important when making bread. It helps to strengthen the dough. You can read more here about the role of salt in baking.
- Unsalted Butter – I always recommend using unsalted butter vs. salted butter. Different brands of butter will add varying amounts of salt, so it’s better to use unsalted butter and add the salt yourself. If you only have salted butter then be sure to reduce the salt in the recipe. You can read more here about Unsalted Butter Vs. Salted Butter In Baking.
For the filling:
- Softened, unsalted butter – You want to use very soft butter so it spread easily on the dough and doesn’t tear the dough.
- Light brown sugar – Of course this adds flavor and sweetness. You can also make your own homemade brown sugar.
- Cinnamon – Of course a cinnamon roll wouldn’t be one without cinnamon.
For the glaze:
- Confectioner Sugar – this is an easy simple powdered sugar glaze.
- Butter – A little melted butter adds richness and flavor.
- Vanilla extract – Of course pure vanilla is best and adds great flavor!
- Milk – This will help thin out the glaze and make it the perfect consistency to spread on top of your warm rolls.
How to make these sourdough cinnamon rolls
Make the dough:
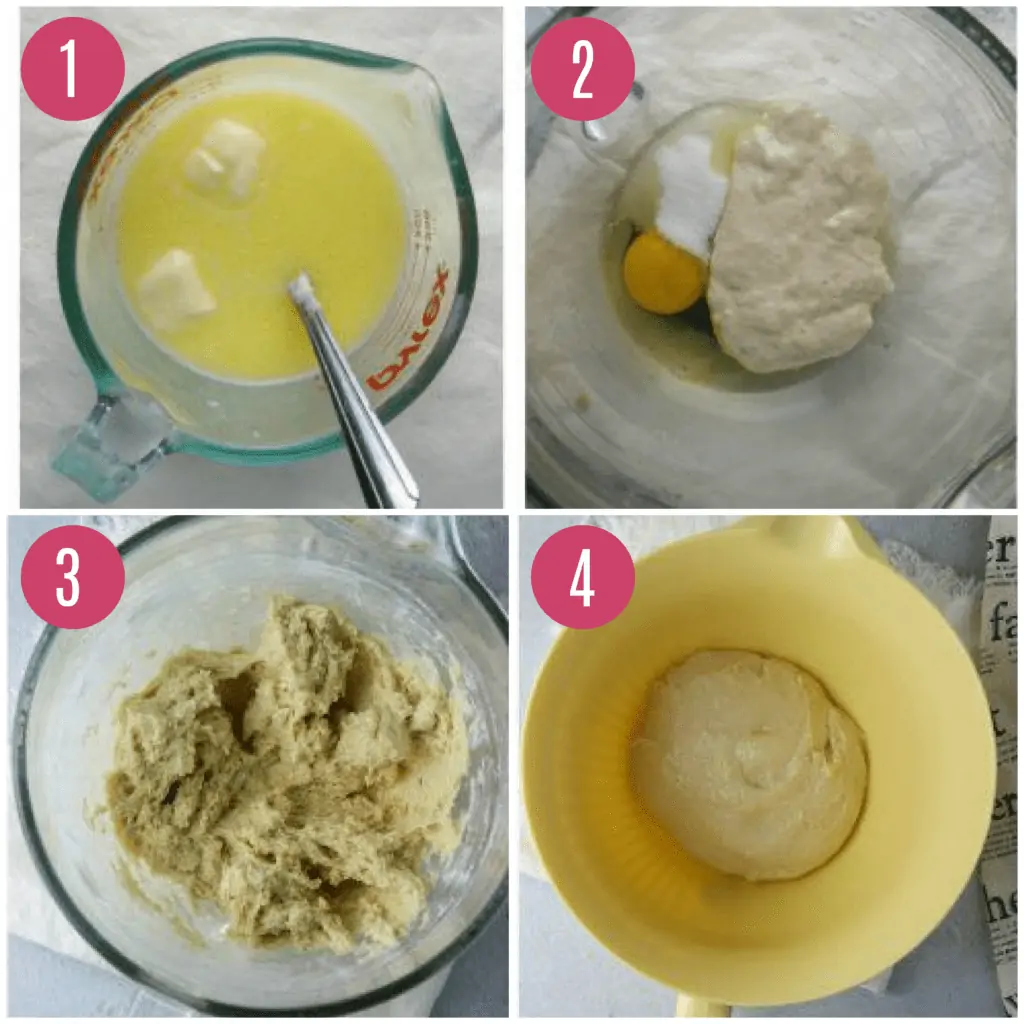
- We want to start by making our sweet dough. You want to warm the milk and butter in a small saucepan (or microwave). Be sure to let it cool slightly before using.
- In your stand mixer, you want to combine the starter, egg, and sugar. Mix this using your paddle attachment. And then add the milk mixture.
- Then add your flour and salt. You want to let the dough rest for about 30 minutes.
- Ad this point, switch to your dough hook attachment, and knead the dough for about 6 to 8 minutes.
Bulk Rise:
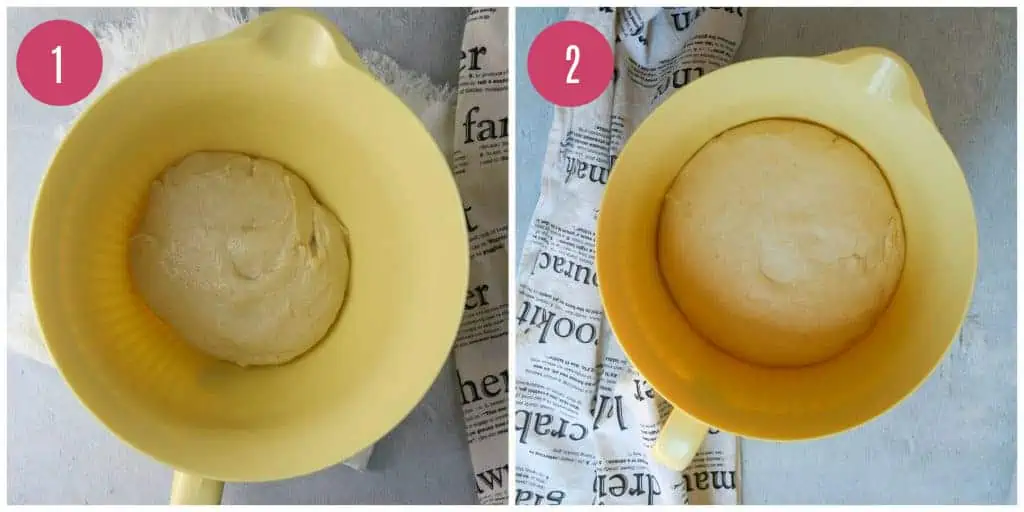
- At this point you want to move the dough to an oiled bowl and cover with a damp towel and let the dough rise, at room temperature for 8 to 10 hours.
- The dough should double in size.
Rolling and filling the rolls:
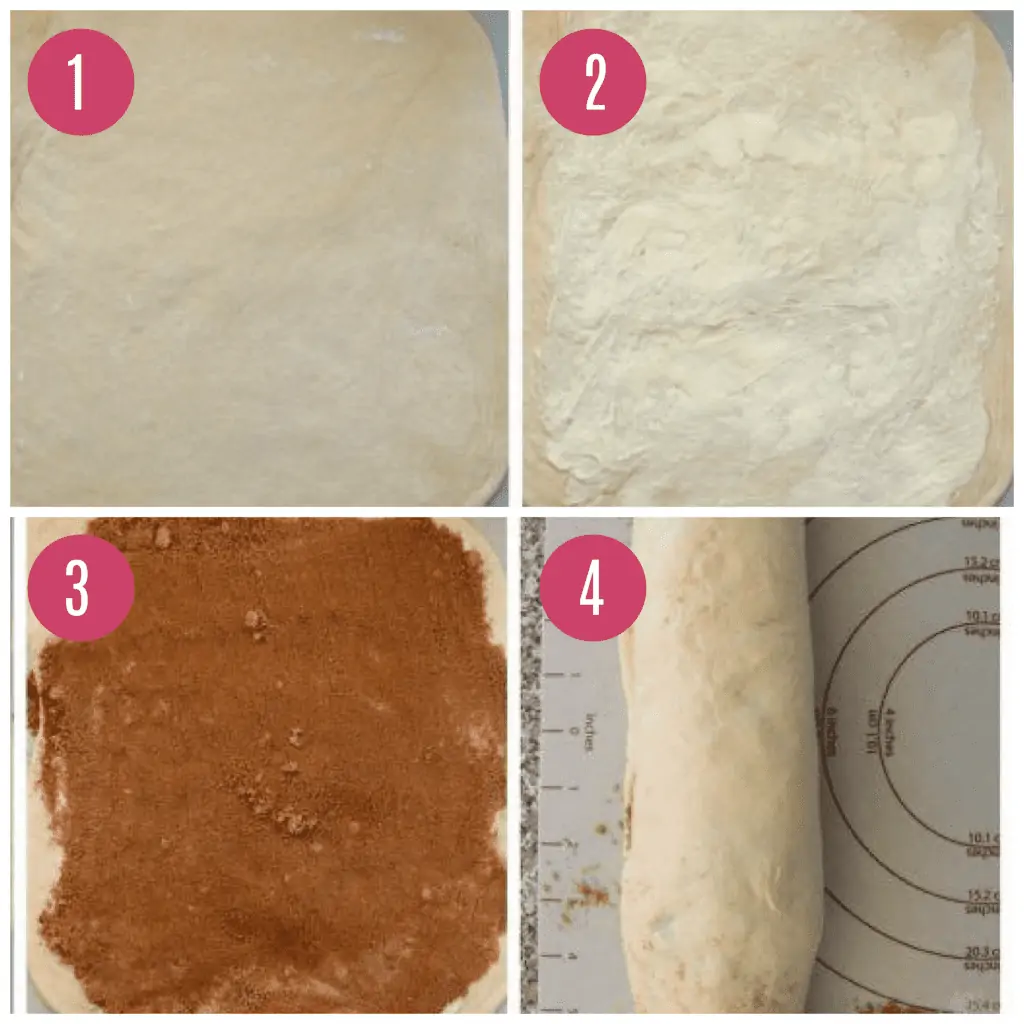
Now that the dough has risen it’s time roll out the dough and add the filling. I adjusted the amount of filling from my 1 Hour Cinnamon Rolls and used a little less since this only made 8 cinnamon buns.
I like to use a pastry mat to roll out my dough.
- You want to lightly flour your surface and roll out the dough to a 12 by 12 inch square.
- Then spread the softened butter.
- Sprinkle on the brown sugar and cinnamon.
- And then roll up the dough into a log.
Shaping Rolls:
Now that our dough is filled and rolled it’s time to cut into rolls. This recipe makes 8 perfect rolls. Here is how I accomplish perfectly shaped cinnamon rolls. My secret…
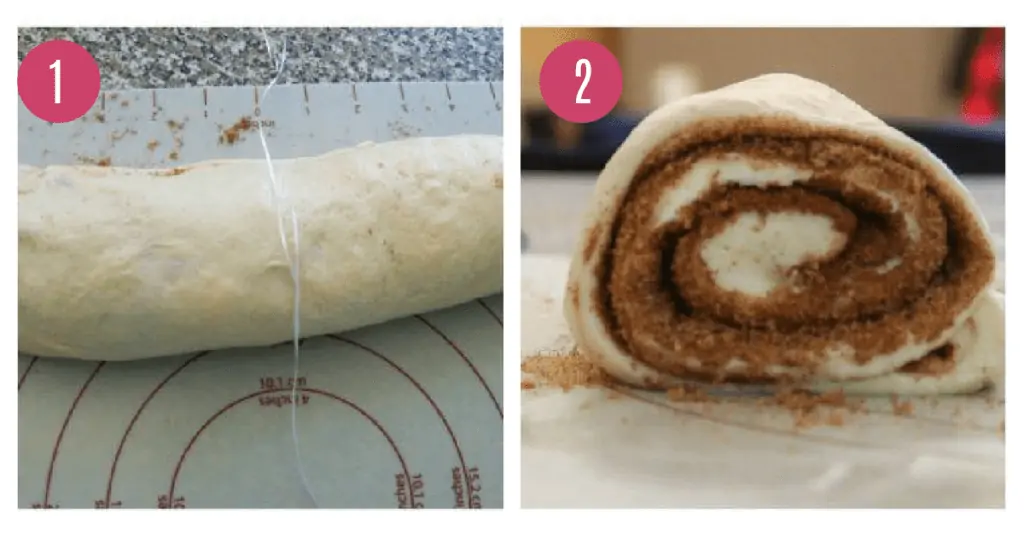
Dental Floss!!! Just make sure it’s not MINT flavored! Or you can use thread. This ensures you don’t squish the dough as you cut through it.
- To cut the rolls, start in the middle of the log. Place the floss underneath the log of dough going perpendicular, then criss cross the floss.
- Pull the floss so it cuts through the dough revealing the beautiful spiral inside! Repeat this to make 8 even sized cinnamon rolls.
Final Rise:
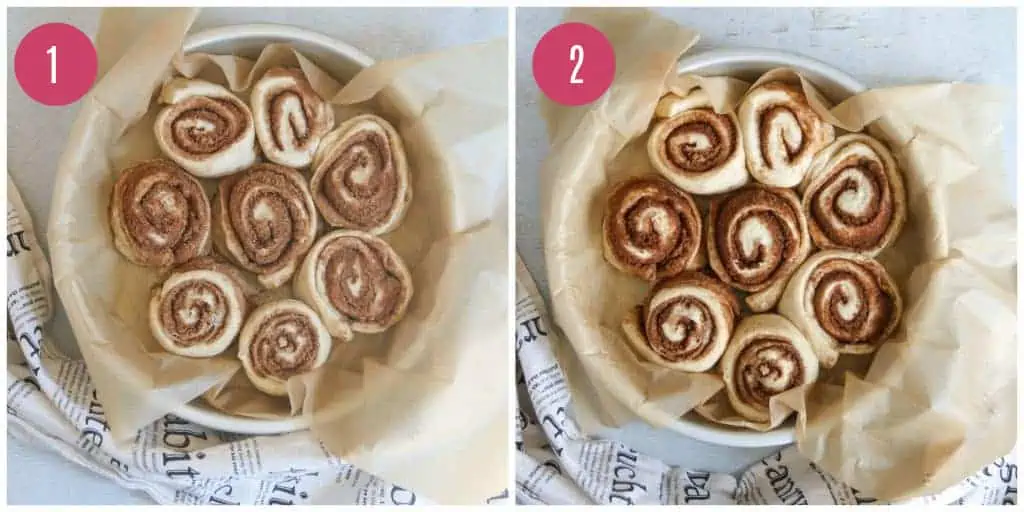
- You want to place the rolls in your pan. I used a 9-inch round cake pan, lined with parchment paper.
- Then cover with a towel and let the rolls rise for another 1- 2 hours until almost doubled in size and puffy.
Bake And Glaze:
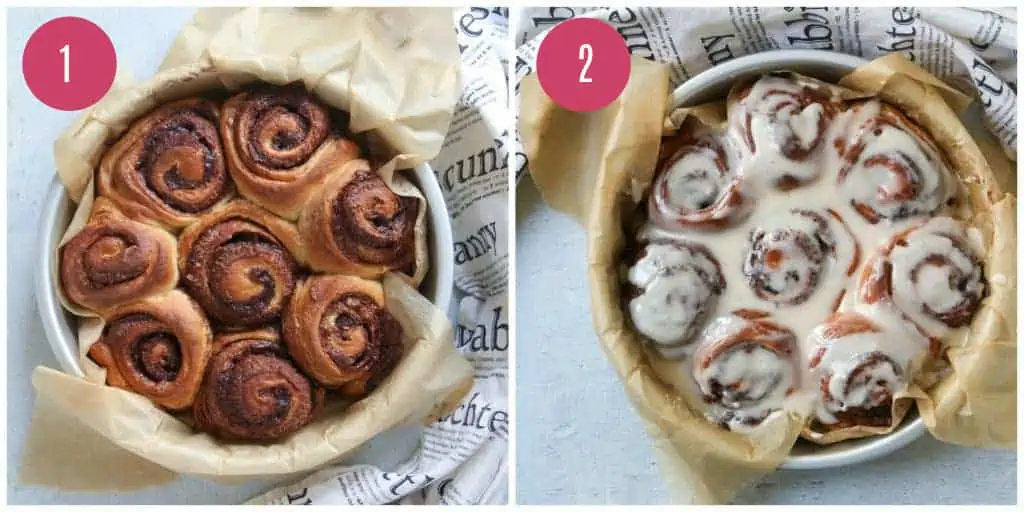
- Then it’s time to bake!!! (Yes all those exclamations are necessary.) It will take about 40-45 minutes in a 350°F oven.
- And then once baked, time to glaaaaaaaaaaze. I like to glaze them while they are still warm.
Seriously, are you drooling on your computer screen yet?
Heather’s Best Baking Tips
- Make sure your starter is active before you start. Drop a small piece in a bowl of water to see if it floats. It it does, then it’s ready! If not, then it may need 1-2 more feedings. The starter should be at it’s peak point (aka doubled in size from when you first fed it – usually within 4 hours).
- Measure Your Flour Using A Kitchen Scale . You can use measuring cups but for best accuracy it’s better use a kitchen scale and weigh out your flour. This ensures you don’t overmeasure, which can result in dense rolls. You can read my post on How To Measure Flour here. Or you can read this post on How To Measure Ingredients (with a video!).
- Damp Towel!! When you let the dough rise overnight, be sure to use a damp towel to cover it so it doesn’t dry out and not rise properly.
- Use Floss (Or Thread). If you use a knife, you risk squishing the dough and not getting a clean cut and neat spiral. Just make sure your floss isn’t mint flavored. Place the floss underneath and then bring it up on either side, criss cross it, and then pull the thread through the dough.
Recipe FAQ’s
This could be because your sourdough starter wasn’t quite bubbly and active enough. Be sure to do the “float test” before you begin. Another culprit could be a cold kitchen (ideally these should rise in a warm environment between 70-80oF). So if your kitchen is colder these will just take longer to rise. Make sure your water is warm. Just like the dough likes a warm kitchen, it will also like warm water to keep it happy and keep it rising.
Sourdough rolls will be fine at room temperature for 4 to 5 days. I think they are best, however, if eaten within the first two days. Once the rolls has cooled completely be sure to cover and store the rolls well. I like to keep them in an airtight container or wrap in plastic wrap.
Absolutely. I just let them cool completely before freezing. If you have the icing on them, you may want to freeze them first, uncovered, until they are frozen solid and then transfer them to a sealable plastic bag. These should freeze well for up to 3 months. I would then thaw at room temperature uncovered. You can always reheat in the microwave for 10-15 seconds until warmed through.
More Recipes To Try
Tools To Make These Sourdough Cinnamon Rolls Recipe
You can check out My Favorite Sourdough Bread Tools and Resources.

Sourdough Cinnamon Rolls
Ingredients
For the Sweet Dough
- 160 g (2/3 cup) milk, whole or 2%
- 28 g (2 tbsp) unsalted butter
- 1 large egg room temperature
- 100 g (1/2 cup) bubbly, active starter
- 24 g (2 tbsp) granulated white sugar
- 300 g (2½ cups) all-purpose flour (I use King Arthur)
- 3 g (1/2 tsp) salt
For the Filling
- 4 tbs. (57 g) unsalted butter very soft
- 2/3 cup (143 g) light brown sugar
- 4 tsp cinnamon
For the Glaze
- 1 cup confectioners sugar
- 1 tablespoon unsalted butter melted
- 1 teaspoon vanilla extract
- 2 tablespoons milk
Instructions
Make the Dough
- Warm the milk and 2 Tbs. butter in a shallow pan or microwave. Cool slightly before using.
- Add the egg, starter, and sugar to the bowl of a stand mixer. Mix to combine using the paddle attachment. With the machine running, slowly pour in the warm milk mixture.
- Add the flour and salt, and continue mixing until a rough dough forms, about 1 minute. Scrape down the sides of the bowl as needed. Cover with a damp towel and let rest for 30 minutes.
- After the dough has rested, switch to the dough hook and knead on medium-low speed for 6-8 minutes. Transfer the dough to a lightly oiled bowl.
- Cover again with a damp towel, and let rise overnight at room temperature until double in size. This can take anywhere from 8-10 hours or more.
Roll and Fill the Dough
- The following morning, lightly flour your countertop to prevent sticking. Gently coax the dough out of the bowl. Let it rest for 5- 10 minutes to relax the gluten. It will be easier to roll out this way.
- With a floured rolling pin, roll the dough into a large rectangle (mine was about 12×12).
- In a small bowl, mix together the brown sugar and cinnamon. Spread the softened butter over the dough, and top with brown sugar and cinnamon mixture.
Roll & Cut the Dough
- Using lightly oiled or floured fingertips, roll it up pressing down as you go. Take your time with this step. You want the log to be somewhat tight so that the swirls stay in tact when baked. Once you get to the end, make sure the dough is facing seam side down.
- To cut the dough and to ensure you don’t squish the spiral, use unflavored dental floss or sewing thread. If you have neither, then use a very sharp knife. To use the floss, I place it underneath the dough in the middle. Bring the floss up on either side, and criss cross it, then pull the floss evenly on both sides so it cuts through the dough. I repeat this with each half (Making 4 logs of even size). Then repeat again to make 8 even sized cinnamon buns (about 1 1/2 inches in size).
Final Rise
- Place the rolls into an 9-inch parchment lined round pan and let rest for about 1-2 hours, or until the dough puffs up. The time can vary depending on the temperature of your kitchen.
Bake the Rolls
- Preheat your oven to 350 F. Place the dough onto the center rack and bake for 40-45 minutes. The tops should be light golden brown and the internal temperature should read 190 F. Cool in the pan for 15 minutes, and then remove to a wire rack.
Make the glaze
- While the rolls are cooling make the glaze. In a small mixing bowl, whisk together the glaze ingredients. You can adjust the consistency by adding a little more milk, or more sugar. Then spread the glaze on top of the rolls (I like to do this while they are still a bit warm).
Notes
- Make sure your starter is active before you start. Drop a small piece in a bowl of water to see if it floats. It it does, then it’s ready! If not, then it may need 1-2 more feedings.
- Measure Your Flour Using A Kitchen Scale . You can use measuring cups but for best accuracy it’s better use a kitchen scale and weigh out your flour. This ensures you don’t overmeasure, which can result in dense rolls. You can read my post on How To Measure Flour here.
- Damp Towel!! When you let the dough rise overnight, be sure to use a damp towel to cover it so it doesn’t dry out and not rise properly.
- Use Floss (Or Thread). If you use a knife, you risk squishing the dough and not getting a clean cut and neat spiral. Just make sure your floss isn’t mint flavored. Place the floss underneath and then bring it up on either side, criss cross it, and then pull the thread through the dough.
- Storage: Store cooled cinnamon rolls, covered, at room temperature for up to 5 days. Or freeze for up to 3 months.
- Adapted From Artisan Sourdough Made Simple cookbook




Storm says
Really good, I’d take down the cinnamon level just a bit, but it’s really good!
Heather says
Thank you Storm! I’m glad you loved them and yes you definitely can use a bit less cinnamon
Adina Meyer says
These are hands down the best cinnamon rolls ever. My friends and family can’t get enough. I sent the recipe to a friend who is also into sourdough. The next week he wrote to me and said, “I’m never making these rolls again.” I said, “You ate all of them, didn’t you?” He admitted that he had. I told him to make them again, just invite people over to share!
Heather says
That’s amazing Adina!!! This just cracks me up 🙂 but I can TOTALLY RELATE…We tend to fight over them and I have to give them away before I’ve scarfed them down all myself!
Michelle says
Hello, quick question on the starter. Do I use the starter when it is at its height of rising or once it has subsided and contracted . Thanks
Heather says
Hi Michelle! I use it at the peak of activity.
Carl Harter says
I fed the sourdough, left it rest overnight, and then fed 99 gr in the morning (33 gr each water, flour, and starter). After two hours, the starter was active, and I started the dough. I mixed by hand, and instead of kneading, stretched and folded three times with a half hour in between. I then let the dough rise until evening, by which time the dough had doubled in size, and I assembled the rolls. I left them sit at room temperature for an hour, and then put the rolls outside at 45-50 F overnight. By morning the dough had finished rising, and I baked them without letting them come to room temperature. Everyone enjoyed them for breakfast, including my daughter who is skeptical of sourdough, and she commented that they did not even taste like they were made with sourdough. Thanks for the recipe!
Heather says
Oh that’s amazing Carl!! I’m so happy to hear! And loved that your daughter loved them as well. You’re so welcome 🙂
Natalie says
What a fantastic recipe. I never made sourdough cinnamon buns. But now I definitely will. This looks delicious!
Heather says
Thanks Natalie!
Jagruti's Cooking Odyssey says
oh my, these cinnamon rolls look divine. Love the idea of sourdough!
Heather says
Thanks Jagruti!
Sam says
Wow these cinnamon rolls look perfect! And that glaze is everything! I love finding new recipes to bake with my starter. Can’t wait to try this one.
Heather says
Thanks Sam! Yes you will love them 🙂
Jo says
That’s amazing looking cinnamon rolls. It looks perfect. Love the flavors here and looks so good!
HEATHER PERINE says
Thank you Jo!!
Nicoletta De Angelis Nardelli says
I like that these sourdough cinnamon rolls are cinnamony and finger-licking good! 😉 They look soft and fluffy. This is an absolutely delicious breakfast!
HEATHER PERINE says
Thanks Nicoletta!
Aditi Bahl says
Am surely trying these today. the recipe sounds an easy preparation and looks delicious. Will try today only. thanks for the share.
HEATHER PERINE says
Let me know how they turn out Aditi!
Jacqueline Debono says
The idea of using sourdough to make cinnamon rolls is so great! They looks scrumptious!
HEATHER PERINE says
Thanks Jacqueline!
Neha says
Wow these rolls turned out fabulous. We polished them off in a matter of few hours. Will definitely make them again.
Heather says
Aw that’s wonderful to hear Neha!
Sues says
Ooh these are SUCH a good idea! It can be hard to find things to do with the extra sourdough starter and these are the PERFECT solution. Yum!
[email protected] says
Thanks Sues! Yes you will love them! It’s a wonderful use 🙂
Monica | Nourish and Fete says
These look absolutely amazing! I’m with you – never met a cinnamon roll I didn’t love, but the idea of sourdough really takes it to the next level.
Heather says
Thanks Monica! Yes the long rising time with sourdough gives these rolls the best texture. Like none other I have had!
Adina says
These turned out amazing! I do not have a stand mixer. After mixing the dough and letting it rest I did a series of stretch and folds then let it rise in the counter overnight. Lovely!
Heather says
Hi Adina! Oh I am so glad you loved them! And so happy they turned out for you even though you didn’t have a stand mixer!
sandra says
Hoping to make these today. Can you make without a stand mixer?
Sandra says
Can these be made without a stand mixer with attachments?
Heather says
Hi Sandra! They definitely can – just make your dough in a mixing bowl with a wooden spoon and then turn the dough onto a lightly floured counter to knead by hand.
Sandra says
Great! One more question. As I am new to sourdough and will be feeding my starter for the first time either today or tomorrow, can I use the “discard” in this recipe? Thank you!
[email protected] says
Hi Sandra! So you want to make sure to use bubbly, active starter – if you are feeding for the first time then I am going to guess your starter isn’t active enough yet for the cinnamon rolls. One quick way to test is to drop some of the starter into a bowl of water and see if it floats. If it sinks, then it needs another feeding (or two) before you can use it in your recipe. Hope that helps!
LaKita says
I love a good cinnamon roll recipe and I am sure that I will fall in love with these after one bite. They look so sweet and delicious!!
HEATHER PERINE says
Thanks LaKita!
Kathy says
Would it work if you put rolls into refrigerator overnight after they are cut and put into pan and bake in the morning? If so, would I put them straight from fridge to oven, or let sit at room temp for awhile?
Heather says
Hi Kathy! Once you have them cut, then yes you can refrigerate them overnight. And then take them back out and let them go through the second rise at room temperature before baking!
Renee says
I would love to know how this method worked out for you. I’m trying to plan ahead for my xmas morning, and I want to send my sister and b.i.l. home with some on xmas eve. If they can take them cold and bake them fresh on their morning, I know they would love it!
Leah says
Hello! If I want to make these then freeze some of them should I wait to add the glaze? Also what would reheating them from the freezer look like? Thank you!
[email protected] says
Hi Leah! Yes if freezing don’t add the glaze until after. And then when ready to enjoy I would let them thaw at room temp and then just warm in an oven (200F) and then add the glaze!
Leah says
Thank you so much for your response! I just made these for the first time & they are delicious! The sourdough gave such an interesting complexity to a familiar food – thanks for sharing this recipe!
[email protected] says
I am so glad you liked them!! They were sooo good! And yes I loved the sourdough aspect to them!
TayDowns says
Delicious recipe! My roommate and I added about 3 tbsp of cream cheese to the glaze and loved the flavor, would recommend!
Heather says
Hi TayDowns! I’m so glad you loved the recipe! And Yes I LOVE adding cream cheese to the glaze 🙂 Thanks for recommending!