This Post May Contain Affiliate Links. Please Read Our Disclosure Policy.
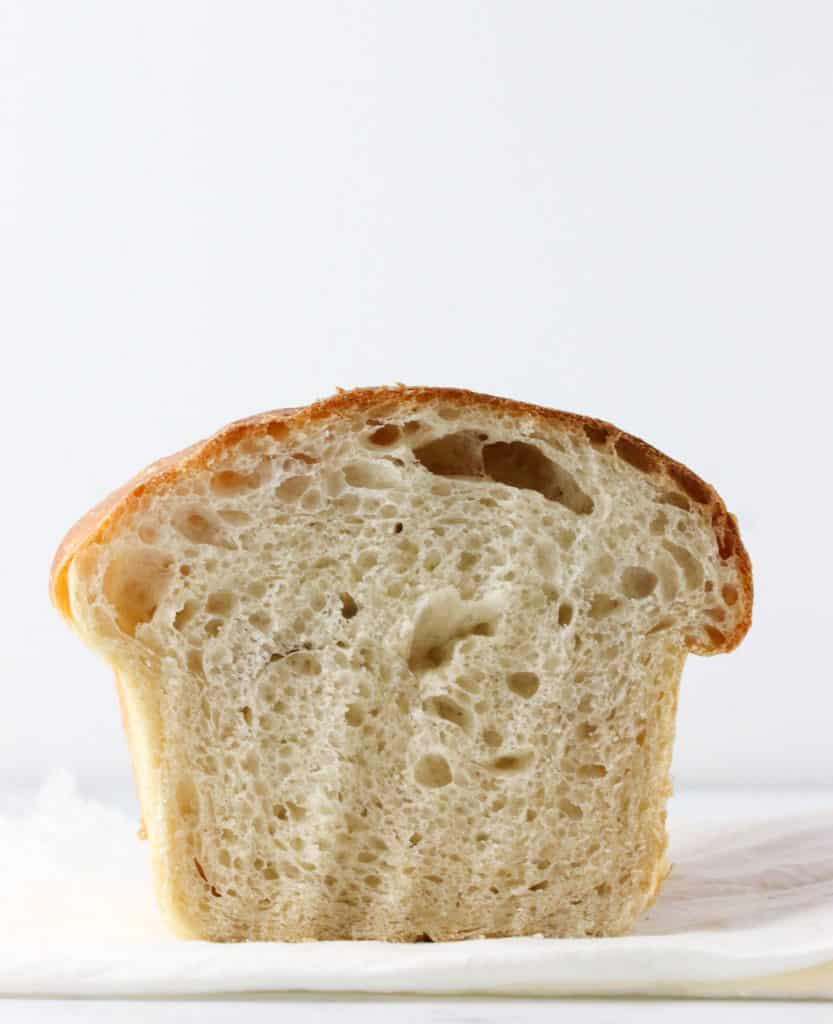
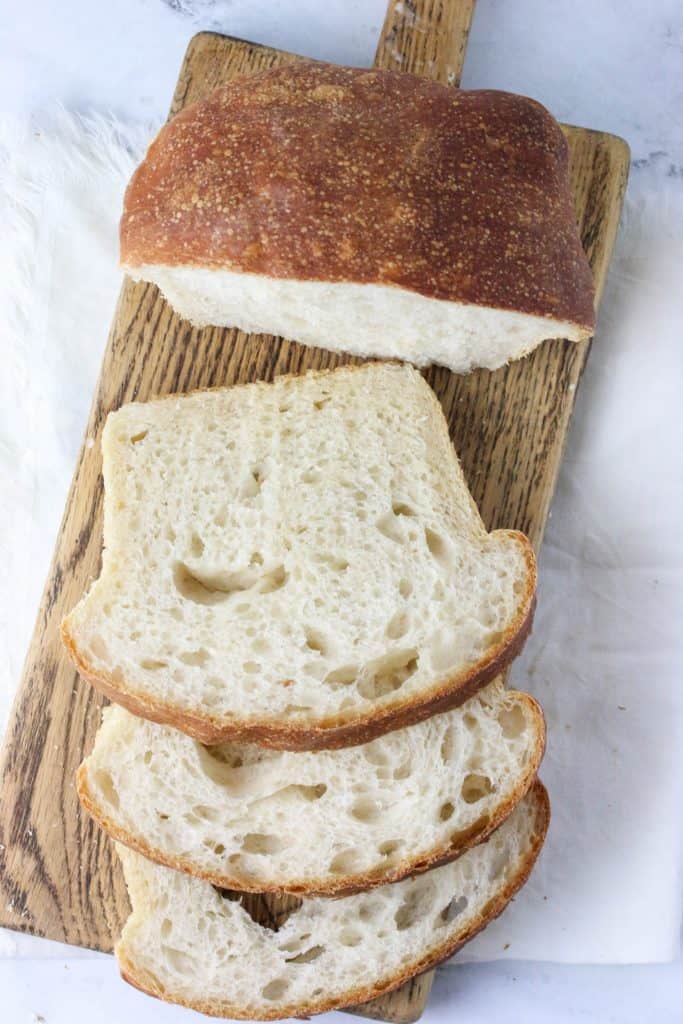
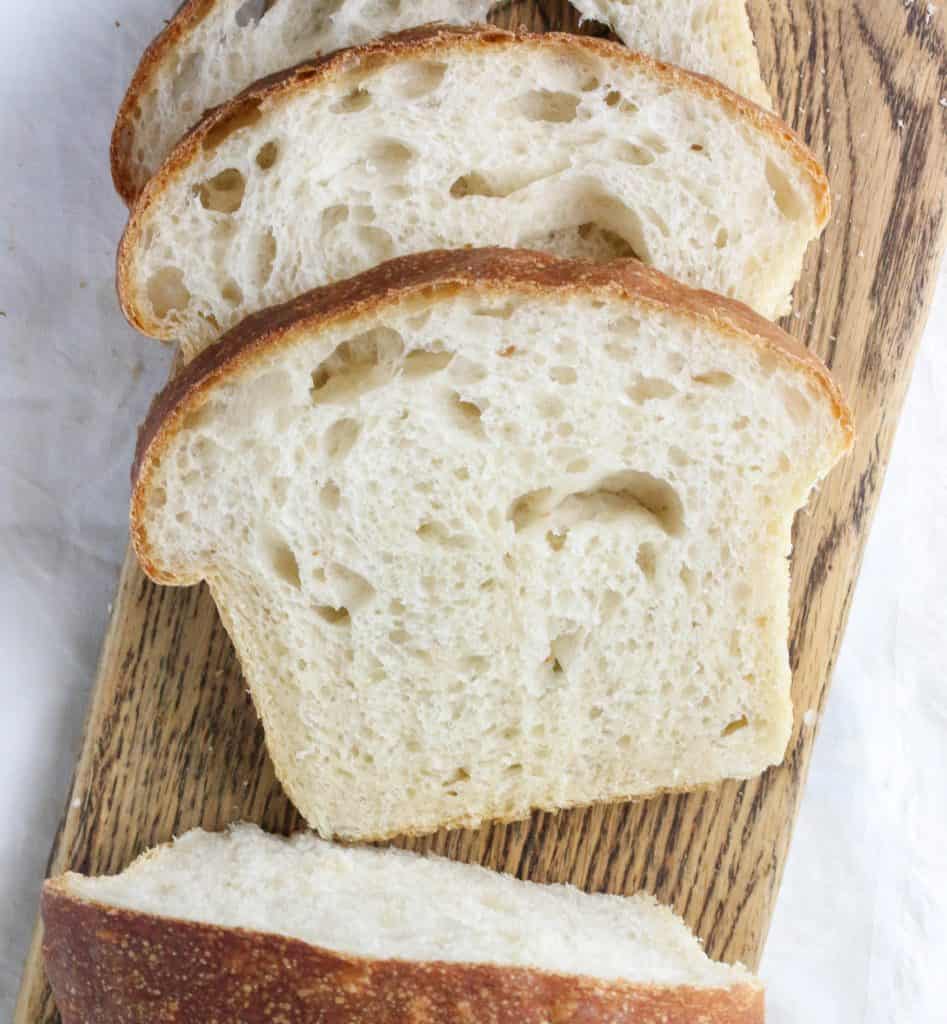
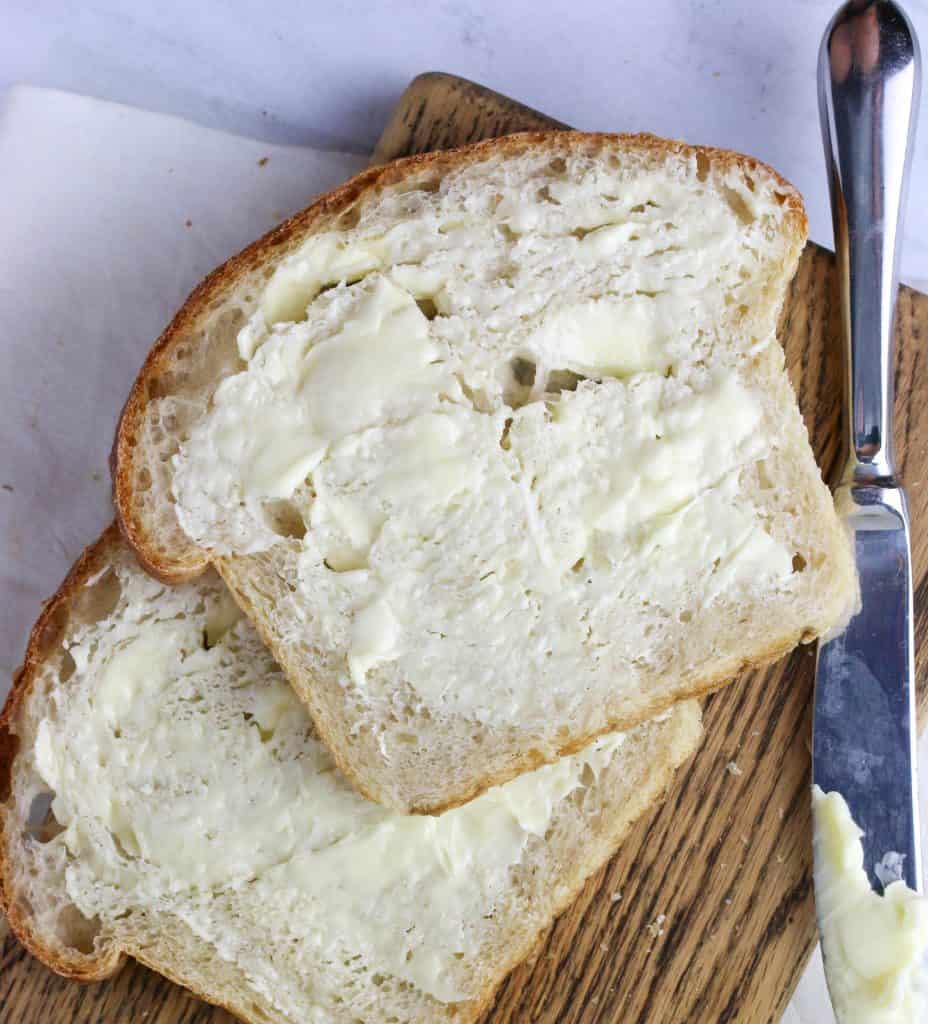
Soft, fluffy sourdough sandwich bread. Oh this is what dreams are made of! I’ve made so many loaves of this bread lately. I’ve turned it into avocado toast, BLTs, and just simply gifted it to friends because that’s how I roll. I have all the step by step photos, tips and tricks for you to master this soft sourdough sandwich loaf at home.
I’ve been pretty obsessed with baking with my Sourdough Starter these past few months stuck at home. It’s like part science. Part magic. And 100% holy moly deliciousness. In fact I created this free e-mail series, Sourdough Simplified to help you get started making sourdough and take away some of the confusion.
I’ve been baking up this Sourdough Bread Recipe (From Starter!) about once a week. I’ve ventured out to make some Sourdough Brioche Bread to make crazy good french toast. Some Whole Wheat Sourdough Sandwich Bread to make amazing sandwiches each day. And let’s not forget about the weekends. Those are reserved for what might be the BEST Sourdough Cinnamon Rolls I have ever eaten.
So this time, a soft sourdough sandwich white bread. Because this is what all sandwiches deserve.
Ok but let’s back it up a bit. Maybe you’re new to sourdough.
What Is Sourdough?
Sourdough is basically an ancient way of making bread. Sourdough doesn’t rely on commercial yeast (aka those little packets you have bought at the store), but on wild yeast. Wild yeast is everywhere around us and even on us!
By simply combining flour and water, you create a live fermented culture from the wild yeast found on the grains of the wheat that the flour is made from. The more it is “fed”, meaning fresh flour and water, allows the wild yeast to multiply.
Because sourdough relies on wild yeast, the process can take much longer than commercial yeast bread recipes. But the complex flavor and texture is far superior of any other bread you will ever eat.
For more Sourdough 101: What Is Sourdough?<– click here.
Is Sourdough Bread Better For You?
Yes. 1000% yes. Sure at first glance, the nutrition label might look the same to conventional bread. But the long fermentation process is what has sourdough sailing past the conventional bread loaves by a mile for its health benefits. Plus it’s made with just a few simple ingredients compared to store-bought bread that has added chemicals and preservatives.
Whole grains, in general, that bread is made with can contain lots of great minerals. But the body can have a hard time absorbing those minerals due to phytic acid that is present in grains. But the lactic acid created from the fermentation process helps to break down the phytic acid allow your body to be able to absorb more of those minerals than you would be able to with bread made from commercial yeast.
Also, sourdough bread can be much more easily digested and enjoyed, especially those with a gluten sensitivity. The long fermentation process helps to already start the process of breaking down the gluten in the bread making it much easier to digest.
So more vitamins, minerals, and it’s easier to digest. Basically, sourdough is awesome.
Make Your Sourdough Starter…
If you haven’t gotten around yet to making your sourdough starter then let’s get going! What are you waiting for? It will take about 5 days to make your starter before you can attempt this bread. But it will be worth it. Here is the full guide on How To Make Sourdough Starter From Scratch.
Once you have your starter raring to go then you will need to feed and mantain your starter.
Want to jump in to sourdough but don’t want to make your own starter? Totally fine! Just buy a sourdough starter and it will be ready to use in a couple days.
Ingredients Needed
The best part about this sourdough sandwich bread is that it requires very few ingredients. I think that’s what I love about making sourdough anything! Just simple, real ingredients. Six ingredients. That’s it!
- Sourdough starter
- Water
- Sugar
- Flour
- Salt
- Oil
Ingredient Notes
- Water – I have made this with my tap water no issues, but if you’re concerned about the quality of your tap water then use filtered or bottled water to be safe.
- Flour – I used a combination of bread flour and all purpose which gives it great structure and a soft loaf at the same time. You can use 100% AP flour but the bread may be harder to shape.
- Salt – Different types of salt can vary by weight. I used kosher salt for the best pure salt taste.
- Oil – I use a neutral tasting oil such as canola or vegetable oil but I think any oil would work here like grapeseed or olive. I haven’t tested it without coconut oil, however.
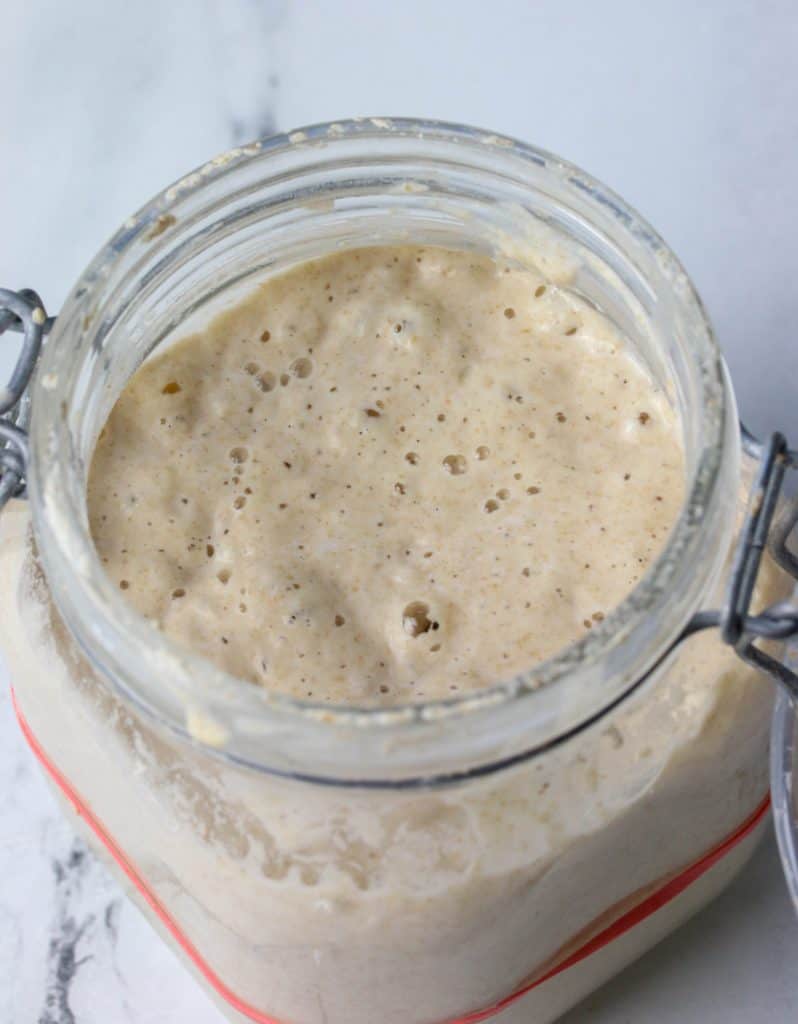
Start With An Active Starter
You want to make sure to start with an ACTIVE STARTER. An active starter is a starter that has doubled in size and you use it when it’s at it’s peak of rising. This is usually about 4 hours after feeding it (if you have been storing the starter in your fridge then it may take a couple feedings to get the starter to an active bubbly stage where it doubles in size within 4 hours).
The time it takes for it to double in size can vary depending on water temperature and room temperature. Warmer = rises faster. Colder = rises slower.
How can you tell when your starter is ready?
I have two ways:
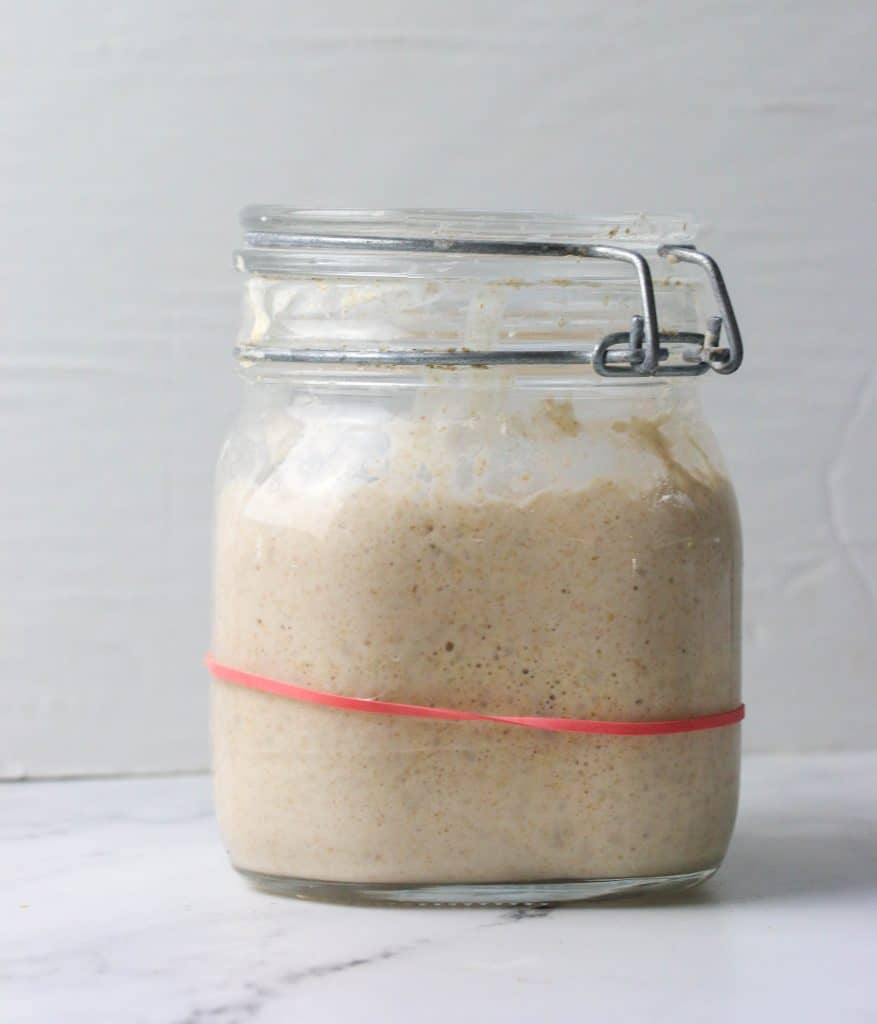
1. The Rubberband trick
Place a rubberband around your starter jar where the height of the starter starts when you feed it. And then when you see it’s doubled in size, it’s ready! Like so…
Update: You can also use a sharpie to mark the outside of your jar! Will wash right off!
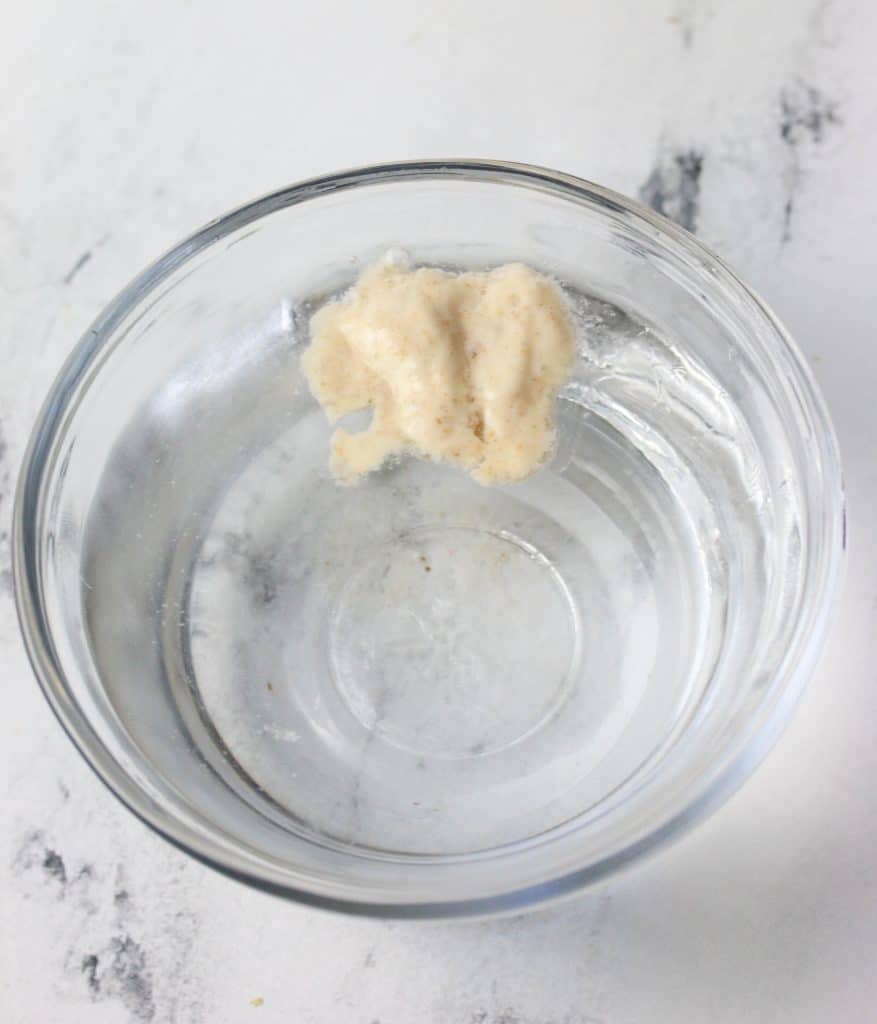
2. The Float Test
Still not sure? Take a spoonful (just be careful to not deflate the bubbles) and place in a bowl of water. Does it float? If it does, then you’re ready! If it doesn’t let the starter continue to bubble away before using it.
Making The Sourdough Sandwich Bread Dough
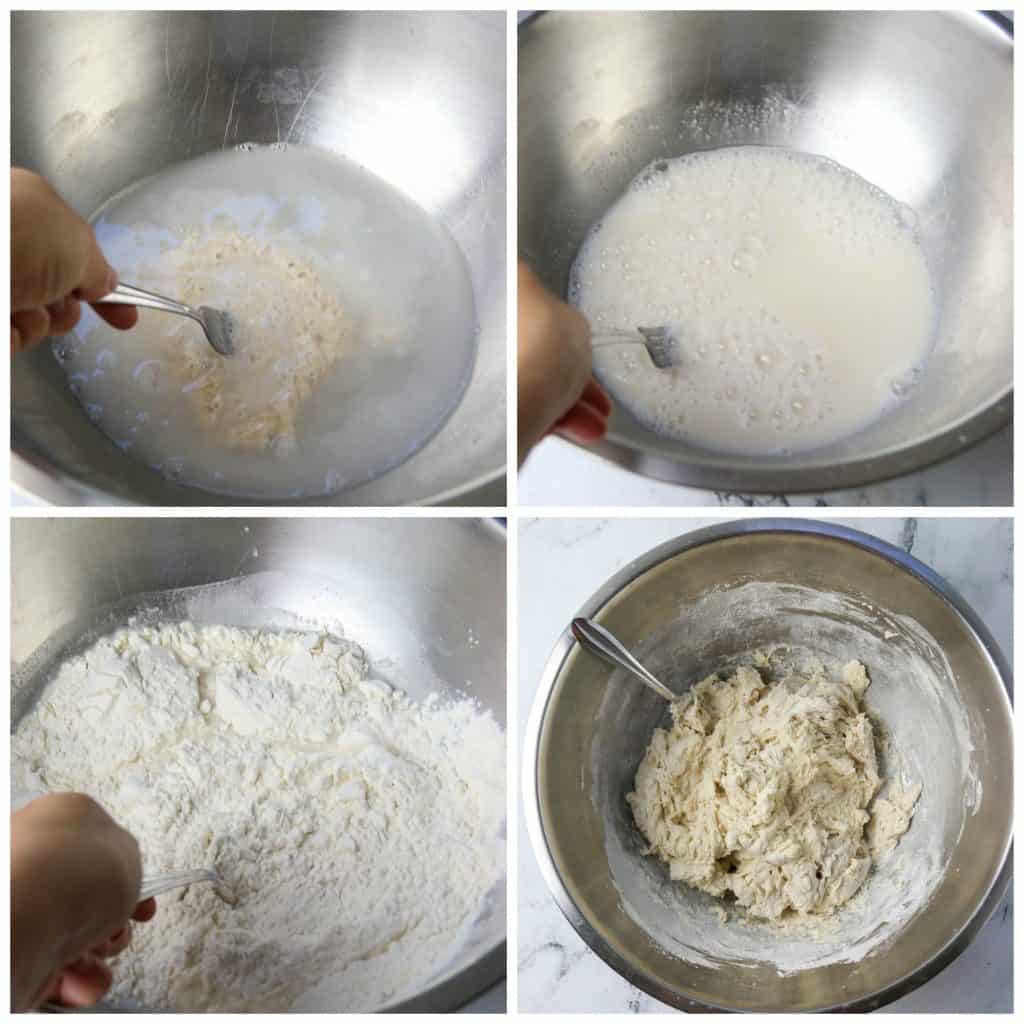
- Ok now that your starter is ready time to make that dough! You want to first stir together your active starter, water, sugar and oil.
- Then go ahead and stir in your flour and salt. It will be quite shaggy at first. I stir with a fork then I just get in there with my hands. Nothing. More. Satisfying.
- Cover with a damp towel for about an hour then work into a smooth ball. I do this by bringing the edges up to the center and the flip it over. And let the dough rise, at room temperature for 8 to 10 hours. I prefer doing this overnight!
Shaping The Dough
Now you can let the dough rise all day and bake it up at night, or start the dough in the P.M. like I do and then it’s ready to be shaped and baked the next morning. No way is wrong. Do what works for you.
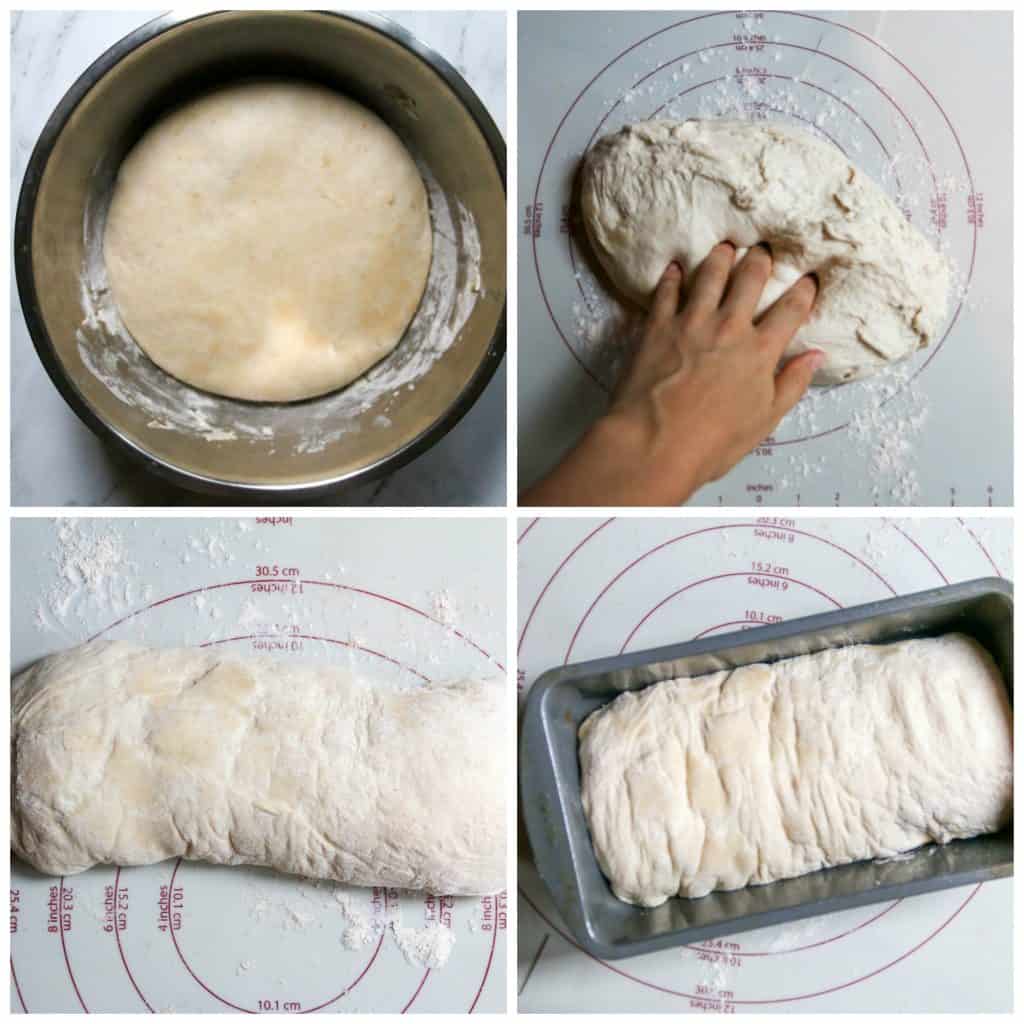
- About 8-10 hours have passed and it’s doubled in size it’s time to shape the dough.
- Shaping the dough is pretty simple. I just scrape the dough onto a lightly floured counter. Then just dimple the dough with your fingertips to release any air bubbles.
- Roll the dough into a log and tuck the ends. Let it hang out for about 5-10 minutes to let the gluten relax. And then tighten the shape with your hands. Just cup the dough and pull it toward you.
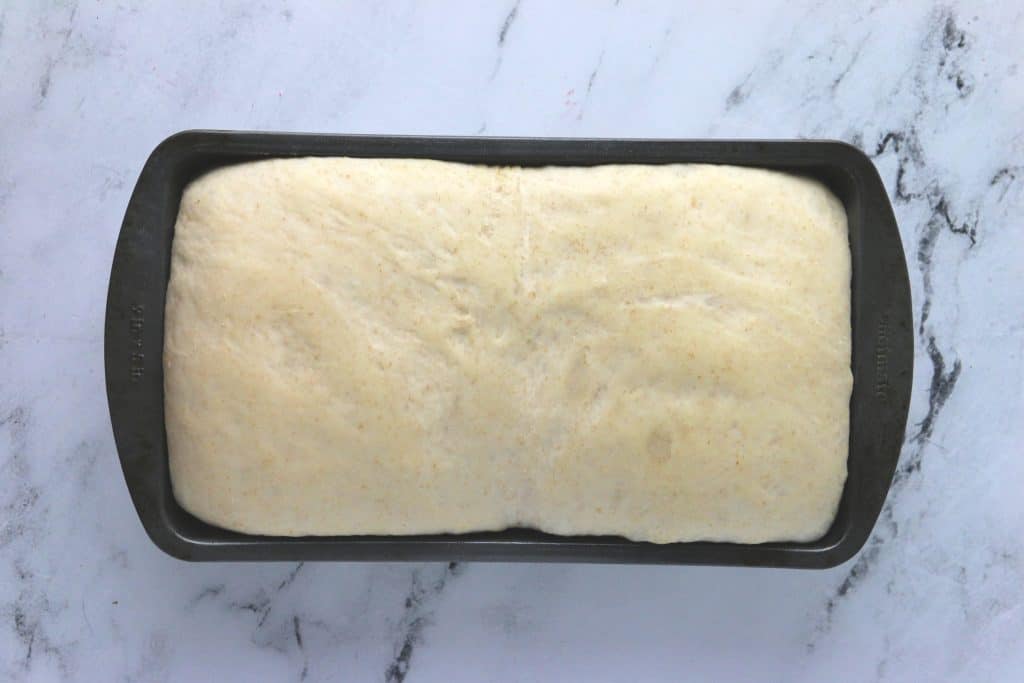
- And then it’s time to place it in an oiled loaf pan to go through a second rise!
Final Rise
You want to place the dough into an oiled loaf pan. Be sure to cover your dough. And now it needs to rise for another 1 1/2 – 2 hours until the dough rises about an inch above the rim of the loaf of the pan.
This time can vary depending on how warm your kitchen is. The colder the kitchen the longer it will take! Ideally, the bread would rise in a warm kitchen, about 75oF. You can always put your bread somewhere warm, or try putting it up high too – like above your fridge is always a good spot.
Time To Bake!
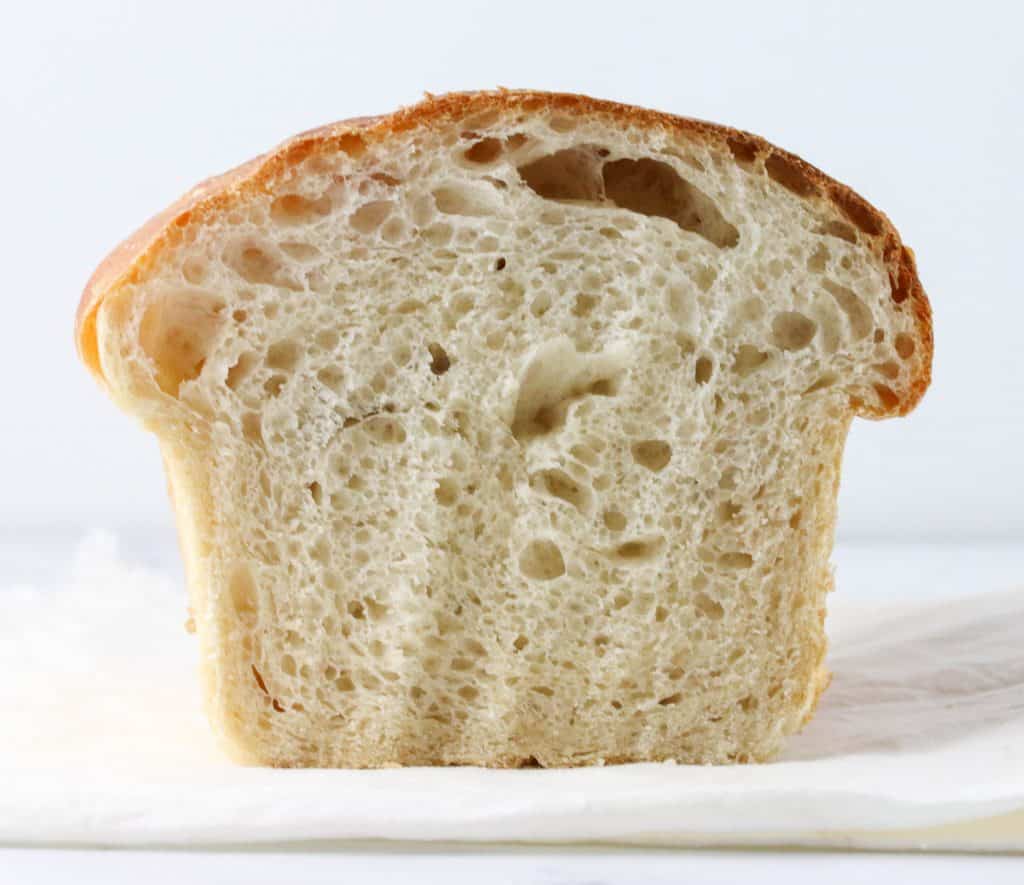
Once the dough has risen, it’s time to bake! I bake my loaf in a 375oF oven for about 40-45 minutes.
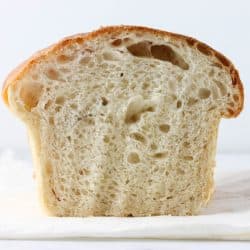
Gorgeous loaf of sandwich bread is almost yours…
Recipe Tips
- Make sure your starter is active before you start. Drop a small piece in a bowl of water to see if it floats. It it does, then it’s ready! If not, then it may need 1-2 more feedings.
- Measure Your Flour Using A Kitchen Scale . You can use measuring cups but for best accuracy it’s better use a kitchen scale and weigh out your flour. This ensures you don’t overmeasure, which can result in dense rolls. You can read my post on How To Measure Flour here.
- Use A Large Mixing Bowl! This dough will expand quite a bit. So the bigger the better.
- Use a damp towel. You don’t want the dough to dry out on top creating a film that will prevent the dough from rising.
Why Didn’t My Sourdough Sandwich Bread Rise?
- Starter Wasn’t Ready: This could be because your sourdough starter wasn’t quite bubbly and active enough. Be sure to do the “float test” before you begin.
- Cold Kitchen: Another culprit could be a cold kitchen! If your kitchen is cold the bread will take longer to rise. Ideally, your kitchen should be around 70°F.
- Overproofed: Another reason I found as I continue on this sourdough journey, is you overproofed your dough. If you overproof then there will be nothing left for it to do, and you will get no rise. So when you place the risen dough in the pan, make sure to not let the dough rise for more than 2 hours. The only exception is if your kitchen is super cold and it’s still not puffy.
Recipe FAQ’s
Bread flour helps to give some structure to this recipe. But if you have to use 100% all-purpose flour, the texture might not be quite the same and it may be harder to shape.
Sourdough bread will be fine at room temperature for about a week. The acidity to the bread is actually a natural mold deterrent so it won’t go bad as quickly. I think it’s best, however, if eaten within the first few days. Any leftovers, I love turning into croutons! Don’t let any of this go to waste.
Yes! I freeze for up to 3 months. Just make sure the bread is completely cool before freezing it. I wrap it in a few layers of plastic wrap and then a final layer of tin foil or place in a plastic bag. I would just unwrap and thaw at room temperature when ready to enjoy!
More Sourdough Recipes
Tools To Make This Sourdough Recipe
You can check out My Favorite Sourdough Bread Tools and Resources.
- Loaf Pan
- Large mixing bowl
- Kitchen scale
- Sourdough cookbook – ok not necessary but it’s chock full of amazing recipes that once you master this loaf you will want to make next.
- Cooling Rack
Sourdough Sandwich Bread
Ingredients
- 65 g (1/3 cup) bubbly, active starter
- 300 g (1 1/4 cups) warm water
- 12 g (1 Tbsp) granulated sugar
- 15 g (1 Tbsp) oil
- 400 g (3 1/3 cups) bread flour
- 100 g (3/4 cup plus 1 Tbsp) all purpose flour
- 9 g (1 1/2 tsp) salt
- melted butter for brushing on top (optional)
Instructions
- Make The Dough. In a large bowl, whisk together the starter, water, sugar, and oil together with a fork. Add the flours and salt. Mix to combine. Finish by hand, until a rough dough forms. Cover with a damp towel and let rest for 30 minutes to 1 hour. (If needed Replenish starter with flour and water at this point). After dough has rested, work the dough into a smooth ball, about 20 seconds. The dough will be supple and smooth when it comes together.
- Bulk Rise. Cover the bowl with a damp towel and let rise at room temperature, 70oF, until double in size, about 8 to 10 hours. The dough will look nice and domed when ready.
- Shape. Remove the dough onto a lightly floured work surface. Gently dimple the surface with your fingertips to release any large air bubbles. Roll the dough into a log, tucking the ends underneath. Let rest for 5 to 10 minutes. Meanwhile, lightly coat a 9-inch loaf pan with oil. With floured hands, cup the dough and pull it toward you to tighten its shape. Place into your loaf pan, seam side down.
- Second Rise. Cover the dough and let rest until it has risen about 1 inch above the rim of the pan, about 1 1/2 hours to 2 hours, depending on room temperature. Near the end of the rising time, pre-heat your oven to 375F.
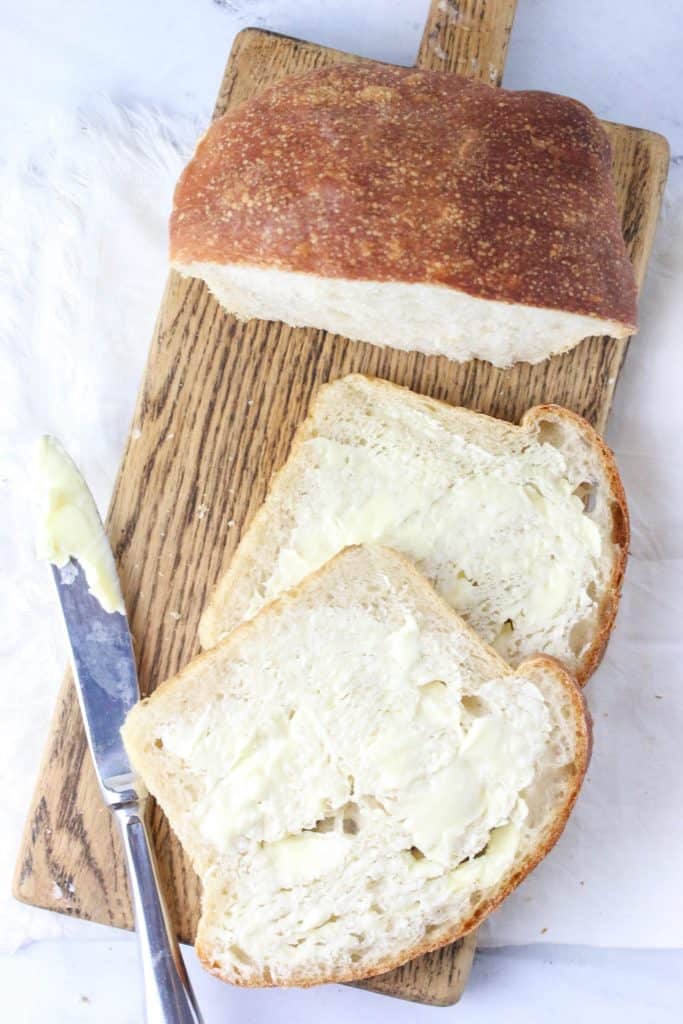
- Bake. Bake the dough on the center rack in your 375F preheated oven for 40 to 45 minutes. When finished, remove the loaf from the oven and brush the crust with the melted butter (optional) Cool in the pan for 10 minutes, then transfer the loaf to a wire rack to cool completely before slicing.
Notes
- Active Starter is key! Make sure your starter is active before you start. Drop a small piece in a bowl of water to see if it floats. It it does, then it’s ready! If not, then it may need 1-2 more feedings.
- Use A Kitchen Scale. For best accuracy, it’s best that you weigh your ingredients and not rely on volume (measuring cups)
- Damp Towel!! When you let the dough rise overnight, be sure to use a damp towel to cover it so it doesn’t dry out and not rise properly.
- Storage: The loaf is best consumed within a week, stored in a plastic bag at room temperature. Otherwise freeze for up to 3 months.
- Recipe From: The Clever Carrot’s cookbook – Artisan Bread Made Simple


Stephanie says
I need to make this to change up my loaves.
Heather says
yes you do let me know how you like it 🙂
Tiff Landi says
Thank you for this recipe! I’ve been making it weekly for my family.
Heather says
aw that’s wonderful Tiff! I’m so glad to hear!!
Diane Hatcher says
I have tried quite a few Sourdough Sandwich Bread recipes and this one turns out great every time! It is very easy! I add 6 Tbsp. Mila (micro sliced chia seeds) to my flour. I also use all bread flour or a combination of bread flour and freshly ground white wheat. It is absolutely delicious every way I have made it!! Also after the 1st hour of resting I do 4 stretch and folds 15 minutes apart before I do the bulk rise. Thank you so much for sharing your recipe.
Heather says
you’re welcome Diane! I’m so glad you love it and I’ll have to try adding some chia seeds to mine next – sounds delicious!
Anne says
This was super easy to make, super yummy, and best of all, super soft!!! My husband will probably never want sourdough bread any other way!!!
Heather says
music to my ears Anne 🙂
Cindy Schroeder says
I’ve baked two loaves of bread and the taste is good. I love how easy it is. However, it turns out very dense and heavy. Am I doing something wrong? How can I make it lighter and fluffier? Thanks
Heather says
Hi Cindy, glad you loved the taste! That might be due to a few different things such as your dough is too cold (try proofing in a warmer place) or how long you’re proofing is incorrect. You might find this post helpful – Why is my bread so dense?
Linda says
If your kitchen is cold how long can you let the last rise go. I have to keep my starter in the oven with the light on and a towel wrapped around. Last time I baked this I didn’t let it go above the pan because I thought 2 hours was all you could do. It was very dense. I have one right now on it’s last rise. The dough looked amazing after the 10 hour rise.
TIA
Heather says
Hi Linda, yes sounds like your bread could use a little bit more time – hard to say exactly depending on how cold your kitchen is. But I tried to use the “poke test” and see if when you poke your finger into the dough it should rise back out slowly – so if it fills back in quickly after being poked it needs more time. Hope that helps!
Deborah says
Amazing and so easy! I have started making this regularly for my family.
Heather says
aw thank you!
Emily C. says
I am an avid bread baker. I love all these bread baking and sourdough. Out of all the recipes I’ve tried this is the easiest and best recipe! I made it for my husband’s coworkers and now they request it for every office event! It is easy and perfect for the beginner bread baker or even the seasoned one! Thank you for this recipe!
Heather says
wow that’s awesome Emily!! I’m so glad you loved it as much as I do (and everyone else!!) Thank you for the kind words!
Caroline Da-Anoy says
I don’t have a loaf pan but I do have Pyrex loaf glass pan. Could I use that instead? If so, would the baking time and temperature change.
The reviews make me really want to make this, so please say yes it will work. Haha. Thank you and looking forward to hearing from you!
Heather says
Hi Caroline! Yes you can use a glass loaf pan but you may find you need to bake the bread an extra five minutes or so. Hope that helps! 🙂
yessica munoz says
Can I do a cold fermented before shaping it after the first rise?
Heather says
Yes you can place into your fridge after the first rise
Deborah says
Hi, if I cold ferment would I shape it straight from the fridge or let it come to room temperature? Will it take longer for the 2nd rise ?
Heather says
Hi Deborah, Yes If I cold ferment in the fridge then I let it come to room temperature before shaping. After it’s at room temperature and shaped, it should rise at the normal time. Hope that helps! I usually let it come to room temperature for 45 min – 1 hour (just depends on how cold my kitchen is – I tend to have a cold one!)
Anna Ng says
I love this recipe as easy to follow and results was great!
Can I substitute the oil with butter to get buttery tasting bread? Thanks!
Heather says
I think it should be fine – just make sure it’s melted and not too hot. So glad you loved it Anna!!
Anna says
Thanks Heather for the reply, one more question, if I want it choc or matcha flavored, how much should I substitute the flour with choc/ matcha powder? Thanks.
Heather says
Hi Anna, I would replace with up to 1/2 cup cocoa powder. I’m not as familiar with match however so I can’t say how strong this is so you may want to try less.
Jen says
Soft and sooo tasty delicious!!
Heather says
aw that’s awesome Jen so glad you liked it!!
shelly says
Hi! Im anxious to try out this recipe! If i want to make more than one loaf can i just double or triple the ingredients? Or are there other things i need to tweak as well?
Heather says
Hi Shelly, I haven’t tried, but I don’t see why you couldn’t. Just make sure you have a bowl big enough!
Gabi says
I have been using this recipe for several months now after trying many different sourdough sandwich bread recipes. It is my favorite! I do tweak it by swapping the sugar for honey and adding a few extra grams of oil. I also let my second rise extend to another 6-8 hrs in the fridge and I put butter on the hot baked bread right out of the oven. It is OH so chewy and soft and just the right amount of sour!
Heather says
Hi Gabi! I’m so glad you love the recipe – and love the idea of swapping in honey!
Kelsee says
I’ve made this loaf quite a few times and sometimes after the overnight rest my dough is quite sticky. What am I doing wrong? The bread still turns out great!
Heather says
Hi Kelsee, every starter can be a bit different so it could be something to do with your starter. You could adding a bit more flour but if it’s coming out great and it’s just difficult to work with, I would use a bench scraper when shaping the bread so I don’t have to get my hands in there. Hope that helps!
Christine says
I have moved to CO which is higher altitude then my usual baking is. Do you know the adjustments I need to take for this recipe?
Heather says
Hi Christine, unfortunately I don’t have any expertise with high altitude baking and sourdough. But this would be a good resource for you: https://www.theperfectloaf.com/how-to-bake-sourdough-bread-at-high-altitude/
Savannah says
I love this recipe.
However, the second rise in the bread pan takes an extremely long time for me. I always have to wait about 6-8 hours for it to rise above the bread pan line. I’ve tried multiple things to get it to rise faster. Feeding my starter twice, changing the temp of the room.
I am issuing coconut sugar instead of regular and coconut oil instead of olive oil. Could that be why? Not sure what I’m doing wrong.
Heather says
Hi Savanna, so glad you love the recipe. The long proof time could be where it’s rising. If your kitchen is colder it could take longer. You could try proving in your oven with the oven light on (oven off). A warmer spot could help speed things along. Hope that helps!
Andrea says
Can I leave out the sugar or replace it with honey?
Heather says
I do not recommend leaving out, but yes you can replace with honey.
Kathy says
Nice website
Heather says
aw thank you!
Kathy W. says
Do you need to do a discard at each feeding? I have a recipe that calls for 2 1/2 cups of starter(it makes a 3 lb. loaf), so I need to have quite a lot of starter, to get 21/2 cups for the recipe plus enough leftover starter to feed again and save for next baking day . So my question is can I feed without discarding at each feeding?? Hope my question makes senseThank yo
Thank you
Kathy W.
P.S. I love your site; it’s very helpful
Krista Hirst says
I do this every time if feed my starter. I don’t discard anything! I just add about 100g of water and about 100g is flour. Mix it all up, let it sit, make whatever bread product I’m making for that day/week then throw the leftover starter in the fridge. The next time I want to use the starter, I take it out do the fridge and start the process again.
Heather says
great tip Krista will have to try!!