
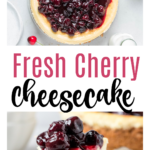
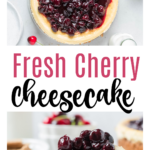
Cherry Cheesecake
This Post May Contain Affiliate Links. Please Read Our Disclosure Policy.
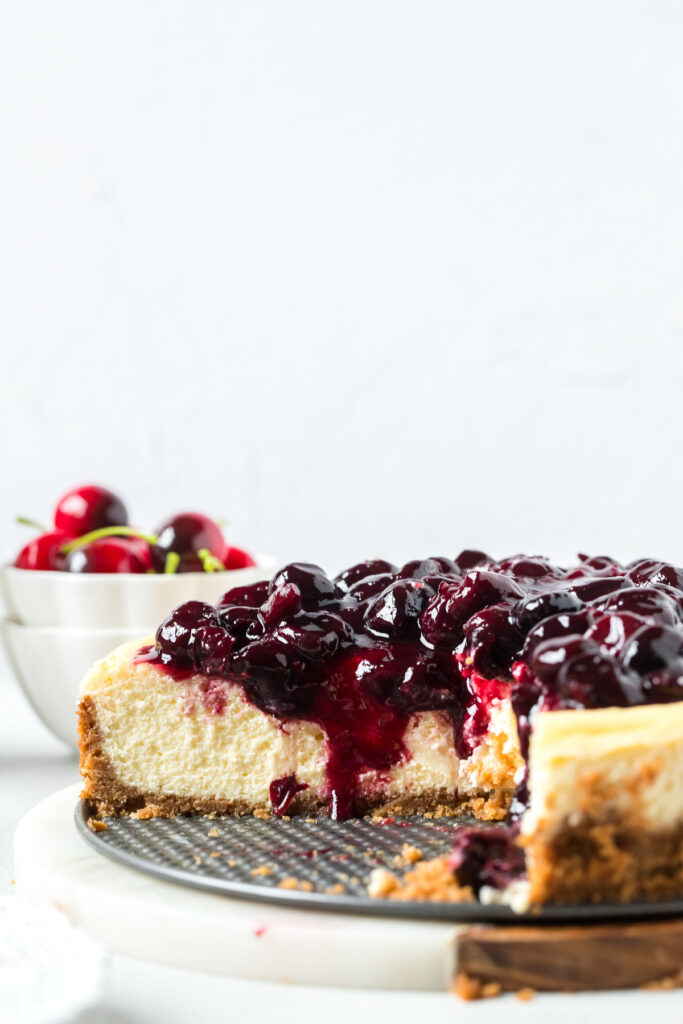
The sweet and sour taste combined with the smooth, creamy, and silky texture of this cherry cheesecake makes it a perfect snack for all occasions. Make cherry cheesecake with frozen or fresh cherries any time, all year round. This is the best homemade cherry cheesecake you will ever try!

The first time I tried cheesecake was at a family dinner at some restaurant. Cheesecake was the dessert they served. It was awful. That’s the reason why I always skipped eating cheesecake.
But after trying a good and delicious cherry cheesecake while I was working in a high-end restaurant, I found out it wasn’t the cheesecake I don’t like, it was the cherry topping. I spent my childhood hating cheesecake, especially cherry cheesecake. I really hate fake cherries. They are super sweet and the texture, oh my God, so far from real cherries.
To make up for the lack of cheesecake in my life, I now make a cheesecake that I will love. I made pumpkin cheesecake, key lime pie cheesecake, triple chocolate cheesecake, and even no-bake cheesecake before.
Now, I will turn my cheesecake nemesis into something I can eat and enjoy. And this cherry cheesecake recipe is that!
If a cherry cheesecake hater like me loves this, I’m sure you will too!
Grab My Cheesecake Book Now!
Discover the joy of baking with my digital cookbook, ‘Cheesecake for All Seasons‘! This comprehensive eBook features over 50 delectable cheesecake recipes, organized by season to suit every occasion.
Each recipe comes with detailed, foolproof instructions, essential baking tips, and troubleshooting advice to ensure your cheesecakes turn out rich, creamy, and delicious every time. Whether you’re a seasoned baker or a novice, this e-book will help you create perfect, indulgent desserts all year round.

Why You’ll Love This Cherry Cheesecake
- Easy To Make – This is a simple and easy-to-make cherry cheesecake recipe that even beginners can make!
- Make Ahead Dessert – Cherry cheesecake needs to cool down and chill before serving. I highly recommend making it in your free days and letting it cool in your fridge overnight. You will have a perfect snack throughout the week.
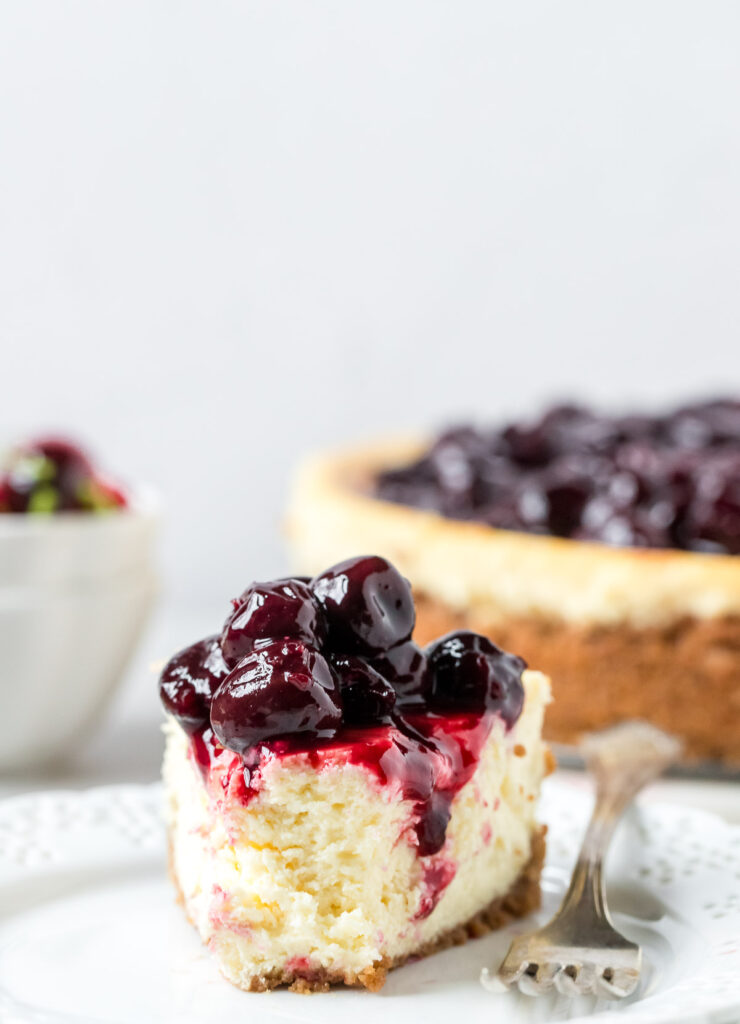
- Two Desserts In One – It is like getting a cherry pie and cake in one!
See Also:
- Triple chocolate cheesecake is a chocolate lover’s dream with a homemade Oreo crust, and topped with a chocolate ganache. And the best part is – no water bath needed!
- Have you ever tried making a San Sebastian cheesecake? This cheesecake couldn’t be simpler and has no crust!
- Black forest cheesecake combines a chocolate cheesecake and my cherry cheesecake into one delicious dessert you have to try.
- Not a fan of cherries? Then try making strawberry topping for cheesecake that is perfect for serving on top of a slice of cheesecake.

Ingredients Needed
Here are the ingredients you will need for this delicious cherry cheesecake recipe.
For graham cracker crust:
- Graham cracker crumbs – If you can’t find graham crackers in the grocery, you can use other types of digestive biscuits or cookies, such as Nilla wafers, for your graham cracker crust. But if you have whole graham crackers in your pantry, use them. You can make graham cracker crumbs by crushing graham crackers using a rolling pin, kitchen mallet, or food processor.
- Melted butter – I use unsalted melted butter for this cherry cheesecake recipe. If you are going to use salted melted butter, there’s no need to add salt for making the graham cracker crust.
- Sugar – I use granulated sugar, but you can also use brown sugar.
- Salt – To balance the sweetness, a pinch of salt will help.
For the cherry cheesecake filling:
- Cream cheese – I personally prefer using full-fat cream cheese. This gives a better texture. Also, choose blocks of cream cheese and not the tub variety. These two have different textures and will affect your cherry cheesecake. For a smooth and creamy cherry cheesecake, use softened cream cheese and ensure the cream cheese is at room temperature.
- Eggs – Make sure your eggs are at room temperature. To bring eggs to room temperature, place them in warm water for 10 minutes.
- Sour cream – For rich and better flavor, use full-fat sour cream. You can also use half sour cream and half heavy cream for a silky, smooth, and creamy cherry cheesecake mixture.
- Sugar – I use granulated sugar for this cherry cream cheese recipe.
- Vanilla extract – I prefer using pure vanilla extract. It has a better taste. But if you don’t have one, you can use imitation vanilla extract.
- Salt – To help balance the sweetness of the cherry cheesecake.
For the cherry topping:
- Pitted cherries – Fresh or frozen cherries will do. Make sure they are pitted before using them. You can also use can cherry pie filling or homemade cherry pie filling. If you are using can cherry filling, it is best to adjust the sugar you add. Cherry pie filling already contains sugar. Adding more sugar to the already sweet cherry pie filling can make the cherry topping too sweet.
- Sugar – I use granulated sugar.
- Lemon juice – To cut the sweetness and add acidity to the cherry topping.
- Cornstarch – For thickening.

How To Make Cherry Cheesecake
Remember, this cherry cheesecake needs at least 6 hours to chill and settle. It is best to make it the day before and leave it overnight in the fridge to chill.
For this cherry cheesecake recipe, I break it down into four sections — the crust, filling, topping, and serving.
The Graham Cracker Crust
1. Preheat Oven
Preheat your oven to 350°F/180°C.
This is also where you prepare your springform pan. Line the bottom of your cherry cheesecake pan with parchment paper.
2. Combine Ingredients
If you’re using whole graham crackers, grind them using a rolling pin or food processor before combining them with other ingredients. I prefer my food processor to make fast work of this step and to ensure the crumbs are properly broken down.
In a mixing medium bowl, combine melted butter, graham cracker crumbs, sugar, and salt until it holds its shape.
3. Bake Graham Cracker Crust
Transfer the graham mixture to the springform pan.
Use a measuring cup and press down the graham cracker crumbs and a bit on the sides. Then, bake for 8 to 10 minutes at 350°F/180°C.
Set it aside and let it cool.

Cherry Cheesecake Filling
1. Make The Cheesecake Batter
Lower the oven temperature to 325°F/163°C.
Attach the paddle attachment to your stand mixer. Combine sour cream, softened cream cheese, vanilla extract, sugar, eggs, and salt on medium-high speed in a large bowl. Scape down the softened cream cheese stuck at the sides of your mixing bowl. Mix it until the cheesecake mixture is smooth, silky, and creamy.
Reduce the speed up to the lowest setting of your electric mixer. Mix for 1 to 2 minutes to remove large air bubbles.

2. Prepare Hot Water Bath
Wrap the exterior of the springform pan with 3 to 4 layers of heavy-duty aluminum foil. This is necessary to prevent the hot water from seeping into your cheesecake cream cheese mixture.
My new favorite way is to use a slow cooker liner to ensure there’s no leakage! I simply tie the slow cooker liner around the outside.

Transfer the cream cheese batter to the springform pan with a cooled cheesecake crust.
Place the springform pan inside a large roasting pan. Then, place the large roasting pan in your oven. Fill the roasting pan with hot water, about ½ full.

3. Bake Cheesecake Cream Cheese Layer
Bake cheesecake cream cheese layer in the oven at 325°F/163°C for about 1 hr 30 minutes or until the filling is cooked. To check, the sides of the mixture should be set and lightly brown. But the sides should still be wobbly.
Turn off your oven and allow it to cool down slowly. Slightly open oven door. You can use a wooden spoon to keep the oven door ajar. Do this for 1 hour.

4. Chill
Remove the springform pan from the water bath. Take off the foil.
When the cheesecake cream cheese mixture is at room temperature, you can cover it up and chill it in your fridge for at least 4 hours or overnight.
Cherry Topping
1. Mix Ingredients
Make a slurry by dissolving cornstarch in water.
In a pot or saucepan, combine slurry, pitted cherries, lemon juice, and sugar. Heat over medium-high heat. Bring to a boil. Make sure to occasionally stir the mixture to avoid burning.
If you are using a can of cherry pie filling, you can make toppings at home and follow cheesecake cherry pie filling instructions and replace strawberries with cherry pie filling. Decrease the sugar you add. Canned cherry filling is already soaked in sugar.
2. Thicken The Cherry Topping
When the sauce thickens, lower the heat. Taste the cherry sauce and adjust it to your liking.
If your sauce is too thick, add more water. But remember, the cherry sauce will thicken as it cools down.

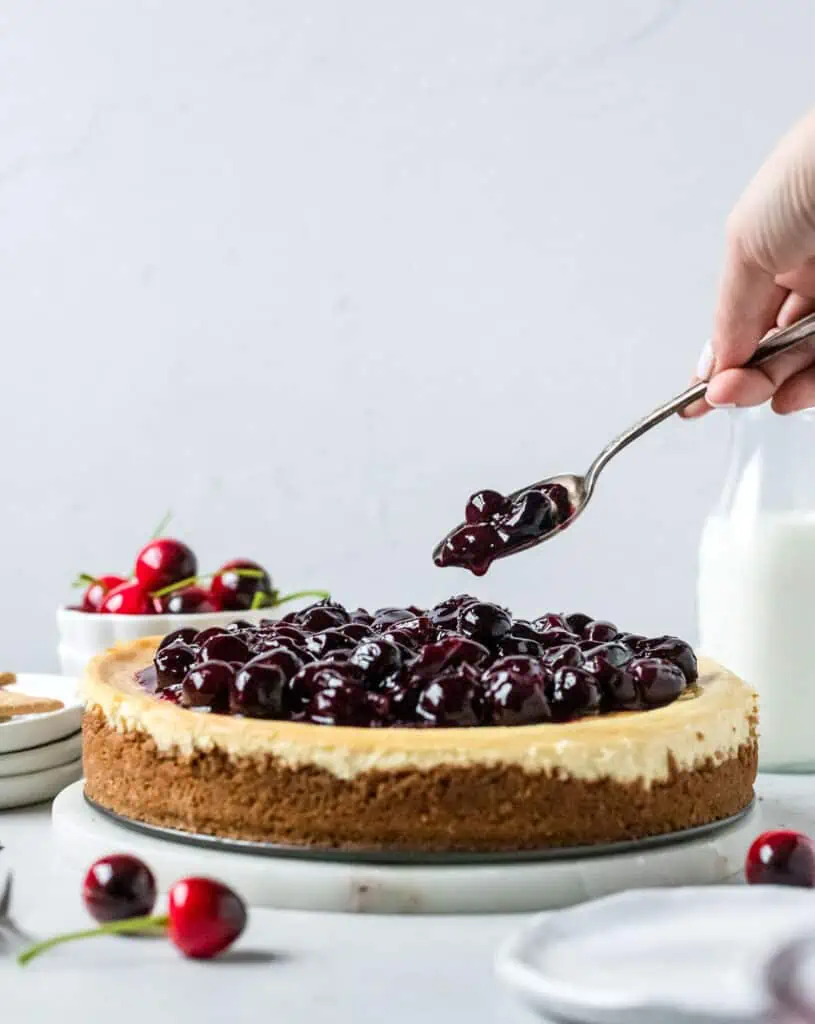
Assemble And Serve
Once your cherry cheesecake filling is set and cooled, carefully remove it from the springform pan. Add the cherry topping, as much or as little as you like. Cut into slices and serve a slice of cherry cheesecake. And you can always add serve with a bit of homemade whipped cream!
Recipe FAQs
You can soften cream cheese easily and quickly a few different ways. There are 3 ways to soften your cream cheese — by taking it out of the fridge, using the microwave, or warm water bath.
Taking cream cheese out of the fridge: At least 40 minutes before making this cherry cheesecake recipe, remove the cream cheese from the fridge.
Microwave frozen cream cheese: Unwrap frozen cream cheese and transfer it to a microwave-safe container. Heat in the microwave for 30 seconds intervals until softened. Flip the block at every interval to avoid burning.
Warm water bath your cream cheese: Place the frozen cream cheese with its wrapper in a heavy-duty ziplock bag. Remove excess air. Make sure the bag is sealed. Submerged into a bowl with lukewarm water for 10 to 15 minutes or until soft.
Yes, you can definitely freeze the cherry cheesecake filling.
Before freezing, let the cherry cheesecake cool completely. Wrap the whole cherry cheesecake with plastic wrap multiple times. Then, wrap it with heavy-duty aluminum foil and freeze it. But if you freeze slices of cherry cheesecake, wrap them with plastic wrap individually. Then, place it in an airtight container or freezer bag.
Remember to consume within a month to avoid changes in texture and taste.
This easy cherry cheesecake recipe will make any cherry cheesecake skeptic fall in love with this delicious snack!
I always store my cheesecake in the fridge for up to 4 days. I like place a paper towel over the top to prevent condensation and then cover in tinfoil.
More Recipes To Try
If you’re craving more cherries, be sure to try my super easy cherry dump cake recipe made with just 4 ingredients!
You might also love my cherry crostata or cherry turnovers made with puff pastry!
Get My Cheesecake Book!
Don’t forget to grab a copy of my cookbook, Cheesecake For All Seasons! It’s an easy to download digital e-book with over 50 delicious cheesecake recipes, toppings, tips and tutorials for you to master making cheesecake at home!
Cherry cheesecake
Ingredients
For the cherry topping:
- ¼ cup (60 ml) water
- 1 Tablespoon cornstarch
- 1/3 cup (67 g) granulated sugar
- 4 cups cherries fresh or frozen
- 1 tablespoon fresh lemon juice
For the crust:
- 1 3/4 cup (227 g) graham crackers (from about 15 crackers)
- 3 Tablespoons granulated white sugar
- 1/8 teaspoon salt
- 6 Tablespoons (85 g) unsalted butter melted
For the cheesecake filling:
- 2 pounds (four 8-ounce) blocks cream cheese softened to room temperature
- 1 ½ cups (300 g) granulated white sugar
- pinch salt
- 2 teaspoons vanilla extract
- 4 large eggs room temperature
- 2/3 cup (151 g) sour cream
- 2/3 cup (151 g) heavy cream
Instructions
Make the cherry topping:
- In a small bowl, stir together the water and cornstarch.
- In a medium saucepan, stir together the cherries, lemon juice, sugar, and cornstarch/water mixture. Cook over medium heat until boiling, stirring continuously and allow to thicken, about 10 minutes.
- Remove from the heat and allow to cool. Refrigerate until ready to use.
Make graham cracker crust
- Prep oven. Preheat oven to 350°F (177°C), with rack in middle of oven.
- Make graham cracker crust. Pulse the graham crackers in a food processor or blender until finely ground. Put in a large bowl, and stir in the sugar and salt. Stir in the melted butter.
- Assemble graham cracker crust. Press the graham cracker crumbs firmly into the bottom and slightly up the sides of a 9 inch springform pan, using the bottom of a measuring cup (or you can use your fingers).
- Bake the crust. Place the pan on a baking sheet and bake at 350°F (177°C) for 10 minutes. Remove from the oven and let cool.
Make cheesecake filling
- Combine cream cheese and sugar. In the bowl of a stand mixer, fitted with a paddle attachment beat cream cheese and sugar on medium speed for 4 minutes
- Add remaining ingredients. Add the salt and vanilla, beating after each addition. Add the eggs, one at a time, beating for one minute after each addition. Add the sour cream, beat until incorporated. Add heavy cream and beat until incorporated. Scrape down the sides of the bowl and along the bottom to make sure all of the cream cheese has been incorporated.
Bake the cheesecake
- Lower the heat on the oven to 325°F (160°C).
- Wrap springform pan. Wrap the outside of the springform pan in three layers of aluminum foil, ensuring none of the pan is exposed. You can also use a slow cooker liner.
- Bake the cheesecake. Prepare pan and boiling water: Place the foil-wrapped springform pan in a large, high-sided roasting pan. Prepare 2 quarts of boiling water.
- Pour filling into pan. Pour the cheesecake filling into the springform pan, over the graham cracker crust. Smooth the top with a rubber spatula.
- Place in oven. Place the roasting pan with the springform pan in it, in the oven.
- Add hot water. Carefully pour the hot water into the roasting pan, pouring until the water reaches halfway up the side of the springform pan.
- Bake the cheesecake. Bake at 325°F (160°C) for 1 1/2 hours until the edges of the cheesecake are set and slightly golden brown, and the middle of the cheesecake is set but still slightly wobbly.
- Allow cheesecake to cool in oven. Turn off the heat of the oven. Crack open the oven door and let the cake cool in the oven, as the oven cools, for another hour, which will help prevent the cheesecake from cracking.
- Chill the cheesecake. Cover the top of the cheesecake with a paper towel (to help with condensation forming) and then cover in foil. Chill in the refrigerator for a minimum of 4 hours, or overnight.
- Serving the cheesecake. When ready to serve, remove the foil. Run a knife around the edges and remove the outer ring of the pan. Spoon cherry topping over the top of the cheesecake. Cut into slices and serve with cherry topping.
Notes
- Storage: Store covered in the fridge for up to 4 days.
- Freezing: Freeze for 1 month. Before freezing, let the cherry cheesecake cool completely. Wrap the whole cherry cheesecake with plastic wrap multiple times. Then, wrap it with heavy-duty aluminum foil and freeze it. But if you freeze slices of cherry cheesecake, wrap them with plastic wrap individually. Then, place it in an airtight container or freezer bag. Remember to consume within a month to avoid changes in texture and taste.


I made this for my boyfriend for his birthday. He ate half of it in one sitting…it was so good!! Had a great flavor and the walnut crust was amazing!
This makes me so happy to hear! There’s no better compliment than someone devouring half a cheesecake. 😂 So thrilled you both loved it, and I’m so honored you made it for his birthday! Thank you for sharing!
Hi my name is Tracey question i have a very small oven i can’t fit a roast pan inside my question is can i still make it without the water
Hi Tracey! Yes, you can definitely place a pan of hot water on a different rack below the cheesecake. This should help create moisture without needing a water bath directly in the roasting pan. Happy baking! 😊
Although this was my first time making a cheesecake it came out amazing ! I’ve been intimidated in the past to make a cheesecake thinking it was too complicated. This recipe was so easy to follow even a first timer can make it like a pro! Not only delicious but also beautiful!
oh wow that’s amazing and awesome to hear Dawn I’m so glad!!!