
Red Velvet Cupcakes
This Post May Contain Affiliate Links. Please Read Our Disclosure Policy.
This easy red velvet cupcake recipe is one that you can whip up to perfection in no time. Top with my favorite cream cheese frosting, for the most perfect cupcake ever.

I adore pretty much any red velvet recipe. Adoration might not even be a strong enough word. I love a good slice of my red velvet cake recipe. And I can’t resist a red velvet brownie either.
Yes this is absolutely pure love-a forever and ever I do kind of love. Like walk me down the aisle, friend. Me and red velvet will never part ways.
Over the years, I have played around with this cupcake recipe and although the original was good, I found it had a bit too much oil and left a little bit of oil in the bottom of the wells after it’s baked.
So I decided to use half butter and half oil. The butter helps to create a tender, fluffy cupcake while the oil helps to make it a moist one. Using half and half creates the perfect red velvet cupcake. Topped with my favorite cream cheese frosting and you have the perfect dessert for any special occasion or party!
Ready To Take Your Baking To The Next Level?
Join the Ultimate Baking Bootcamp and master essential techniques like mixing methods and the why behind every recipe! Whether you’re a beginner or looking to refine your skills, this step-by-step class will help you bake with confidence and create flawless desserts every time. Start your baking journey today!
Table of contents

Why This Recipe Works
- Perfect red velvet cupcakes for Christmas, Valentine’s Day or the 4th of July
- Topped with an easy to mix up tangy cream cheese frosting.
- Wonderful to freeze and make ahead!
See Also:
- If you’re looking for a showstopping cake, this Milk Bar cake is the perfect dessert to make for a birthday!
- Calling all peanut butter lovers with this super easy peanut butter cream cheese frosting to use on all your favorite cake recipes!
- This easy vanilla cupcake recipe uses melted butter so it comes together in minutes and no mixer is needed!
- When it’s summertime then you have to make these S’mores cupcakes with toasted meringue frosting and graham cracker bottom!
- Get a mixing bowl and make the easiest cake ever! This Tornado cake recipe (aka do nothing cake) made with crushed pineapple, coconut, and pecans!

Ingredients needed
- Cake flour – I love using cake flour because it has a lower protein content than regular all purpose flour which means you get a light and fluffy cupcake in the end. If you don’t have any you can use AP flour, or make your own cake flour (just know this will affect your results in the end). For more recipes that use cake flour, check out my 41 cake flour recipes.
- Sugar
- Baking soda
- Cocoa powder – Red velvet has a hint of cocoa powder added to the mixture. You want to use unsweetened cocoa powder or natural cocoa powder, and not dutch process. Dutch cocoa powder will not react the same way with the baking soda. You can read more here about natural cocoa vs dutch process cocoa.
- Salt
- Eggs
- Unsalted butter
- Canola oil – You can use another neutral-tasting oil but this is an oil-based cake recipe, which means it comes together easily and results in moist cupcakes!
- Buttermilk – A true red velvet cake is made with buttermilk to give it that tangy flavor, adds moisture, and reacts with the baking soda. If you don’t have any you can make your own buttermilk whole milk and lemon juice or white vinegar.
- Vanilla extract
- Vinegar
- Red Food Coloring – I used liquid food coloring, but you could also use gel food coloring (you will not need as much as it’s stronger).

How To Make Red Velvet Cupcakes:
Combine dry ingredients. In a mixing bowl, whisk together cake flour, baking soda, cocoa powder, and salt and set aside.

Cream butter and sugar. In a second mixing bowl with a hand mixer or in your stand mixer with paddle attachment cream butter and sugar together until light and fluffy, about 2 to 3 minutes on medium speed.

Add wet ingredients. Add egg and beat to combine.

Add vanilla, oil, and red food coloring.

Alternate the flour and buttermilk. Stir vinegar into buttermilk. Alternate the flour and buttermilk mixture, starting and ending with the flour mixture. Beat just until combined. Do not overmix.

Bake. Divide the cupcake batter between the prepared cupcake liners, filling each about 2/3 full. Bake for about 18 minutes, or until a toothpick inserted in the center comes out clean. The cupcakes should bounce back when you touch the tops.

Allow to cool in the pan for 5 minutes, then transfer to a wire rack to cool completely. Frost cooled cupcakes as desired.
Make the cream cheese frosting
To make the frosting, combine the cream cheese and butter in the bowl of an electric mixer. Beat on medium-high speed until well combined and smooth, about 2-3 minutes.
Mix in the vanilla extract.
Gradually beat in the confectioners’ sugar and pinch of salt until totally incorporated, increase the speed and then beat until smooth.

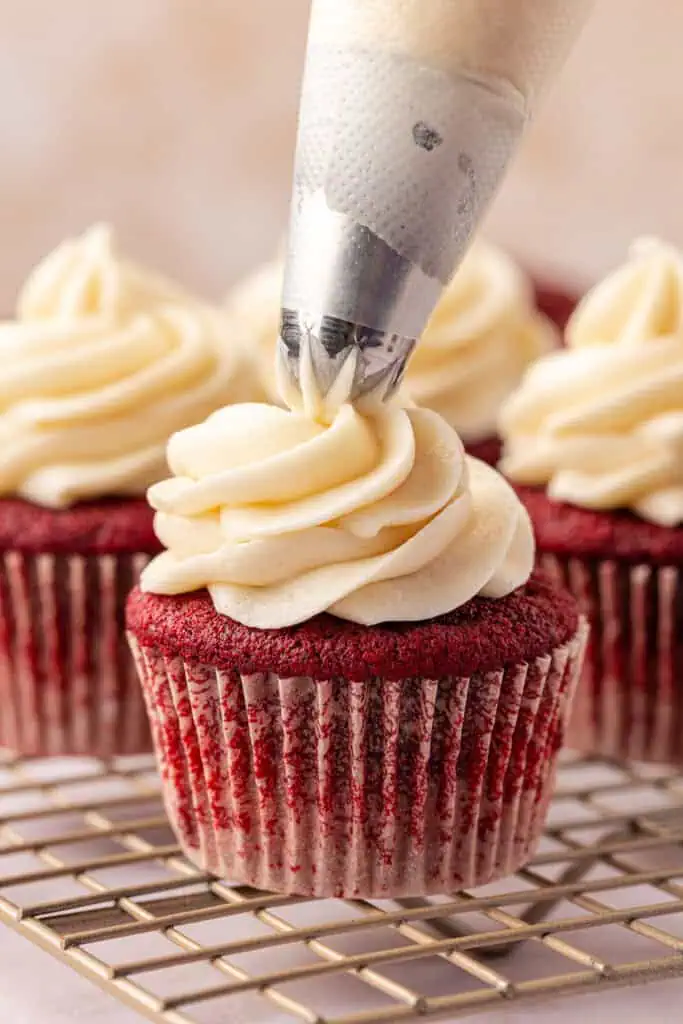
Frost cooled cupcakes as desired. (I used a large, unlabeled star tip to frost these cupcakes.)
I then place the frosting in a piping bag fitted with the Wilton 1M piping tip and frost the cupcakes once cooled.
Recipe Tips
- Measure correctly. Be sure to measure your flour correctly. Over measuring your flour could result in a tough dense cupcake. Use the spoon and level method.
- Check your leavening agents! Make sure your leavening agents are fresh. The key to cupcakes rising perfectly is make sure your baking powder and baking soda haven’t expired. If you are not sure you can test to see if they bubble. Add a a teaspoon of baking soda to a a few tablespoons of vinegar. Add a teaspoon of baking powder to a few tablespoons of warm water. If they bubble, they are good to use! If not, then throw them out and start over.
- Do not overfill. Make sure to not overfill your cupcake wells. Overfilled cupcakes will create a mess when they rise, stick to the pans, and also deflate after they cool. It’s one of the reasons your cupcakes sink in the middle.
- Cool properly. Once baked, it’s essential to take them out of the pan and let them cool on a cooling rack. If you leave them in the pan, they will continue to bake from “carryover heat”, which means your cupcakes could come out perfect and then end up being being dry if left in the pan.
- Frost when cool. Frost your cupcakes after they have cooled completely. If you are new to decorating cupcakes, check out my Ultimate Guide To Decorating Cupcakes! I also just used one cupcake and crumbled it to use as a decoration. It’s one easy way to decorate your cupcakes. Check out my 9 Cupcake Decorating Ideas for more inspiration!
- Use two non-stick cupcake pans. Be sure to use a non-stick cupcake pan when baking cupcakes. And I always recommend having two on hand, so you put both in your oven if they fit (or quickly swap one out of the oven and put your second pan in without having to wait for the first one to cool).
- Rotate your pans. For cupcakes that all come out perfectly, I like to set my timer for half the time the recipe calls for in order to remember to rotate my pans halfway through baking. Most ovens have what are called “hot spots” where it’s hotter in certain areas. So cupcakes that are in the “hot spots” can bake faster than others, so by rotating your pans halfway through you can ensure they evenly bake.

Make Ahead And Storage Instructions
Store any frosted cupcakes covered in an airtight container in the refrigerator. Because of the cream cheese frosting, I recommend storing in the refrigerator. The frosting should not stay out at room temperature.
You can make the red velvet cupcakes up to 2 days in advance, unfrosted. Just wrap the unfrosted cupcakes in plastic wrap and keep at room temperature. The frosting can be made up to a week in advance. Just store in your refrigerator for up to a week. You may need to place them back in your mixer and rewhip back to the same consistency.
You can also make the cupcakes and freeze for up to 2 months. Learn how to freeze your cupcakes here. Thaw at room temperature then frost.
Recipe FAQ’s
I made these cupcakes with cream cheese frosting which is very common. However, traditionally red velvet cupcakes and cake were served with ermine frosting(also known as flour or boiled milk) icing.
If you leave out the red food coloring the cupcakes will be a very dull brown color because of the cocoa powder. I recommend using a natural red food coloring if you don’t like traditional red food coloring. You might like India Tree Nature’s Colors from Craftsy. Or Amazon has a few varieties of natural food colorings that I think are worth checking out. I’ve tried the all natural food colors and they work just fine but your red velvet cupcakes won’t be u0022red redu0022 is all.
No red velvet cupcakes are not a chocolate cupcake. They are a buttermilk based cupcake with a hint of cocoa giving them a hint of chocolate flavor, with the tanginess of the buttermilk and of course red food coloring added in.
Yes you can bake these into mini cupcakes. You will need to bake them significantly less. I would bake them for 10-12 minutes.
This batter should make enough for a 9×13 cake, or two 9u0022 cake pans. Or you can try my red velvet cake recipe instead!

More Recipes To Try
If you’re craving more cupcakes, be sure to try my Oreo cupcakes with Oreo frosting! They are an oreo lover’s dream.
Or you can’t go wrong with my easy vanilla cupcake recipe. They are the perfect beginner’s cupcake to make.
Master The Art Of Baking!
Don’t miss out on the chance to elevate your baking skills! Join the Ultimate Baking Bootcamp today and unlock the secrets to creating perfect desserts every time. With expert guidance, step-by-step lessons, and insider tips, you’ll be baking like a pro in no time. Sign up now and start mastering your baking!

Red Velvet Cupcakes
Ingredients
For the cupcakes
- 2½ cups (300 grams) cake flour spooned and leveled
- 1 teaspoon baking soda
- 2 Tablespoons unsweetened cocoa powder
- 1 teaspoon salt
- 1/2 cup (1 stick, 113 g) unsalted butter softened to room temperature
- 1½ cups (300 g) granulated white sugar
- 2 large eggs room temperature
- ½ cup (120 mL) canola oil
- 2 Tablespoons (1 oz.) liquid red food coloring
- 1 teaspoon vanilla extract
- 1 cup (240 mL) buttermilk
- 1 teaspoon distilled white vinegar
For the frosting:
- 8 oz. (227 g) cream cheese room temperature
- 8 tbsp. (113 g) unsalted butter at room temperature
- 2 tsp. vanilla extract
- pinch of salt
- 4 cups (452 g) confectioners’ (powdered, icing) sugar
Instructions
- Prep pans and preheat. Preheat the oven to 350° F/180oC. Line cupcake pans with paper liners.
- Combine dry ingredients. In a mixing bowl, whisk together cake flour, baking soda, cocoa powder, and salt and set aside. 2½ cups (300 grams) cake flour 1 teaspoon baking soda 2 Tablespoons unsweetened cocoa powder 1 teaspoon salt
- Cream butter and sugar. In a second mixing bowl with a hand mixer or in your stand mixer with paddle attachment cream butter and sugar together until light and fluffy, about 2 to 3 minutes on medium speed. Add eggs and beat to combine. Add vanilla, oil, and red food coloring. 1/2 cup (1 stick, 113 g) unsalted butter 1½ cups (300 g) granulated white sugar 2 large eggs ½ cup (120 mL) canola oil 2 Tablespoons (1 oz.) liquid red food coloring 1 teaspoon vanilla extract
- Alternate the flour and buttermilk. Stir vinegar into buttermilk. Add and alternate the flour and buttermilk mixture, starting and ending with the flour mixture into the butter mixture. Beat just until combined. Do not overmix. 1 cup (240 mL) buttermilk 1 teaspoon distilled white vinegar
- Bake. Divide the batter between the prepared paper liners, filling each about 2/3 full. Bake for about 18 minutes, or until a toothpick inserted in the center comes out clean. Allow to cool in the pan for 5 minutes, then transfer to a cooling rack to cool completely. Frost cooled cupcakes as desired.
- Make the frosting. To make the frosting, combine the cream cheese and butter in the bowl of an electric mixer. Beat on medium-high speed until well combined and smooth, about 2-3 minutes. Mix in the vanilla extract. Gradually beat in the confectioners’ sugar and pinch of salt until totally incorporated, increase the speed and then beat until smooth. Frost cooled cupcakes as desired. (I used a large, unlabeled star tip to frost these cupcakes.) 8 oz. (227 g) cream cheese 8 tbsp. (113 g) unsalted butter 2 tsp. vanilla extract pinch of salt 4 cups (452 g) confectioners’ (powdered, icing) sugar
Video
Notes
- Make Ahead and storage: Store any frosted cupcakes covered in an airtight container in the refrigerator. Because of the cream cheese frosting, I recommend storing in the refrigerator. The frosting should not stay out at room temperature. You can make the red velvet cupcakes up to 2 days in advance, unfrosted. Just wrap the unfrosted cupcakes in plastic wrap and keep at room temperature. The frosting can be made up to a week in advance. Just store in your refrigerator for up to a week. You may need to place them back in your mixer and rewhip back to the same consistency. You can also make the cupcakes and freeze for up to 2 months. Learn how to freeze your cupcakes here. Thaw at room temperature then frost.
- Cake flour: If you don’t have cake flour, you can use AP flour but your cupcakes won’t be as light and fluffy. Or you can make your own cake flour by measuring out the 2 1/2 cups AP flour, remove 2 1/2 Tbsp. Replace with 2 1/2 Tbsp. cornstarch and then sift. Results won’t be quite the same but will come close!
- Buttermilk: If you don’t have buttermilk on hand, then you can replace with 1 cup milk, and 1 Tbsp. lemon juice (or vinegar) mixed together. Let it sit for 10 minutes to thicken/react.
- Red food coloring: You can reduce or omit the food coloring, or use an all-natural food coloring brand.
- Layer cake: Here is my layer cake recipe.
- Mini cupcakes: you can bake these into mini cupcakes. You will need to bake them significantly less. I would bake them for 10-12 minutes.


Do I add the buttermilk/vinegar mixture to the dry ingredients first or do I mix it with the butter, eggs, and oil mixture before adding it to the dry ingredients?
You’ll want to stir the vinegar into the buttermilk first, then alternate adding the flour mixture and the buttermilk mixture into the butter/sugar/egg mixture — starting and ending with the flour. Mix just until combined. 😊
If you’re making your own buttermilk, add 1 tablespoon vinegar (or lemon juice) to a measuring cup, fill with milk to the 1-cup line, stir, and let it sit for 10 minutes before using.
There are step-by-step photos in the post too if that helps!
I live in the co mountains and my cupcakes come Out deflated l, what am I doing wrong?
Hi there! Baking at high altitudes, like in the Colorado mountains, can definitely be tricky. The lower air pressure can cause cupcakes to deflate. Here are a few adjustments you can try:
Increase your oven temperature by 15-25°F to help set the structure faster.
Reduce the sugar slightly (about 1 tablespoon per cup) to prevent weakening the batter.
Add a bit more liquid (1-2 tablespoons at 3,000 feet) to keep the cupcakes moist.
Adjust the leavening agents: At high altitudes, leavening (baking powder/soda) works more aggressively, which can cause baked goods to rise too quickly and then collapse. Try reducing the amount slightly. For example:
If your recipe calls for 1 teaspoon of baking powder, use 7/8 teaspoon at 3,000-5,000 feet, 1/2 teaspoon at 5,000-6,500 feet, or 1/4 teaspoon at 6,500-8,000 feet.
If your recipe uses both baking powder and baking soda with an acidic ingredient (like buttermilk or sour cream), consider switching to all baking powder and whole milk for better results.
Add a little extra flour (1 tablespoon at 3,500 feet, plus 1 more tablespoon for every additional 1,500 feet) to strengthen the batter.
It might take a few tries to get it just right, so keep notes as you experiment. Happy baking, and let me know how it goes!
Hello can i substitute the canola oil with an oil that is not from seed? Coconut oil? Olive?
Hi there! Yes, you can absolutely substitute the canola oil with melted, cooled coconut oil in this recipe. Olive oil could work too, but it may add a slightly different flavor. Let me know how it turns out, and enjoy the cupcakes! Thank you! 😊
Did you just crumble cupcake mix on the frosting when done? How much extra did you make for that? It looks so cute with the red pieces speckled
I just use a crumbled extra cupcake and sprinkle it over the frosting. It does add a cute touch with those red speckles!
Hi! I was only able to find Lowfat Buttermilk – will that change much?
The low-fat option will work perfectly! Most buttermilk sold today is low-fat, while full-fat varieties are available but less common.
I’m making them for my daughters BaByQ
She says these are the best cupcakes she’s ever eaten!
Thank you for sharing! I’m so happy to hear the red velvet cupcakes are a hit with your daughter. I know they’ll make a wonderful addition to her BaByQ. Enjoy the celebration!
Hi! Wondering if I could substitute the buttermilk to sour cream
I really enjoy the moisture with sour cream batter.
Hi Sondra, sour cream might make the batter too thick, and the cupcakes might come out a bit dense but if you want to try to substitute you can try using sour cream and milk (for every cup of buttermilk use 3/4 cup sour cream and 1/4 cup milk).
These cupcakes came out perfectly. I couldn’t be happier and my coworkers loved them too.
aw that’s amazing Cheryle! I’m so happy to hear this – glad they were loved by everyone 🙂
Does it matter the kind of buttermilk we use?
No I’ve used different brands with success 🙂
Hi I’m planning to try this recipe for a gender reveal event. Do you think adding food coloring to the cream cheese frosting would change the texture or outcome?
When adding food coloring I always recommend gel food coloring because it’s more concentrated and you will only need a little bit. You may want to try refrigerating the frosting as well to firm up a bit as well.
Can I use all purpose flour if I can’t find cake flour?
Hi Kathleen, sorry for the delay during the holidays I was away however yes you can the texture might be slightly affected. Hopefully you gave it a try!
Made them and only baked them for 18 minutes and are perfect on the middle rack in my oven.
aw wonderful Bea I’m so glad you loved them!!
So I made this recipe. It took my cupcakes longer to cook. I kept giving them additional 5 minutes and checking it. Weird I think it took like 45-50 minutes. I feel they were a little dry. What did I do wrong?
Hi Wendy, sounds like they were overbaked. Cupcakes usually take only around 20 minutes. If dry you may have used too much flour. Be sure to bake in the center of your oven, use a regular muffin tin and fill about 3/4 full. Hope that helps!
This recipe is delicious!! Just made today and they are moist and decadent in taste. This is the 1st red velvet scratch recipe that I actually love! Thanks for sharing this winner.
aw thank you Danielle I’m so happy you loved them as much as I did!
Hi Wendy I definitely agree with Heather. They baked way too long for cupcakes. You probably stuck your toothpick in and it came back with batter on it correct? Unfortunately that doesn’t always tell you if an item is done. Another good way to tell is by looking at the tops, if they have a matte finish and if by light touch they spring back then they’re done. Hope the tips help and definitely give the recipe another shot. They’re yummy!
I just never made this one before ever for the first time so thanks for the offer though that’s awesome.
These red velvet cupcakes are divine and the cream cheese frosting is better than the best! These are now officially my favourite recipes. Thank you for sharing!
Aw thank you Ronel! I’m so glad you loved the recipe!
Wow, incredible blog layout! How long have you been blogging for?
you made blogging look easy. The overall look of your website is magnificent, let
alone the content!
Thanks! I’ve been blogging for a few year now- starts and stops along the way in the beginning as I got going- but now consistently for the past year! 🙂