
Quick Cinnamon Rolls
This Post May Contain Affiliate Links. Please Read Our Disclosure Policy.
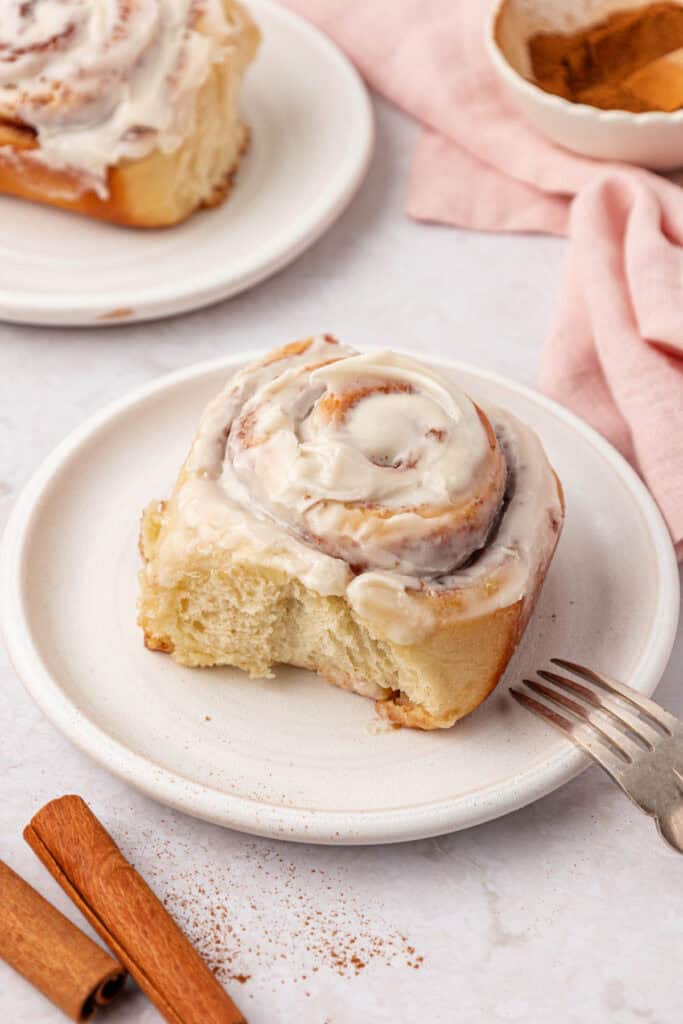
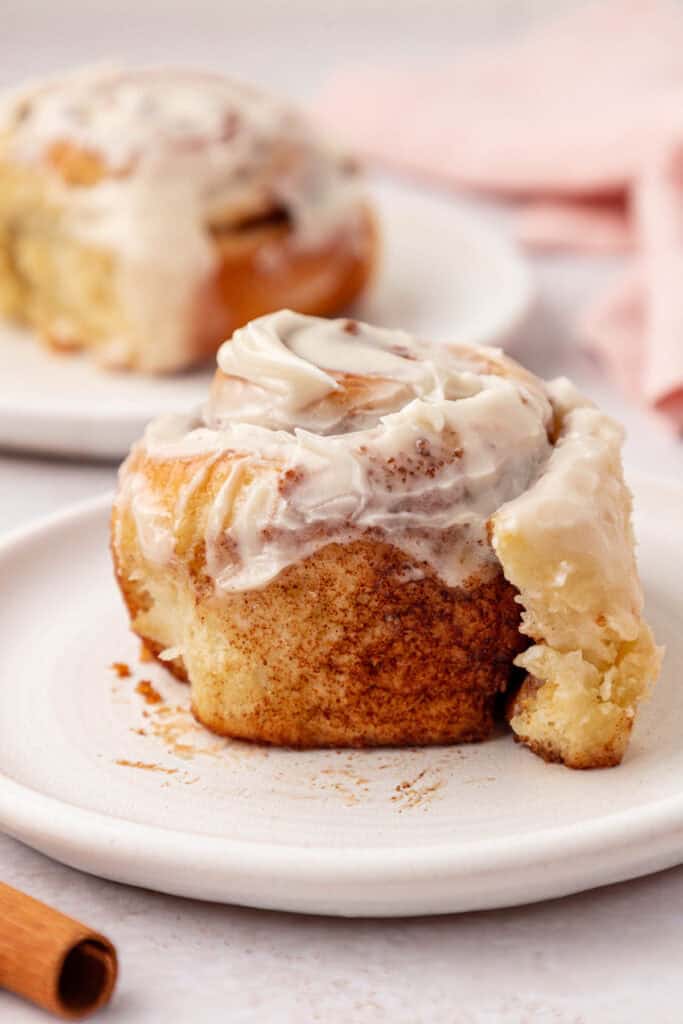
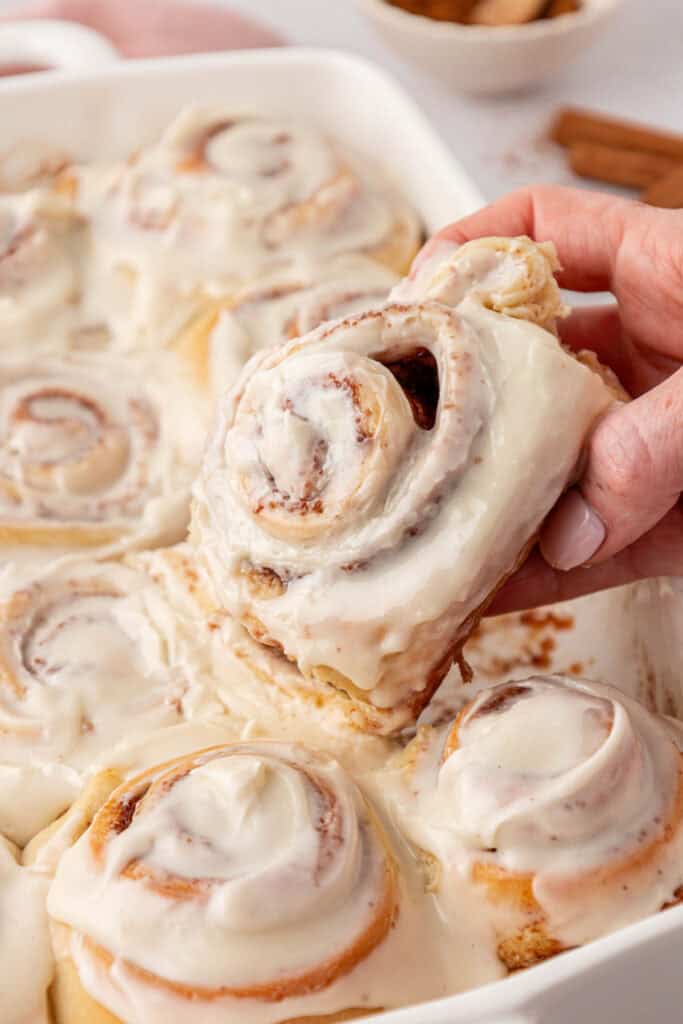
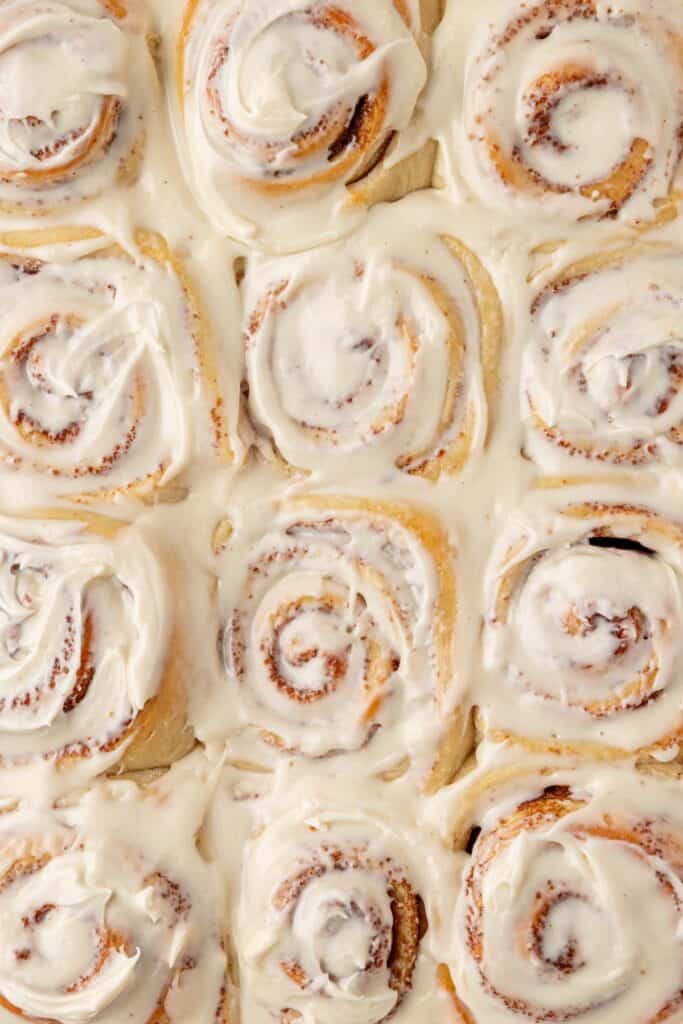
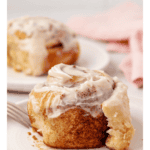
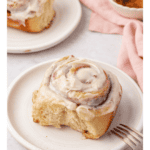
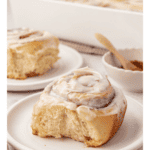
An ooey gooey easy cinnamon roll recipe with a thick layer of cream cheese frosting …ready in about one hour! These quick cinnamon rolls are like a Cinnabon cinnamon rolls that you can make at home.
Seriously try not to drool. I know it’s going to be tough. Because these copycat cinnabon cinnamon rolls that are made in an about hour start to finish are totally droolworthy.
Basically, get those sweatpants and get ready.
I’ve made these cinnamon rolls a few times. It took me a few attempts to get this recipe right, but when I did. Boy oh boy. I am going to make these for any brunch coming up in my life. Mother’s Day? Yup. Easter? Definitely. Any Sunday that needs it. Check.
Because I mean cinnamon rolls can be a time consuming process but when they are done in an hour there’ no excuse not to whip some up. And when they are done I slathered on this cream cheese frosting for cinnamon rolls recipe. But you could also use my cinnamon roll icing recipe that doesn’t use cream cheese
So let’s grab some yeast and let’s do this because I’m getting impatient. I want cinnamon rolls. Like now.
Ready To Take Your Baking To The Next Level?
Join the Ultimate Baking Bootcamp and master essential techniques like mixing methods and the why behind every recipe! Whether you’re a beginner or looking to refine your skills, this step-by-step class will help you bake with confidence and create flawless desserts every time. Start your baking journey today!
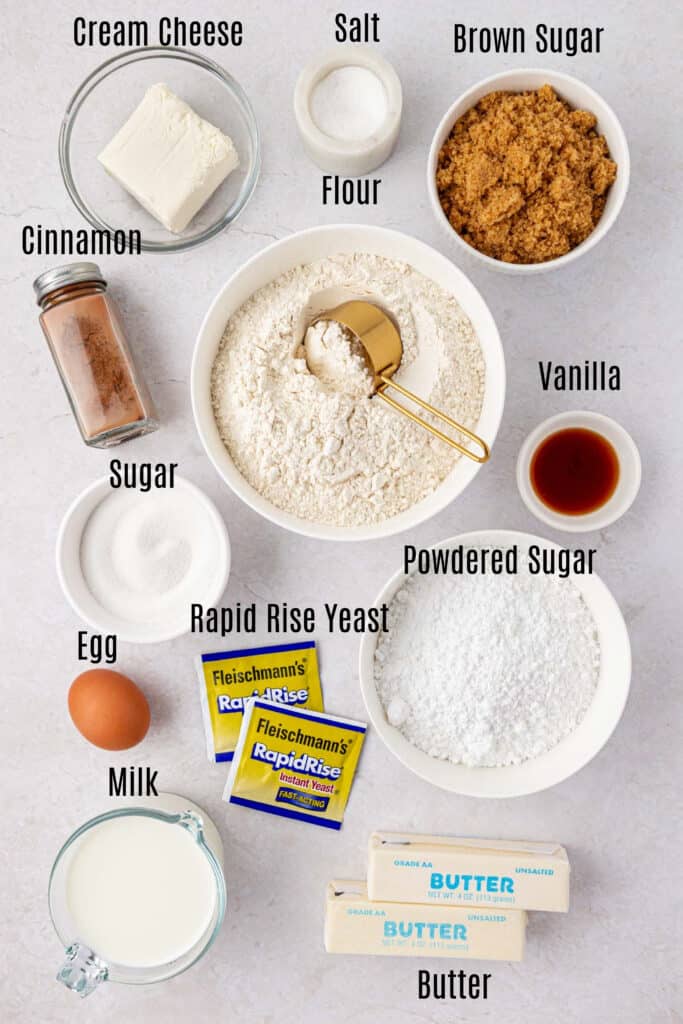
Ingredients Needed
For the dough:
- Milk – I used whole milk for the best flavor, and texture. Low-fat milk can be used or a dairy free milk as well.
- Butter – I used unsalted butter so I can control the amount of salt
- Sugar
- Salt
- Rapid Rise Yeast – Or instant yeast. You can use active dry yeast however the rolls will take longer to rise.
- Flour
- Egg
For the filling:
- Unsalted butter
- Light Brown sugar
- Cinnamon
For the icing:
- Cream cheese – Use full fat bricks of cream cheese for the best texture.
- Powdered sugar
- Unsalted Butter
- Vanilla
How To Make These Easy Cinnamon Rolls
Let’s face it. Cinnamon rolls might be the ultimate breakfast treat. Worth every calorie. But all that time waiting for the dough to rise? No way Jose. Not this girl. So what is a person to do? Eat oatmeal. Yea, right. Nope, use fast-acting yeast.
And there you go! These quick cinnamon rolls, adapted from Lauren’s Latest, from dough to baked and to your tummy in an hour.
Making The Dough:
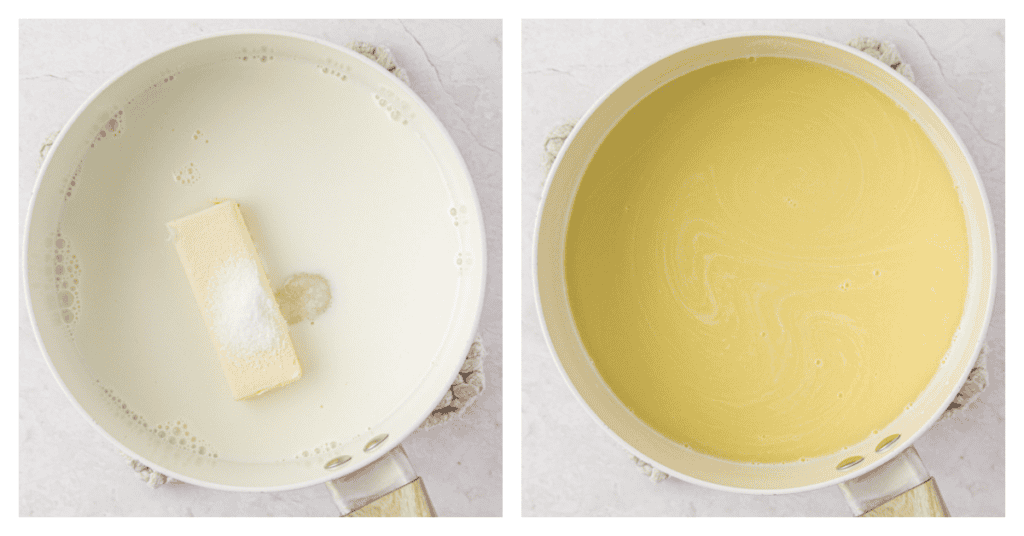
Start by combining the milk, sugar, salt, and butter together in a sauce pan over medium heat. combine the milk, Heat until the butter melts and then allow to cool.
Into the bowl of a stand mixer, measure out 2 cups of flour and yeast with dough hook attachment .
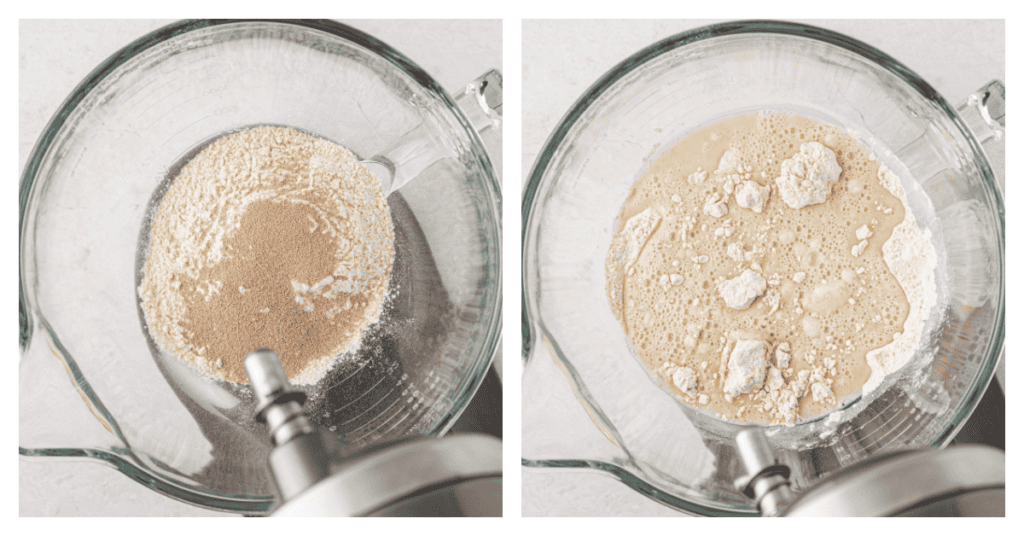
Once butter mixture has cooled, add into stand mixer and mix on low. Add in the egg and combine.
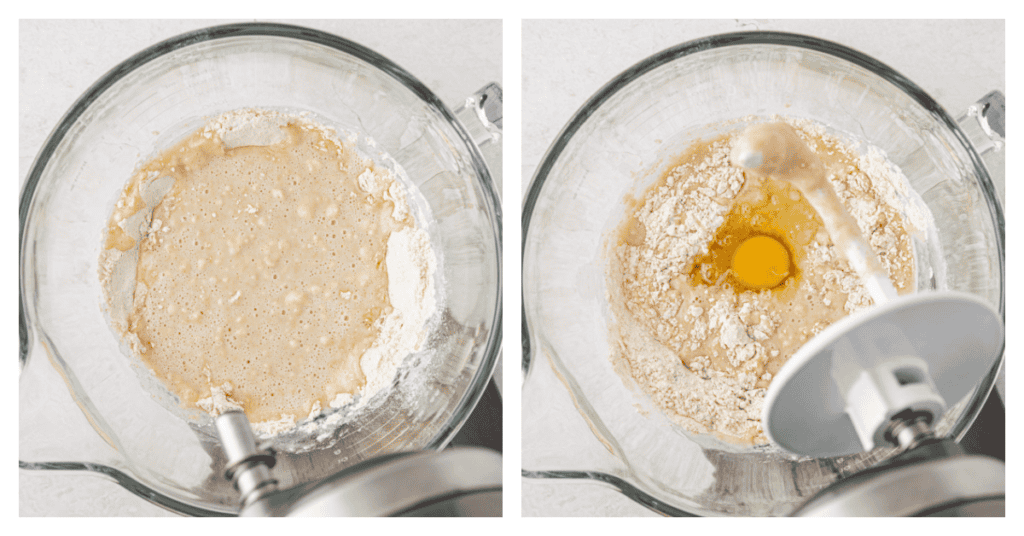
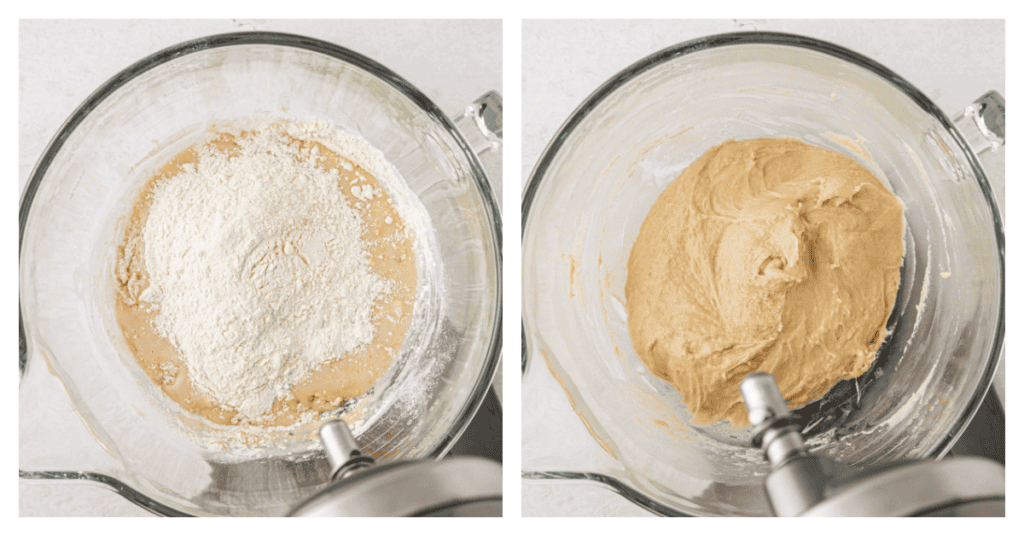
Add in remaining 2 cups of flour. Scrape edges of bowl to stir flour in evenly. Knead 5 minutes on low. If dough seems a bit sticky, stir in 2 tablespoons of flour at a time until it starts pulling away from the bowl. {You still want it to be a little sticky!} Rest dough 5 minutes.
Shaping The Cinnamon Rolls
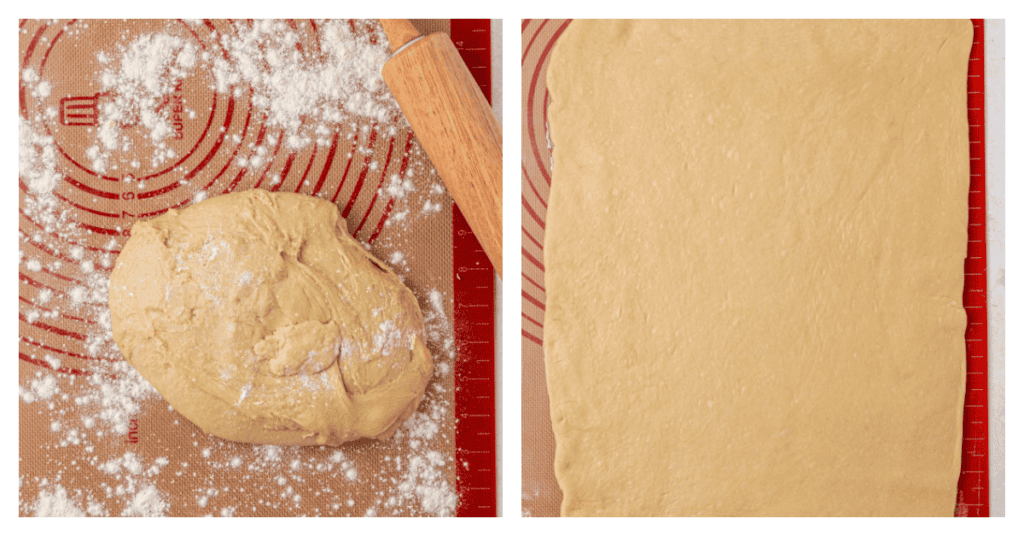
To help roll out the dough, I like to use my silicone pastry mat. I like to lightly flour the surface. You want to roll out the dough into a big rectangle, about 12×16 inches.
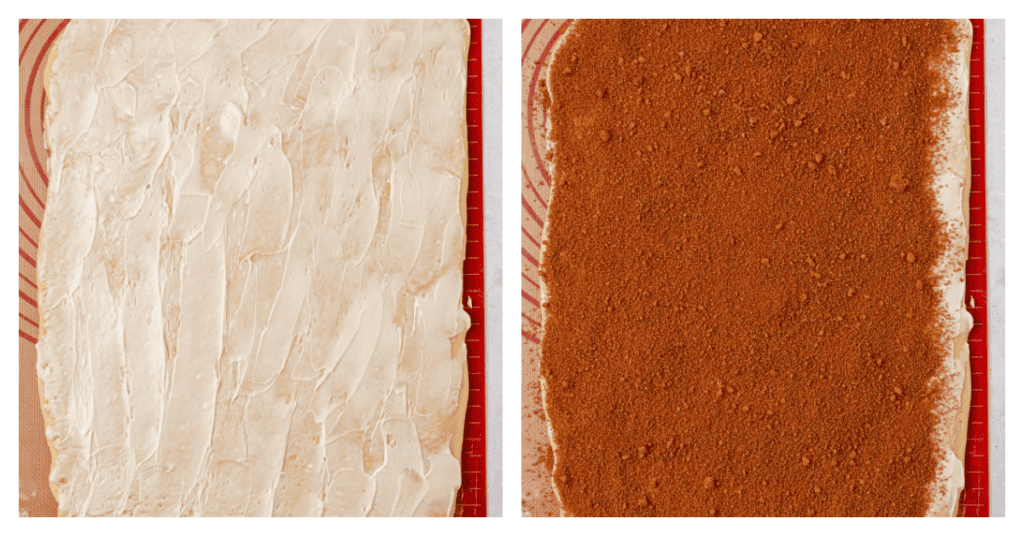
Once you have the dough rolled out, go ahead and slather it in butter. Sprinkle it with brown sugar and cinnamon. You know what Heaven is made of.
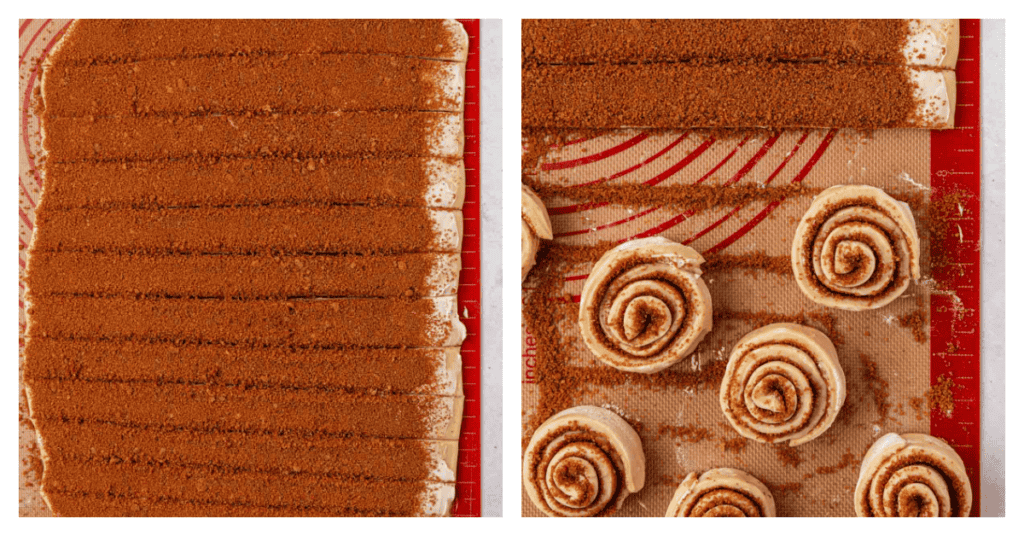
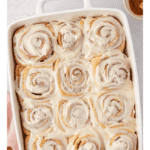
And roll it on up. Place them in a 9 by 13 inch pan.
Heather’s Pro Baking Tip
Use thread or unwaxed unflavored dental floss to cut the rolls without squishing the dough. Or you can also cut them into strips and roll the individually. Cutting these rolls into go by much faster. Like I did for these Healthy Cinnamon Rolls below.
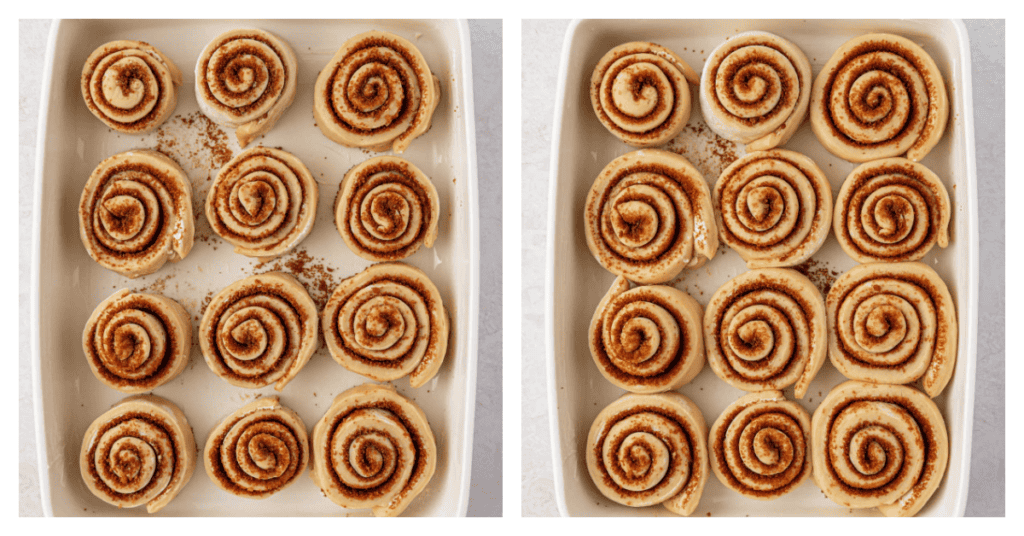
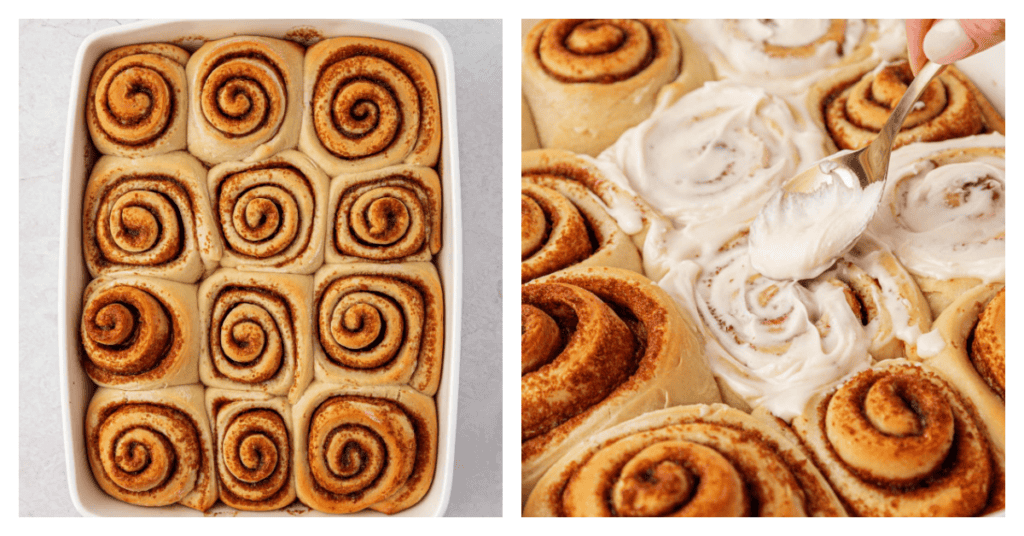
You can freeze them at this point if you would like and continue with the second rise and baking at a later date! Just wrap in dish, well. Then you need to let them rise for 20-25 minutes until puffy.
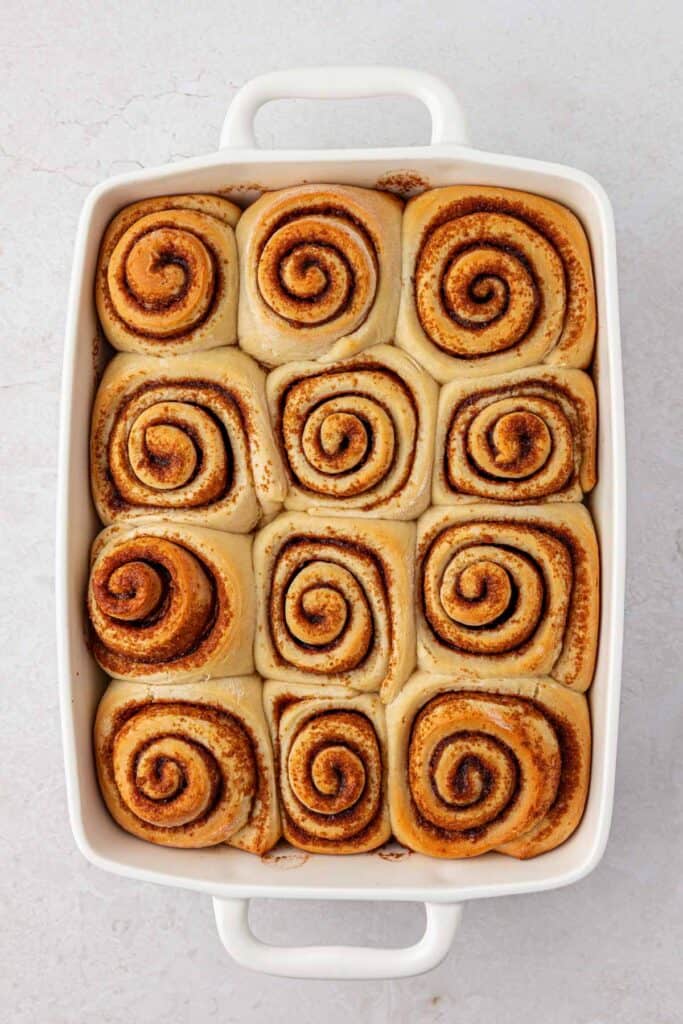
And the best part of these rolls? They take 20 minutes to bake. Seriously. Do you hate me for introducing these into your life?
You want to bake these at 350oF for 20 minutes until golden brown and internal temperature reads 190oF. While they are baking I like to make the cream cheese icing.
Frosting These Easy Cinnamon Rolls
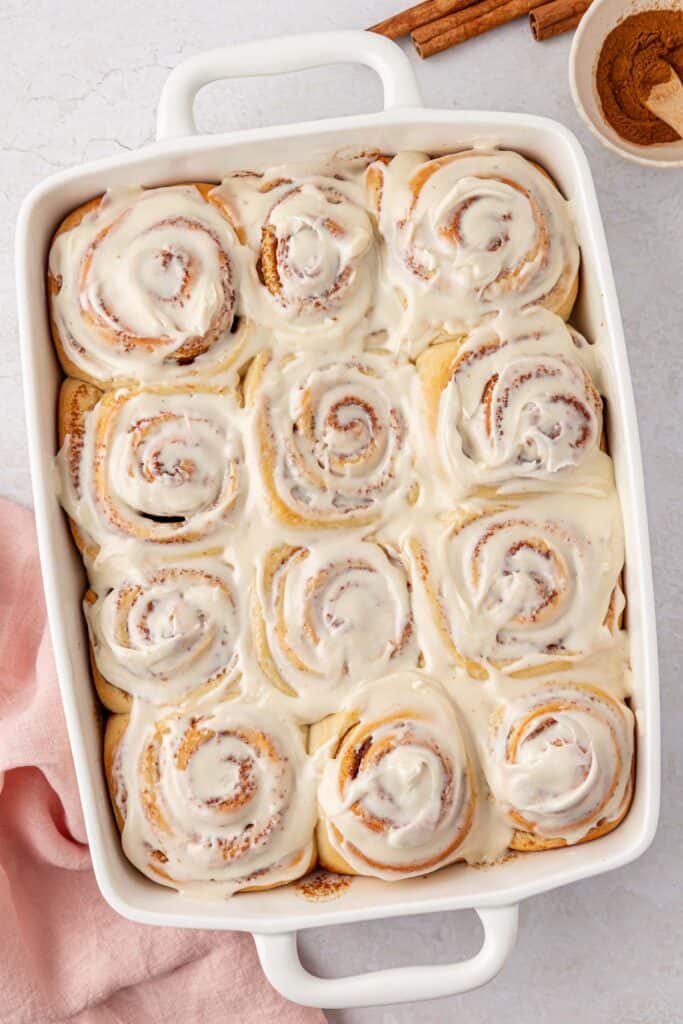
And of course, half the reason I eat those cinnamon swirled treats is the thick layer of vanilla cream cheese frosting on top. I used my go-to cream cheese frosting recipe that I have used to frost a carrot cake, pumpkin cupcakes, and my favorite red velvet cupcakes. Or you can try my cinnamon roll icing – 2 ways!
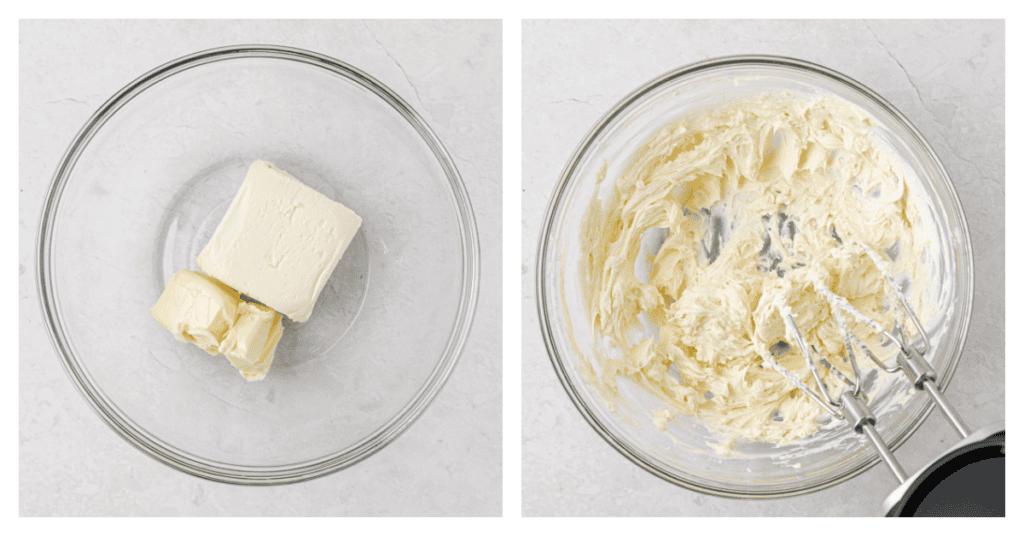
To make the cinnamon roll icing you want to first beat together butter and cream cheese.
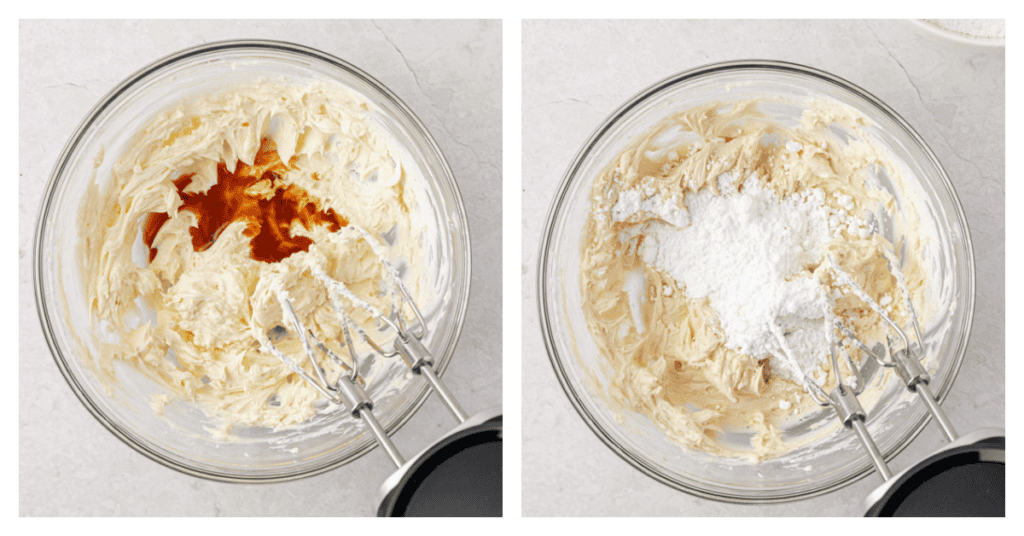
Then add in vanilla and powdered sugar a little at a time. Then when the rolls are done baking it’s time to frost.
When you frost your rolls, use only half the frosting so it can melt into all those cinnamoney (yes spell check that IS a word) nook and crannies. Then once they have cooled (if you can wait that long) spread the remaining frosting on.
Ok now you can dive in. Bet you’re glad you busted out those sweatpants now aren’t you?
More Recipe Tips
- Use A Thermometer. You want to use a thermometer to test the temperature of your milk/butter mixture before adding to the bowl. Yeast is a living thing, which means if the milk is too hot, it will kill the yeast. If the milk is too cold the yeast will not proof properly. Because this mixture uses Rapid Rise Yeast, it can be at a higher tempreature than use for other types of yeast. The mixture can be between 120-130°F. You can read more here from Bob’s Red Mills about what temperature kills yeast.
- Measure your flour accurately. Either measure using this method on how to measure flour described in this post, or use a kitchen scale for best accuracy. You can read (and watch there’s a video!) on how to measure all your ingredients here too.
- Use A Mixer. You can use your stand mixer with a dough hook attachment to make kneading this bread easy or make your bread dough in a mixing bowl with a dough whisk, and knead your bread dough by hand. However, a mixer makes everything come together much faster!
How To Get These Done In An Hour
These cinnamon rolls will take about an hour or so – give or take. Here are my tips to speed up the process!
- Weigh Your Ingredients. Yes it’s just faster! Besides being more accurate, it will speed up the measuring process. You can read (and watch there’s a video!) on how to measure all your ingredients here too.
- Use A Mixer. If you are making these by hand, then expect things to take a little longer.
- Cut Into Strips. As you saw above, I used to roll the dough up and then cut with a sharp knife or dental floss, but I found it much faster and easier to cut the dough into 12 strips after it’s been rolled out and then roll up each individual roll. Much faster and easier!
- Proof In Your Oven. Yeast will take longer in a colder kitchen. So if your kitchen is below 70oF and it’s winter do yourself a favor and proof in your oven. Turn your oven on at its lowest setting (for me that’s 170oF) and let it preheat. Once it’s preheated, I turn my oven off and put my pan of rolls into proof. This will speed up the process greatly!
- Use The Yeast Called For. If you use active yeast it will take longer for these to rise.
Storage Instructions
If you have them covered in cream cheese icing, then they will need to be refrigerated (should keep for up to 2-3 days). Just warm them ( I do this in the microwave for a few seconds until warm and gooey again).
You can also try warming them in the oven for a few minutes (200oF). If they are unfrosted, then you keep them at room temperature for 2-3 days.
You can also freeze these quick cinnamon rolls. After rolling and cutting after the first rise, you can wrap the pan in plastic wrap (and then a layer of tin foil to ensure no freezer burn).
When ready to bake, allow to thaw overnight in the fridge, or at room temperature for 2 hours then continue with the second rise and bake as directed.
You can also freeze baked cinnamon rolls. After baking, allow to cool completely before wrapping up and freezing.
Recipe FAQ’s
Unbaked: If you want to make the rolls but not bake them, go ahead make and shape these. But then cover the pan with plastic wrap and place in your fridge. The next day, bring them out and let them proof as usual before baking.
Baked: Yes you can make them the night before. Just warm them up gently in an oven or in the microwave for a few seconds (10-15 for each roll. They should last at room temperature for up to 3 days. Any longer and I would freeze. If they have a cream cheese icing I like to store in the fridge wrapped to be safe.
Freezing Unbaked: You can also freeze the rolls unbaked as well for up to 3 months. If freezing unbaked rolls, shape them and then freeze before you allow them to proof (rise for the last time). And then when ready to bake, let them thaw overnight in the fridge. Then when ready to bake the day of, take them out and let them proof as normal until puffy in volume and bake as normal.
Freezing Baked: Allow them to cool completely before freezing. And then I like to place on a baking sheet to freeze solid and then pop into a plastic bag for up to 3 months. You can reheat them in the microwave.
The dough should be somewhat sticky. It should come off the sides of the bowl, but still stick to the bottom of the bowl. If it’s not coming away from the sides of the bowl, then add in a bit more flour. Just add a few tablespoons at a time though, so you don’t end up adding too much (which will make for a tough cinnamon roll in the end).
This is probably because you added too much flour, either at the measuring stage or the shaping step. Weighing your flour will help prevent this (or spoon and level your flour). When shaping, lightly flour your counter, and try to not add too much flour to your dough and counter at this stage.
More Recipes
Craving more cinnamon rolls? Try my chocolate cinnamon rolls! They are a chocolate lover’s dream. Perfect for a sweet treat for your loved one. I also love my banana bread cinnamon rolls made with banana in the dough and sliced bananas in the filling.
Or my pecan sticky buns! I love making these for Father’s Day but they are perfect for any brunch.
Master The Art Of Baking!
Don’t miss out on the chance to elevate your baking skills! Join the Ultimate Baking Bootcamp today and unlock the secrets to creating perfect desserts every time. With expert guidance, step-by-step lessons, and insider tips, you’ll be baking like a pro in no time. Sign up now and start mastering your baking!

Quick Cinnamon Rolls
Ingredients
For the dough:
- 1 cup (240 ml) milk
- ⅓ cup (5 1/3 Tbs., 76 g) unsalted butter
- ½ cup (99 g) granulated sugar
- 1 teaspoon salt
- 4 ½ teaspoons (2 pkg.) rapid rise yeast
- 4-4 ½ cups (480-540 g) all purpose flour
- 1 large egg
For the filling:
- ⅓ cup (5 1/3 Tbs., 76 g) softened unsalted butter
- 1 cup (220 g) packed light brown sugar
- 2 tablespoons (12 g) ground cinnamon
For the icing:
- 4 ounces (113 g) cream cheese
- 4 Tablespoons (57 g) unsalted butter room temperature
- 1 teaspoon vanilla extract
- 2 cups (226g) powdered sugar
Instructions
Making the dough:
- In a sauce pan over medium heat, combine the milk, granulated sugar, salt, and butter. Heat until the butter melts and then allow to cool. (Mixture should be about 120-130oF.) If using active dry yeast, the mixture should be between 105-110oF. Note: If using active dry yeast, rolls will take longer to rise. 1 cup (240 ml) milk ⅓ cup (5 1/3 Tbs., 76 g) unsalted butter ½ cup (99 g) granulated sugar 1 teaspoon salt
- Into the bowl of a stand mixer, combine 2 cups of flour and yeast with dough hook attachment . 4 ½ teaspoons (2 pkg.) rapid rise yeast 4-4 ½ cups (480-540 g) all purpose flour
- Once butter mixture has cooled, add into stand mixer and mix on low. Add in the egg and combine. 1 large egg
- Add in remaining 2 cups of flour – 1/2 cup at a time (You may not need it all). I find 4 cups is perfect (but this may depend on how you measure your flour – refer to my notes). Scrape edges of bowl to stir flour in evenly. Knead 5 minutes on low. If dough seems a bit sticky, stir in 2 tablespoons of flour at a time until it starts pulling away from the bowl. {You still want it to be a little sticky!} Rest dough 5 minutes.
Shaping the cinnamon rolls:
- Preheat oven to 350 degrees. Line rimmed baking sheet with silicone baking mat or parchment paper, spray lightly with nonstick cooking spray and set aside.
- Sprinkle counter with flour and roll dough to be about 12×16 inches.
- Spread with softened butter over dough, being sure to go right to the edges leaving a 1-inch strip untouched on one of the longer sides of dough. ⅓ cup (5 1/3 Tbs., 76 g) softened unsalted butter
- Dump brown sugar and cinnamon mixture onto the middle of the dough and spread with your hands, creating an even layer over top of the butter, still leaving that 1-inch strip of dough untouched. Lightly press the sugar mixture into the butter using a rolling pin. 1 cup (220 g) packed light brown sugar 2 tablespoons (12 g) ground cinnamon
- Shaping Method #1: Using a pizza wheel, cut the dough into 12 equal strips. Roll up each strip into one roll and place into your pan. Shaping Method #2: Roll the dough up into a tight log, finishing with the plain dough on the bottom to seal the entire thing together. Cut off the uneven ends to even out the log. Slice your rolls into 1 1/2 inch rounds and place on prepared pan.
- Cover the dish with a towel and allow to rise in a warm draft place for about 20-25 minutes until puffy. (If you used instant or active dry, rise times will be longer)
- Bake about 20 minutes or until tops start to brown lightly.
Make the cream cheese icing:
- Cream the cream cheese and butter together. 4 ounces (113 g) cream cheese 4 Tablespoons (57 g) unsalted butter
- Add in your vanilla extract. 1 teaspoon vanilla extract
- Then add in your sugar 1/2 cup at a time, and mix until smooth and creamy. 2 cups (226g) powdered sugar
- Once rolls have been removed from the oven, frost using half the amount made. Then after they have cooled a few more minutes, frost again
Video
Notes
- Making Ahead/Storage:
- Unbaked: If you want to make the rolls but not bake them, go ahead make and shape these. But then cover the pan with plastic wrap and place in your fridge. The next day, bring them out and let them proof as usual before baking.
- Baked: Yes you can make them the night before. Just warm them up gently in an oven or in the microwave for a few seconds (10-15 for each roll. They should last at room temperature for up to 3 days. Any longer and I would freeze. If they have a cream cheese icing I like to store in the fridge wrapped to be safe.
- Freezing Unbaked: You can also freeze the rolls unbaked as well for up to 3 months. If freezing unbaked rolls, shape them and then freeze before you allow them to proof (rise for the last time). And then when ready to bake, let them thaw overnight in the fridge. Then when ready to bake the day of, take them out and let them proof as normal until puffy in volume and bake as normal.
- Freezing Baked: Allow them to cool completely before freezing. And then I like to place on a baking sheet to freeze solid and then pop into a plastic bag for up to 3 months. You can reheat them in the microwave.
- Butter: Make sure to use real butter in stick form, not margarine or tub butter which is made with oils and will affect the dough outcome.
- Cream Cheese: Use the brick variety, full fat is best. Do not use the tub variety.
- Tips On Baking These:
- Test Your Milk Mixture. You want to use a thermometer to test the temperature of your milk before adding your yeast. Yeast is a living thing, which means if the milk is too hot, it will kill the yeast. If the milk is too cold the yeast will not proof properly. You want the milk mixture to be around 105-110°F.
- Weigh Your Ingredients For Best Accuracy (And It’s Faster!). If you don’t use a scale, then measure your flour accurately by spooning the flour into your measuring cup and then level it off. Be sure to NOT pack it down. Either measure using this method described in this post, or use a kitchen scale for best accuracy.
- Slightly Sticky Dough Is Good. It’s better to have your dough be on the bit sticky side, this will result in a fluffier roll.
- Cut Into Strips. I used to roll the dough up and then cut with a sharp knife or dental floss, but I found it much faster and easier to cut the dough into 12 strips after it’s been rolled out and then roll up each individual roll. Much faster and easier!
- Proof In Your Oven. Yeast will take longer in a colder kitchen. So if your kitchen is below 70oF and it’s winter do yourself a favor and proof in your oven. Turn your oven on at its lowest setting (for me that’s 170oF) and let it preheat. Once it’s preheated, I turn my oven off and put my pan of rolls into proof. This will speed up the process greatly!


OH.MY.GOODNESS!!!!! These were so easy and so delicious!! The hit to our Christmas brunch!!! I’ve never done anything with yeast because I’m intimidated by it and I’m 70! But is my weakness and these looked scrumptious and they didn’t disappoint. I did try something and thankfully it worked out. Made them the night before, refrigerated overnight night then set them out the next morning for an hour then set them in a warmed oven for 49 min to rise then baked per recipe. Worked beautifully!!!
Aw Thank you Becky I’m so glad you loved this recipe! ANd yes I love making them the night before and then letting them rise the next morning, may take a bit longer but worth getting to sleep in 🙂
So are the nutrition facts for only one roll? Just curious
Yes Jonelle that’s for one roll
Love this recipe and have made it many times ! Just wondering if it could made the night before and then bake it in the morning?
Hi Amanda, sorry for the late reply – got lost in the shuffle. But yes you can always shape these and then pop in the fridge and let rise overnight!
I’m very disappointed, I’m not sure sure where this recipe went wrong but the dough was very tough when I rolled it out, and the rolls never really rose. I guess I shouldn’t have added the full 4 cups of flour. I used Rapid Rise yeast just liked the recipe calls for. I would advise against adding all of the two additional cups of flour if you decide to make this recipe; just a little at a time so that the dough remains sticky. Oh well you live and you learn 🤷🏼♀️
Hi Emma, sorry to hear that. I’m not sure how you measured your flour – I recommend measuring by weight as it’s easy to incorrectly measure your flour by volume and end up with too much in your measuring cup. And too much flour will definitely end up in a tough dough – so it sounds like something to do with the amount of flour. But yes I definitely recommend adding the last 2 cups of flour gradually so to avoid adding too much. And the rolls not rising, makes me think your yeast may have been expired or killed in the process. It’s always good to check the date on the package, and check the temperature of your ingredients the yeast is added to. Hopefully these tips help you!
Made these this morning! They were so good. Better than some other “best cinnamon rolls ever” recipes. The bread was soft and fluffy and delicious even when you don’t get a cinnamoney part. Also I didn’t have milk so I used half and half instead … so good!
Aw thank you so much Jessica! I’m so glad you loved them!
What size pan should you be using?
Hi Victoria! I used a 9*13 sized pan!
I just made these, but I added 2 cups of flour in the bowl with the yeast, added the milk mixture, and then 2 cups more of flour. Way to much flour!! Anyone else have that problem? Next time I will have to add the flour in slower. Lol
Hi Stephanie! Sorry to hear that. Could be from how you measured your flour. I always recommend measuring flour with a digital scale to be accurate. However if you don’t own one be sure to fluff up the flour, spoon (don’t pack it in) to the cup and the level off. I’ll be sure to put a note in the recipe to help!
These are delicious. However I can’t seem to get them to rise in the 20-25 minutes. Should they get fat and poofy during this time? Do you have a picture you can post of what yours look like right before going in the oven? Thanks!
THey should be a little poofy but won’t necessarily double in size.
So tonight we had breakfast for dinner, and my hubby was craving cinnamon rolls. After a lazy afternoon, I ran out of time to make a full batch so we tried these. They turned out well. I think I maybe should have left them in the oven for just another couple of minutes, as the middle was a tad on the doughy side. But it also could have been the texture of a recipe that is only allowed to rise once instead of twice. I made up my own glaze – a salted, maple and brown sugar cream cheese concoction that my husband approved of. Definitely will try these again, and if I have the time, I may try giving them that extra rise. 🙂
Hi Dorinda! I love the sounds of this glaze! The one rise only works if you use the rapid rise yeast. If you use active then it would need to go through a second rise. I also like to check the internal temperature with a thermometer for 190oF to gauge whether or not they are done. Hopefully that helps for the second time you try!
This is the recipe I want to keep for cinnamon rolls, can’t beleive it in an hour they are ready. Such a beautiful pics you have taken.
Thanks Jagruti! Yes it’s a great one to keep in your backpocket!
I love cinnamon rolls and these look amazing. Such great tips in this post….super helpful to those of us making these!! Can’t wait to try these!
Thanks Amanda! Yes the tips hopefully have you rocking these out in your kitchen.
Delicious all the way! Also the recipe looks so easy and approachable, need to try this out soon!
Thanks Neha..it’s a definitely easy yeast recipe to start with!
What a great recipe to have on hand!! When you’re craving cinnamon rolls you can have them on the table in no time. When it comes to yeast the only kind we use is the instant variety. It never fails us.
Thanks Marisa! Yes it’s a great one to remember for brunch. And I’m with you I always keep instant yeast on hand!
You can’t go wrong with a cinnamon roll that’s for sure! I love that they are easy to make too!
Thanks Anne! Yes they are easy and sooooo goood!
One hour cinnamon rolls!?!? My family will go nuts over these for sure!!! They sound delish and so easy!!
Thanks Lori! Yes they are so easy and delicious. Your family will love them for sure.
This looks great but I’m not seeing the step where you add the yeast. I’m assuming after you allow the milk mixture to cool to the 105-110?
I wonder this too…… it says to test the temp of the milk, but in the list of steps, it says to add the yeast to the flour mixture, then put the cooled milk mixture in?
Hi Sarah! Sorry for any confusion. So you want to make sure the butter/milk mixture that you prepared on the stovetop (to melt the butter) isn’t too hot before adding to the rest of the ingredients that contain the yeast. If it’s too hot it will kill the yeast. So by “cooled” I mean it needs to be cooled down to 105-110. It can be sometimes over that temperature after being on the stovetop.
I’m confused by this. Active dry yeast calls for liquid to be 105-110. Rapid rise yeast calls for liquid to be at 120-130.
Hi Karen, these cinnamon rolls do use rapid rise yeast so yes it can withstand a higher temperature of 120-130F since it’s not being directly added to the milk mixture and since it’ mixed with flour first. I’ll be sure to update the post with this information!
You can make this in under 1 hour? Yes please! These look perfect for Mother’s Day!
Making these this morning for my birthday…in my new Kitchenaid mixer… they were so easy to whip up and the perfect amount of time. Thank you for such a wonderful recipe! My new go-to cinnamon roll recipe!
Hi Charlotte! Oh I’m so glad you found a fun way to use your new kitchen aid mixer 🙂 aren’t they the best?! And aw that makes my day that you loved the recipe!!
I love Cinnabon but these cinnamon rolls look even better! Love that they’re so fast and easy to make, too.
This is picture perfect and delicious. Love the creamy frosting on it. The kids to enjoy them.
Thank you Veena! Oh yes, kids will definitely love these. Of course adults will too! 🙂
Cinnabon rolls made right at home in an hour? Yes, please!! These look so delicious.
Yes one hour Sharon!..sounds good to be true but it isn’t 🙂