
What Is The Creaming Method?

This Post May Contain Affiliate Links. Please Read Our Disclosure Policy.
The creaming method is used to make cookies, cakes, and so much more in the baking world. The creaming method for cookies and cakes is a common mixing method in baking. Properly creamed dough will yield thick, chewy cookies that don’t spread and cakes that rise tall and fluffy. This post goes in depth to all my tips, tricks, and step by step photos to accomplish the creaming method properly when making cookies and cakes.
Making chocolate chip cookies is the first thing I can remember when I think back to what I baked as a kid. I’m guessing it is for most. Classic yellow bag of chocolate chips. Grab a couple sticks of butter. Mix away. Sneak a few bites of dough (mom won’t know) and cookies in minutes.
Little did I know I was engaging in one of the most common mixing methods in baking – the creaming method.
And the one method that I think is done incorrectly. So today we are going to dive deep into the creaming method for cookies and explore how to properly cream your cookie dough.
I get many e-mails asking me for cookie help. “My cookies melted into big puddles!” “My cookies are thin and crispy, what gives?”.
My answer: Could be the way you are creaming your cookie dough. So let’s dig in, shall we?
Ready To Take Your Baking To The Next Level?
Join the Ultimate Baking Bootcamp and master essential techniques like mixing methods and the why behind every recipe! Whether you’re a beginner or looking to refine your skills, this step-by-step class will help you bake with confidence and create flawless desserts every time. Start your baking journey today!
See Also:
- Learn what the whisking method is and how to make cakes with it!
- Making a gingerbread or carrot cake, and confused on what the melting method is, read more about it here!
- When it comes to make perfect biscuits, understanding how to incorporate the ingredients using the rubbing in method is important!
What Is The Purpose Of The Creaming Method?
The creaming method for cookies is a way to mix our butter (or fat) and sugars together to help leaven (make rise) our cookies in the oven. It helps to properly cream (aka) mix our fats and sugar together.
Creaming can also help increase the volume of our cookie dough (aka the yield of our cookies). If you have ever gotten a different yield of cookies than the recipe stated this is probably due to the fact that you creamed the dough for a different amount of time than stated.
The creaming method for cookies is slightly different than the the creaming method for cakes. With cakes, you would after you have properly creamed the butter and sugar together add the wet and dry ingredients alternately. With cookies, after the creaming step you would add your wet ingredients and then the dry ingredients.
What Tools And Ingredients You Need
- Room Temperature Ingredients – this is important so that everything is incorporated. This includes the butter and the eggs
- Stand mixer (or hand mixer) fitted with a paddle attachment– to properly cream together your butter and sugar
- Silicone spatula – You need a sturdy spatula to scrape down the bowl to make sure there is no pockets of sugar and butter not completely incorporated
What Are The Steps Of The Creaming Method?
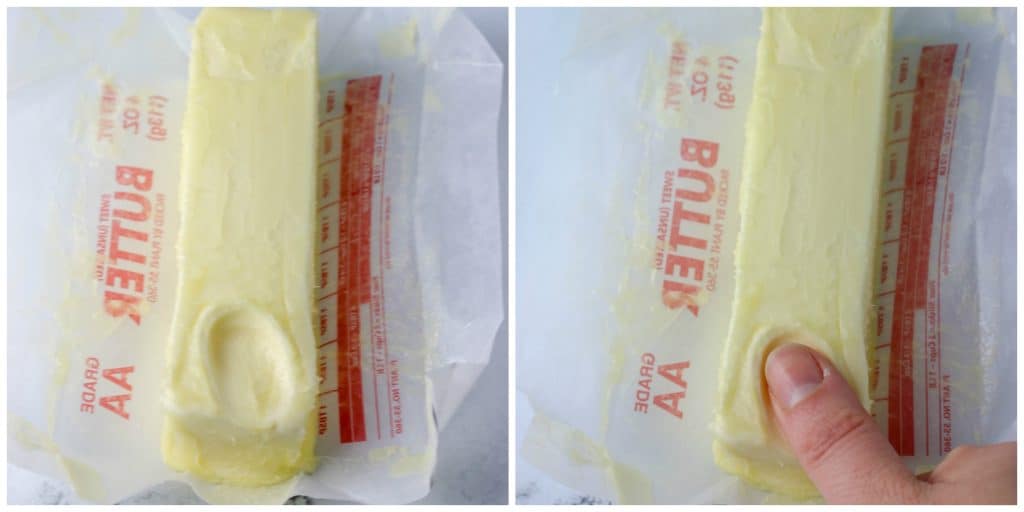
Step One: Start With Softened Butter
Softened butter is the key to have a properly creamed dough. You want to be able to press your thumb into the butter, but still have some resistance. It shouldn’t just smush right through. Yes, that’s a technical term 😉
To get your butter to room temperature you cube the butter up and let it sit out at room temperature until it reaches the desired softeness. Here are 3 ways to soften your butter quickly. My favorite involves the microwave (which many may tell you to avoid but I have a surefire way to do this without it melting)

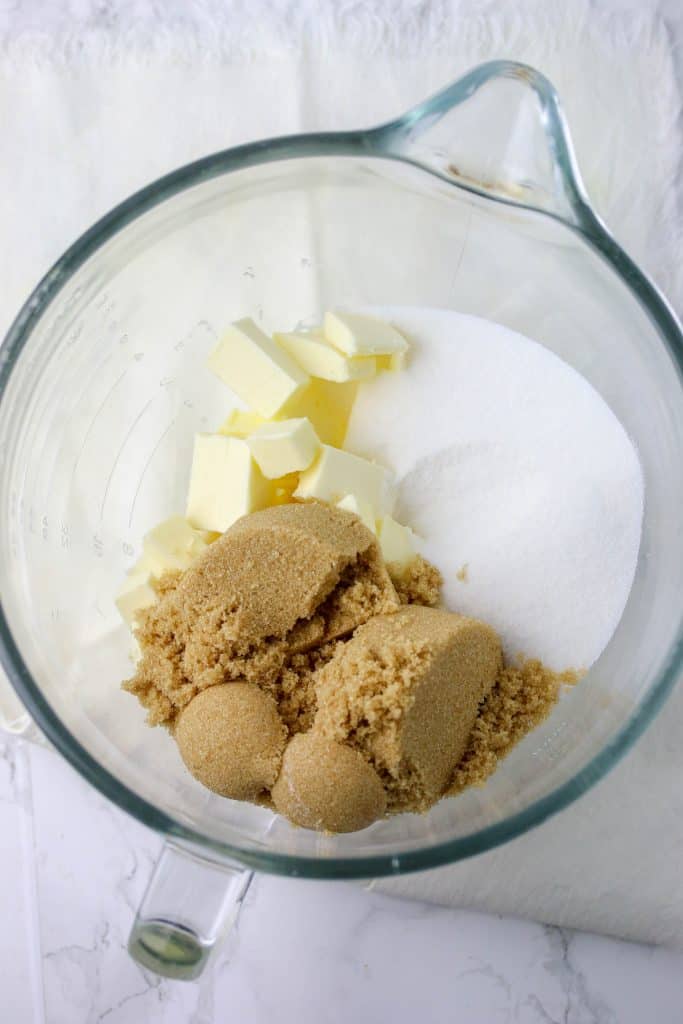
Step Two: Combine The Butter And Sugars
Once your butter is softened, you can add the butter and sugars to your stand mixer bowl. You want to use a paddle attachment at this point to begin creaming the ingredients together.
You want to mix on a “medium speed” – which for me is about 4 – 5 for about 2-3 minutes (unless specified). You do not want to cream on high as this will overcream your butter and sugars. Overcreaming will add too much air into the mixture resulting in cookies that spread too much and cakes that fall in the middle.
During this time, the sugar will “punch holes” into the butter creating air pockets. And then in the oven, those air pockets will become filled with the carbon dioxide from the leavening agents (aka baking powder and baking soda) and expand.
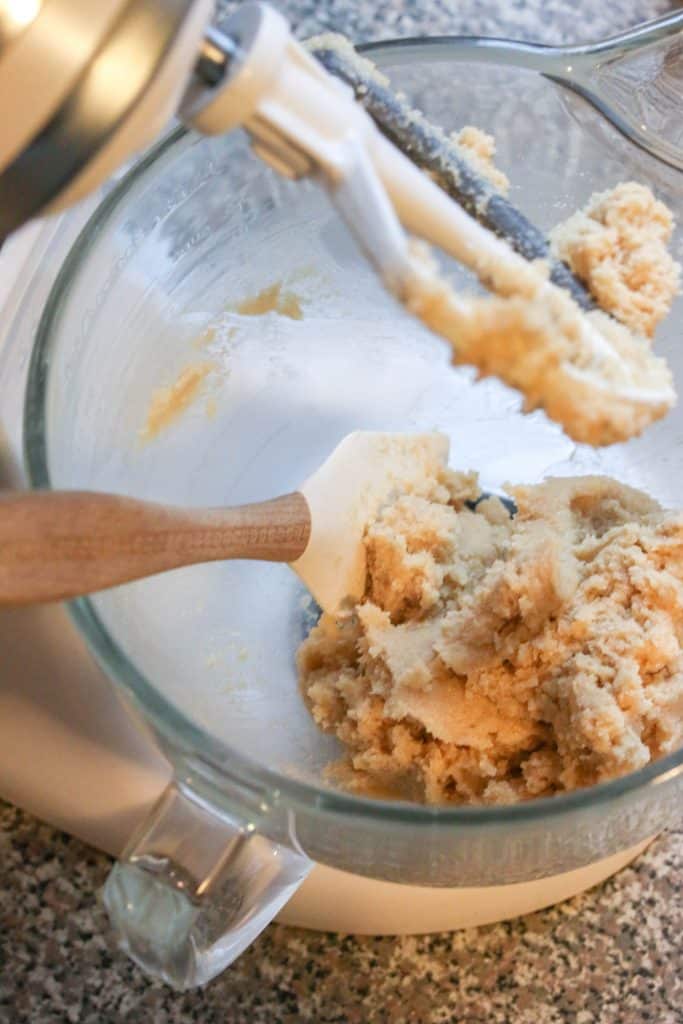
It is during these few minutes, that your fat will soften and increase in volume. The mixture will begin to lighten in color as well.
Just as you don’t want to overcream, you also don’t want to undercream the mixture. The mixture should be light and fluffy, but you can still feel the sugar granules if you rub it between your fingers.

Step Three: Scrape Down The Bowl
I have to admit this is NOT my favorite part of creaming as it can be awkward to work your spatula around the mixing bowl. However, it’s crucial to stop your mixture and scrape down the bowl as needed.
I aim to do this once every minute. Some mixer paddle attachments won’t be able to reach the bottom of your bowl leaving unincorporated pockets of butter and sugar.
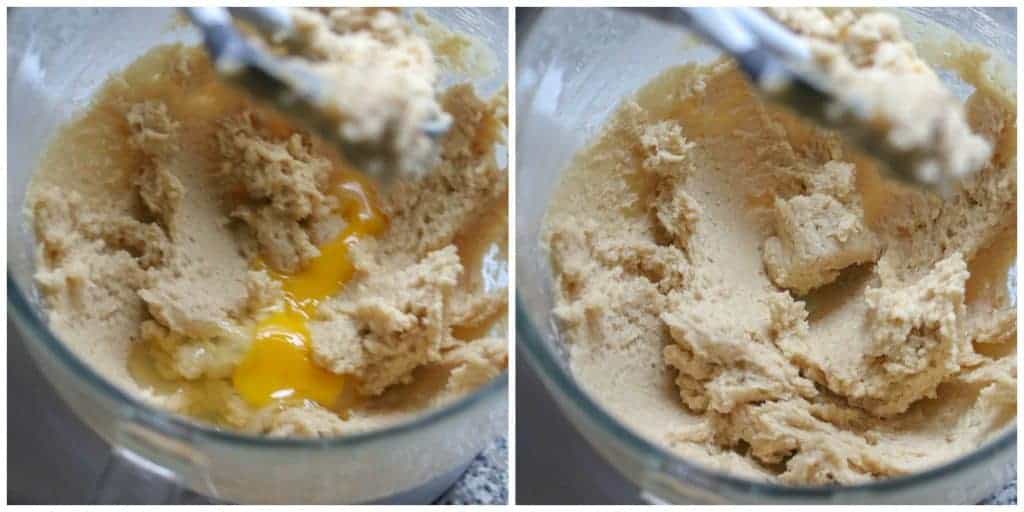
Step Four: Add The Eggs
Once the mixture has been properly creamed it’s time to add your room temperature eggs. If you add COLD eggs, you will seize the butter in the bowl, ruining all your hard work.
To get your eggs to room temperature quickly: Place them in a bowl of warm water for 10 minutes.
And you want to add the eggs one at a time mixing after each, so they don’t overwhelm the mixture causing it to curdle and separate.
To ensure this doesn’t happen, I crack the eggs in a small separate bowl first and quickly beat the egg to break up the yolk.
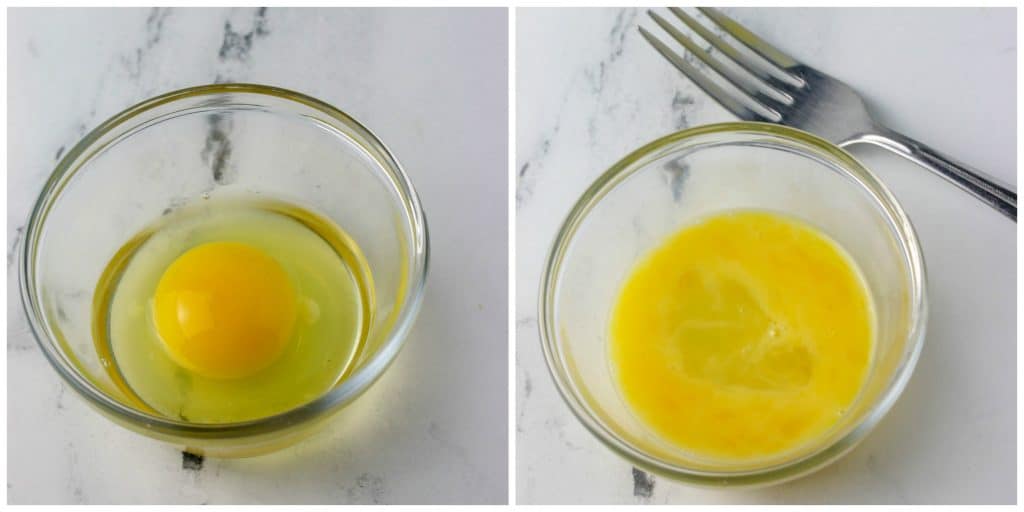
You want to make sure to add your eggs one a time and let each one get incorporated before adding a second. You will notice the mixture becomes lighter in color and larger in volume. (you would also add any flavorings at this point such as vanilla extract)
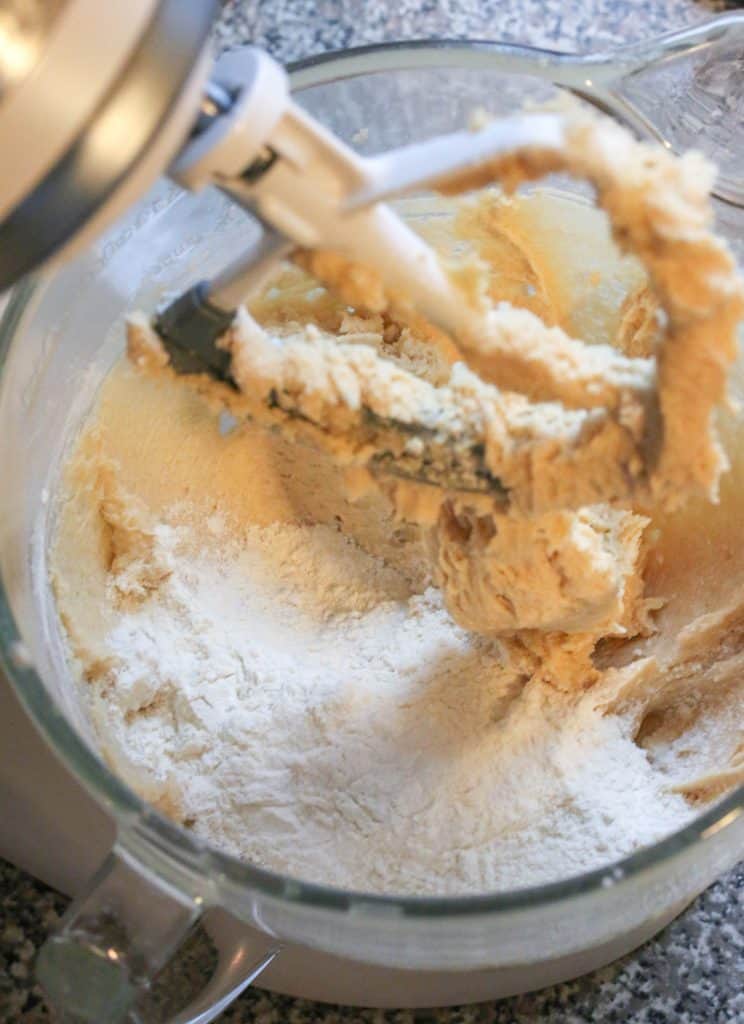
Step Five: Add Your Dry Ingredients
You’re almost done! Aren’t you excited!? 🥳
Time for your dry ingredients. You want to add these gradually and do this with your stand mixer OFF. Unless you like big messes to clean up in your kitchen.
If you are making a cake, then you will alternate adding the dry ingredients with any other added liquids – beginning and ending with the dry ingredients.
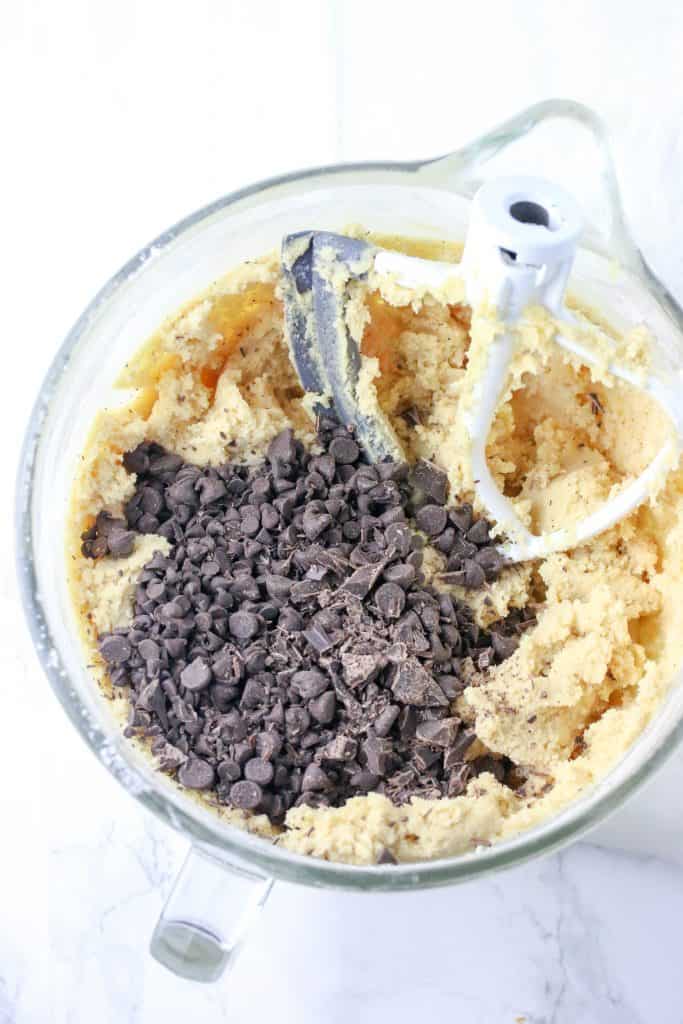
And if you’re making cookies, then go ahead and add in yummy mix-ins..aka chocolate chips!
More Cake And Cookie 101
- Which Flour Is Best For Cookies?
- 6 Tips To Bake Perfect Chocolate Chip Cookies
- How To Freeze Cookie Dough
- My Top 20 Tips For Baking Cakes
- 8 Reasons Your Cookies Spread Too Much
- How To Prepare Cake Pans (in 4 easy steps!)
- What Does Butter Do In Cookies?
- Unsalted Butter Vs. Salted Butter In Baking
Recipes Using The Creaming Method
Ok now that you have this classic baking method under control…let’s get to baking. Listed below are some recipes that use the creaming method.
- New York Times Chocolate Chip Cookies
- Lemon Sour Cream Pound Cake Recipe
- Red Velvet White Chocolate Chip Cookies
- Apple Crumb Cake
- Fresh Strawberry Pound Cake (with strawberry glaze!)
Master The Art Of Baking!
Don’t miss out on the chance to elevate your baking skills! Join the Ultimate Baking Bootcamp today and unlock the secrets to creating perfect desserts every time. With expert guidance, step-by-step lessons, and insider tips, you’ll be baking like a pro in no time. Sign up now and start mastering your baking!
Got A Baking Question? Leave A Comment Below And Let Me Know!
Happy Baking!


Is reverse creaming good for baking gobs? I would hate to try and have a miss!
Hi Cindi, I’m not familiar with baking gobs – sorry I couldn’t be more help!
Hello
Excellent information but I got lost when adding the dry ingredients. It says standing mixer should be off. Do you mix the dry ingredients in with a spatula or spoon?
Oh thank you I clarify that in the post. So I either stir in with a spatula or add the fry with mixer off then mix on low (so you don’t overmix and end up with a blizzard of flour in your kitchen! Haha)