This Post May Contain Affiliate Links. Please Read Our Disclosure Policy.
If you have ever had a pie crust with a soggy bottom the problem was not the crust but that you didn’t blind bake it first. Blind baking your pie crust is super simple and will help you rock out homemade pie crust every time!
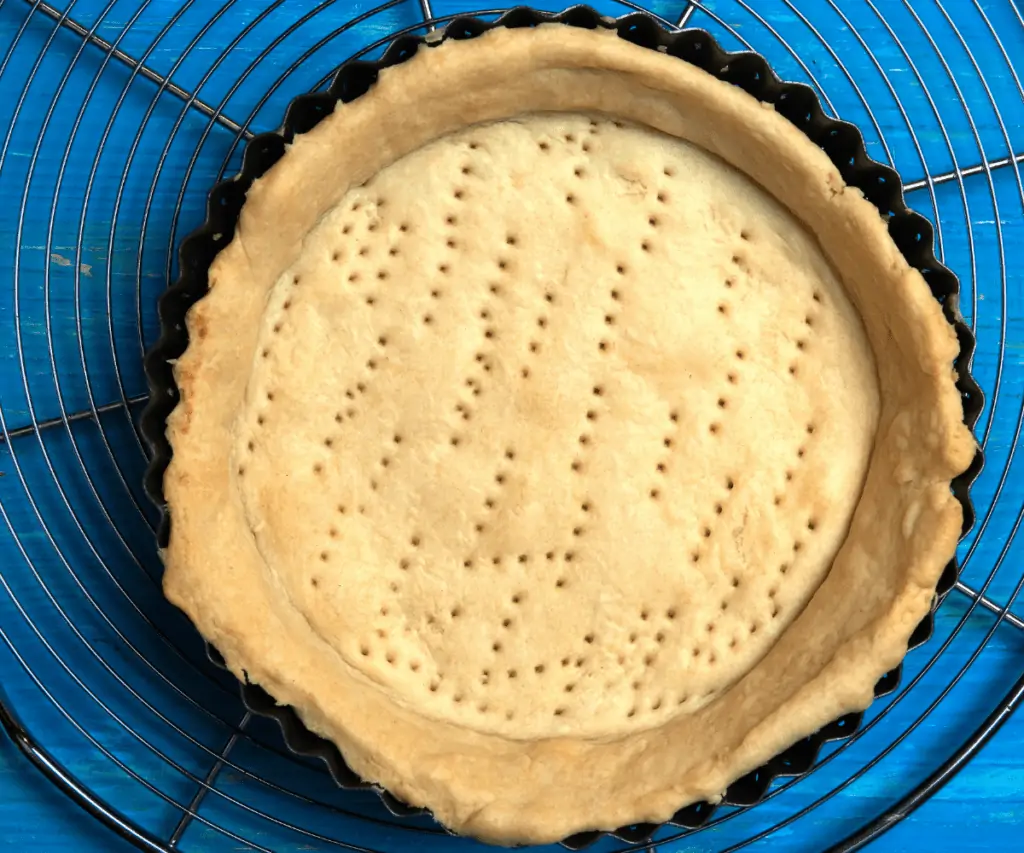
When the leaves turn color, my brain always turns to pies. Apple, pumpkin, chocolate. Doesn’t matter. I want them all.
But I know for some making pies can be intimidating! It really shouldn’t be! And one key technique you need to master to make stellar pies it learning how to blind bake pie crust.
Blind baking is key to making sure you get a perfectly crispy crust. No soggy bottoms here! But it’s taken a few trials and lots of errors over the years for me to now master my blind baking pie crust skills. So I want to share with you all my secrets so you can avoid a soggy pie crust too.
Jump To…
What Is Blind Baking?
If you are new to blind baking…you are going to be amazed at how easy it is. If you are like huh blind baking? No you don’t close your eyes while baking a pie.
Blind baking means you partially bake your crust before adding the filling. You blind bake a pie crust (or par-bake) for no bake pies, or certain types of pies like a custard, pudding, or pumpkin pie. Or you can do this if you want to ensure the bottom of your pie crust comes out extra crispy and not soggy.
For example, if I didn’t blind bake my crust for my pumpkin pie then it would cause the crust to become soggy before it has a chance to cook up. So we solve that by pre-baking the crust first before we add the filling. You also blind bake for cream and custard pies like my Coconut Cream Pie.
Full Blind Bake Vs. Partial Blind Bake
Some pie recipes will vary on how long the pie crust is partially baked for. This will depend on the type of recipe. For a no bake pie, you would want to fully bake the pie crust. But for pies that will return to the oven after with a filling, then the pie crust will be partially baked in the oven to give it a head start.
I’ll show you in the recipe just how long to bake for either!
Pie Weights Vs. Dried Beans
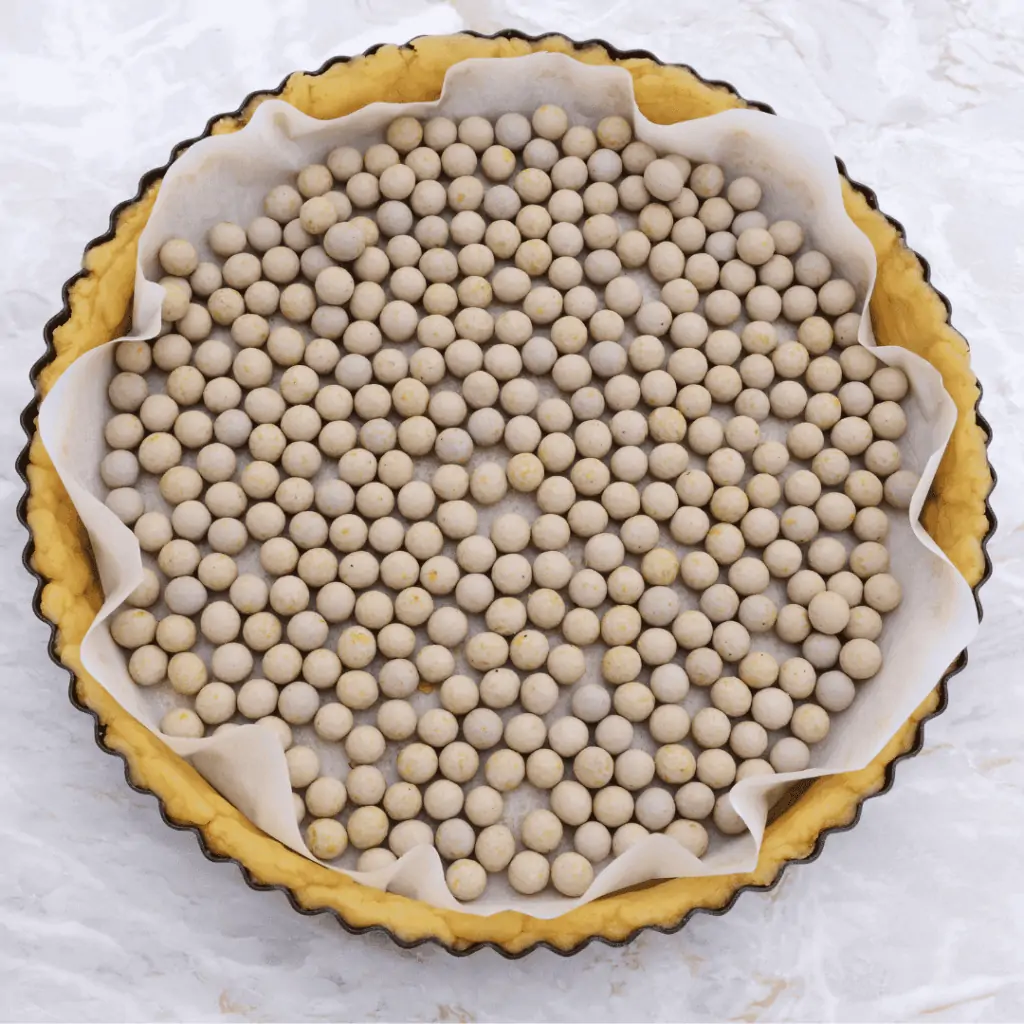
If you are going to blind bake a pie crust you will need either pie weights or some dried rice/beans to weight the pie crust down while it partially bakes. If you don’t do this, the pie crust will either bubble up and/or shrink on you. I’ve had both it happens and it’s no fun!
I own pie weights, but have gone to just using beans/rice. I find to keep the pie crust fully weighted down and have no shrinkage/bubbling I need to fill the pie crust all the way to the top. This requires a lot of weights! And dried beans and rice are much cheaper. Plus you can keep using them again and again.
How To Blind Bake Your Pie Crust
Step 1: Make your pie crust
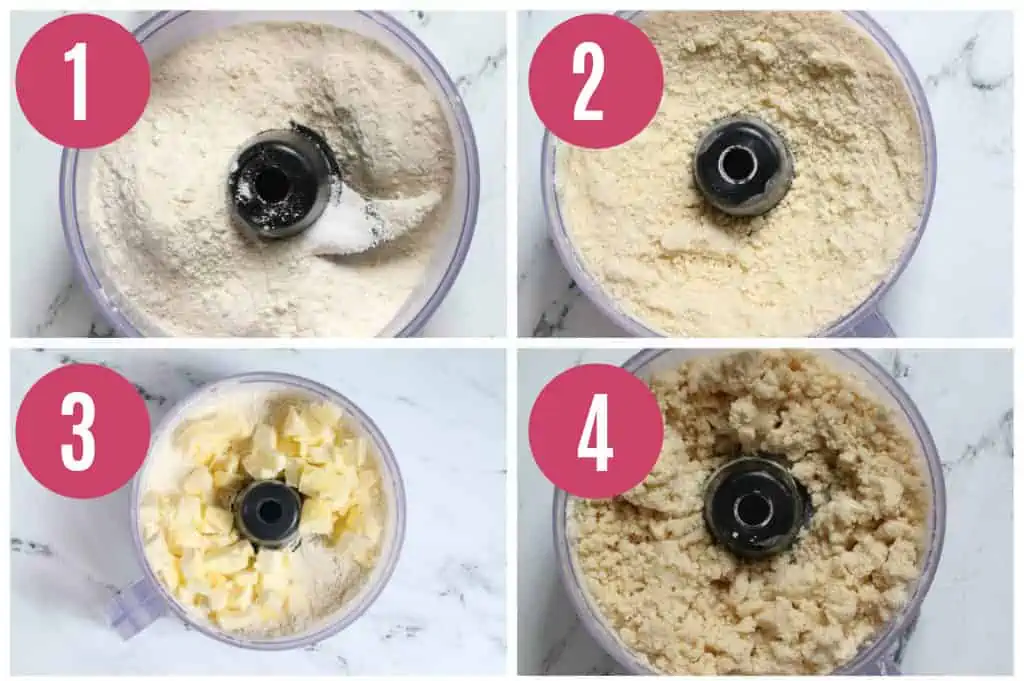
You can make your pie crust by hand, or in a make your pie crust in a food processor. I used to make it all the time by hand, but have started opting for my food processor because it’s just so quick and easy.
- Combine the flour and salt. In a food processor combine the flour and salt and pulse to combine.
- Add the butter. Scatter the butter over the top. You want to make sure it’s cubed and COLD.
- Pulse. Pulse until the butter and fat are pea-sized.
- Add water. Sprinkle in the water with the food processor running and stop until the mixture comes together and is crumbly.
Step 2: Chill Your Pie Crust
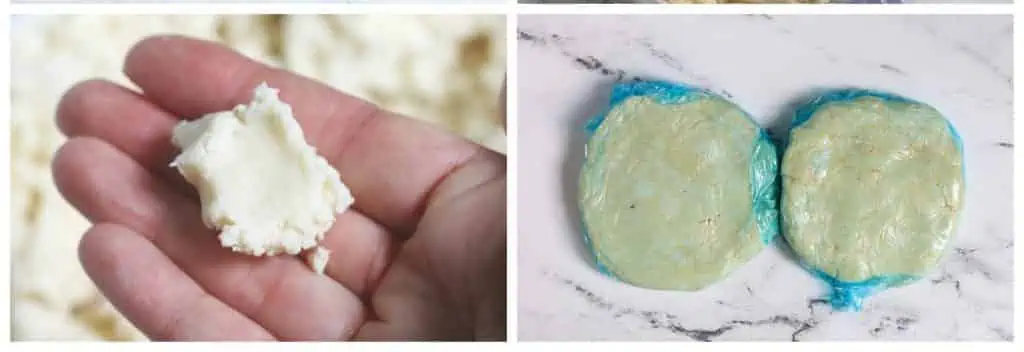
If your pie crust has enough water added, you should be able to squeeze the pie crust with your fingers and it hsould hold together. If it’s still dry and crumbly, add a little bit more water. You want to then dump the contents onto plastic wrap and wrap up into a disc and refrigerate for at least 30 minutes.
This step is crucial! Your pie crust needs to be COLD before you start. You want to keep that butter solid as long as possible. I chill mine for 30 minutes (up to 1 hour).
If it’s been in the fridge longer, then you may need to let it sit for a few minutes at room temperature to let it soften slightly so you can roll it out.
MAKE AHEAD TIP: Pie crust can be made up to 3 days ahead of time! Just keep it in the fridge, well wrapped. You can also freeze pie crust up to 3 months. Thaw overnight in the fridge before using.
Step 3: Roll Out Your Pie Crust And Put In Pie Plate
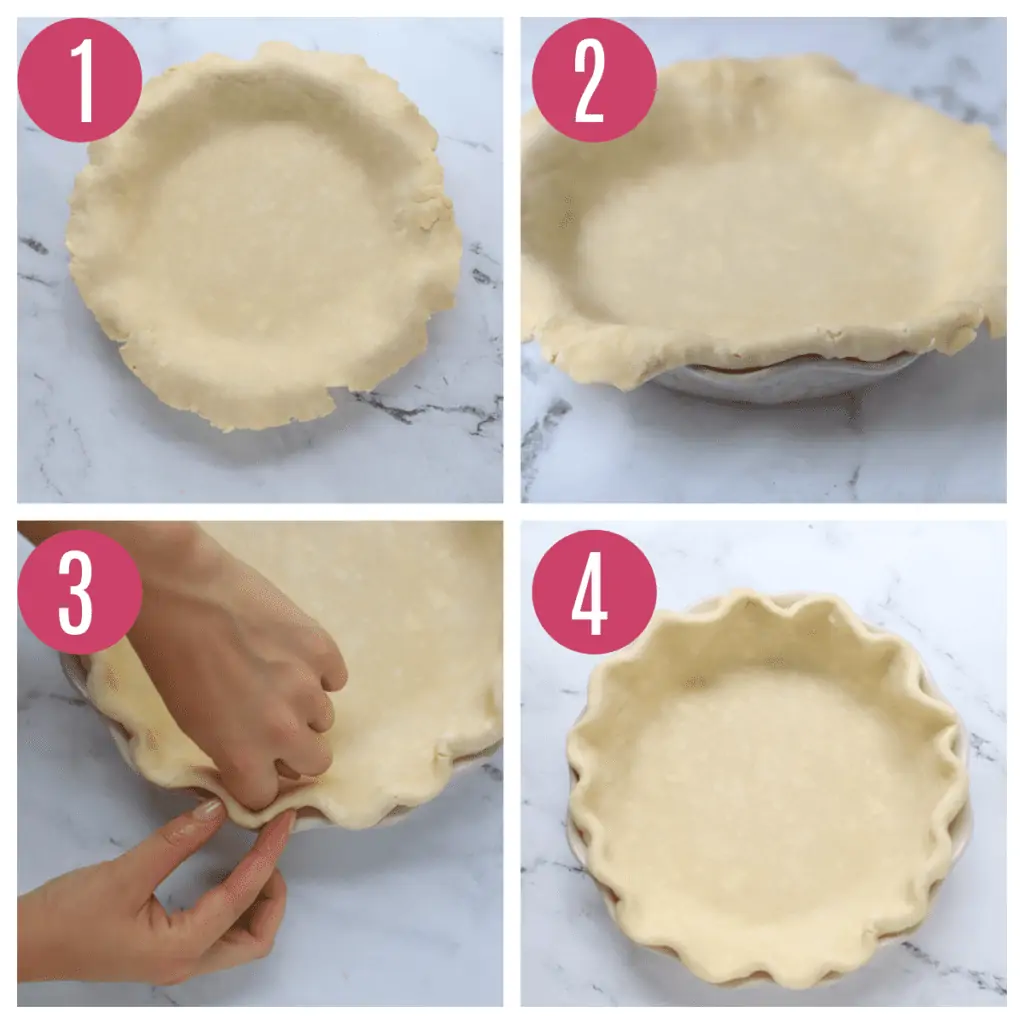
- Roll out pie crust and place in pie pan. Using a lightly floured surface and rolling pin, roll out the pie crust to a 12″ circle. Fold the pie crust in quarters or roll it over your rolling pin. Unfold (or unroll) the pie crust into your pie plate tuck into the bottom.
- Fold the edge under.
- Crimp the edges. Fold the edge under and flute the edges by pressing the crust between your index finger and thumb and index finger of your other hand.
- Chill the pie crust for 30 minutes. Yes, again in the fridge! But this helps to keep your pie crust from shrinking during the blind bake.
Don’t Want To Crimp? Crimping can be a bit more difficult for beginner bakers, so if you’re new to baking pies and not ready to tackle the crimping you can decorate your pie crust edges in lots of easier ways. The easiest way it to press the crust edge down with a fork to make crimped edge. Or try one of these other fun ways to decorate your pie crust edge.
Step 4: Blind Baking
- Prepare oven and pie crust. Pre-heat your oven to 375oF. Prepare your crust as the recipe directs and then roll out your pie crust. Be sure to chill for 30 minutes.
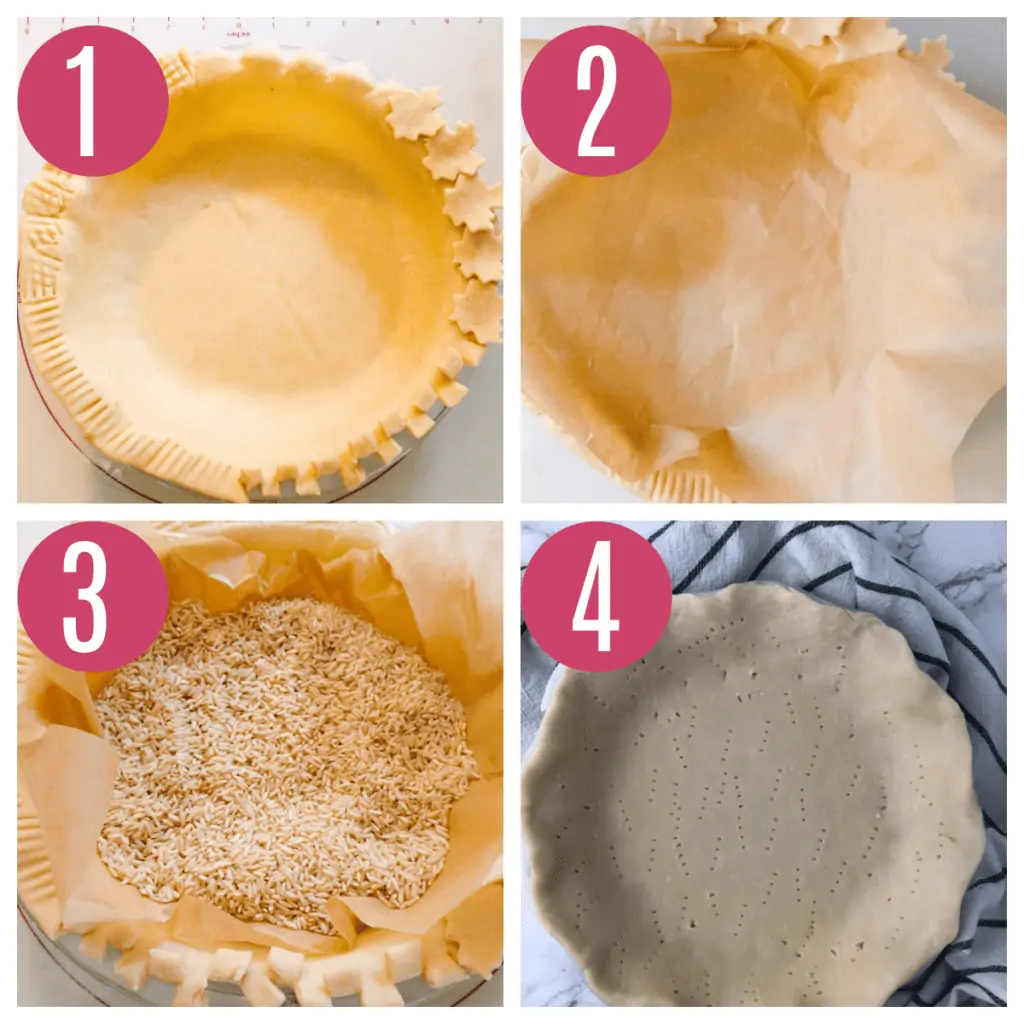
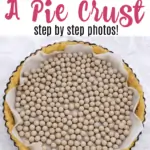
- Put parchment on top of crust. Cut off a large square of parchment paper (slightly larger than your pie). Cover the pie crust with the parchment paper, and make the sure the parchment paper is snug on the sides and the edges. You can also use aluminum foil if you are out of parchment paper.
- Add pie weights. You need to weight down the pie crust before placing it in then oven so it doesn’t bubble
up or shrink on you. Fill the parchment paper lined crust with pie weights. If you don’t own pie weights, you can use dried beans or uncooked rice (I prefer this because I can use a lot and they’re cheap!.) Save those beans or rice and use them again later for anytime you need to blind bake a crust! Place your pie on a cookie sheet and place in your oven. Bake for about 15 minutes, until the crust is lightly golden brown. - Remove pie weights and bake longer. Remove the pie crust from the oven, and remove the parchment paper with weights. Dock the pie crust on the bottom and edges with a fork. Then return to the oven to bake longer. If you need a fully baked crust, bake for an additional 15-18 minutes until golden brown. If you need a partially baked crust, bake for about 8 minutes longer until edges are just slightly golden brown and bottom no longer looks raw.
How To Keep Your Pie Crust From Shrinking And Bubbling
- Chill Your Pie Crust Before Baking. I find if I don’t do a second chill for 30 minutes, the edges tend to slip down the sides while par-baking leaving a shrunken pie crust.
- Dock The Crust. After you remove the parchment paper, dock the pie crust (aka prick it with the tines of a fork). This will keep the pie crust from bubbling up on you while it finishes blind baking.
- Fill With Weights All The Way To The Top. I par-baked a few pie crusts awhile back and didn’t fill the pie shell to the top of the crust with pie weights and the pie crust shrunk down the sides. So I find it better to make sure it’s completely filled. That can take a lot of pie weights, so that’s why I’ve started using dried beans/rice because it requires a lot.
Storage/Make Ahead
You can blind bake your pie crust up to 3 days ahead of time. Um, game changer for Thanksgiving am I right?! Just partially bake the pie crust, let it cool, and then wrap it up and keep it at room temperature until you’re ready to fill it.
You can also make your pie crust ahead of time! Keep in the fridge for up to 5 days, or in the freezer for up to 3 months.
More Pie Tutorials And Recipes To Check Out
Single Pie Crust
Equipment
- Pie Weights *you will need four containers
Ingredients
- 1 1/2 cups (180 g) g all-purpose flour
- 1 teaspoon granulated sugar
- 1/2 teaspoon salt
- 6 Tablespoons (85 g) unsalted butter cold and cut into 1/4-inch pieces
- 4 Tablespoons vegetable shortening cold
- 3-5 tablespoons ice cold water
Instructions
Make pie dough:
- Process flour, sugar, and salt together in food processor until combined, about 5 seconds. Scatter shortenign over the flour mixture and pulse to combine. Then scatter butter over top and process until mixture resembles coarse cornmeal, about 10 seconds. Or do this by hand in a mixing bowl, with a pastry cutter.
- Sprinkle 3 tablespoons of the ice water over the mixture. Pulse together, until dough sticks together. If dough does not stick together, stir in remaining ice water 1 tablespoon at a time.
- Turn dough onto sheet of plastic wrap. Bring dough together into a smooth round disc and flatten slightly. Wrap in plastic wrap and refrigerate for 30 minutes.
- Roll Out Pie Crust
- On a floured work surface, roll out the disc of chilled pie dough. Turn the dough a quarter turn to ensure it's not sticking to your surface. Continue rolling (and turning) the dough until you have a 12" circle. Roll the pie crust over a rolling pin (or fold into quarters) and transfer to your pie plate. Roll out (or unfold) and tuck gently into the pie crust. Fold the edges under and crimp. Chill the pie crust for 30 minutes.
Blind Bake
- Preheat the oven to 375°F. Line the chilled pie crust with parchment paper or aluminum foil. Fill with pie weights, dried beans or rice. Make sure the weights are evenly distributed around the pie dish. Fill to the top of the pie crust.
- Bake until the edges of the crust are starting to brown, about 15 minutes. Remove pie from the oven and carefully lift the parchment paper/aluminum foil (with the weights) out of the pie.
- Prick holes all around the bottom crust (and sides) with a fork. Return the pie crust to the oven.
- For a fully baked pie crust: Bake until the bottom crust is golden brown about 15-18 minutes longer until edges are golden brown. For a partially baked pie crust: Bake until the pie crust is lightly golden brown, and no longer looks raw about 8 minutes longer until edges are lightly golden brown and bottom no longer looks raw. Remove from the oven and allow to cool while you prepare your pie recipe as directed.
- For a no bake pie, let the pie crust cool before adding your filling. For a fully baked pie crust, you can add the filling to the crust while it is warm.
Notes
- Make ahead: You can blind bake a pie crust up to 3 days ahead of time. Just let it cool, wrap it well, and keep it at room temperature until ready to fill. Pie crust can be made up to 3 days ahead of time! Just keep it in the fridge, well wrapped. You can also freeze pie crust up to 3 months. Thaw overnight in the fridge before using.
- Chill Your Pie Crust Before Baking. I find if I don’t do a second chill for 30 minutes, the edges tend to slip down the sides while par-baking leaving a shrunken pie crust.
- Dock The Crust. After you remove the parchment paper, dock the pie crust (aka prick it with the tines of a fork). This will keep the pie crust from bubbling up on you while it finishes blind baking.
- Fill With Weights All The Way To The Top. I par-baked a few pie crusts awhile back and didn’t fill the pie shell to the top of the crust with pie weights and the pie crust shrunk down the sides. So I find it better to make sure it’s completely filled. That can take a lot of pie weights, so that’s why I’ve started using dried beans/rice because it requires a lot.




The Mrs says
Hi, just a question (probably a daft one!). Would pricking the crust result in the filling leaking out the bottom? Or do you not prick it all the way through. Thanks for your time.
Heather says
Not a daft question at all 🙂 I do prick the crust with a fork (called docking)n after par baking it with pie weights. I’ve never had an issue with leaking. Hope that helps!
Elaine Trimble says
What I have trouble with is a soggy bottom crust with lemon meringue pie
Or coconut cream pie. Do you brush on egg white or corn syrup before
Putting pie crust in oven or after it’s baked and before pouring in filling?
Heather says
I haven’t tried this but yes I have heard that brushing an egg white on helps. But also it might be the type of pie dish you’re using. I find if I use a ceramic or glass plate I get a soggy bottom. I find a metal pie plate works best for a crisp crust.