This Post May Contain Affiliate Links. Please Read Our Disclosure Policy.
Learn how to make a flaky all butter pie crust, without shortening, in this step by step tutorial! Just a few simple ingredients is all you need plus a few techniques to make the best pie crust made from 100% butter.
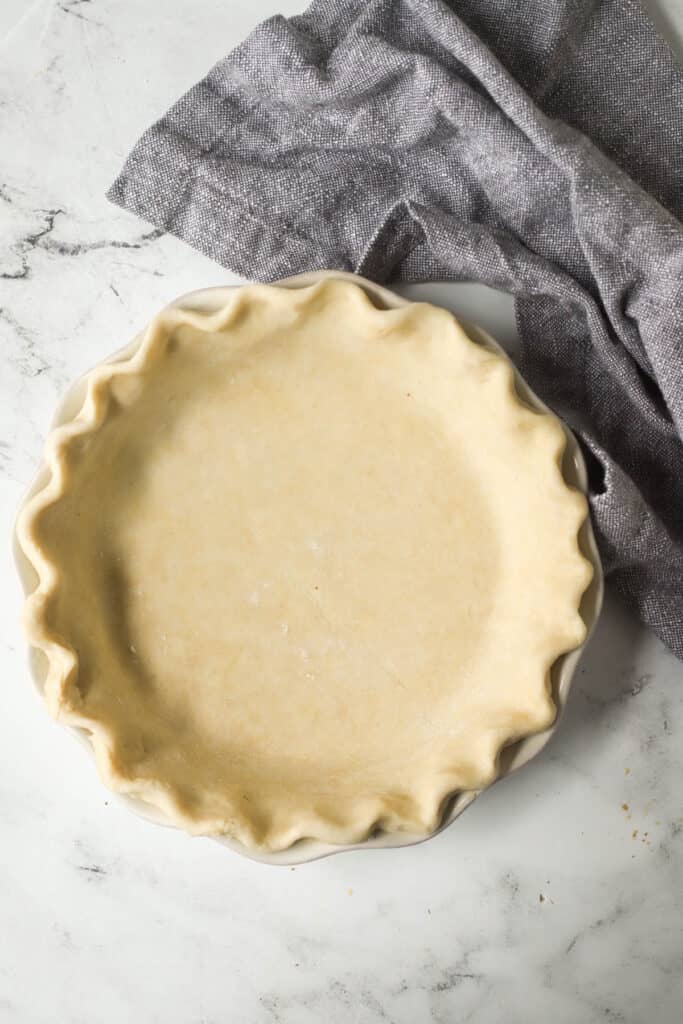
Making pie crust can be a tricky thing for beginner bakers. And I’ve had my fair share of not so great pie crusts over the years. Crumbly pie crust. Pie crust that shrinks. You name it. And for the longest time I relied on vegetable shortening in my pie crust to make for an easy to make pie crust.
But no longer! I’m an all butter gal. I’ve gone basically 100% organic in my life and so why not in my pie crust. And making an all butter pie crust use to freak me out for the longest time. I heard it was much harder to work with and wouldn’t resulting in quite a flaky crust than one with half butter and half shortening. But it’s not true! An all butter crust is flaky and delicious.
Let me show you the light.
Butter Vs. Shortening
Shortening weirds me out. Let me just state that now. I do use organic shortening now in my recipes when called for. But when it comes to my pie crust I rely now on using 100% butter. Butter is all flavor! But all butter pie crusts sometimes can be a bit trickier than a crust that calls for half butter and half shortening.
Using shortening has it benefits. It contains no water so it can create a tender crust. Because of it’s higher melting point, it tends to hold its shape better which makes its easier to work with making a lattice pie crust, or any fun, pretty pie crust designs. The edges and designs will keep their shape while baking. It’s also perfect if you need to make a vegan pie crust for someone since it’s made from vegetable oil. But shortening has zero flavor.
Butter, on the other hand, brings all the flavor. I mean butter makes it all better doesn’t it? Butter contains water, which can result in the water turning to steam. That steam will push apart the flour layers, puffing up your crust and creating one lovely flaky crust. A nice light texture can be achieved with all butter. Butter is 80-85% fat, and 15-20% water. Whereas, shortening is 100% fat.
However, Butter has a lower melting point than shortening or lard, and therefore can be tougher to work with. So if it gets too warm, it can become too soft to work with and tear easily. If you do choose butter, just make sure to chill your dough if it looks like it’s becoming soft and tearing.
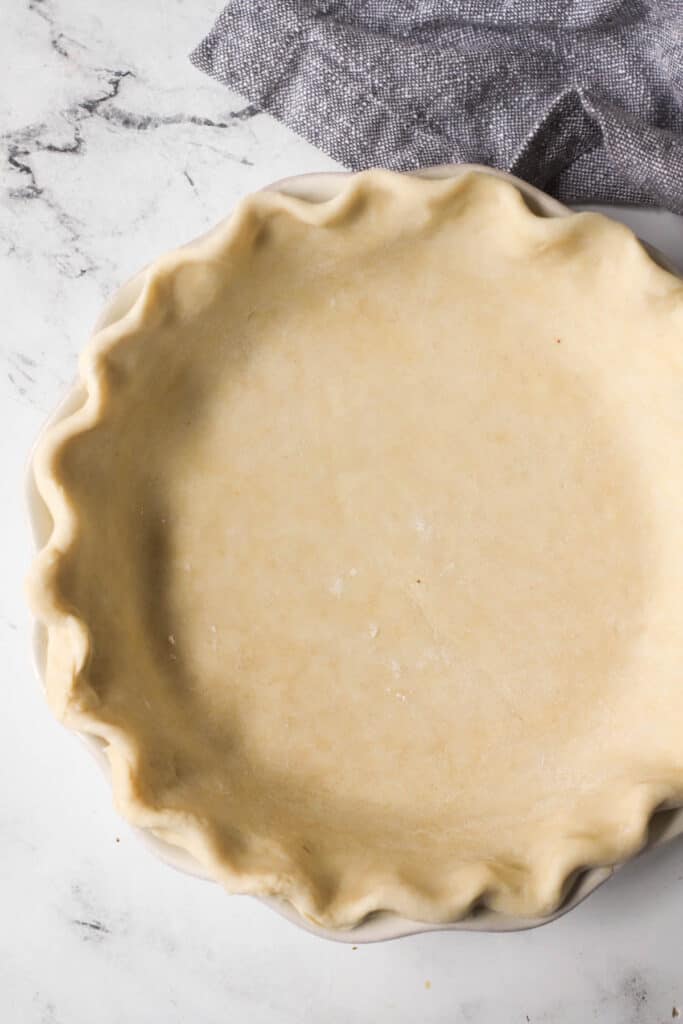
Tools Needed
- Mixing bowls (I always recommend metal or glass, but not plastic. Plastic can retain odors and grease over time.)
- Measuring spoons <–I love my magnetic double-sided measuring spoons!!!
- Glass measuring cup (for the ice water)
- Kitchen scale <– my new favorite gadget.I recommend using this to measure the ingredients and to evenly divide your dough)
- Pastry blender (if making by hand), Food processor, or stand mixer
- Spatula <– I highly recommend a spatula that is 100% silicone. That way the handle doesn’t seperate or become a home for some nasty mold and bacteria!
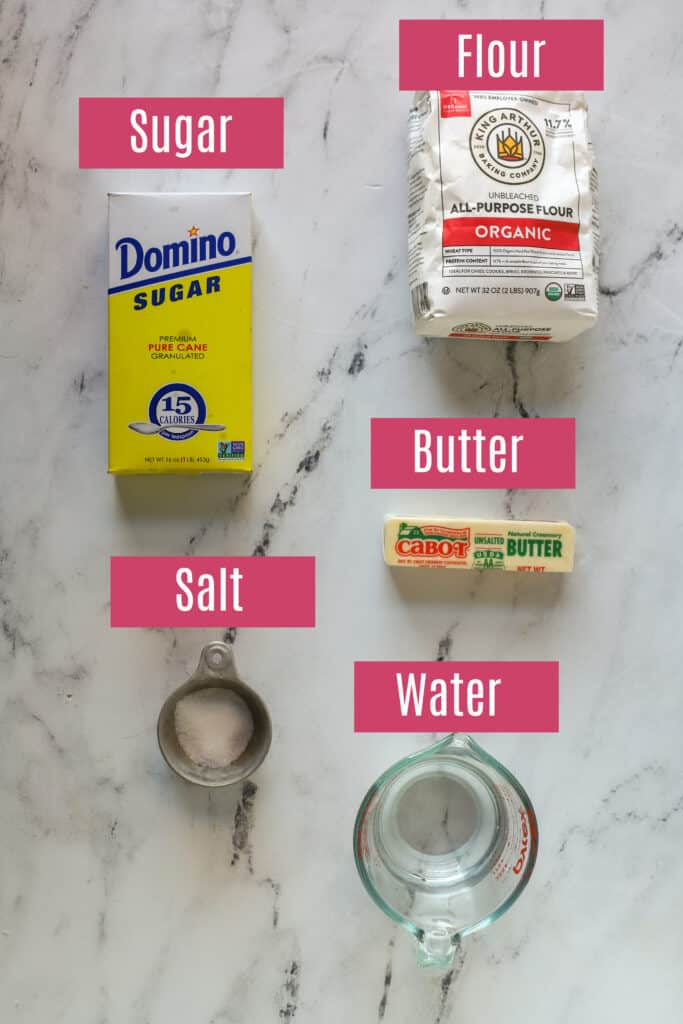
Ingredients Needed
Ingredients Notes
- Flour – Make sure you are using all-purpose flour here. It has the mid-range protein content for forming just enough gluten to hold the pie dough together and still be tender. You want to make sure you are measuring your flour correctly! Do not scoop directly into your measuring cup, but spoon in the flour and level it off. Do not pack it down in the cup. For best accuracy, measure with a kitchen scale by weight.
- Sugar – You are only adding a tablespoon of sugar. This doesn’t sweeten the crust but helps with browning and tenderizing the crust. You can always leave it out and the pie crust is still fantastic.
- Salt- This adds a bit of flavor as well. Use a finer table salt, like fine sea salt or table salt so it dissolves into the dough.
- Butter – Use unsalted butter vs. salted butter. It’s fresher and you control the amount of salt in the recipe. And it has to be COLD! I cube up my cold butter, and then pop it into the freezer for about 15 minutes before I start. This helps to create a tender, flaky pie crust. You don’t want warm, or room temperature butter that would get absorbed into the dough.
- Water – You want ICE COLD WATER. I fill up a measuring cup and place a few ice cubes in it and keep in the fridge until I’m ready to use it. And then I’ll spoon out a tablespoon at a time and add to my pie crust mixture. Cold water will ensure the butter also stays cold in the mixture.
How To Make Pie Crust By Hand
If you don’t own a food processor you can make pie crust by hand. You can use a pastry cutter to cut the butter into small pieces. Or you can even use your fingertips! Just squish the pieces with your fingertips. Don’t use your whole hand that could warm up the dough too much.
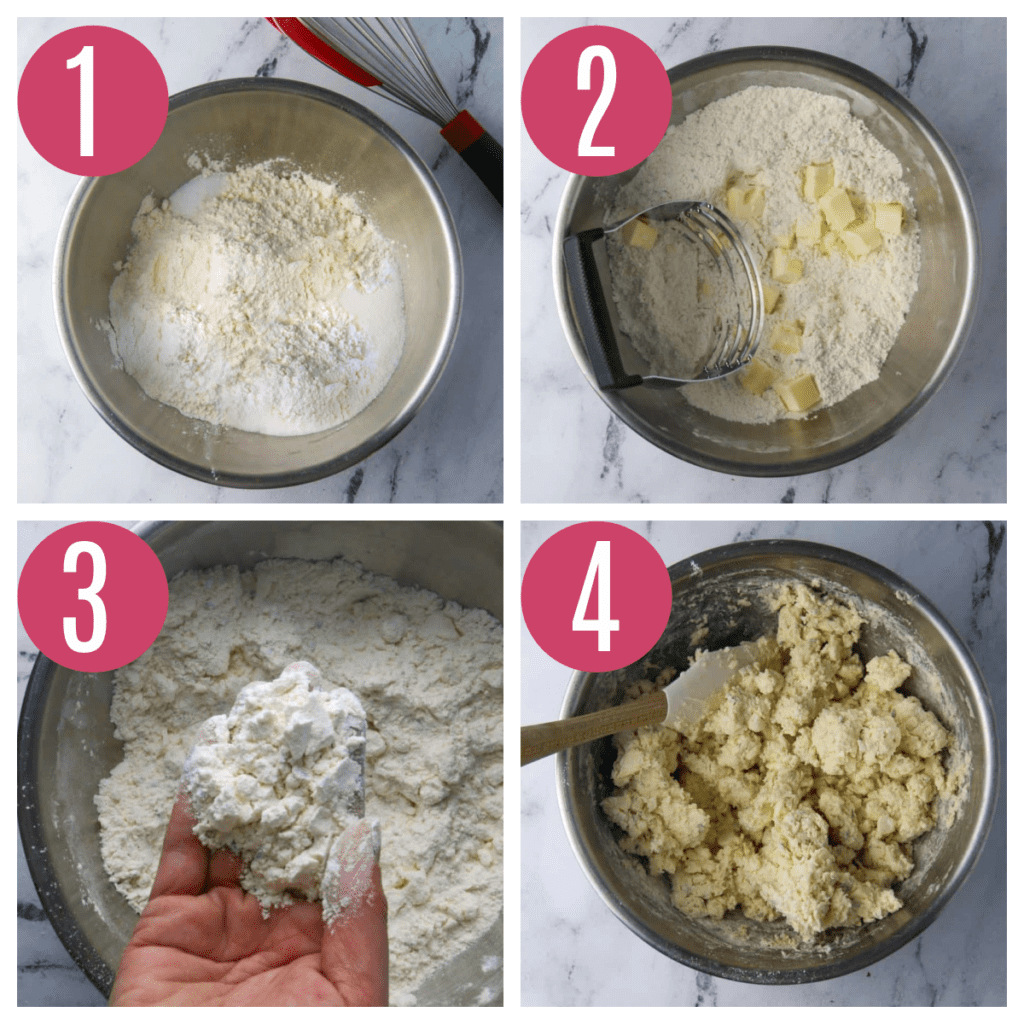
- Stir together the flour, sugar and salt in your mixing bowl.
- Add in your cubed, cold butter to the bowl. I like to toss the butter into the flour so it’s coated.
- Cut the butter into the flour until the the pieces are pea-sized. You want still visible butter pieces. You can use a pastry cutter to cut the butter in, or just your fingertips (but if you have warm hands this could cause your butter to melt and become absorbed into the dough). If using your fingertips, squish the butter pieces until they are smaller.
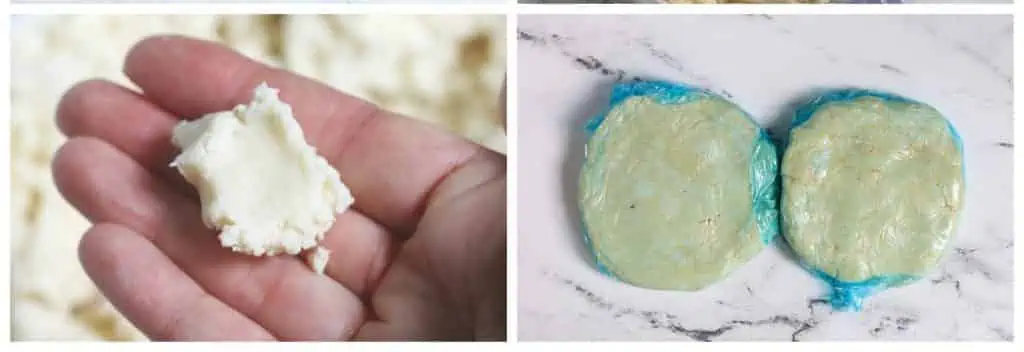
- Stir in the water one tablespoon at a time (I use a spatula to do this). You want the dough to be still be crumbly, but if you squish some of the dough together it will hold together. If it doesn’t or you still see a lot of dry bits, sprinkle in more water a little a time.
5. Dump the contents of the dough onto either plastic wrap or a clean towel. I like to dump onto a clean towel and then twist up and it forms into a perfect ball of dough. If it’s a double crust, divide the dough in half and wrap up two pieces.

6. Wrap up the dough in plastic wrap and refrigerate for at least hour (up to 3 days).
How Do I Make An All Butter Pie Crust In Food Processor
I used to be very anti-food processor for my pie dough. Why? Did I think I was going against all grandmas everywhere? Sure there’s a risk of overworking your dough. But if you use the pulse feature you should be all set. I love making pie crust in my food processor.
If you’re really nervous about overworking your dough, then you can always stir your water in by hand. But I love using my food processor for how fast it comes together.
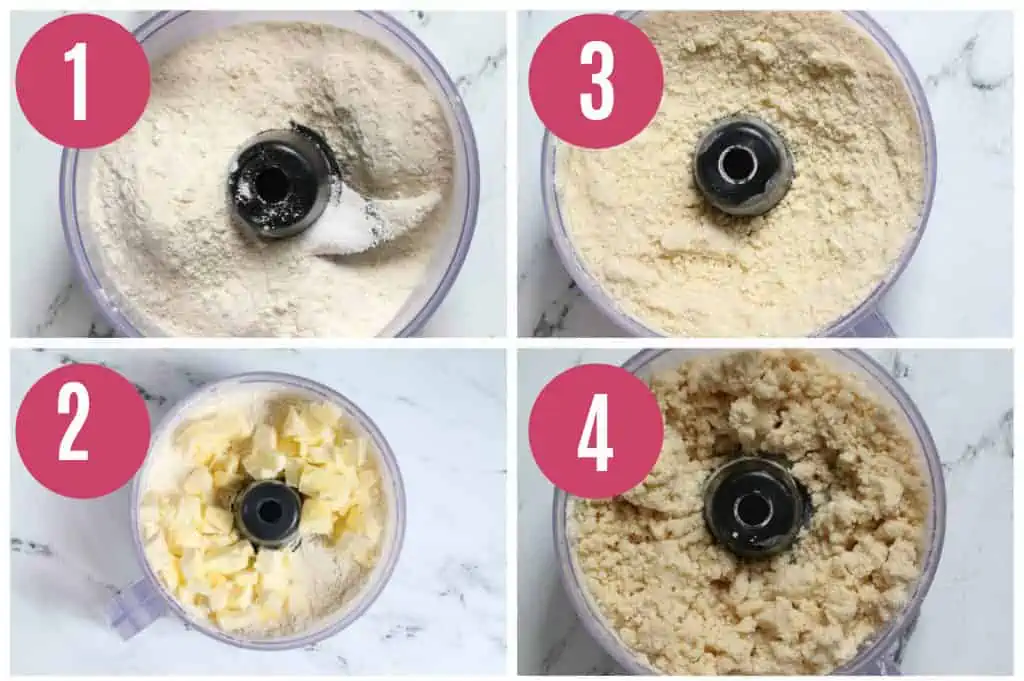
- Combine the flour, salt, and sugar. Give it a quick pulse to combine it.
- Scatter the cold butter over the mixture.
- Give it a few quick pulses until most of the pieces are pea-sized. Some can be bigger. And some can be smaller.
- Add your water a tablespoon at a time, pulsing in between. Most recipes call for a varying amount, and this is due to how well the fat was cut in. So it always vary. I start with the minimum called for. I like to give it a “pinch test” to see if it holds together. If it doesn’t, then I add another tablespoon and repeat.
5. Dump the contents of the dough onto either plastic wrap or a clean towel. I like to dump onto a clean towel and then twist up and it forms into a perfect ball of dough. If it’s a double crust, divide the dough in half and wrap up two pieces.
6. Wrap up the dough in plastic wrap and refrigerate for at least hour (up to 3 days).

How To Roll And Crimp Your Pie Dough
To properly roll your dough and place into your pie pan I recommend using a pastry mat. I love the non-stick surface and the measurements so I can ensure I’ve rolled enough.
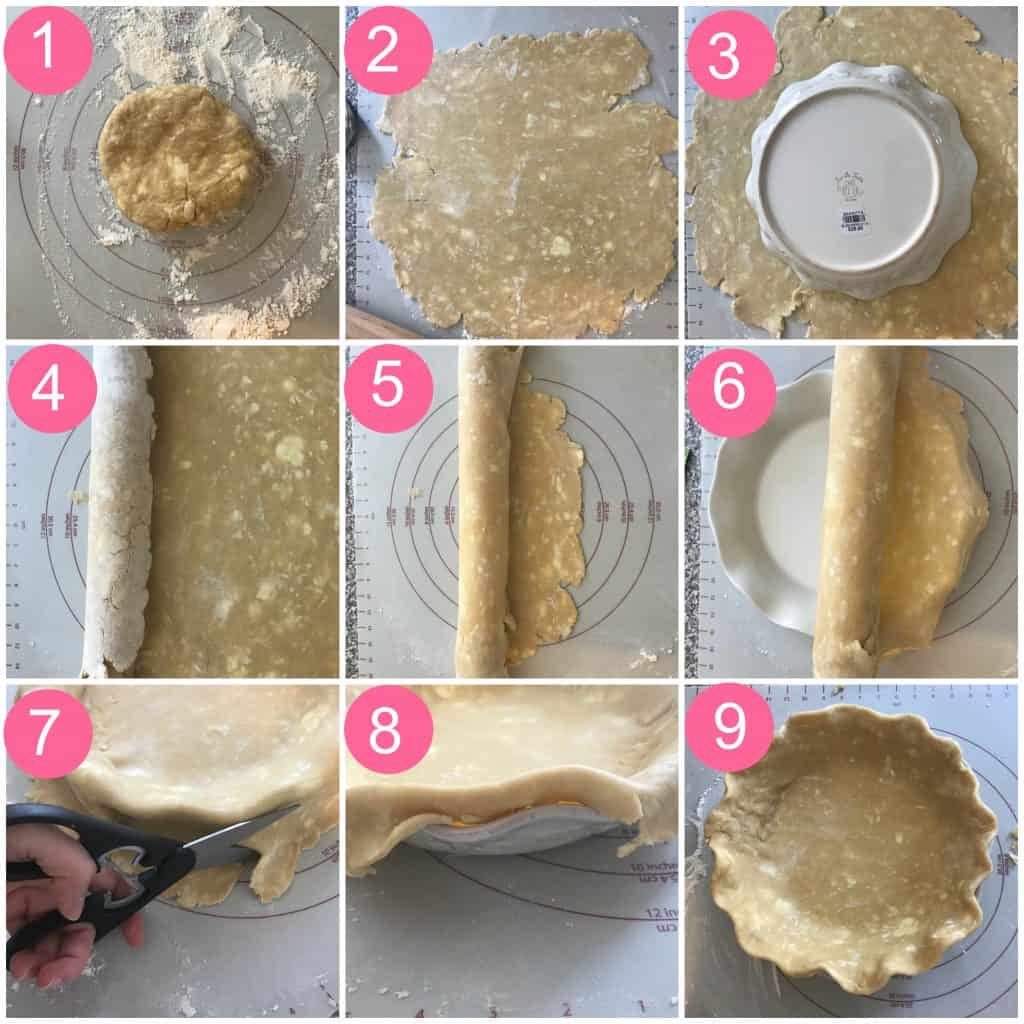
- Sprinkle your surface with a bit of flour. You just want to slightly flour your surface so you don’t incorporate too much extra flour into your dough.
- Roll out your dough. If your dough is sticking you can always pop it back into the fridge. If your dough is breaking, it may be too dry. Add a few sprinkles of water to the dough.
- To see if your dough has been rolled out large enough, turn your pie plate upside down. The pie dough should be larger than your pie plate.
- Using your rolling pin, roll your pie dough over the pin so it’s completely rolled around it (like a roll of paper towels!)
- With your pie dough rolled around the pin, roll it out over the pie plate.
- Trim the overhang with a pair of kitchen shears, leaving about a 1 -inch overhang.
- For a single crust: Fold the extra pie dough under creating an edge. For a double crust, repeat steps 1-6 and fold both top and bottom dough under to create an edge.
- Crimp the edges. For 4 easy ways to crimp and decorate your pie crust, read this post.
- At this point, I like to pop my crust into the fridge to firm up the crust and butter. I do this for 30 minutes.
Pie Crust Troubleshooting
- Soggy Bottom – This could be from baking your pie crust too high up in the oven. I always recommend baking your pies in the lower third of the oven. Also use a glass pie plate so you can see the bottom. I find if I use a ceramic dish I end up with a soggier pie crust.
- Pie crust is crumbly. Your pie crust is too dry. You need to add a little more water. A spray bottle works best for this.
- Pie crust breaks when transferring to your pie plate – Transfer carefully by rolling the crust over your rolling pin, or folding into quarters first. The good thing is you can usually patch it back together with some scraps or press it back together.
- Pie crust shrinks when it bakes. The pie crust may have been too warm. I like to chill my pie crust at 3 stages – after mixing together, after it’s shaped into the pan, and once more when it’s completely assembled to make sure the crust is perfectly cold before baking. If it shrinks during blind baking, it could be because you didn’t fill up the pie plate enough with your pie weights or dried beans.
- Pie crust is pale (underbaked). Throw it back in the oven for longer! Make sure to brush the crust with an eggwash to help with browning. Just mix an egg with 1 tablespoon of water and then brush on before baking.
- Pie crust is tough. You probably overworked your dough. Or added too much water. Unfortunately there’s no real fixing it at this point. Just add some extra ice-cream or scoop of whipped cream on top. Pie crust takes practice!
- Pie crust is burnt. During baking the pie crust may get too browned before the pie is done baking. Use a pie shield to protect the edges, or place foil loosely over the top if the whole top is browning too quickly.
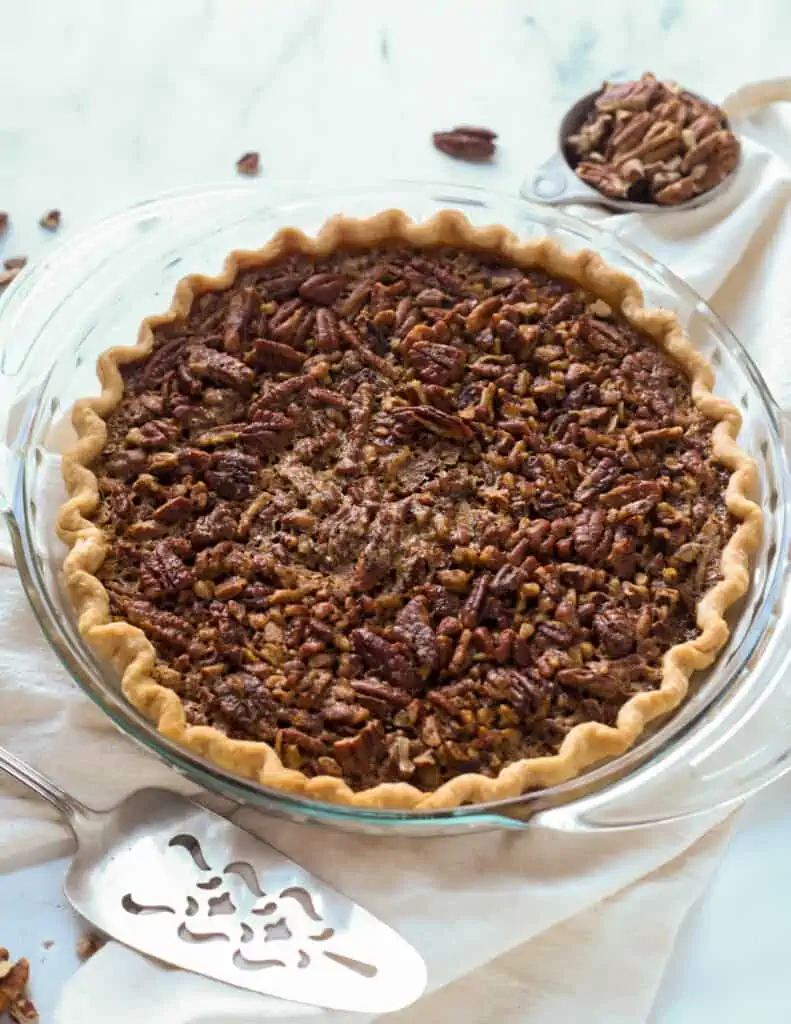
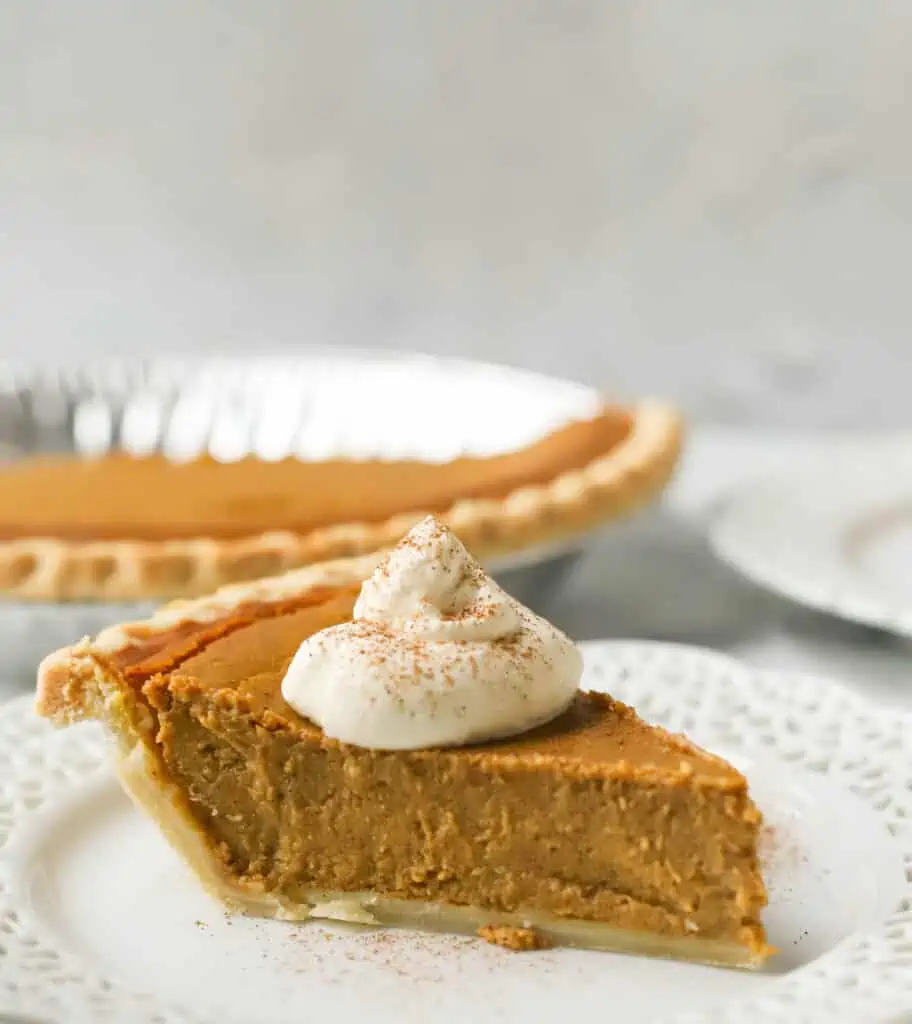
Pssst….my that’s maple pecan pie using my all butter pie crust below…
Recipe FAQ’s
Cold butter is key! You want the butter to be cold so it is solid when going into the oven. Also cold butter will not incorporate as well into the dough. So you will be left with pockets of visible butter. That’s a good thing.
The butter when it hits the oven will create steam which will expand the dough (aka lots of yummy flaky layers!)
And that’s why we want everything else cold as well! So we don’t melt that butter before it has a chance to get into the oven.
We need to refrigerate the pie dough after making it to relax the gluten strands. This will help make the pie crust tender and also easier to roll out. It will also help to cut down on any shrinking during the baking process because it will chill the butter again.
Yes. You can make it up to 3 days ahead of time. You may need to let it soften at room temperature for 5-10 minutes before attempting to roll it out.
Yes! Freeze it for up to 3 months. Let it thaw overnight in the refrigerator and then proceed with rolling it out.
More Pie Tutorials
- 13 Tips For Perfect Pie Crust
- 9 Tips To Make The Best Pie From Scratch
- How To Blind Bake A Crust
- 9 Must Have Pie Baking Tools
What can I use this pie crust with?
Now that you’ve mastered an all butter pie crust, time to make a pie!! Here are some delicious favorites on the blog
All Butter Pie Crust
Ingredients
- 2 ½ cups (300 g) all-purpose flour *spooned and leveled
- 1 tablespoon granulated sugar
- 1 teaspoon salt
- 1 cup (2 sticks, 226 g) unsalted butter cold and cut into ½” cubes
- 6-8 tablespoons ice water
Instructions
- Combine dry ingredients. In a food processor pulse, or mixing bowl with a whisk combine the flour, sugar, and salt.
- Add butter. Scatter butter over top and cut in the butter until mixture resembles coarse cornmeal. If using a food processor, pulse a few times to cut the butter in. If making by hand use a pastry cutter to cut the butter in. You can also use just your fingertips and squish the butter pieces until they are smaller.
- Add water. Sprinkle 4 tablespoons of the ice water over the mixture. Stir the dough together using a spatula, until the dough sticks together if making by hand or pulse with the food processor. Test the dough by squeezing some together with your fingertips. If it sticks together, then do not add more water. If it does not, then add the remaining tablespoon water one tablespoon at a time.
- Chill the dough. I like to use a clean dish towel and turn the dough onto it. Bring the edges of the towel and twist it. This will bring the dough together into a cohesive mass. Turn the dough onto a sheet of plastic wrap and flatten into a 4-inch disk. Wrap tightly in plastic wrap and refrigerate for at least 1 hour (up to 3 days ahead of time. Use as directed in your pie recipe.
Notes
- Make Ahead: You can make it up to 3 days ahead of time. You may need to let it soften at room temperature for 5-10 minutes before attempting to roll it out.
- Freezing: Freeze it for up to 3 months. Let it thaw overnight in the refrigerator and then proceed with rolling it out.
- Flour – Make sure you are using all-purpose flour here. It has the mid-range protein content for forming just enough gluten to hold the pie dough together and still be tender. You want to make sure you are measuring your flour correctly! Do not scoop directly into your measuring cup, but spoon in the flour and level it off. Do not pack it down in the cup. For best accuracy, measure with a kitchen scale by weight.
- Sugar – You are only adding a tablespoon of sugar. This doesn’t sweeten the crust but helps with browning and tenderizing the crust. You can always leave it out and the pie crust is still fantastic.
- Salt- This adds a bit of flavor as well. Use a finer table salt, like fine sea salt or table salt so it dissolves into the dough.
- Butter – Use unsalted butter vs. salted butter. It’s fresher and you control the amount of salt in the recipe. And it has to be COLD! I cube up my cold butter, and then pop it into the freezer for about 15 minutes before I start. This helps to create a tender, flaky pie crust. You don’t want warm, or room temperature butter that would get absorbed into the dough.
- Water – You want ICE COLD WATER. I fill up a measuring cup and place a few ice cubes in it and keep in the fridge until I’m ready to use it. And then I’ll spoon out a tablespoon at a time and add to my pie crust mixture. Cold water will ensure the butter also stays cold in the mixture.



Sonja says
Thank u so much for sharing! I love this recipe and would like to use it for my chicken pot pie. I use a 9×13 baking dish. What ingredient measurements do you recommend? I’m thinking of tripling the recipe? Thank you so much!
Heather says
Hi Sonja! For a 9×13 baking dish I would say doubling the pie crust recipe should be sufficient. I’m not sure if tripling is necessary (assuming you’re only putting crust on the top) if you’re doing crust both top and bottom then yes I’d say triple it to be safe!
victoria says
how long do i cook it for and what degrees
Heather says
This will depend on the pie recipe you use it for. Once your crust is made you can follow your pie recipe for baking time.
Jo Beattie says
This crust is by far the best I have ever made & or tasted. I chose not to add the sugar. I made what my mom called a cobbler using a bottom & top crust. In a large Pyrex glass baking dish; it was a4.8 or 4.5 L. Oblong rectangle .
My son was here and convinced me to add a 1/2 teaspoon of cinnamon to my blackberries .and it was the best ever. I also added some fresh lemon juice from a 1/2 lemon.( I only did a couple of squeezes.)
My local grocery store had these 6oz. Containers of large blackberries foe a $1.00/each. I used all 8 that I bought, minus the ones my 10 year old grandson & I didn’t eat….but wished I had gotten a dozen. Needless to say it was amazing and my husband and I ate this wonderful desserts for about a week. Had I had more berries, it would have been a better balance but the crust itself was the best I’ve ever tasted.oh: I didn’t realize until I read it that the tablespoon of sugar would help the crust to brown. Nor did I use the egg wash.
Maria San Juan says
Interesting recipe! Thanks for sharing! Will try it this holiday season!
Heather says
I hope it turns out well for you 🙂
Maria Venus says
What an excellent and easy-to-follow template recipe for pie crust! I think this will go perfectly well with my apple pie recipe. Thank you so much for sharing this!
Heather says
I cannot wait to hear what you think, Maria =)
Amanda Dixon says
This pie crust is fool proof! It came together easily, and it was so flavorful and flaky. Perfect for the holiday season.
Heather says
great to hear Amanda
Toni says
This is amazing! Such a perfect pie crust for the holidays!
Heather says
thank you Toni
Sara Welch says
I love that I can make this ahead of time! Definitely going to be giving this a try for Thanksgiving; looks too good to pass up, indeed!
Heather says
make ahead definitely helps!
Colleen says
I never seem to get pie crust right, so thanks for this fantastic tutorial I feel more confident to give it another try with all these excellent tips!
Heather says
That’s excellent Colleen – go for it!