This Post May Contain Affiliate Links. Please Read Our Disclosure Policy.
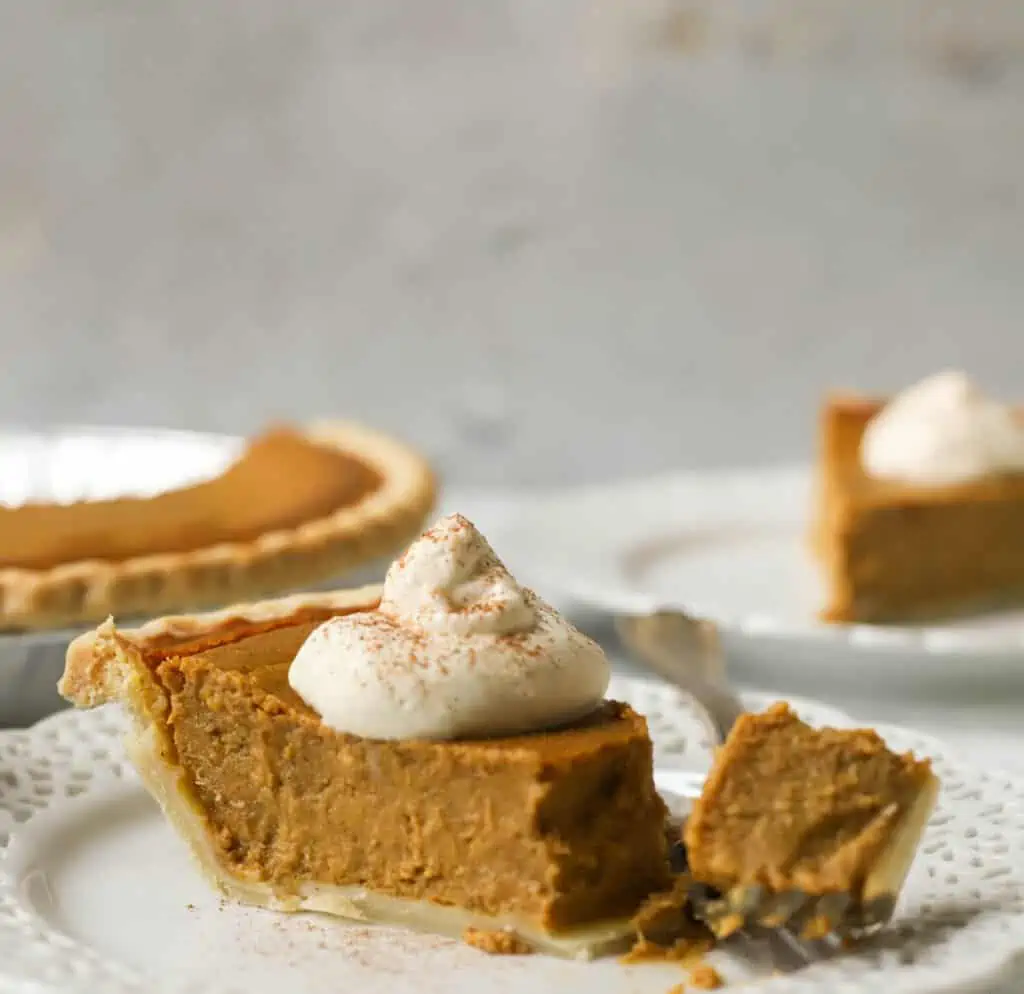
A classic pumpkin pie recipe, made without canned evaporated milk, and made with a homemade all butter pie crust. The best part is you can make the pie ahead of time – perfect for the holidays!
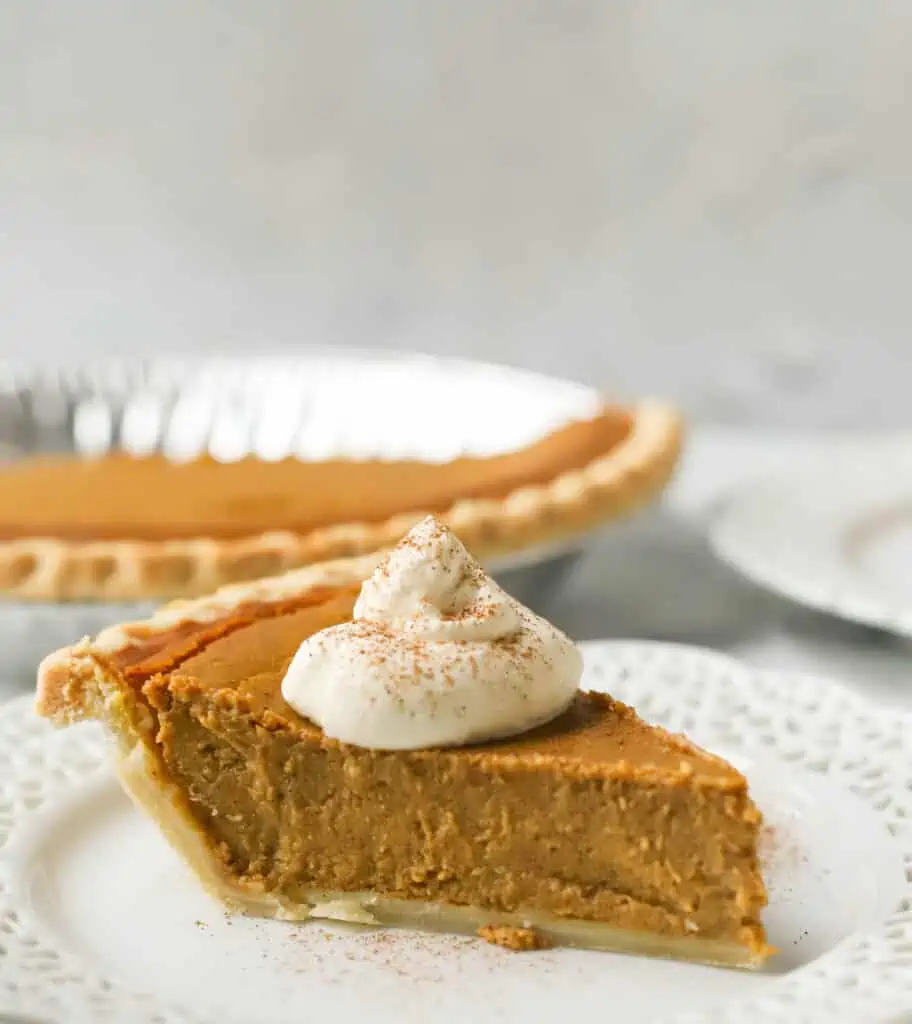
Out of all the classic holiday pies, apple pie, pecan pie, and pumpkin pie – pumpkin pie was the one that was my least favorite. But I made the mistake one year of NOT making one.
My boyfriend, now husband, was devastated. He drove all the way home with me from Boston to upstate NY for Thanksgiving to find his favorite pie not on the table?! Don’t worry I redeemed myself and whipped up this Eggless Pumpkin Pie, (made with condensed milk) the next day (we were out of eggs after all our feasting but it did the trick!)
But I decided it was high time that a classic pumpkin pie recipe was on the blog and unlike traditional pumpkin pies, this recipe does not rely on evaporated milk. This pie is 100% from scratch, through and through. But you can break up the steps to make this pie over a few days if you need to. In fact I recommend it!
I like to make my all butter pie crust a few days ahead of time, so it’s nice and cold in the fridge waiting for me. You can even blind bake the crust a few days ahead of time. Then the day before I’m ready to serve, I assemble and bake the entire pie. Pies need time to cool and set up anyway so it’s even better to make this a whole day ahead and let it cool and properly set up.
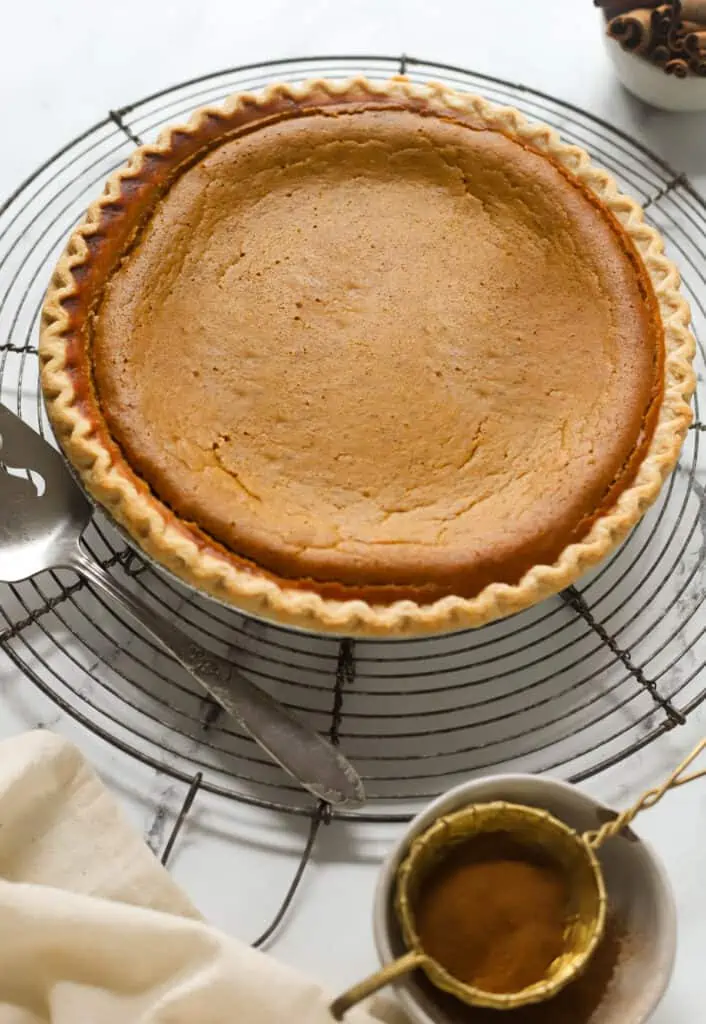
This pumpkin pie recipe starts with an all butter homemade pie crust. I’ll show you step by step how to make the best pie crust ever. No tough pie crust for you! And then an easy, no mixer required pumpkin pie filling gets poured into a partially baked pie shell.
Can you make pumpkin pie without evaporated milk?
Yes! And this pie is here to prove it. Evaporated milk is usually used in a pumpkin pie recipe because evaporated milk has 60% of the water removed which helps to create a thick, creamy texture without adding extra sweetness.
But if you’re like me you don’t always have a canned evaporated milk on hand. But the best part is you can substitute the canned milk for heavy cream or half and half instead. And that’s just what I did for this pie! I used heavy cream to make a rich, velvety smooth pumpkin pie (without any canned milk!)
See Also:
- Move over pumpkin bread, this butternut squash bread is the new Fall quick bread to make!
- Apple cider cookies are soft and chewy. And full of apple flavor! Topped with an apple cider icing these will be a favorite!
- Looking for a cinnamon roll that’s made a little healthier? Then try my healthy cinnamon rolls! Made with coconut sugar, whole wheat flour and a maple icing.
My Favorite Pie Making Tools
 Buy Now →
  Buy Now →
  Buy Now →
  Buy Now →
 Pie Crust Ingredients
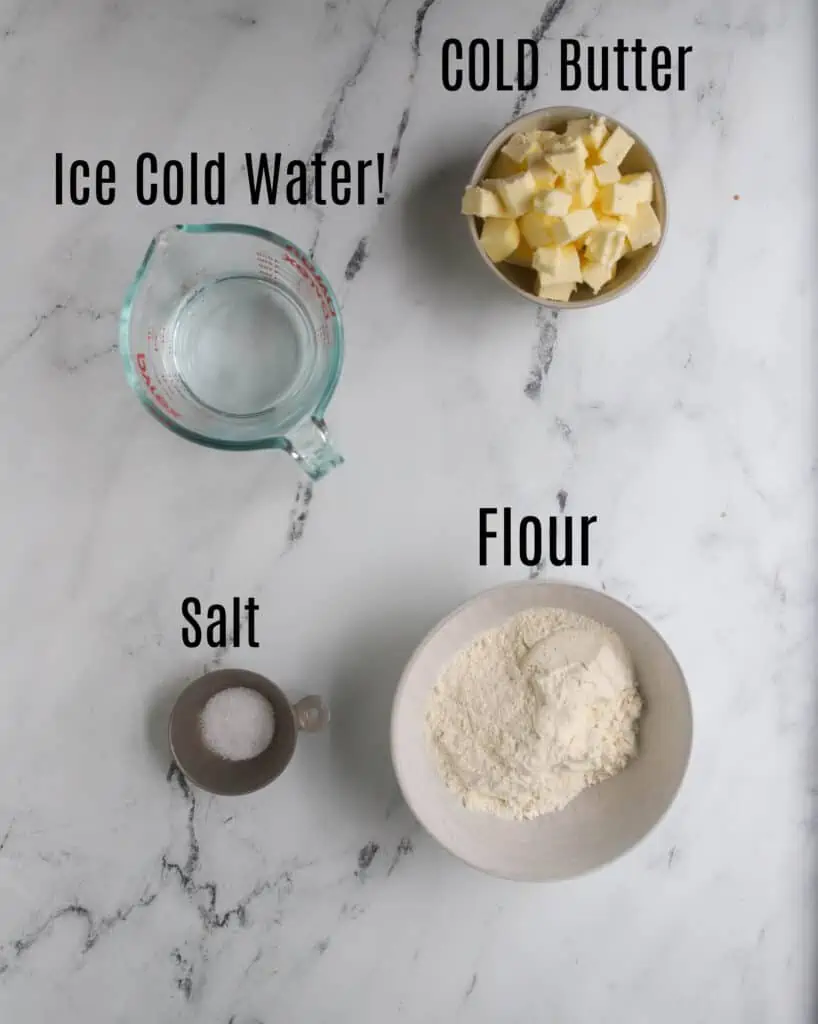
Pumpkin Pie Filling Ingredients
- Brown Sugar
- Vanilla
- Eggs
- Heavy Cream
- Pumpkin Puree
- Salt
- Pumpkin Pie Spice
- Cinnamon
How To Make Pumpkin Pie
1. Make the pie crust
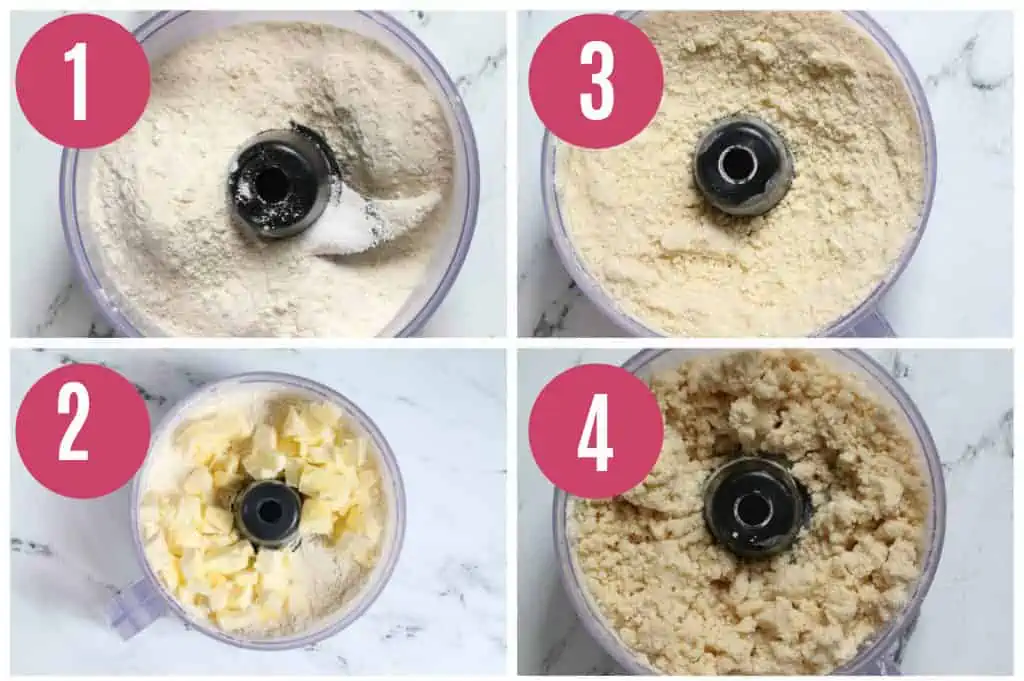
- Make the crust. In a food processor, or mixing bowl combine the flour and salt.
- Add butter pieces. Scatter butter over top. Make sure your butter is cold and cubed up so it’s easier to work in.
- Cut in the butter. You want to incorporate the butter until mixture resembles coarse cornmeal. If using a food processor, I pulse until the piece are pea-sized. If doing this by hand, then you can rub the butter between your fingertips or use a pastry cutter.
- Add ice cold water. Sprinkle 3 tablespoons of the ice water over the mixture. If making by hand, stir dough together using a spatula, until dough sticks together. Or pulse if using the food processor. Test the dough by squeezing some together with your fingertips. If it sticks together, then do not add more water. If it does not, then add the remaining tablespoon of water. Turn the dough onto a sheet of plastic wrap and flatten into a 4-inch disk. Wrap tightly in plastic wrap and refrigerate for 1 hour.
2. Blind bake the crust
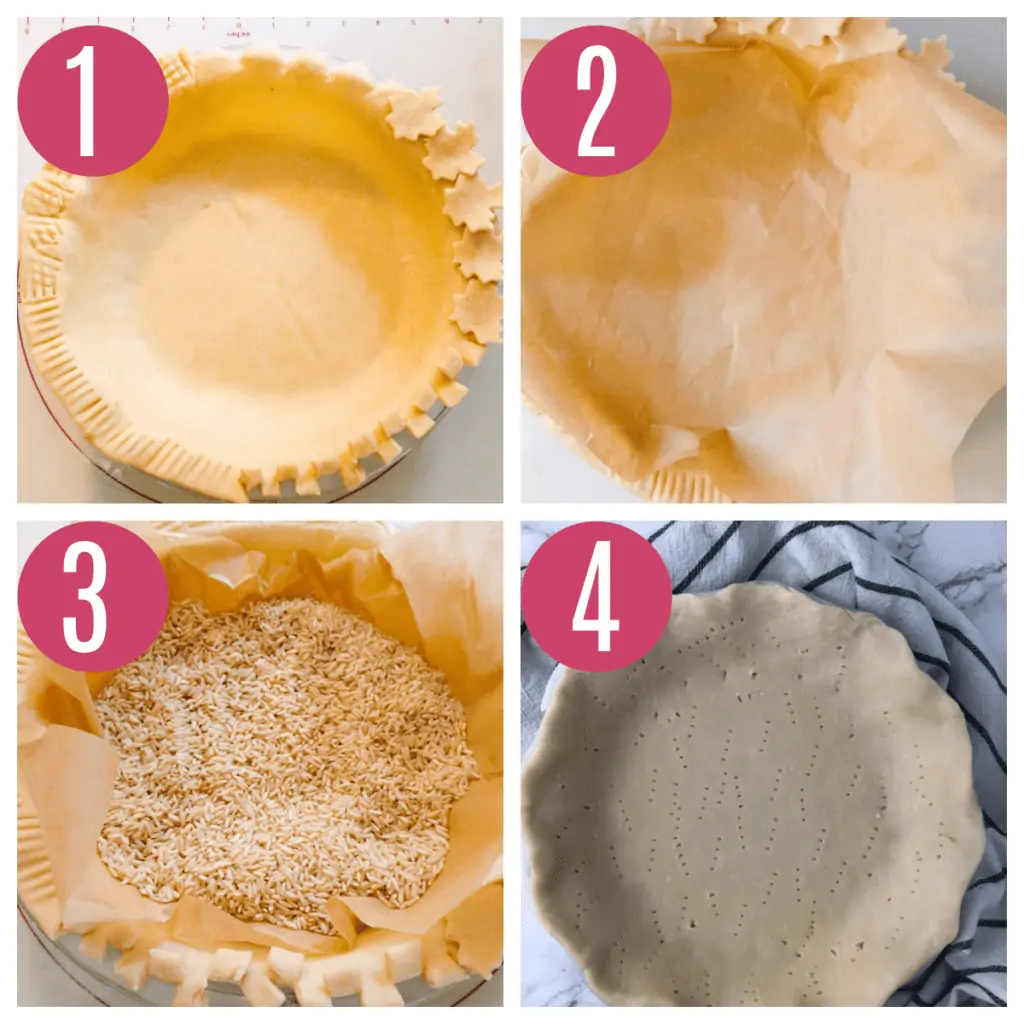
For this type of pie, you want to blind bake it first, which means to partially bake the crust without any filling to it. To blind bake your crust you need something to hold down your pie crust as it bakes. Pie weights like these are a great thing to have (but hey you can also use uncooked dry rice or beans too!).
Here a complete tutorial on how to blind bake your crust. And if you want to make the edges of your crust super pretty, here are 4 fun ways to decorate your pie crust. My favorite for this pie is to use these pie cutters.
HEATHER’S BAKING Tip: I recommend you bake your pie in a glass pie plate. This will ensure you can see that the bottom of your crust is fully baked (nothing worse than a soggy bottomed crust!).
3. Make the pumpkin filling
While the pie crust is blind baking I prepare the pumpkin pie filling.
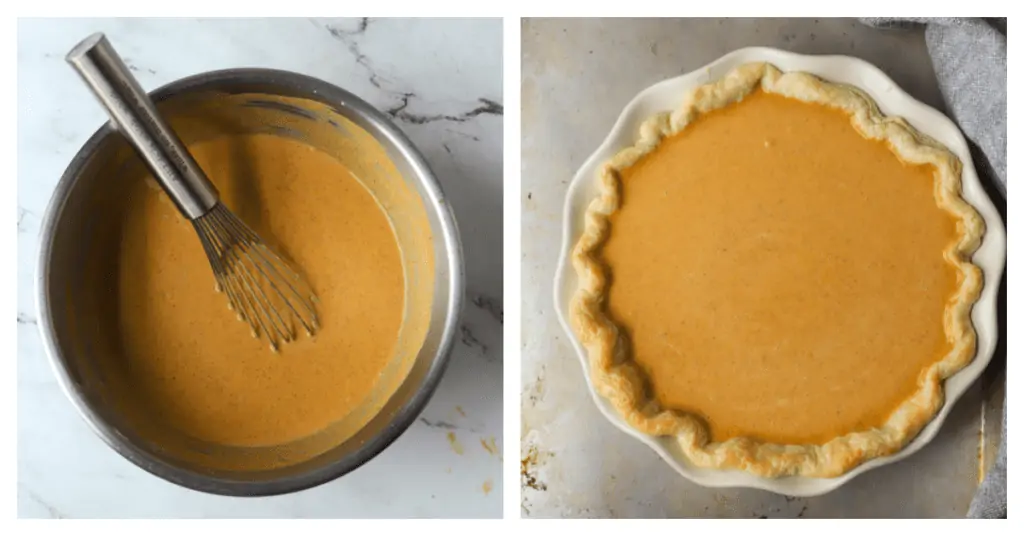
- Make the filling. In a mixing bowl, whisk together the brown sugar, cornstarch, spices, eggs, pumpkin puree, milk, and heavy cream until smooth. Pour into the prepared pie shell.
- Bake the pie. Pour into the prepared pie shell. Bake at 450oF for 15 minutes, then lower the temperature to 350oF and bake for an additional 40 minutes, or until the edges of the filling are set, but the center is still jiggly. You can place a pie shield (or aluminum foil) over the edges of the crust during baking if they are browning too much. During the baking, I prepare the topping.
How To Make This Pie Ahead Of Time
Nothing like leaving a pie to the last minute for the holidays! Talk about super stressful! I did it a few times back in the day. What was I thinking?! Making a whole Thanksgiving dinner and the pies on the actual holiday? Yea, let’s just say I didn’t enjoy that Thanksgiving very much. But I’ve learned that pies can be broken up over many days and it’s for the best (for the pie and my sanity).
- Pie Crust: You can make this up to 3 days ahead of time and keep in the fridge. You can also freeze it for 3 months!
- Blind baking: This can be done up to 3 days ahead of time as kept wrapped up on your counter.
- Filling: Prepare this the night before you want to bake the pie and keep in the fridge.
- Whole Pie: I prefer to bake this the day before I plan to enjoy it so it can set up and cool properly. I also like to whip up some homemade whipped cream the day before so it’s all ready for me!
My Thanksgiving timeline:
- Week before: Make my pie crusts and keep wrapped in the fridge (If I’m making multiple pies, I’ll do multiple batches at once.)
- Sunday: Blind bake my crust.
- Tuesday: Mix up the filling and refrigerate.
- Wednesday: Bake the pie (and make some whipped cream). And at this point it’s just a matter of pouring the filling into my partially baked crust and baking. How easy was that?!
- Thursday: Enjoy!
Recipe Tips
- Use A Glass Plate. Make sure to use a glass pie plate so you can see if your crust is browned or not. If its not browning, then move the pie to the lower third of your oven.
- Blind Bake. Blind bake your pie crust so you don’t end up with a soggy pie bottom.
- Use pumpkin puree not filling. Pumpkin pie filling mix has added sugar and spices already in it.
- Use A Pie Shield. If your pie crust edges are browning too much then be sure to cover them with a pie shield (or you can simply use some aluminum foil).
Recipe FAQ’s
You definitely can. Just make sure to still blind bake the crust.
Yes you can. You can make the pie crust a few days ahead of time, and also blind bake up to 3 days ahead of time. I like to make mine the day before and then let it cool and you can store it in the refrigerator. You can also make the pie crust and filling separate the night before you assemble and bake.
Yes the pie freezes well for up to 3 months. Thaw overnight in the refrigerator. You can also freeze just the pie crust as well.
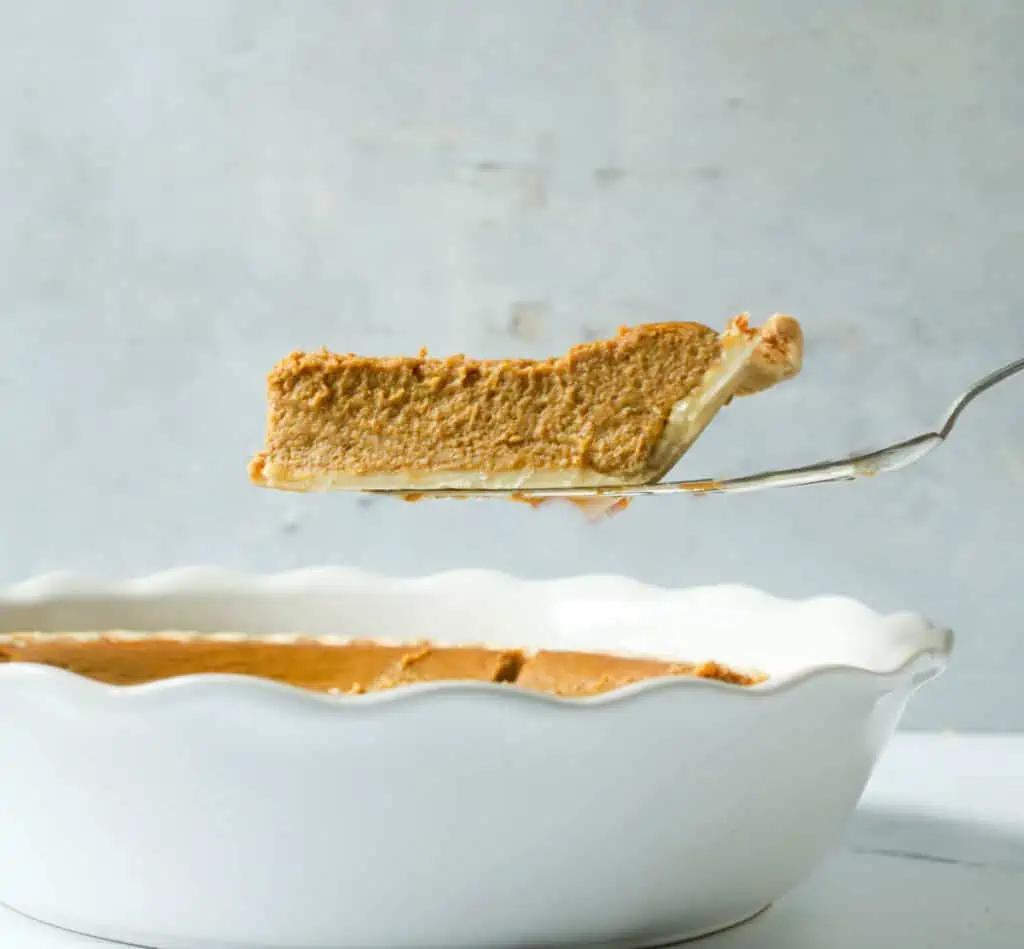
This means your pie is undercooked, but you can pop it back in the oven. Bake the pie for another 15 minutes at 425oF.
Yes you can substitute with half and half. Or you can use milk, a lactose free milk, or plant based milk like almond milk but you will need to add 1 Tablespoon cornstarch to help thicken the pie up. I haven’t tried this method, but My Recipes recommend this substitution.
Serving Suggestions
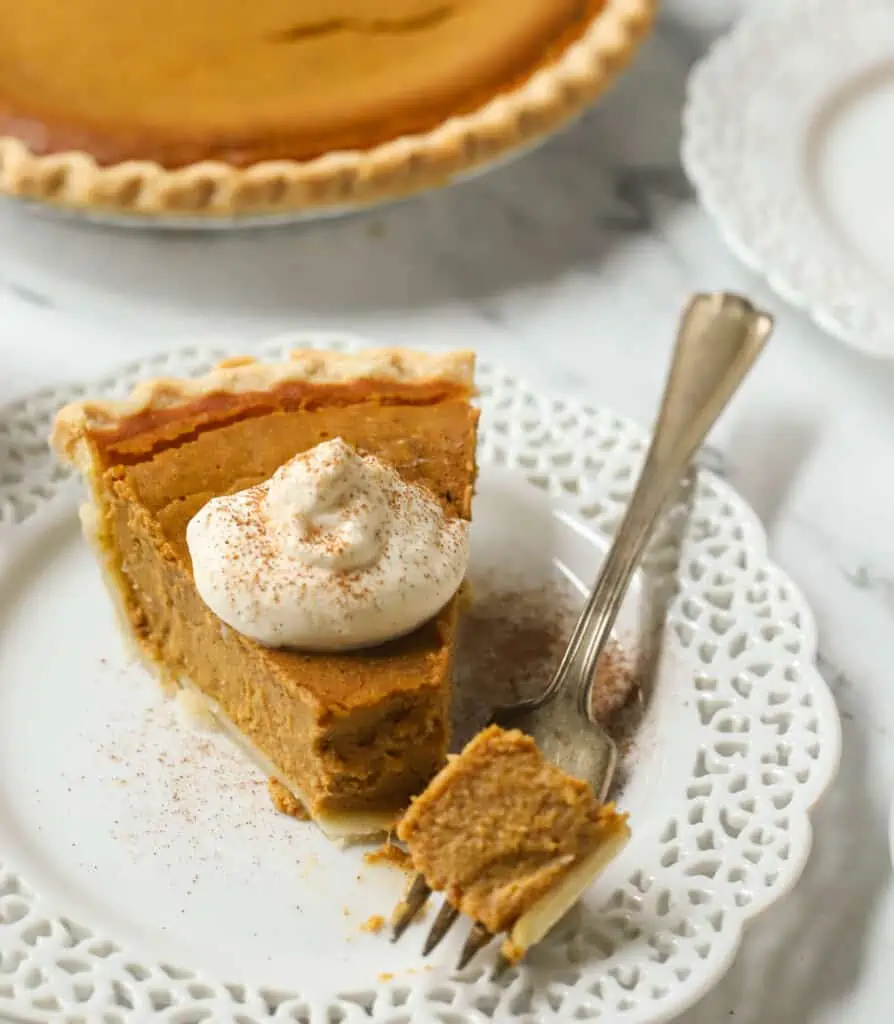
Nothing beats a slice of pumpkin pie than with a big dollop of my easy to make Homemade whipped Cream. Just 3 ingredients is all you need! Or try my Stabilized Whipped Cream that does a great job of holding up and great for making ahead of time.
Of course pie and Vanilla Ice-cream go perfect together!
And if you want to decorate your pie even further, try making and sprinkling some Sugared Cranberries over!
More Popular Thanksgiving Recipes To Try
When it comes to Thanksgiving I can’t just make one dessert! Are you the same? Tell me I’m not alone. So here are some of my favorite Thanksgiving desserts to try.
Like my apple cranberry crisp made with tart, fresh cranberries and an easy oat streusel. Of course you can always make my classic apple crisp for a sure fire crowd pleaser.
Of course I can’t skip making my favorite no knead dinner rolls to serve with dinner! But if yeast has you intimidated you can always make my easy butternut squash bread to serve.
For more Thanksgiving inspiration, check out 28 Thanksgiving Recipes To Try!
More Recipes To Try
- Self Rising Flour Biscuits
- Lemon Cookies
- Brown Sugar Chocolate Chip Cookies
- 20 Self Rising Flour Recipes
- Milk Bar Cake
Pumpkin Pie
Ingredients
For the crust:
- 1 1/2 cups (180g) all purpose flour
- ½ teaspoon salt
- ½ cup (1 stick, 113 g) unsalted butter, cold and cut into cubes
- 4-6 tablespoons ice water
For the filling:
- ¾ cup (160 g) packed light brown sugar
- 1 teaspoon vanilla extract
- ½ teaspoon salt
- 2 teaspoons pumpkin pie spice
- 1 teaspoon cinnamon
- 2 large eggs
- 15 ounces pumpkin puree
- 1 cups (240 ml) heavy cream
Instructions
- Make the crust. In a food processor, or mixing bowl combine the flour, sugar, and salt Scatter butter over top and cut in the butter until mixture resembles coarse cornmeal. If using a food processor, transfer mixture to a large bowl. Sprinkle 3 tablespoons of the ice water over the mixture. Stir and press dough together, using a spatula, until dough sticks together. If dough does not stick together, stir in the remaining tablespoon of water. Turn the dough onto a sheet of plastic wrap and flatten into a 4-inch disk. Wrap tightly in plastic wrap and refrigerate for 1 hour.
- Roll out the chilled pie dough. Preheat the oven to 350oF. On a floured work surface, roll out the disc of chilled dough. Turn the dough a quarter turn after every few rolls until you have a circle 12 inches in diameter. Carefully place the dough into a 9” pie dish. Tuck it in with your fingers, making sure it is smooth. Trim the excess, leaving about a 1 inch overhang. Fold the excess pie dough underneath, crimping the edges.
- Blind bake the crust. Roll out the pie dough, into a 12” circle and shape into a prepared pie plate. Line the crust with parchment paper and fill with pie weights. Bake for 15 minutes. Remove the pie weights, and dock the crust with a fork. Return to the oven and continue baking for an additional 10 minutes. Increase the oven temperature to 425°F.
- Make the filling. Combine all the filling ingredients and whisk together until smooth and combined. Pour the custard into the par-baked crust.
- Bake the pie. Place the pie onto a large baking sheet and bake for 15 minutes. Reduce the oven temperature to 350°F for 40 minutes longer, until the edges are set and the internal temperature registers 175°F.
- Cool the pie. Allow the pie to cool for 4 full hours at room temperature before serving. This time allows the filling to thicken up. Serve with vanilla ice cream if desired. Cover pie leftovers tightly and store in the refrigerator for up to 5 days.
Video
Notes
- Storage: Store leftovers for up to 4 days, covered in the refrigerator.
- Make Ahead: You can make the pie crust a few days ahead of time, and also blind bake up to 3 days ahead of time. I like to make mine the day before and then let it cool and you can store it in the refrigerator. You can also make the pie crust and filling separate the night before you assemble and bake.
- Freezing: You can make the pie crust a few days ahead of time, and also blind bake up to 3 days ahead of time. I like to make mine the day before and then let it cool and you can store it in the refrigerator. You can also make the pie crust and filling separate the night before you assemble and bake.
- Heavy Cream: You can substitute with half and half. Or you can use milk, a lactose free milk, or plant based milk like almond milk but you will need to add 1 Tablespoon cornstarch to help thicken the pie up. I haven’t tried this method, but My Recipes recommend this substitution.
- Pumpkin: Make sure you are using pumpkin puree NOT pumpkin pie filling.
- If pie doesn’t set: This means your pie is undercooked, but you can pop it back in the oven. Bake the pie for another 15 minutes at 425oF.





Olivia Tworkowsky says
Love this recipe with the balance of the spices!!! A great classic that you cant go wrong with!
Heather says
aw thank you so much!! I’m so glad you loved it Olivia!
Adrienne says
Pumpkin pie is my favorite so I couldn’t resist making this one and it did not disappoint! Perfectly tender crust and creamy filling. Just the right amount of spice. This will definitely appear at my Thanksgiving table!
Heather says
aw that means so much Adrienne!! I’m so happy to hear this!! Thank you for such kind words 🙂
Lola says
This turned out so well! My family really enjoyed the creaminess of this pie. I will be making it again!
Heather says
That’s awesome Lola…I’m so glad you and your family loved it!
Jan says
Can egg nog be used for heavy cream?
Heather says
I haven’t tried but yes I think it should be great!
Diane Fallon says
I have used egg nog and it is delicious.
Heather says
Oh wow what a great substitution! That sounds fabulous!
Carol says
This was the best pumpkin pie I’ve made yet! Thank you for the recipe!
Heather says
aw thank you Carol!! I’m so glad you loved it!!
Katia says
I tried this pumpkin pie version without the evaporated milk because I had none in the cupboard and I have to say now that I have tried it im sold!!! So much lighter and tastier than the original version you can almost taste the pumpkin more.
Heather says
perfect!
Angela says
The heavy cream in this recipe is a great substitute for the evaporated milk. It’s my preferred way to make pumpkin pie. Thanks for the great recipe!
Heather says
excellent, thanks
Dannii says
I am so excited for pumpkin pie season and this looks delicious, and so easy too.
Heather says
love this time of year too!
Wajeeha Nadeem says
This pie looks so delicious! Can I use homemade pumpkin puree for it, as canned pumpkin puree isn’t available where I live. Thanks!
Heather says
excellent news, =)
Gina Abernathy says
Pumpkin pie is perfect for this time of the year.
Heather says
Thanks for your sweet feedback, Gina!
GRETA TALAS says
Such a good and simple recipe! Thanks for sharing!
Heather says
thank you for your nice feedback Greta =)
Addie says
What an absolutely amazing pie!!!
Heather says
thank you Addie =)
Tara says
Such a wonderful pie to celebrate the holidays! I love that creamy texture. You also had me at homemade all butter pie crust!
Heather says
yay!
Jules says
I was looking for a classic pumpkin pie and I have found it! Thank you for sharing!! xx
Heather says
success!!
Sue says
I love the use of heavy cream to make the filling so rich and delicious!
Heather says
theres no substitute sometimes!
Cindy Mom, the Lunch Lady says
What a delicious looking pumpkin pie! The cream must add amazing creaminess.
Heather says
so creamy & dreamy !
Meryl says
Great recipe! I love the ingredient list, very clean without the evaporated milk! I’ll be making this for Thanksgiving, maybe Christmas too! Thanks!
Heather says
I cannot wait to hear what you think, Meryl