This Post May Contain Affiliate Links. Please Read Our Disclosure Policy.
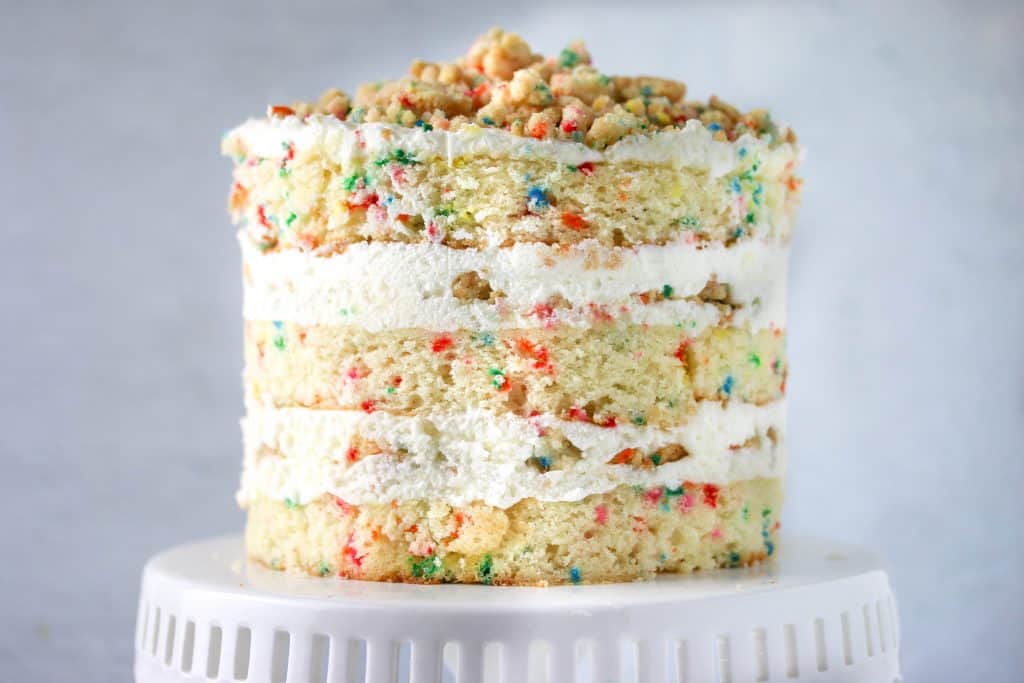
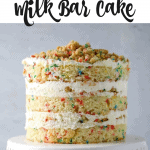
This might be the best cake I have ever eaten. Seriously. The famous Momofuku Milk Bar cake is layers of funfetti cake, creamy vanilla buttercream frosting, and these crunchy cake crumbs that send it over the edge. Have a special birthday coming up? Then you MUST make this Momofuku cake! I have step by step photos for you to rock this cake out.
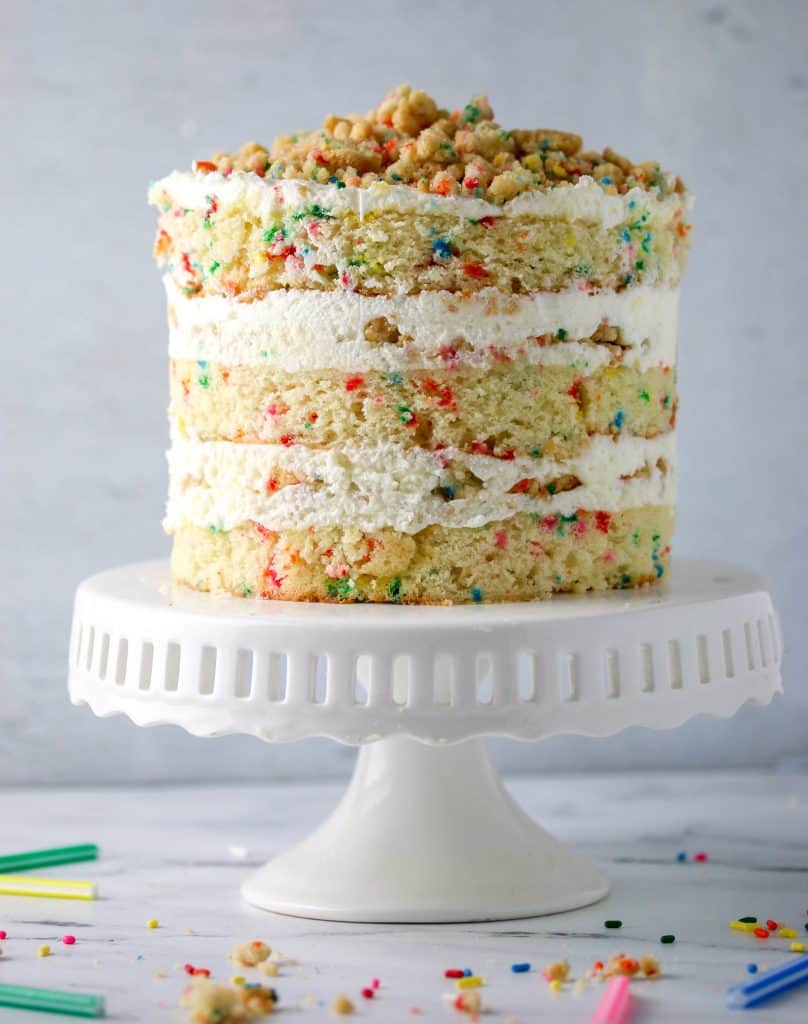
If you haven’t heard of this Milk Bar cake let me help you out from underneath the rock you have been living under. It’s OK I, too, once lived under that sad rock where this cake did not exist. Well, let me you bring you into a wonderful world that includes this cake.
Oh my. This. Cake. 🤤 This cake is the genius behind Christine Tossi’s Milk Bar in NYC.
This recipe is one of 60+ Home Baking Projects To Try!
What Is The Momofuku Birthday Cake?
A funfetti cake that’s light and fluffy. With sprinkles abound. Soaked in a vanilla milk. Slathered in a creamy dreamy vanilla buttercream frosting.
And the best part…
Cake crumbs. Don’t worry we will get to the crunchy (I could eat these alone and may have while making this cake) cake crumbs. And it all comes together into one blissful bite that I am still dreaming about. I actually made this cake months ago for my amazing Fiance’s birthday. He is a funfetti fiend and loves a good boxed mix. I won’t judge. I still love him. But I wanted to make him one from scratch.
Ok this cake is a bit of a labor of love. Hey I’m all for making some awesome easy desserts when the time calls for it. Nothing wrong with whipping up some easy Chocolate Fudge or maybe some Old Fashioned Peanut Butter Fudge but then some occasions call for an epic cake like this one.
This cake is a bit different for a few reasons:
- Baking Pan: The cake is baked in a 10×15 jelly roll sheet pan and then rounds of cake are cut out and stacked. I had leftovers when I made my cake so I assembled a “mini version” to taste since while the real deal was chilling.
- Ingredients: Yes there were quite a few ingredients I don’t normally bake with like clear vanilla extract and glucose. I splurged and got both so I make the cake as close as possible to the recipe.
- Assembly: It’s stacked in a cake ring with an acetate cake collar wrapped around it, so in the end you get a “naked cake” look.
- Layers and layers: And it’s layers of cake, soaked in a “vanilla milk”, then layered with the frosting and cake crumbs. It’s flavor, and texture, and basically perfection.
- Make Ahead: The cake has to FREEZE (aka assemble the day before) until you are allowed to reveal the cake and serve. I have included in this post the make ahead times so you can break down the process. I do not recommend making this cake all in one day.
And this cake promised that it “tastes just like those boxed funfetti mixes” we all hate to love. It delivers. On so many levels. And then some. In fact, it blows a boxed cake mix out of the water. Yes I will be making this cake again.
Is it time consuming? Heck yes. Is it worth it? Every calorie laden, drool worthy bite.
What Do I Need To Make This Milk Bar Cake?
Ok yes here’s the thing you will need a few things to make this cake that you may not have on hand. I’ll be perfectly honest it’s got some unique tools and ingredients but it’s all worth it.
- 6-inch cake rings – You will use these to cut the cake rounds out and then to stack the cake. You might be able to try baking this in a 6-inch cake or 8-inch cake round but you would need to adjust the baking time.
- Jelly roll pan – You need to use a specific sized jelly roll pan so the batter fits. You need a 10×15 jelly roll pan.
- Acetate Cake Collar – This is used to wrap around the cake rings to create that look that is the Milk Bar cake.
If you don’t want to get all these things but want to experience the wonder that is the Milk Bar cake you could try baking in a 6-inch cake pan and then frost without the cake collar. I haven’t tried this method, but I think it would work. It won’t have the same look but no one will care once they take a bite.
Ingredients Needed To Make The Momofuku Milk Bar Cake
Not gonna lie. There are also some specialty ingredients in this cake as well. I thought about taking some shortcuts, but I decided to go for it and see what the fuss is all about. Glad I did.
Cake Crumbs:
- Sugars – The crumbs use both brown sugar and granulated white sugar.
- Cake Flour – A little low protein flour to help bind the crumble together
- Baking Powder – To help give the cake crumbs so lift so they aren’t dense.
- Salt – I used table salt (the only adjustment I made to the recipe) so I used less than called for since the original recipe used kosher salt. Kosher salt is bigger in granules so you need more.
- Rainbow Sprinkles – Of course, sprinkles. Because hello ultimate funfetti cake is what we are going for here.
- Grapeseed oil (but vegetable or canola oil would also work)
- Clear vanilla extract – this is what Christine recommends using because it gives it that classic boxed mix taste.
Funfetti Cake:
- Unsalted butter – Unsalted butter is key so you aren’t adding extra salt.
- Vegetable shortening – I don’t like using shortening in my cakes, but I kept true to the recipe here and used it. It does help create a soft fluffy textured cake in the end.
- Sugars – The cake, like the crumbs, uses both light brown sugar and granulated sugar.
- Eggs – Be sure these are room temperature so they are incorporated into the cake batter.
- Buttermilk – If you don’t have buttermilk on hand, you can always make your own buttermilk.
- Grapeseed Oil – Again, you could also use a vegetable or canola oil.
- Clear Vanilla Extract – You could substitute regular vanilla extract, but this is what gives the cake the flavor Tossi was trying to achieve – that boxed mix flavor we all know we secretly love.
- Cake Flour – This flour has a lower protein content that regular AP flour so you will get a lighter cake in the end. You can always make your own cake flour. You won’t get exactly the same results but it will be a close second.
- Baking Powder – This is what helps to cause the cake to rise. Don’t mix it up with baking soda. It’s not the same thing! You can read more about baking powder vs. baking soda here.
- Salt – The original recipe uses kosher salt, but I typically use table salt. Kosher salt is larger in granules so if you use table salt you will need to use less. I made the mistake the first time and used the same amount called for in the recipe and it was SO salty. Oops.
- Sprinkles – Of course, this funfetti cake isn’t complete with some rainbow sprinkles.
Frosting:
- Unsalted Butter – Again I recommend unsalted butter so to control the amount of salt
- Vegetable shortening – Not always a fan of using – here is an all natural version of shortening if you don’t like using the blue tub either.
- Cream Cheese – A little bit goes a long way to add a bit of tangy depth of flavor.
- Glucose – I have never used this before so I was skeptical. But the glucose is there to help make a smooth buttercream frosting and help meld all the ingredients together. But you can leave it out or add more corn syrup.
- Corn Syrup – This adds sweetness but also smoothness.
- Clear vanilla extract – Yes I think it’s worth the splurge here. It will also give your frosting and cake a more white color.
- Powdered Sugar – Of course powdered sugar helps to create the sweetness here. If you are worried about lumps you could sift, but I didn’t bother.
- Salt – Again I used table salt so I used a bit less (the recipe will reflect the amount I used)
- Citric Acid (I used lemon juice) – I couldn’t find citric acid in my grocery store, but lemon juice is a perfect substitute so I took it and ran with it. It helps to cut the sweetness of the frosting, so don’t skip it.
Soak:
- Milk – I used whole milk, but I think a lower fat milk would be fine. It’s used to soak the cake layers to help keep them moist.
- Vanilla – A little more flavor here. Nothing wrong with that. Really drives home the vanilla cake flavor.
How Do I Make This Milk Bar Cake?
Ok ladies and gentlemen are you ready to tackle this cake in all it’s glory? I have quite a few step by step photos for you. It took me a lot of research into other blogs, and multiple times reading the recipe to make this cake as instructed. So I hope you find these photos are helpful!
Step One: Make The Cake Crumbs
These are surpringly easy and can be made up to a week ahead of time. Just don’t snack on them all week before you get to the cake assembly! Trust me it will take willpower.
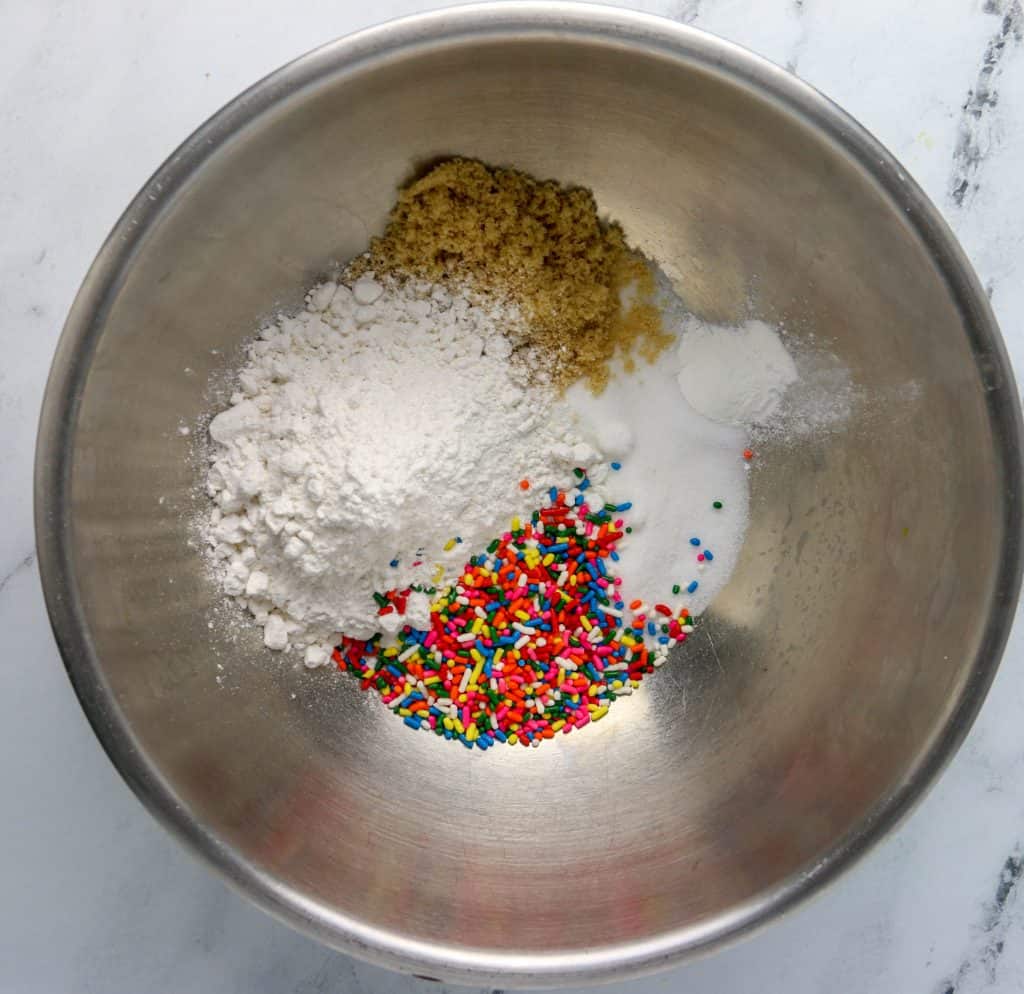
Start by combining the dry ingredients- sugars, flour, baking powder, salt, and sprinkles
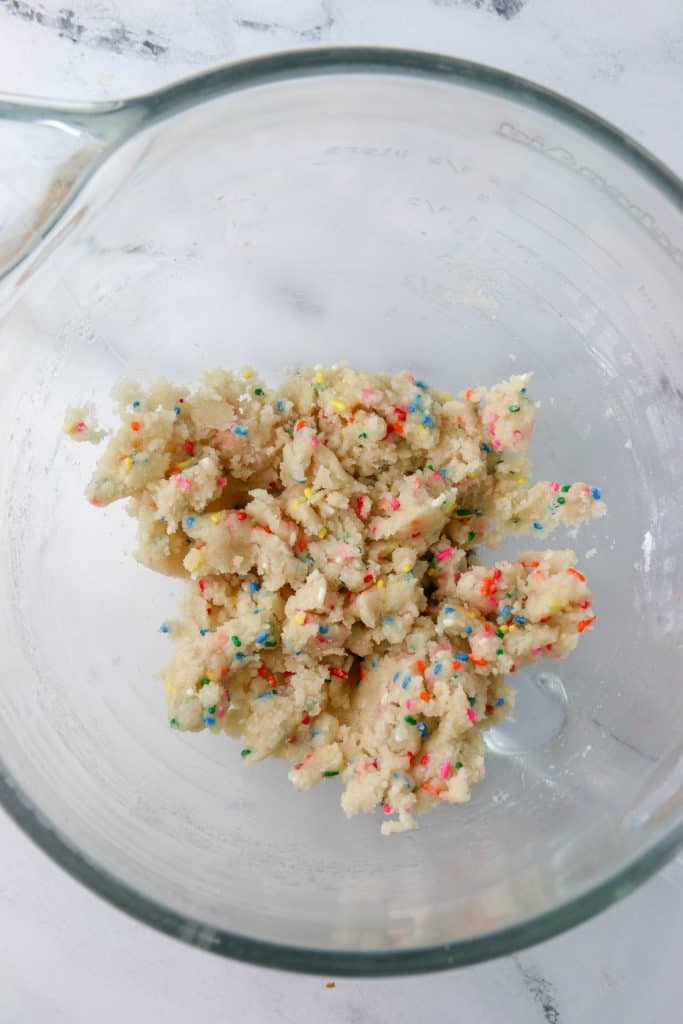
Then add the oil and vanilla. The mixture will become moist and crumbly.
Then spread the mixture onto a baking sheet. I lined mine with parchment paper, but you could use a silicone baking mat. You want to break up the crumbs with your hands.
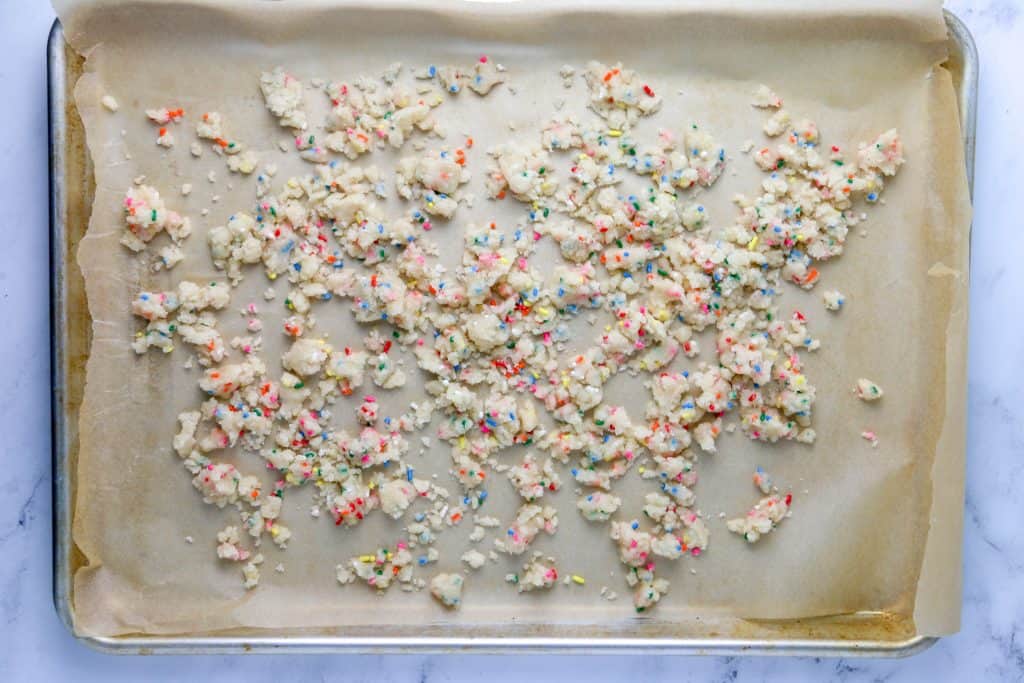
Once during baking, and then once they cool you want to break up the crumbs a bit. The crumbs will still be soft when you take them out of the oven but will crisp up as they cool.
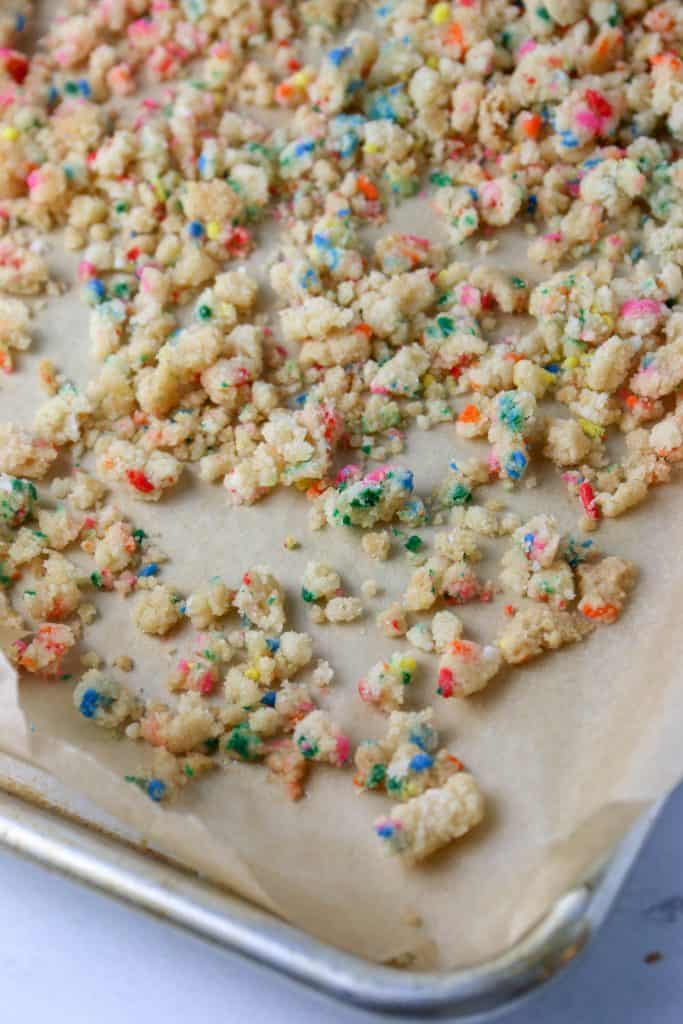
The cake crumbs can be stored up to a week ahead of time at room temperature in a container or frozen up to a month.
Step Two: Make The Milk Bar Funfetti Cake
Okay, step one done! Let’s make the cake. Start by mixing together the dry ingredients.
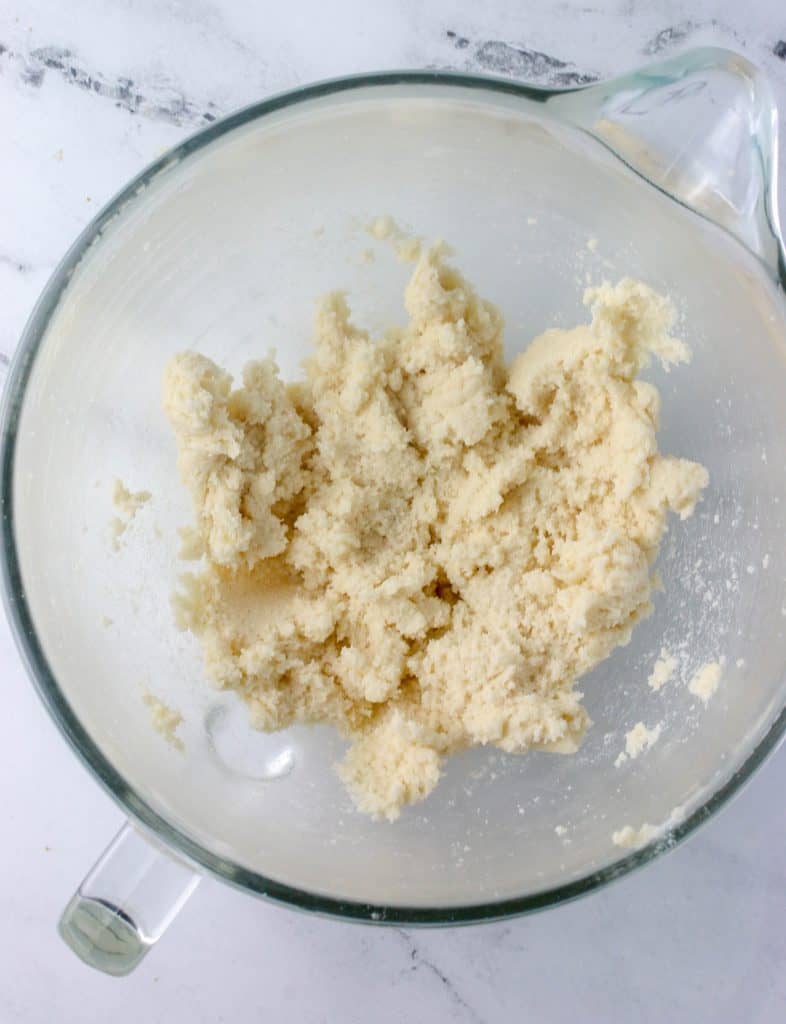
And then in a second bowl, you want to cream your butter, shortening and sugars until light and fluffy, about 3 minutes. Then add the eggs one at a time. You want to then add the oil, buttermilk, and vanilla and mix again to medium high and beat again for 4-6 minutes. The mixture will be light in color and liquidy.
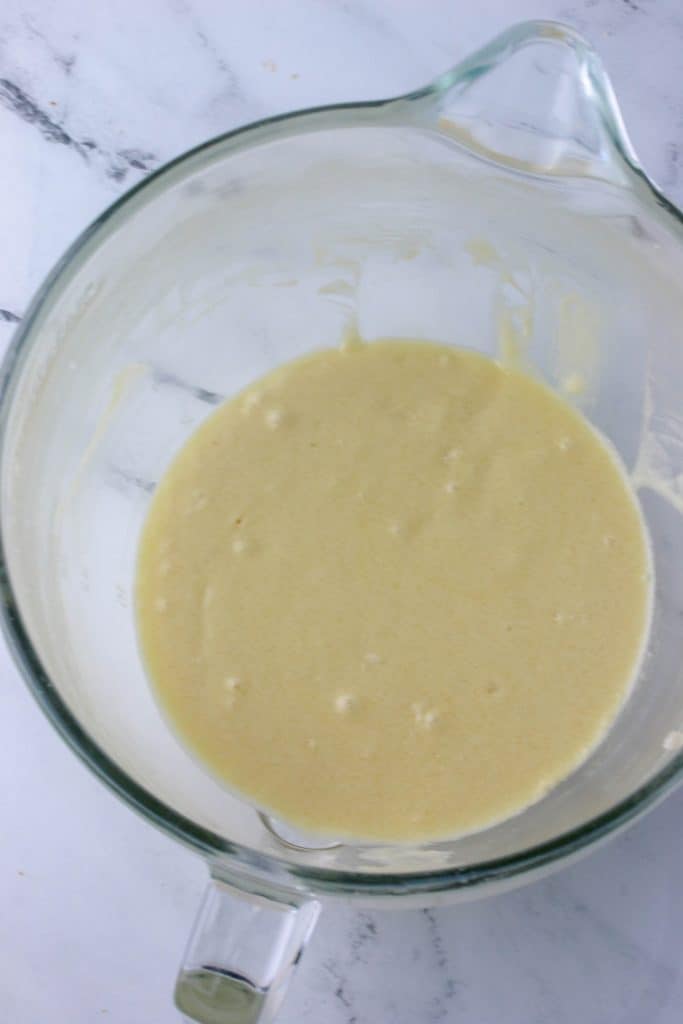
On low speed, gradually pour in the buttermilk mixture. Increase the mixer speed to medium-high and beat for 4 to 6 minutes, until the mixture has nearly doubled in size and is completely homogenous (don’t rush this step!). Stop the mixer and scrape down the sides of the bowl.
On low speed, gradually add the flour mixture and mix just until the batter comes together, about 45 to 60 seconds. Scrape down the sides of the bowl and give the batter a final mix with a rubber spatula.
Then Don’t forget to add those sprinkles!
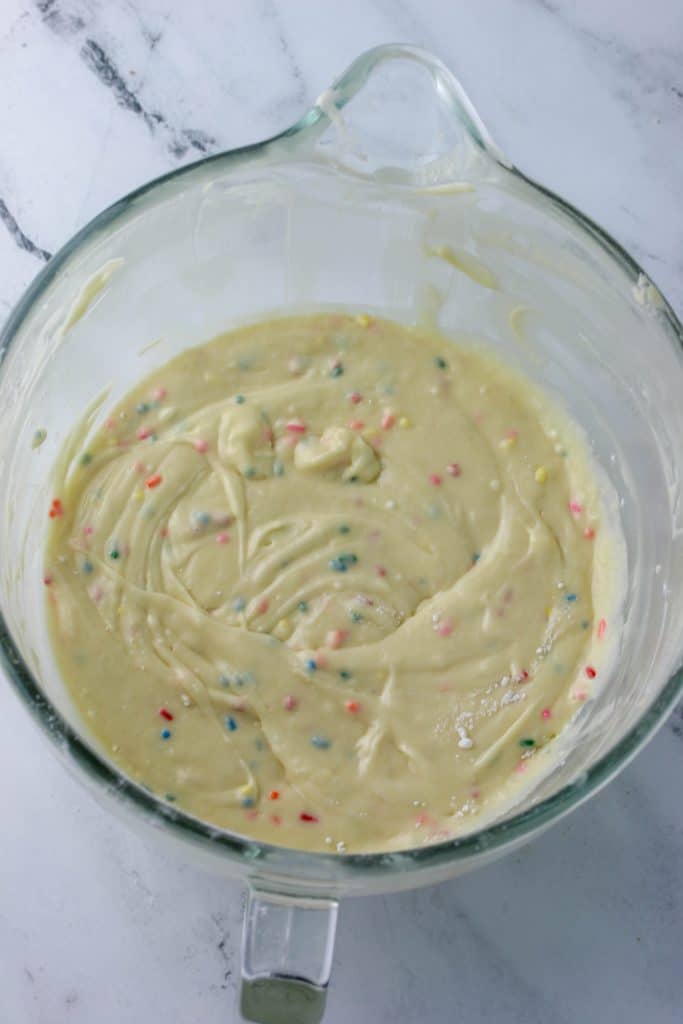
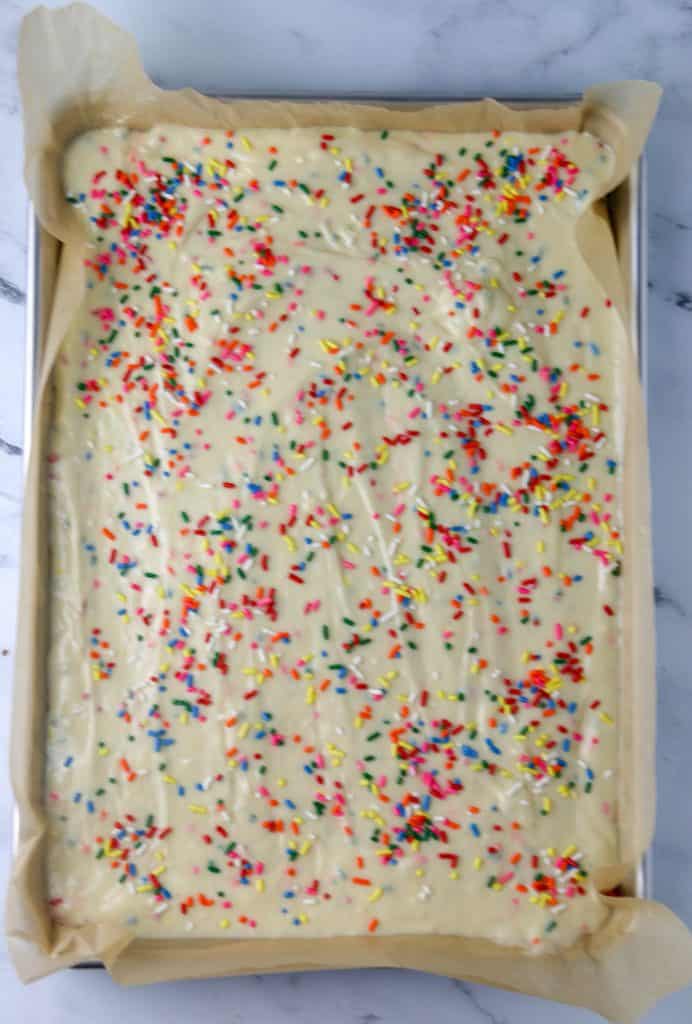
Then spread the batter into your prepared sheet pan and bake. Once the cake springs back, or a cake tester comes out clean it’s done. Allow to cool. You can make the cake ahead of time, up to 5 days. Just allow to cool and then wrap and store in the refrigerator.
Step Three: Make The Frosting
You still with me?! Oh good. It’s going to be worth it. Pinky swear. Now for the frosting.
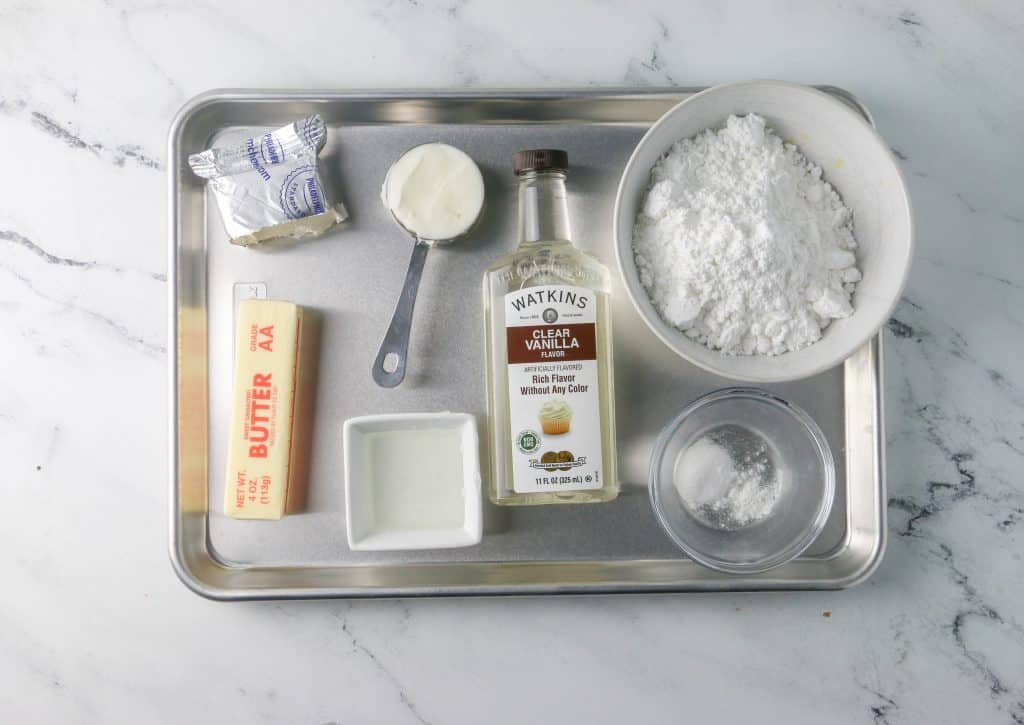
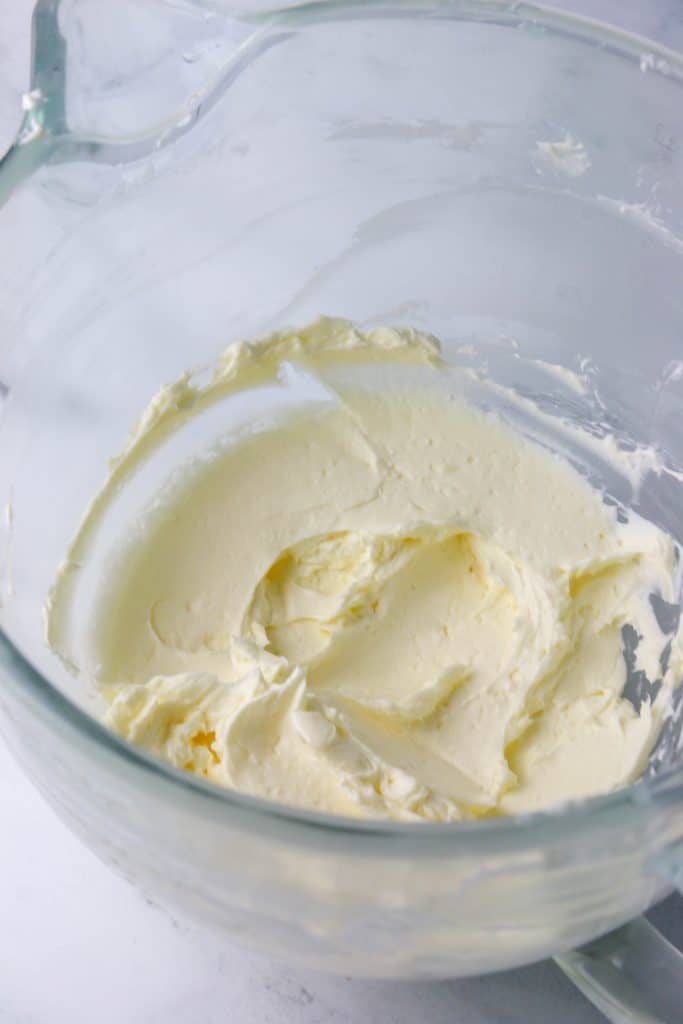
Start by creaming together the butter, shortening, and cream cheese until the mixture is smooth and fluffy (about 2-3 minutes). Be sure to scrape down the bowl.
And then stream in the glucose, corn syrup, and vanilla. And beat again for about 2-3 minutes. The mixture will become smooth and glossy white.
Then finish by adding the lemon juice and powdered sugar. Mix again for a final 2-3 minutes. You can also make the frosting ahead of time. Just store in an airtight container for a week in the fridge.
Ok now that we have everything ready to go. It’s time to assemble!
How Do I Assemble A Milk Bar Cake?
When you’re ready to assemble, you want to mix together the soak – an easy combination of milk and vanilla. Here’s how this is going to work:
Layer 1: 1 layer cake, 1/2 soak, 1/5 frosting, 1/3 crumbs, 1/5 frosting
Layer 2: 1 layer cake, 1/2 soak, 1/5 frosting, 1/3 crumbs, 1/5 frosting
Layer 3: 1 layer cake, 1/5 frosting, 1/3 crumbs
Got it? Ok let’s break this down. Start by cutting out your cake circles. Flip the cake out of the sheet pan. Then using the 6″ round cutter, cut two circles out of the cake. Like such…
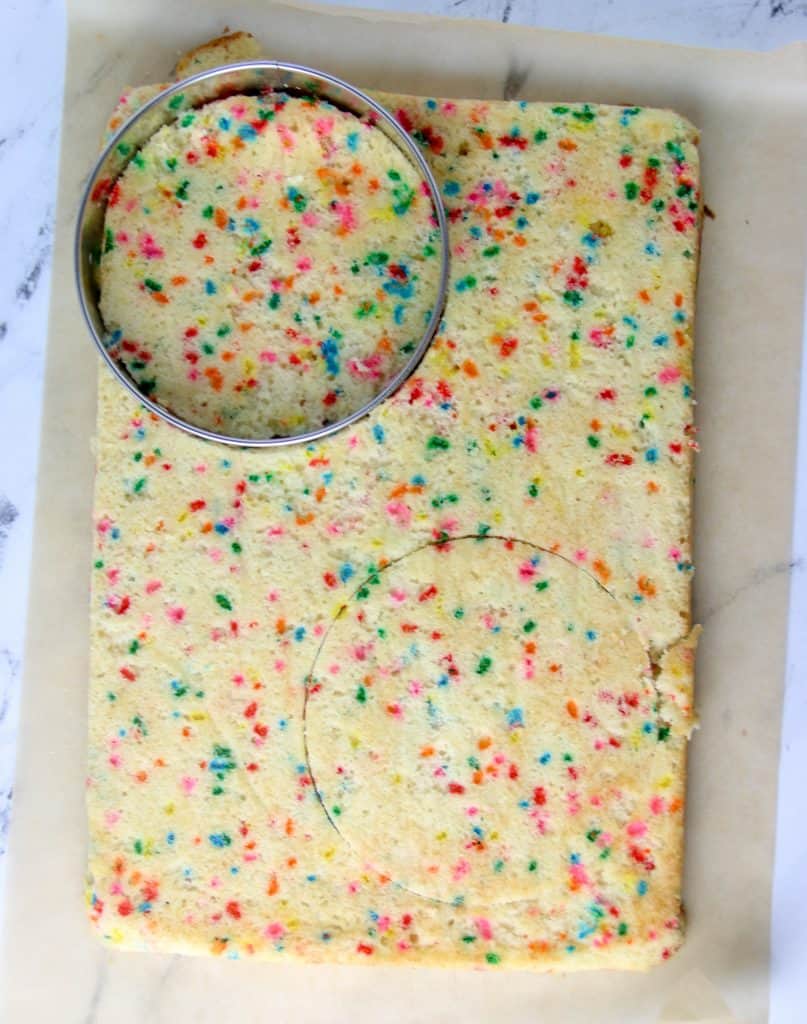
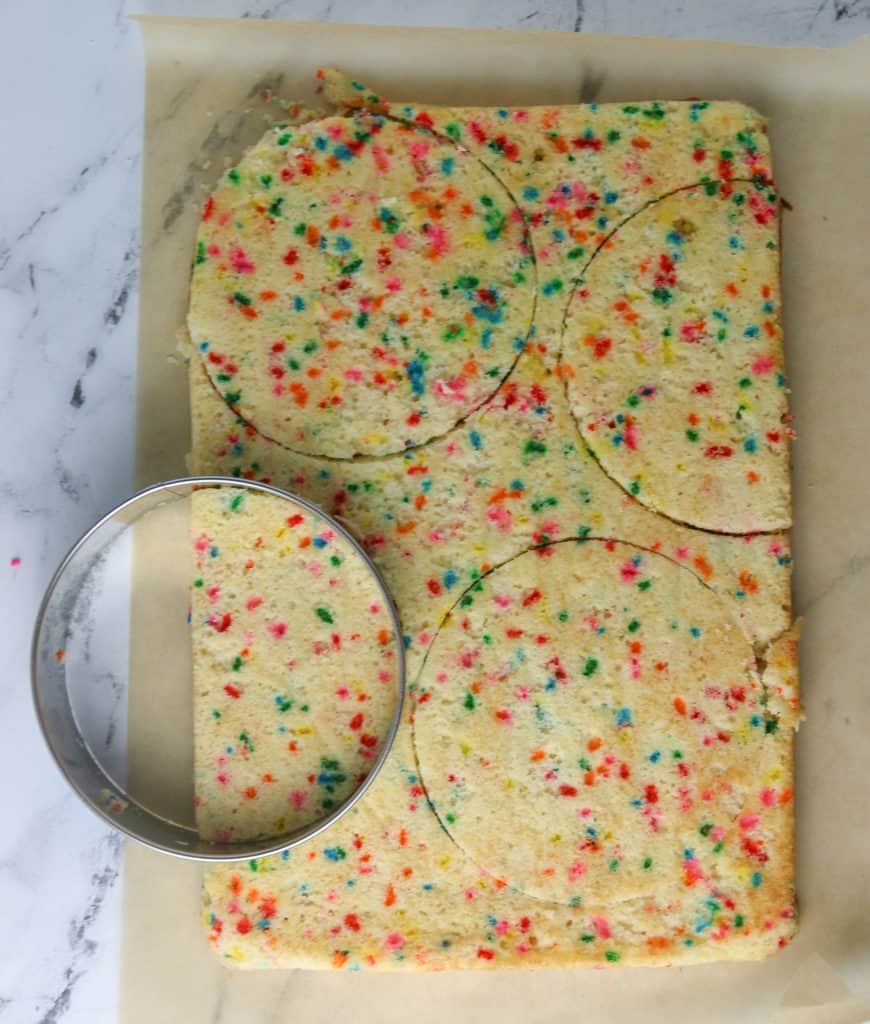
You will get two full perfect circles. And then use the cutter to cut TWO half circles out of the scraps. You will piece those together to make the final cake layer.
It’s unconventional. Sure. But it works. Will there be scraps left? Sure. But this cake takes some time to assemble. You’re bound to get hungry 😉
Then you want to start assembling. Using the same cutter, give it a wash. And then place on a baking sheet lined with parchment paper. And line with the acetate collar.
Note: The acetate collar I used had to be cut into two 3″wide strips.
Place your first layer in the cake ring.
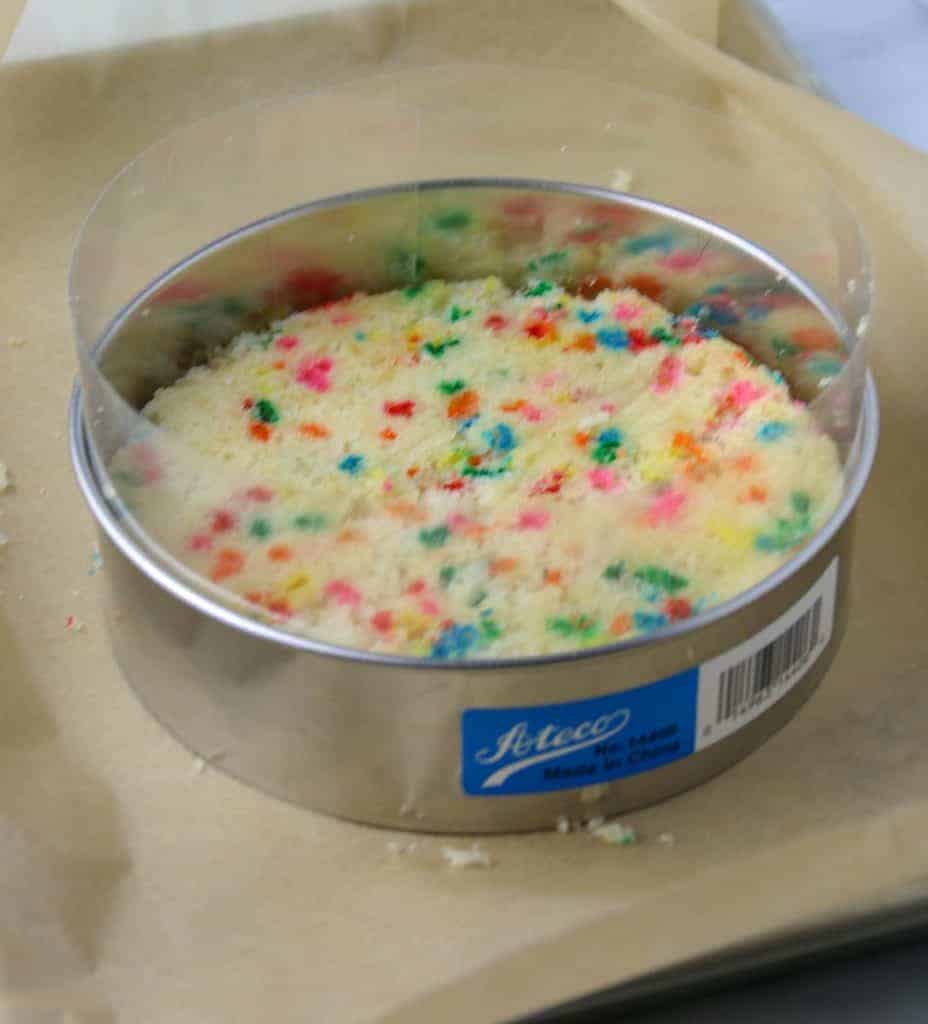
Then give it a good soak with your vanilla milk.
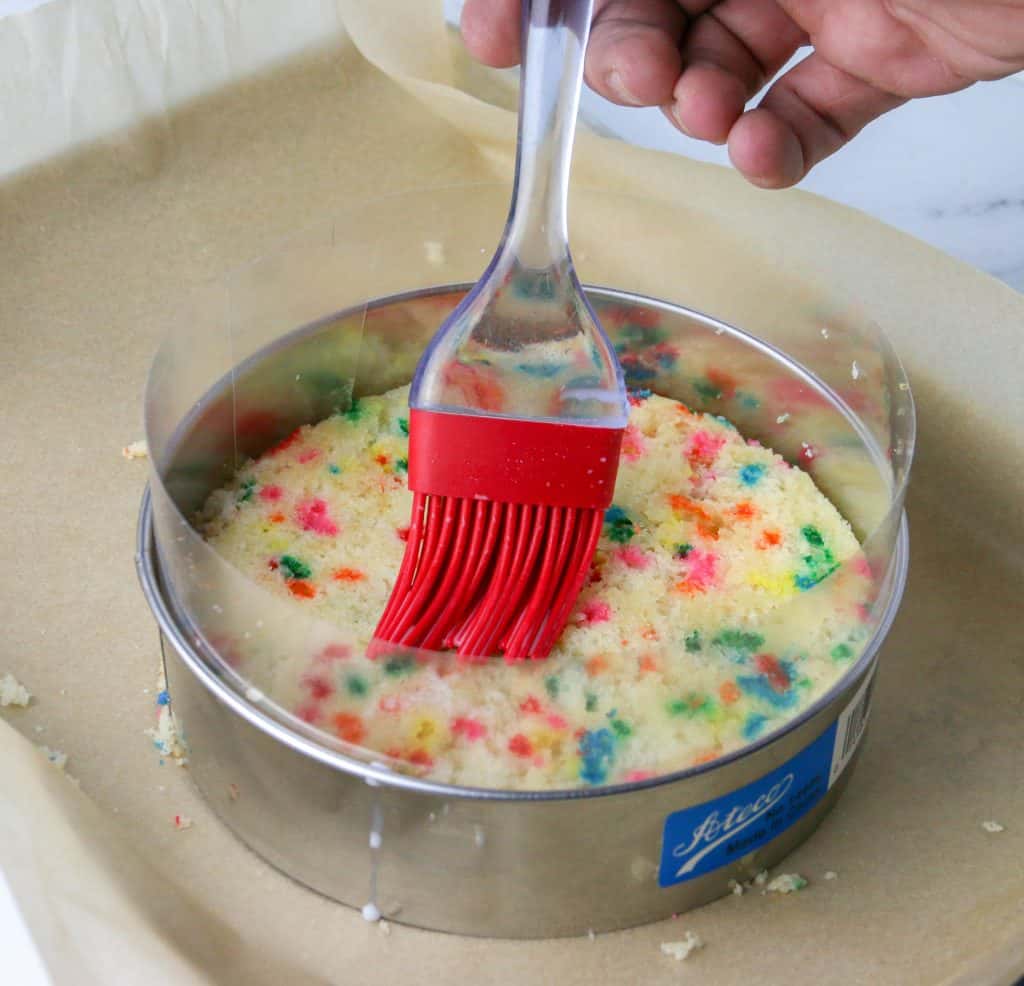
Then add 1/5 of the frosting.
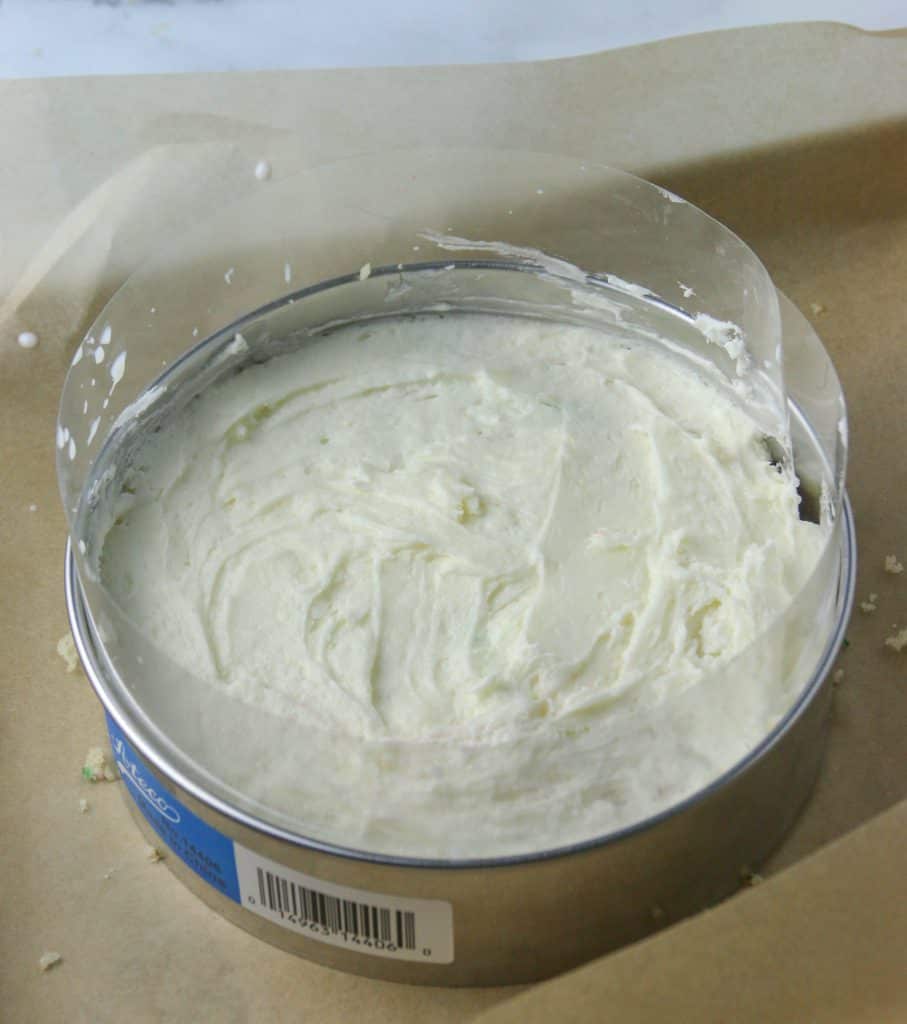
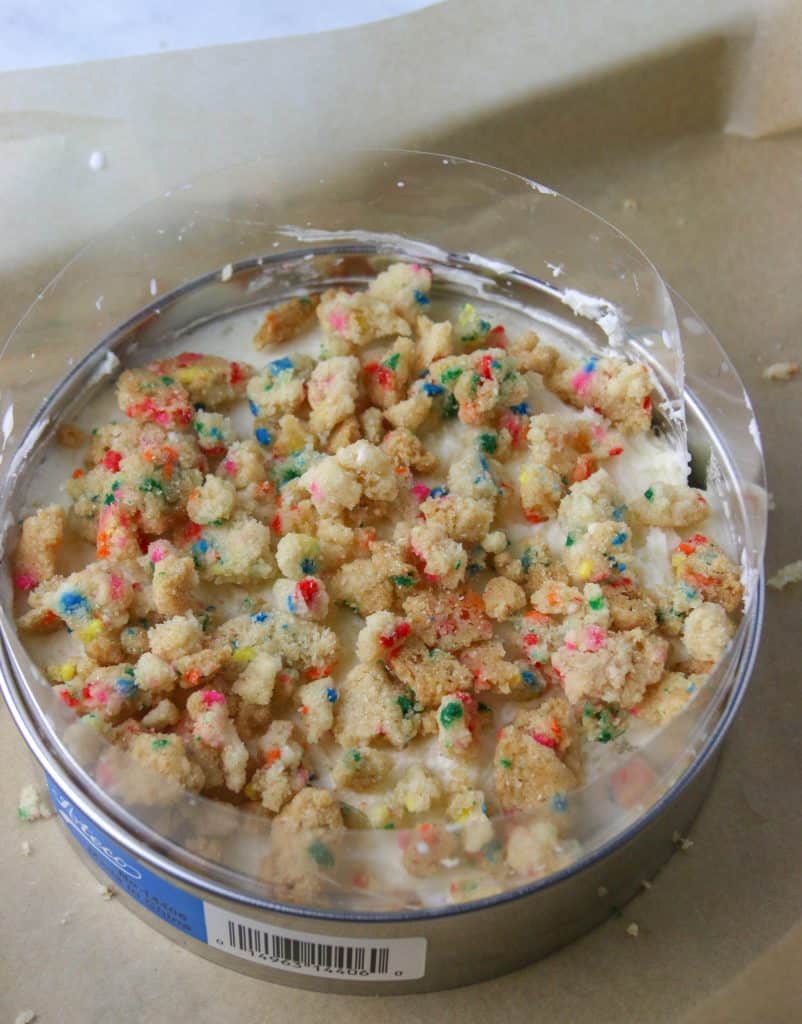
Then sprinkle on 1/3 of those delicious cake crumbs. You want to press these down slightly into the frosting. Oh, and sneak one for yourself.
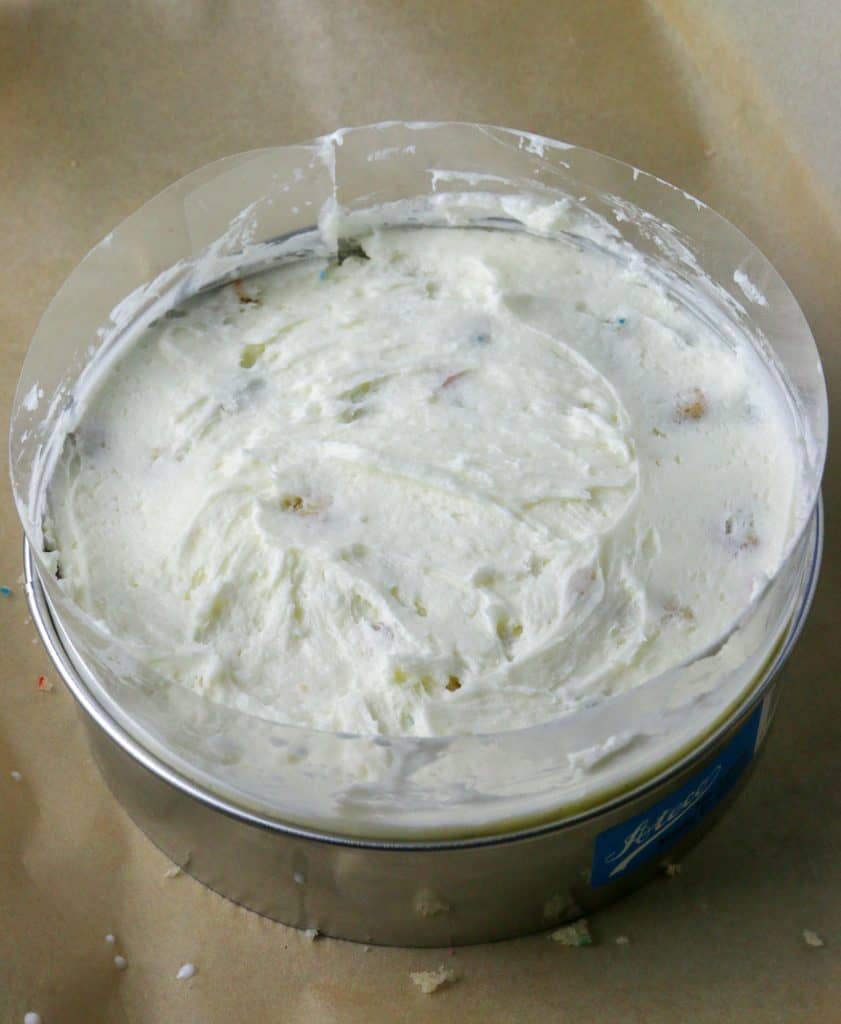
Then more frosting on top. Again, about 1/3 of the frosting. It’s OK I eyeballed it as well.
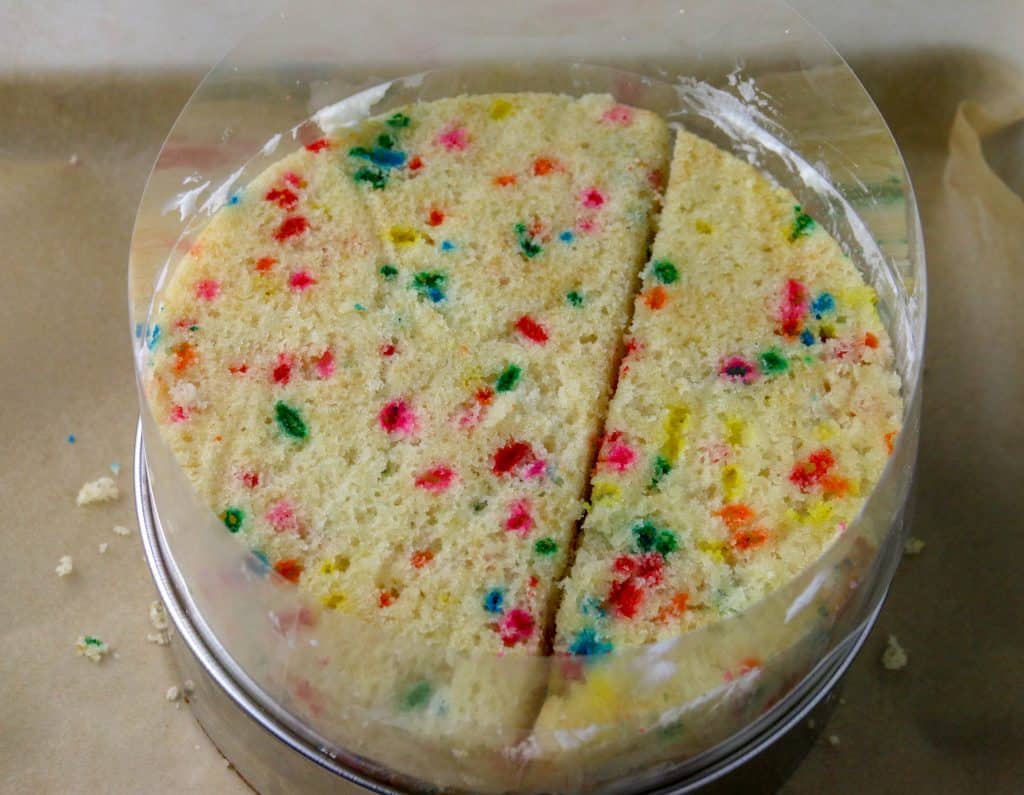
Before you start the next layer you want to add your next layer of acetate to make the collar higher. Tuck the new piece into cake ring so it extends above the last one a few inches. Then you want to piece together the half circles on top.
You will repeat this process for the second layer: cake, soak, frosting, crumbs, and frosting.
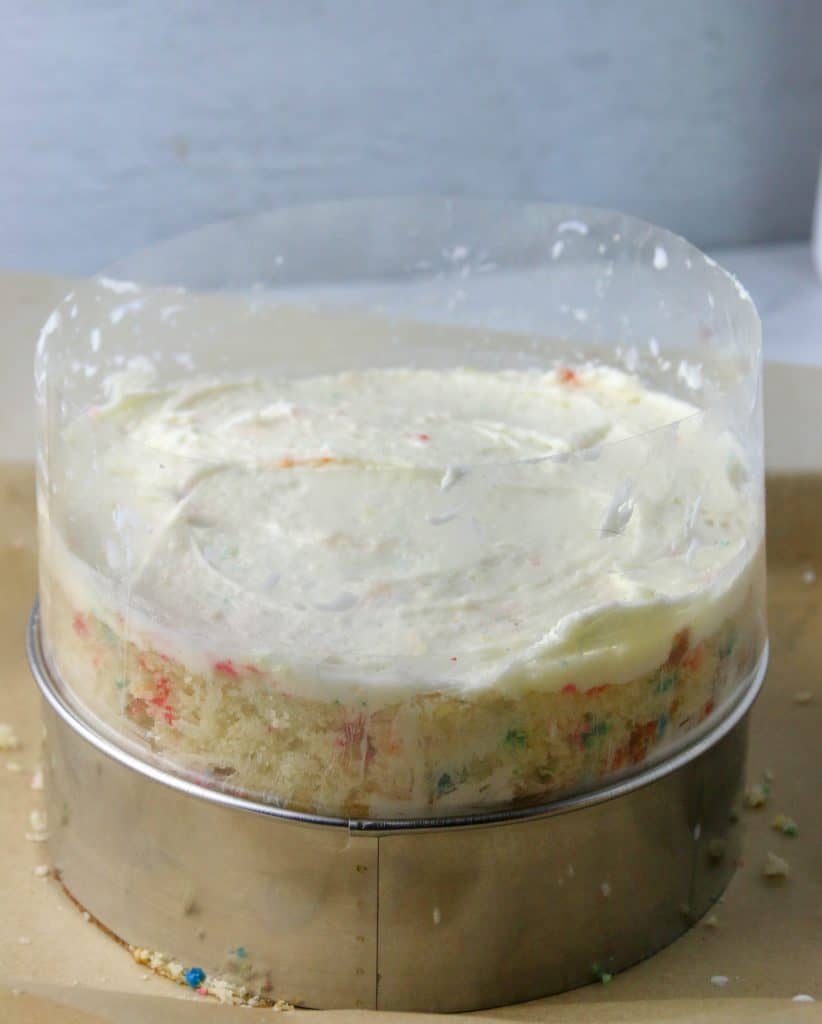
Then repeat with the final cake layer and frosting
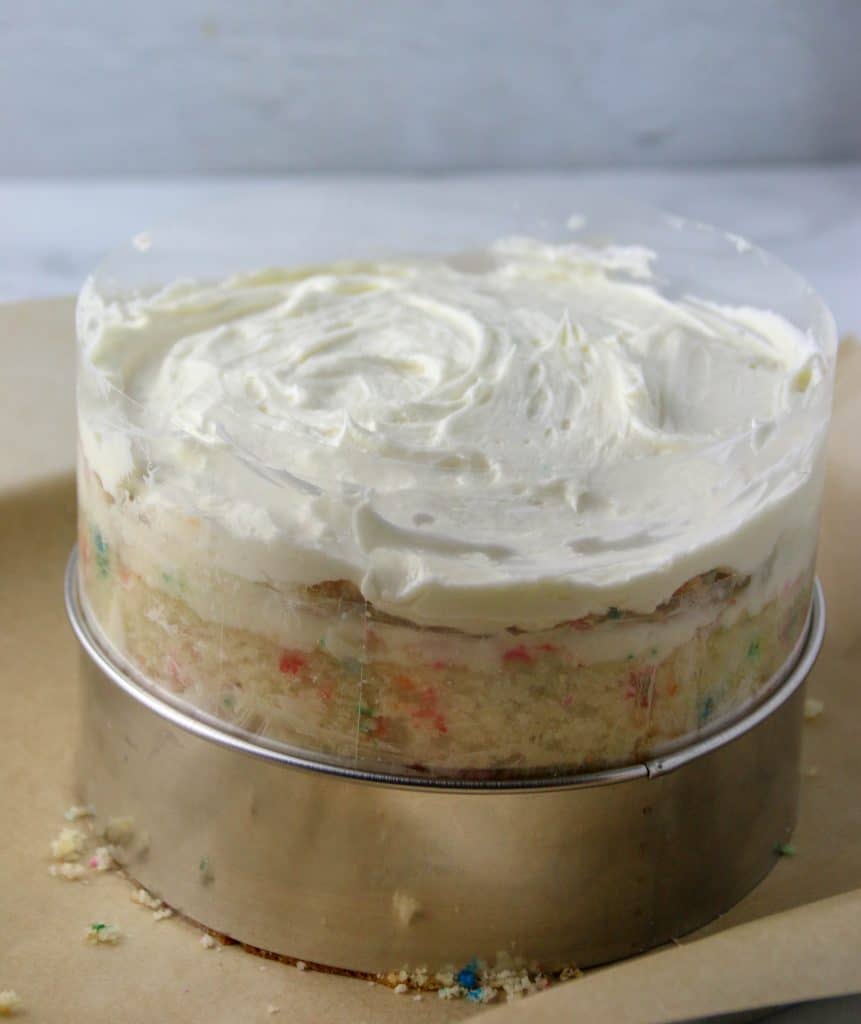
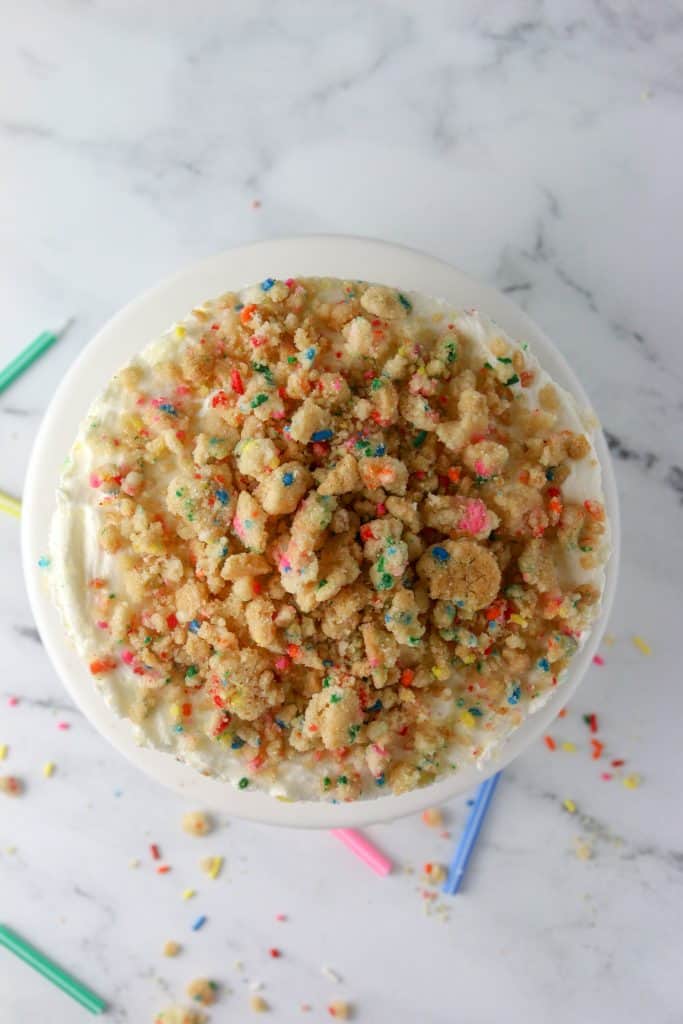
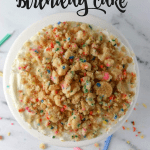
And then don’t forget topping with those last cake crumbs! I like to mound mine up in the middle.
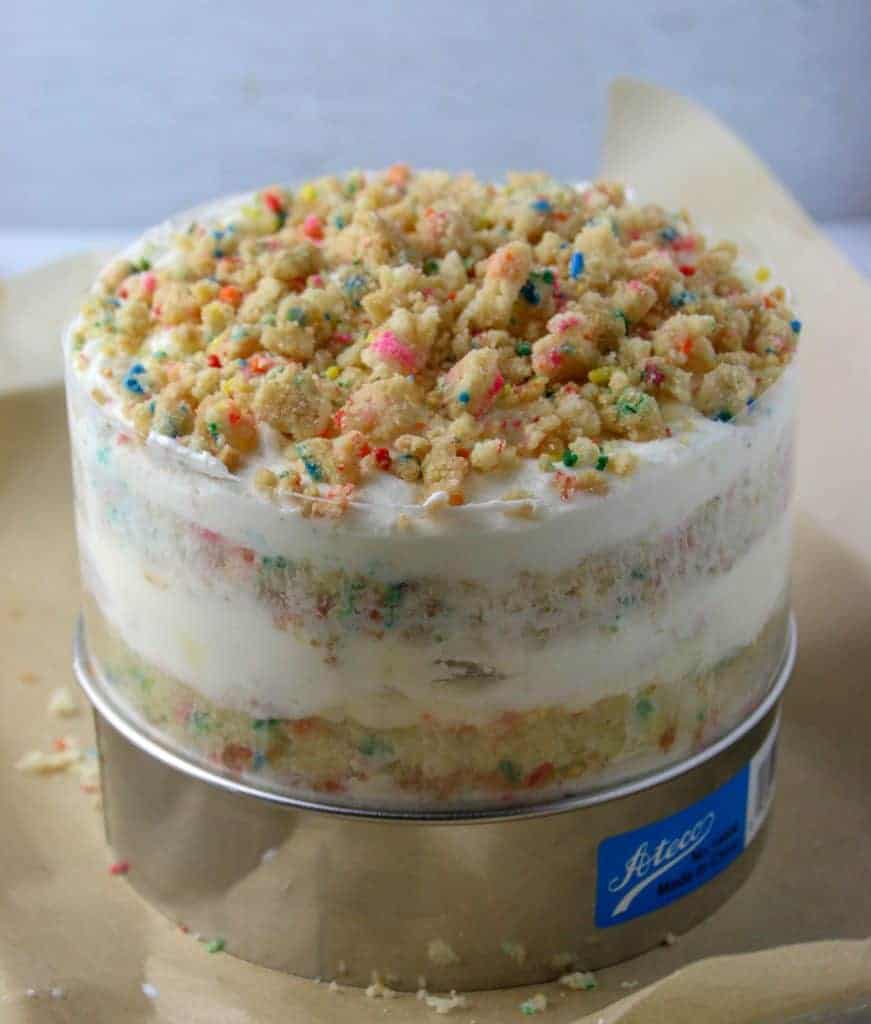
Now the hard part. The waiting. Patience isn’t my thing either. But it will be rewarded. Promises.
You need to pop this beauty into your freezer for a minimum of 12 hours. You could also freeze this cake for up to two weeks.
When you’re ready to serve you want to remove the cake 3 hours before serving. And then carefully pop the cake out of the ring and remove the acetate. You want to let the cake defrost in the fridge for those 3 hours before serving.
How Do I Make A Milk Bar Cake Ahead Of Time?
I get it. This cake is not for the faint of heart. So here is a breakdown of the components and their make ahead schedule:
Cake crumbs: Up to a week ahead of time. Store at room temperature. You can also store these in the freezer for 1 month.
Cake: You can store this, cooled and wrapped, in the fridge up to 5 days.
Frosting: Store in the fridge up to 1 week ahead of time. Bring to room temperature before using.
Whole Cake Assembled: Store in the fridge, covered up to 5 days. Freezer, covered, up to 2 weeks.
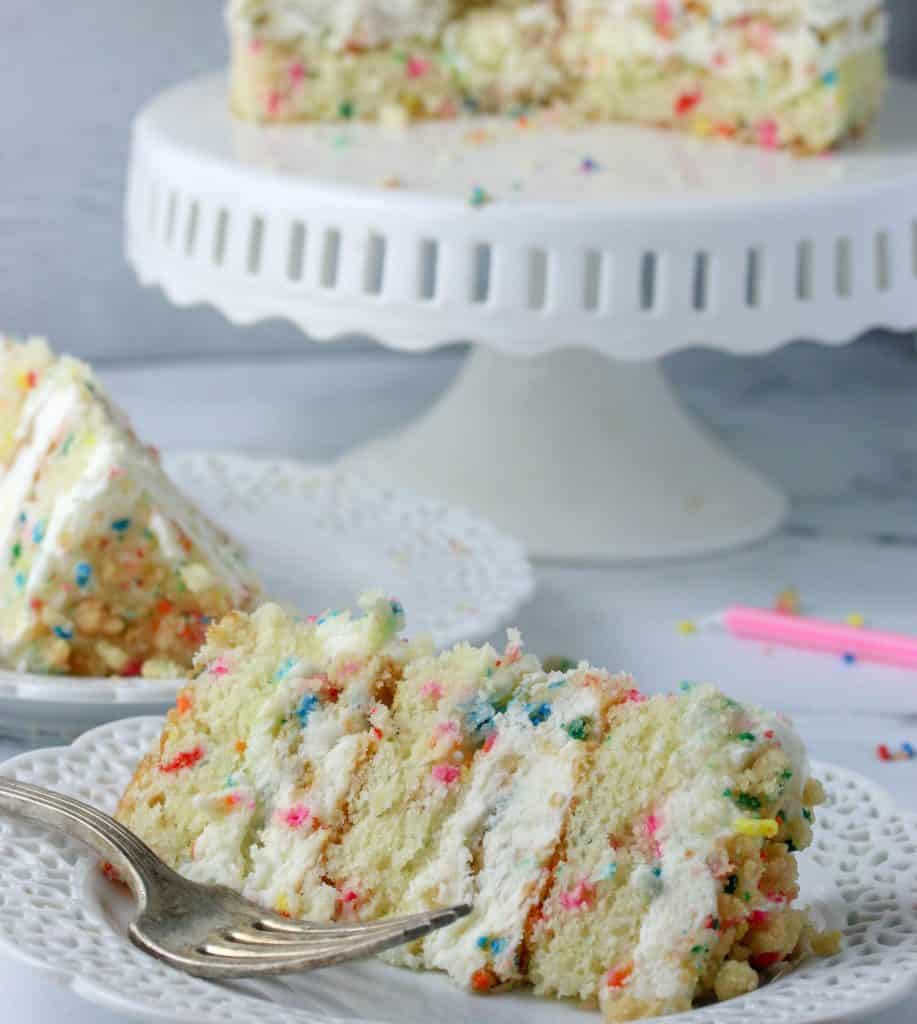
Tips For Making This Momofuku Birthday Cake Recipe
- Use the correct pan: I read other blogs stating they had issues making this in the incorrect pan and having the cake bubble over. You need to use a 10×15 jelly roll pan.
- Make Ahead: Use the times above to figure out how to break down this process. And don’t forget this cake has to freeze for 12 hours, and then defrost a full 3 hours in the fridge before serving.
- Vanilla Extract: Worth the splurge. The flavor really was true to that vanilla cake mix flavor. Of course you can substitute the regular vanilla, but be aware the cake and frosting will have a darker hue.
- Frosting: I doubled the amount based on other reviews. Some suggested using 1.5x the original recipe called for. So you may have some leftover.
- Oil: I did not use grapeseed oil either. You can replace that with another neutral tasting oil such as vegetable or canola.
- Glucose syrup: I did use this in my frosting and helps to make it smooth. But if you don’t have it, you can replace with more corn syrup but it can make your frosting sweeter than intended and texturally not the same.
- Salt: I used table salt, so I adjusted this amount in the recipe for what I used. If you are using kosher salt you will need to increase the amount slightly.
- Citric Acid: I didn’t use this either but used lemon juice instead. But that little bit of acidity does help to balance the frosting’s sweetness.
More Recipes To Try:
- Easy Vanilla Cupcakes
- Self Rising Flour Biscuits
- Peanut Butter Cream Cheese Frosting
- Brown Sugar Chocolate Chip Cookies
- Lemon Cookie Recipe
- 41 Cake Flour Recipes
- Caramel Apple Cheesecake Bars
- Cinnamon Roll Icing Recipe
Alright are you ready to enjoy the BEST cake ever?!
Momofuku Milk Bar Birthday Cake
Ingredients
For The Birthday Cake Crumb
- ½ cup (99 g) granulated sugar
- 1½ tablespoons light brown sugar
- ¾ cup (90 g) cake flour
- ½ teaspoon baking powder
- 1/4 teaspoon table salt
- 2 tablespoons rainbow sprinkles
- ¼ cup (60 mL) grapeseed oil
- 1 tablespoon clear vanilla extract
For The Birthday Cake
- 4 tablespoons (1/2 stick, 57 g) unsalted butter at room temperature
- ⅓ cup (61 g) vegetable shortening
- 1¼ cups (248 g) granulated sugar
- 3 tablespoons light brown sugar
- 3 large eggs room temperature
- ½ cup (120 mL) buttermilk
- ⅓ cup grapeseed oil
- 2 teaspoons clear vanilla extract
- 2 cups (240 g) cake flour
- 1½ teaspoons baking powder
- 1/2 teaspoon table salt
- ¼ cup + 2 tablespoons rainbow sprinkles divided
For The Birthday Cake Frosting
- 16 tablespoons (2 sticks) unsalted butter at room temperature
- 1/2 cup (92 g) vegetable shortening
- 4 ounces cream cheese
- 2 tablespoons glucose
- 2 tablespoons corn syrup
- 2 tablespoons clear vanilla extract
- 2 1/2 cups (284 g) powdered (confectioners) sugar
- 1/2 teaspoon table salt
- 1/8 teaspoon baking powder
- 1/8 teaspoon lemon juice (or citric acid)
For The Birthday Cake Soak
- ¼ cup milk
- 1 teaspoon clear vanilla extract
Special Equipment
Instructions
MAKE THE BIRTHDAY CAKE CRUMB
- Preheat the oven to 300°F. Line a cookie sheet with parchment paper or Silpat.
- Combine the sugars, flour, baking powder, salt and sprinkles in the bowl of a mixer fitted with a paddle attachment. Mix on low speed until well combined. Add the oil and vanilla and mix on low speed until small clusters form.
- Spread the clusters on the prepared sheet pan. Bake for 20 minutes, breaking up the clusters once or twice during baking. The crumbs should be slightly moist to the touch; they will dry and harden as they cool. Allow the crumbs to cool completely on the pan before using. The birthday cake crumbs can be stored in an airtight container at room temperature for 1 week, or in the refrigerator or freezer for up to 1 month.
MAKE THE BIRTHDAY CAKE
- Preheat oven to 350 degrees F. Spray a rimmed 10×15 jelly roll pan with non-stick cooking spray and line with parchment paper, or with Silpat.
- In a measuring cup, combine the buttermilk, grapeseed oil, and vanilla extract.
- In a medium bowl, whisk together the flour, baking powder, salt, and ¼ cup of the sprinkles.
- Combine the butter, shortening, and sugars in the bowl of a stand mixer fitted with the paddle attachment and cream together on medium-high for 2 to 3 minutes. Scrape down the sides of the bowl, add the eggs, and mix on medium-high for 2 to 3 minutes. Scrape down the sides of the bowl once more.
- On low speed, gradually pour in the buttermilk mixture. Increase the mixer speed to medium-high and beat for 4 to 6 minutes, until the mixture has nearly doubled in size and is completely homogenous (don’t rush this step!). Stop the mixer and scrape down the sides of the bowl.
- On low speed, gradually add the flour mixture and mix just until the batter comes together, about 45 to 60 seconds. Scrape down the sides of the bowl and give the batter a final mix with a rubber spatula.
- Spread the cake batter in an even layer in the prepared pan. Sprinkle the remaining 2 tablespoons rainbow sprinkles evenly on top of the batter. Bake the cake for 30 to 35 minutes; when you gently poke the edge of the cake with your finger, the cake should bounce back slightly, and the center should no longer be jiggly. Place the pan on a wire rack to cool completely. The cooled cake can be stored in the refrigerator, wrapped in plastic wrap, for up to 5 days.
MAKE THE BIRTHDAY CAKE FROSTING
- In a small bowl, whisk together the glucose, corn syrup and vanilla extract.
- Combine the butter, shortening and cream cheese in the bowl of a stand mixer fitted with the paddle attachment and cream together on medium-high for 2 to 3 minutes, until the mixture is smooth and fluffy. Scrape down the sides of the bowl.
- With the mixer on its lowest speed, stream in the glucose mixture. Increase the mixer to medium-high speed and beat for 2 to 3 minutes, until the mixture is silky smooth and glossy. Scrape down the sides of the bowl.
- Add the powdered sugar, salt, baking powder and citric acid, and mix on low speed just to incorporate them into the batter. Increase the speed to medium-high and beat for 2 to 3 minutes, until the frosting is completely smooth. Use the frosting immediately, or store in an airtight container in the refrigerator for up to 1 week. (Bring to room temperature before using in the recipe.)
ASSEMBLE THE BIRTHDAY LAYER CAKE
- Put a piece of parchment or Silpat on the counter. Invert the cake onto it and peel off the parchment or Silpat from the bottom of the cake. Use the cake ring to stamp out 2 circles from the cake. These are your top 2 cake layers. The remaining cake “scrap” will come together to make the bottom layer of the cake.
- Layer 1, The Bottom: Clean the cake ring and place it in the center of a sheet pan lined with clean parchment or a Silpat. Use 1 strip of acetate to line the inside of the cake ring.
- Put the cake scraps in the ring and use the back of your hand to tamp the scraps together into a flat even layer.
- In a small bowl, whisk together the milk and vanilla extract for the birthday cake soak. Using a pastry brush, brush half of the soak over the top of the cake.
- Using the back of a spoon, spread one-fifth of the frosting in an even layer over the cake.
- Sprinkle one-third of the birthday cake crumbs evenly over the top of the frosting. use the back of your hand to press them gently into the frosting.
- Use the back of a spoon to spread a second fifth of the frosting as evenly as possible over the crumbs.
- Layer 2, The Middle: With your index finger, gently tuck the second strip of acetate between the cake ring and the top 1/4 inch of the first strip of acetate, so that you have a clear ring of acetate 5 to 6 inches tall. Set one of the cake rounds (the more imperfect of the two) on top of the frosting, brush with the remaining soak, and repeat the process for Layer 1 (a fifth of frosting, a third of crumbs, and another fifth of frosting).
- Layer 3, The Top: Nestle the remaining cake round into the frosting. Cover the top of the cake with the last fifth of the frosting. Garnish the frosting with the remaining birthday crumbs.
- Transfer the sheet pan to the freezer and freeze for a minimum of 12 hours to set the cake and filling. (The cake will keep in the freezer for up to 2 weeks.)
- At least 3 hours before you are ready to serve the cake, pull the sheet pan out of the freezer and, using your fingers and thumbs, pop the cake out of the cake ring. Gently peel off the acetate and transfer the cake to a platter or cake stand. Let it defrost in the refrigerator for a minimum of 3 hours before slicing and serving. (You can store the cake, wrapped well in plastic wrap, in the refrigerator for up to 5 days.)
Notes
- Cake crumbs: Up to a week ahead of time. Store at room temperature. You can also store these in the freezer for 1 month.
- Cake: You can store this, cooled and wrapped, in the fridge up to 5 days.
- Frosting: Store in the fridge up to 1 week ahead of time. Bring to room temperature before using.
- Whole Cake Assembled: Store in the fridge, covered up to 5 days. Freezer, covered, up to 2 weeks.
- Use the correct pan: I read other blogs stating they had issues making this in the incorrect pan and having the cake bubble over.
- Make Ahead: Use the times above to figure out how to break down this process. And don’t forget this cake has to freeze for 12 hours, and then defrost a full 3 hours in the fridge before serving.
- Clear Vanilla Extract: Worth the splurge. The flavor really was true to that vanilla cake mix flavor. Of course you can substitute the regular vanilla, but be aware the cake and frosting will have a darker hue. I got mine on Amazon, but your grocery store may also sell it.
- Frosting: I doubled the amount based on other reviews. Some suggested using 1.5x the original recipe called for. So you may have some leftover.
- Oil: I did not use grapeseed oil either. You can replace that with another neutral tasting oil such as vegetable or canola.
- Glucose syrup: I did use this in my frosting and helps to make it smooth. But if you don’t have it, you can replace with more corn syrup but it can make your frosting sweeter than intended and texturally not the same. For each tablespoon of glucose replace it with 2 teaspoons of corn syrup.
- Salt: I used table salt, so I adjusted this amount in the recipe for what I used. If you are using kosher salt you will need to increase the amount slightly.
- Citric Acid: I didn’t use this either but used lemon juice instead. But that little bit of acidity does help to balance the frosting’s sweetness.

Danielle says
In the Milkbar cookbook, she recommends Purasnow cake flour. But I can’t find anything smaller than a 50 pound bag! I don’t need that much! What flour do you recommend that’s comparable to purasnow?
Heather says
I just use cake flour I can get from the grocery store- I’ve used King Arthur Flour cake flour with great success. Another great brand is Softassilk.
kim says
You link to clear vanilla flavor. But you call it clear vanilla extract. is this a mistake or do you consider them the same?
Heather says
Yes same thing 🙂
Courtney says
Hey Heather!
I am having trouble finding glucose that isn’t crazy expensive (Amazon has the one you linked for $17, but I only plan to use it one time?! 😬)
The Wilton glucose you linked, actually says that the ingredient is Corn Syrup?
Do you know if I could just use that?
Heather says
Hi Courtney, yes you can definitely swap and use corn syrup 🙂
Nicole says
You do not write when to add the dry ingredients to the butter mix. I had to go out and buy more sprinkles because of this step being missed. Quite annoyed as I had to already go to many places to get the ingredients. Please revise.
Heather says
Hi Nicole, sorry to hear that you had trouble however it is listed in step 6 when to add it.
Nicole says
I used the picture guide and the step is not there.
Heather says
aw yes you’re right, my fault! It is missing from the visual steps. All fixed now, thank you for letting me know!
Chelsea Watson says
Lol, yes, apologies to you Nicole for not reading all of the steps of a FREE and very in depth recipe the blogger spent time posting for you.
Allison says
YOUR annoyed because YOU admittedly didn’t read the recipe? Lol, what?
Thank you for your time and dedication, Heather. Most of us appreciate you hard work!
Melody says
Hi! I have a jelly roll pan that is only 1 inch in depth- the one you posted is 1.13 inches- is mine okay? About to get started on this recipe. Looks so yummy! Thanks 🙂
Heather says
Hi Melody, I would just make sure to not fill up the pan to the brim and leave a little room for expansion so you might have a little batter over with your pan is all. Let me know how it turns out!
Melody says
My pan turned out fine. The cake turned out really well. I made a 3 layer rectangle instead because I couldn’t find a 6 inch cake ring in a store near me. It wasn’t as pretty as yours though! One change I made- I doubled the soak. I didn’t think 1/4 cup was enough. Also, the recipe doesn’t say to brush the top layer with soak,but I did anyway. Glad I did because I may have overcooked my cake a bit and the soak helped moisten it back up. Thanks for a great recipe!
Heather says
Oh that’s great I’m glad it worked out and you loved it 🙂
Sue says
Confused as I work my way through this. The caution says to use a 10×15 pan so the batter fits. The actual instructions use a10x15 for the crumbles but instruct you to use a quarter sheet pan for the cake. ???
Heather says
sorry for the typo and confusion. The cake should be baked on the 10×15 jelly roll pan, and the crumbs can be basically baked on any cookie sheet.
Beth says
Great recipe!
If you’re making this in the U.K. – our ‘sprinkles’ just don’t have the same powerful colourants as American sprinkles! I put as many in as the recipe called for – and more- and you literally can’t see them in the cake. They just add a little crunch. If I was making it again I would buy American sprinkles online.
Also as with all American recipes, it’s suuuuper sweet. You could slightly cut down the sugar in the frosting if that’s not your thing.
I forgot to let me eggs get to room temp so my mixture curdled, but after adding all the flour it was fine and rose beautifully so don’t panic if yours does that too.
Heather says
Hi Beth! Glad this recipe worked out for you despite the cold eggs and sprinkles. And thanks for the tip on the sprinkles too!
Tammy says
Is the recipe for the frosting already doubled or did you double what was shared above? Thanks!
Heather says
Already doubled 🙂 enjoy!
Katy says
Hi Heather!
Thank you for this recipe. I had two questions since I want to make this for a friend’s birthday:
1) can I use two round pans for this batter and if yes, would 8 inch pans be okay?
2) is there a substitute for grape seed oil?
Many thanks in advance,
Katy
Heather says
Hi Katy! I haven’t tried it with the 8 inch cake pans so can’t say for sure but I think it could work, but the baking time would different. You could also try my funfetti cake recipe which uses 8 inch cake pans for the cake part. And another neutral oil would be fine like canola or vegetable.
Juna says
Hi Heather!
Thankyou for the amazing instructions, im super excited to give it a try!
I was wondering if there is a way to make the cake less sweet, maybe by cutting down on the sugar? Or less sugar in the frosting?
I haven’t tried the cake yet, but im just scared it will be way too sweet for me and my family.
Thankyou in advance!
Heather says
Hi Juna! You’re welcome 🙂 It’s the Best cake ever!! I would not recommend cutting down the sugar in the cake as that will affect how the cake turns out. But you could reduce the sugar in the frosting if you wanted and make that less sweet. Let me know how it turns out!
Alyssa says
Hi! After defrosting, in the fridge, how long did you set the cake out at room temperature before slicing and serving?
Heather says
Hi Alyssa, I believe it was for about a hour or so just to let it come up to room temp! 🙂
Alyssa says
Thank you Heather!
Heather says
thank YOU
Paula Santos says
I am making this cake for the first time. I have promised one for my son and my neighbors daughter to take with them to college! Everything looks great so far, except something happened with my cake crumbs, they didn’t form into little nuggets like your picture. Instead mine are closer to the consistency of cornmeal. What could I have done wrong? Do you have to mix them long to get them to crumb, or did I maybe mix them too long? Any help with timing would be great.
Heather says
Hi Paula, next time I would try squeezing the mixture together to form clumps- and if it’s not coming together then maybe try adding a bit more oil, or even a little water or milk to se if they clump. Hope that helps!
Rosie says
Hi! Can you give me a sense of how tall this cake is when fully assembled? Trying to figure out the right size container to store it in the fridge overnight. Thank you!
Heather says
Hi Rosie, I don’t have an exact measurement, but mine fit fine in my normal sized freezer just fine with room to spare. If I had to make a guess I’d say 10 inches at the most?
Elizabeth says
Any tips for high altitude baking? Anything you think I should change? I’m in Denver (~5280 ft elevation).
Heather says
Hi Elizabeth, unfortunately I’m not familiar with high altitude baking but here is a helpful guide for you: https://www.kingarthurbaking.com/learn/resources/high-altitude-baking
Kat says
Hi! If I freeze the cake in the cake ring and then take it out of the cake ring can I then pop the finished cake in the freezer without the cake ring until it’s ready to serve?
Heather says
Hi Kat! If the cake is out of the ring I’d keep it covered in the fridge until ready to serve. If you do keep it in the freezer, just make sure to bring it out a few hours before hand to thaw before serving!
Kat says
Thank you! I plan to keep it in the freezer for at least 12 hours, take it out of the cake ring, put back in freezer, cover it with Seran wrap, and keep in the freezer before ready to serve but to defrost it in the fridge for at least 3 hours before serving. Is that okay?
Heather says
Yes I think that should work beautifully Kat! 🙂
Catherine says
I’m sending your recipe to my sisters. I have the cookbook ( which is a filthy mess from overuse— and have made the cake, yet again for a family birthday tomorrow.
Your instructions are clear and concise for anyone who is making the cake especially for the first time!
Might I add, Amazon is a great source for the cake ring, acetate sheets or rolls and citric acid! I found the clear vanilla for a very inexpensive price at Walmart.
In addition, cake truffles can be made with the leftover cake scraps!!!💕
Heather says
Hi Catherine! Aw I’m so happy you found it helpful for first timers. I’ve used Amazon for the supplies, but thank you for Wal-mart. And YUM you can’t go wrong with cake truffles…going to try this for sure 🙂
Bobby says
Do you guys mean trifles?
Katharine says
Oh no – it’s flat!! I have followed the recipes to a T, and am nowhere near a novice baker – have checked expiration dates on everything, etc. When all three layers are stacked, they’re *almost* the height of the springform collar!! Crumbs are DELICIOUS, but it’s not the showstopper I was anticipating. Any advice?
Heather says
Hi Katharine! I’m so sorry to hear that! I haven’t had that issue with this recipe from the Milk bar book but here are a few thought…have you tested your baking powder in hot water (just to double check?), and possibly your ingredients weren’t room temperature? Or you may have over mixed once the flour was added? Just a few ideas… did it fall and sink? Then I would guess if wasn’t baked long enough. And not sure if you measured by volume but I always recommend by weight to ensure accuracy. Hope that troubleshoots! But glad the crumbs were delicious and with frosting it’s all still good!
Grace says
When freezing for 12 hours, do you freeze it as is (with the cake ring and acetate collar) and with the cake exposed on the top without any sort of cover (ie cling wrap)? And to put it in the freezer, what type of “base” is the cake sitting on? Surely not the sheet pan bcos how can you fit a 10×15″ sheet pan into the freezer?
Heather says
Hi Grace, so yes I freeze the cake with acetate collar and cake ring on it. And I put the cake on a small quarter sheet pan that I have because that’s all
That fits in my small freezer but it can sit on a flat sturdy surface in your freezer. And you can cover the top of the cake lightly with plastic wrap! Happy baking!
Kat says
Hi! Can I just use a cake round instead of a sheet pan and parchment paper and put my cake on top of the cake round (with nothing else) and directly in the freezer to freeze for 12 hours? I’m worried that I may accidentally break the cake when transferring it to the cake round later in the process.
Heather says
Hi Kat yes I think that would work fine! And I think you can skip the freezing part I think that’s just so you can easily and neatly pull off the acetate collar.
Jennifer says
I may have a silly question, but why do you have to make separate crumbles when there’s surely cake crumbles leftover from cutting the layers. I’m guessing you could toast them for texture? I guess it just adds an extra layer of texture? Could you explain? Thanks!
Heather says
Hi Jennifer! Not silly at all! So the crumbled are more like a crunchy sugar cookie than crumbled cake. So it adds this amazing texture to the cake that just can’t be beat. It was my favorite part!
Audrey says
Hi Heather,
Thank you for the recipe and tips. I would like to make this for my husband’s birthday but our freezer is very full and the assembled cake will definitely not fit in it. Would it be adequate to just refrigerate instead of freezing?
Heather says
Hi Audrey I think the freezing step is for being able to cleanly remove the acetate pan and collar. So if I couldn’t freeze it I would skip the acetate collar and decorate and stack like a normal cake. Wouldn’t look exactly the same but then I could refrigerate instead of freeze! Hope that helps!
Audrey says
Yes, thank you! And thank you also for the super quick reply.
Heather says
Of course! Let me know how it turns out 🙂