Small Apple Pie
This Post May Contain Affiliate Links. Please Read Our Disclosure Policy.
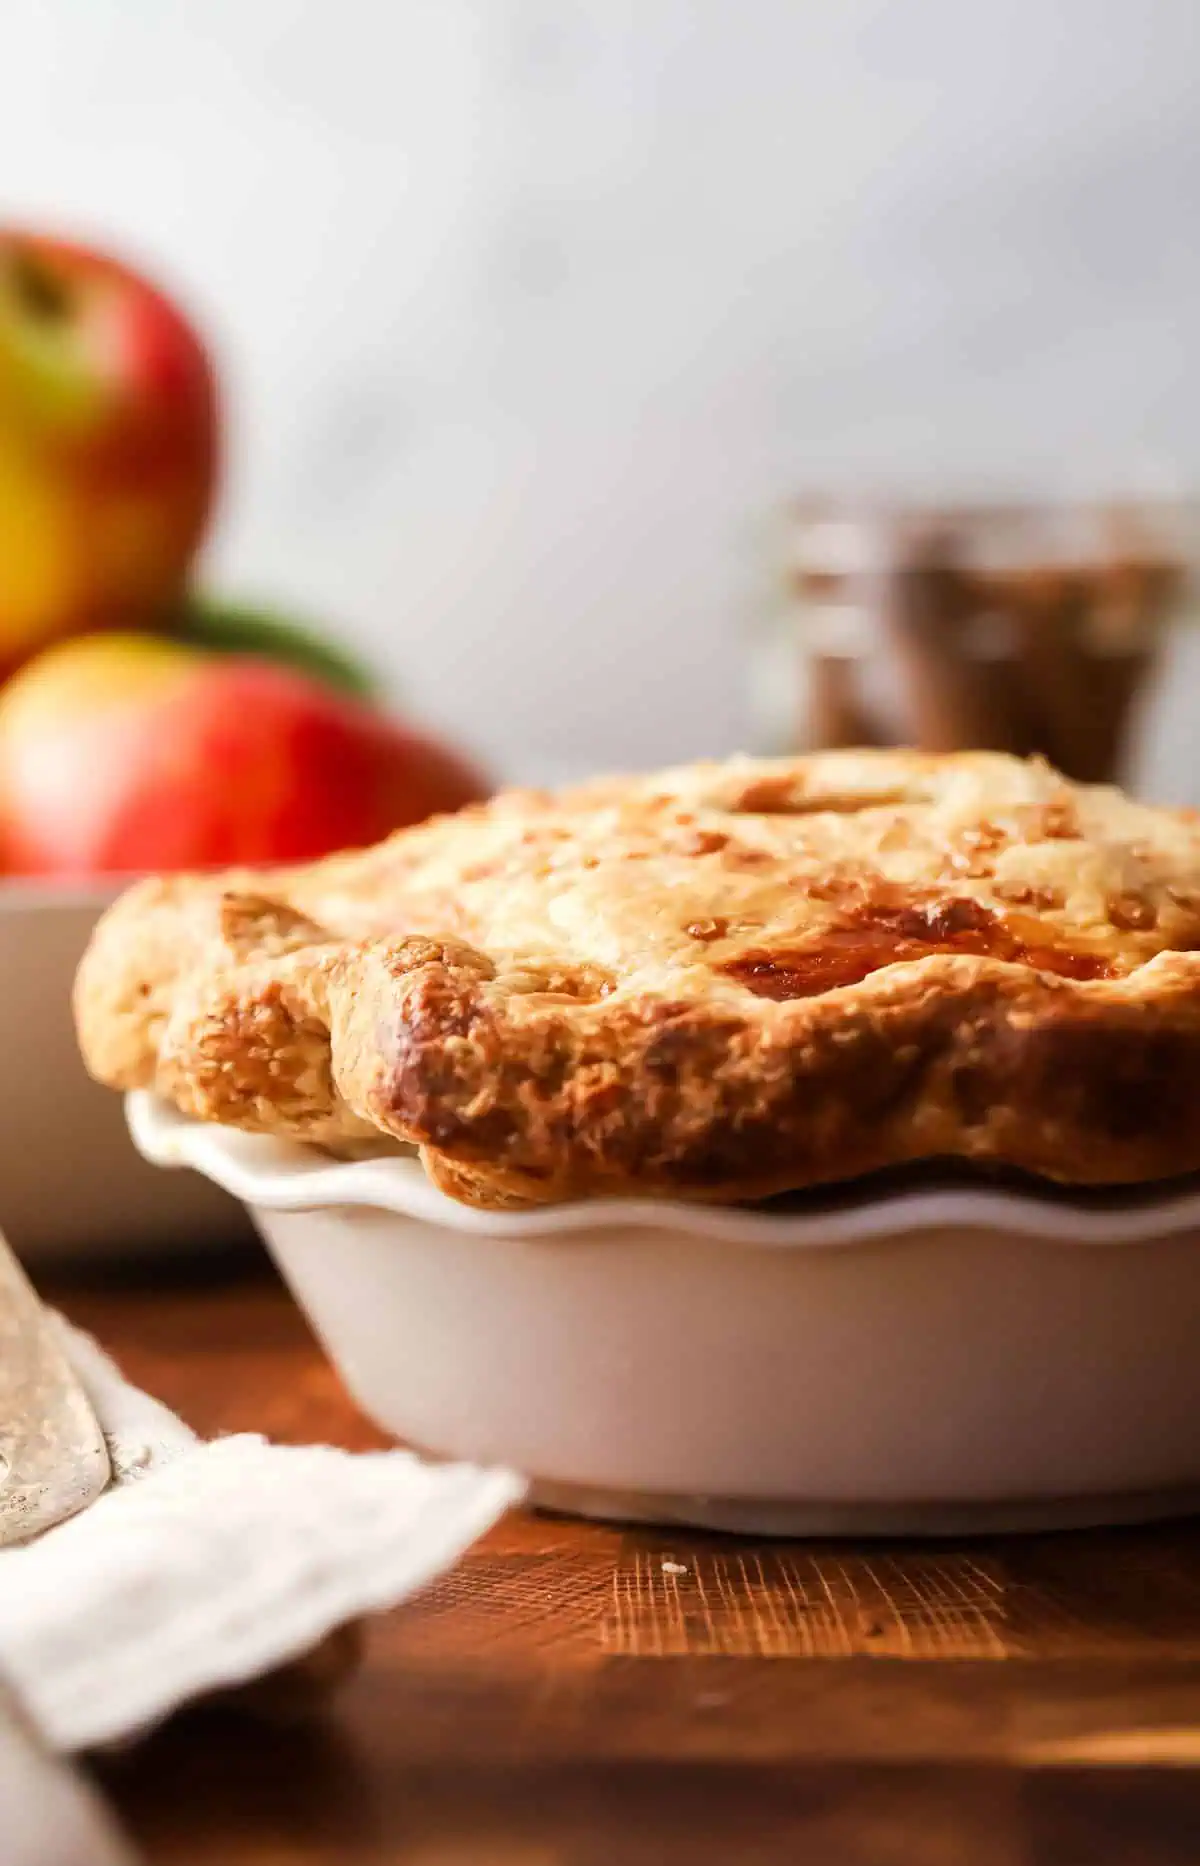
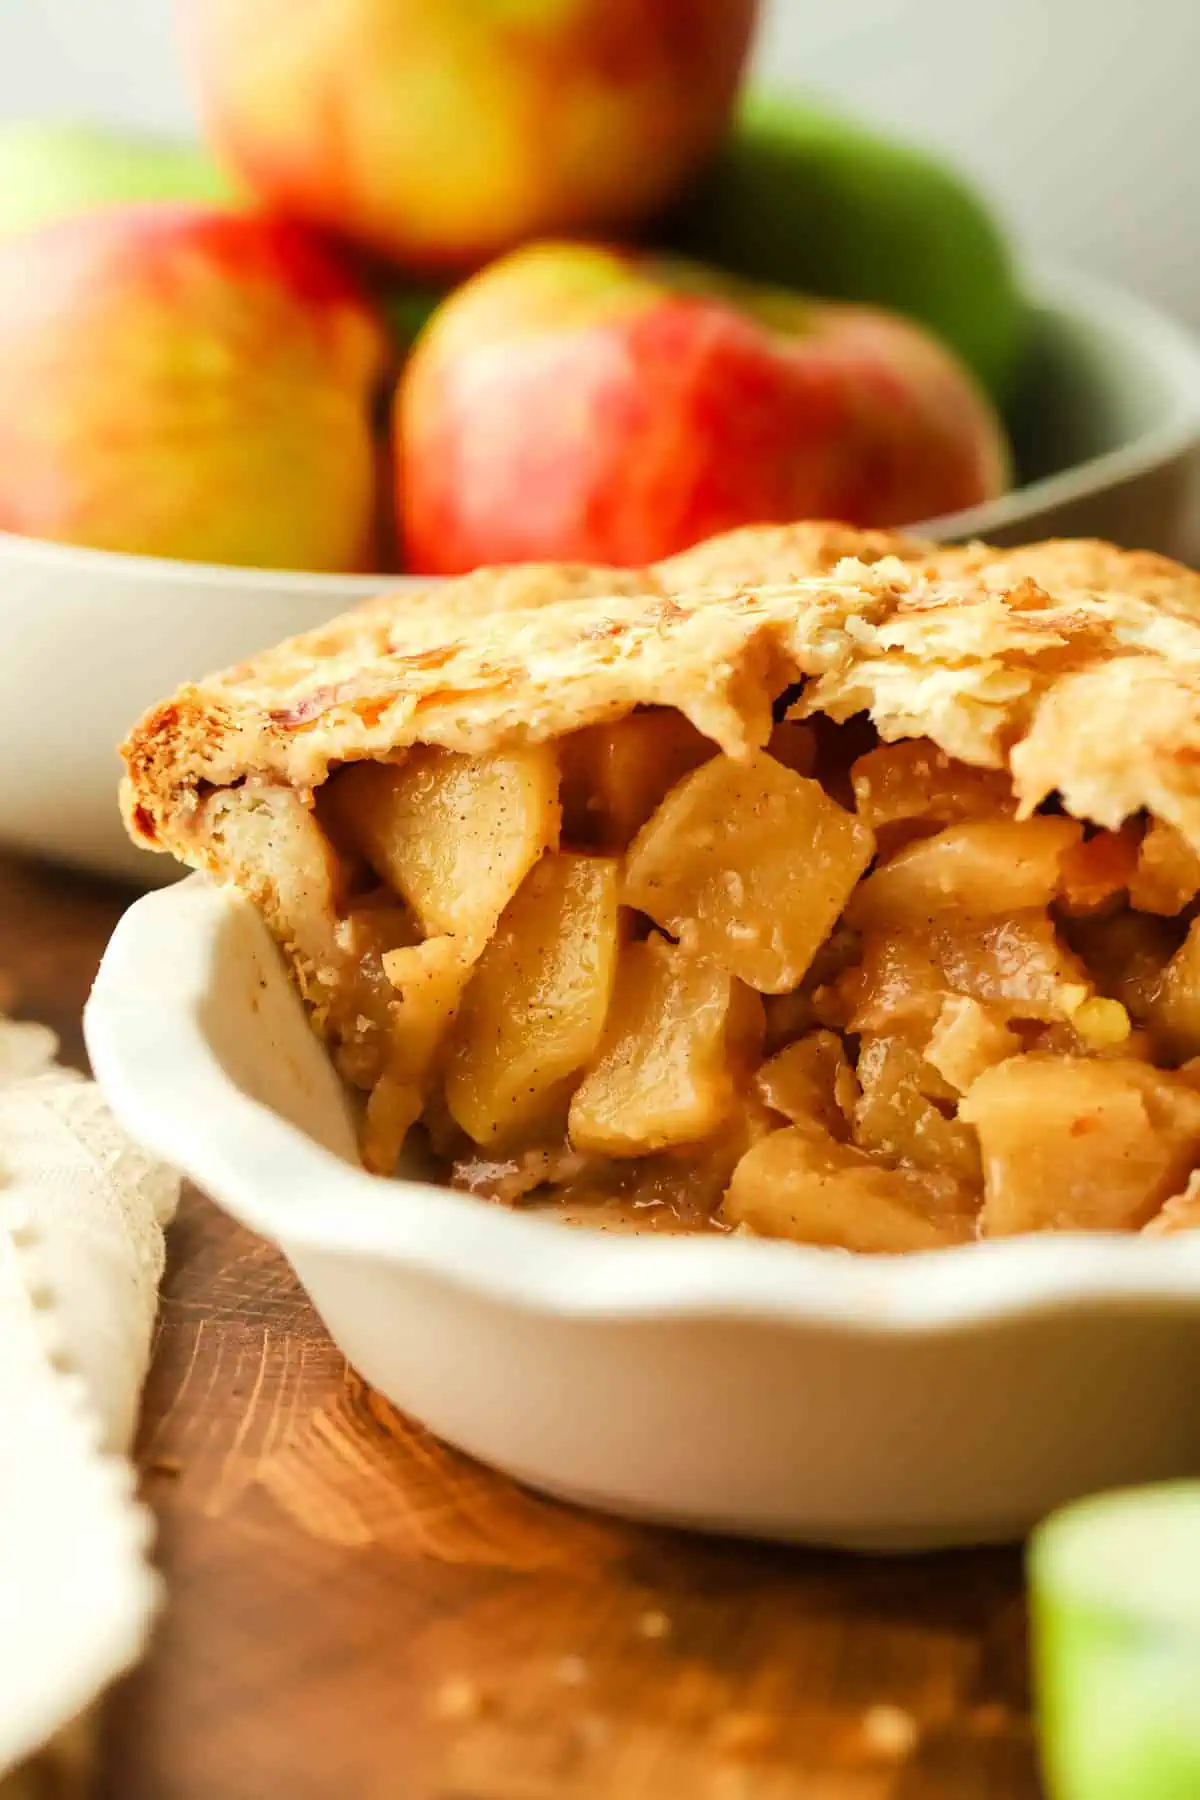
This small apple pie has everything you love about a classic homemade apple pie, just in a smaller size! Made in a 6-inch pie pan, it has a buttery, flaky homemade pie crust and a cinnamon-spiced apple filling. It’s perfect when you’re craving homemade apple pie but don’t need a full-size dessert.
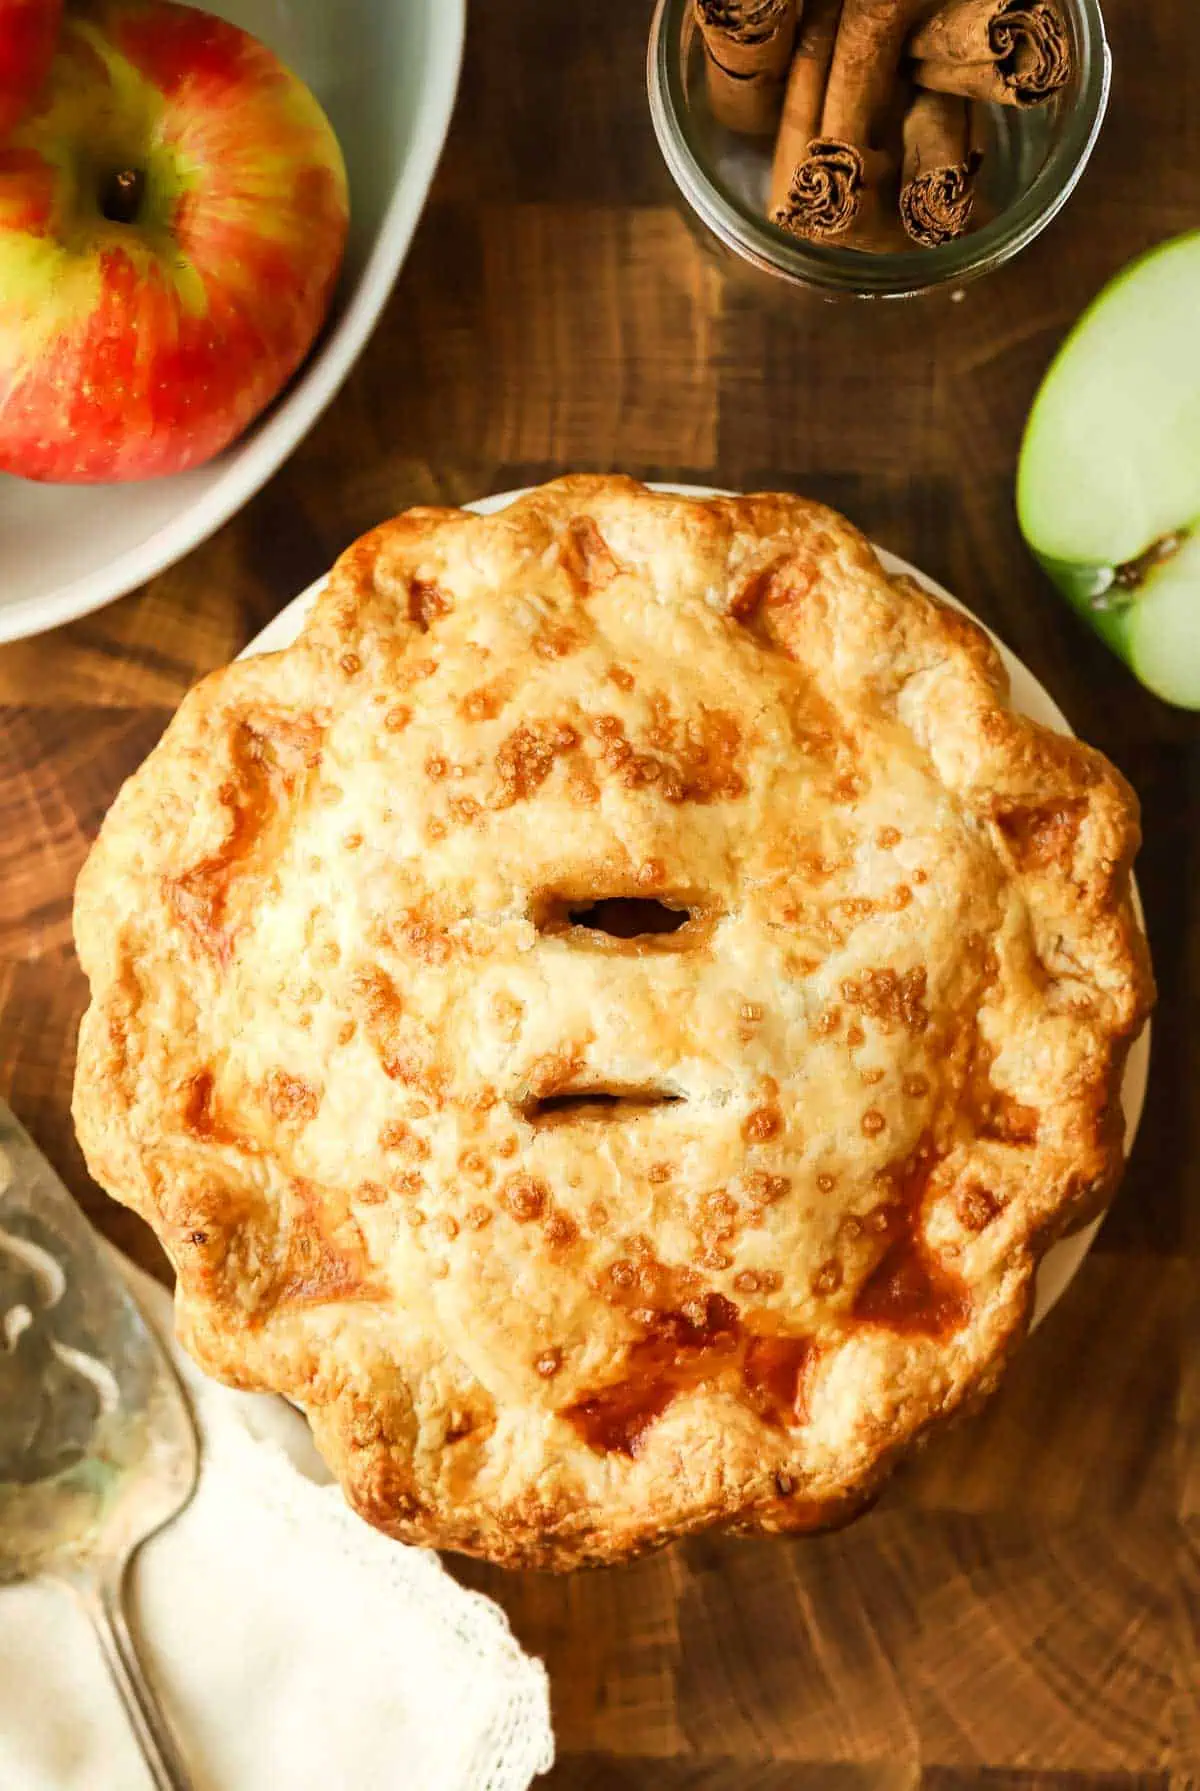
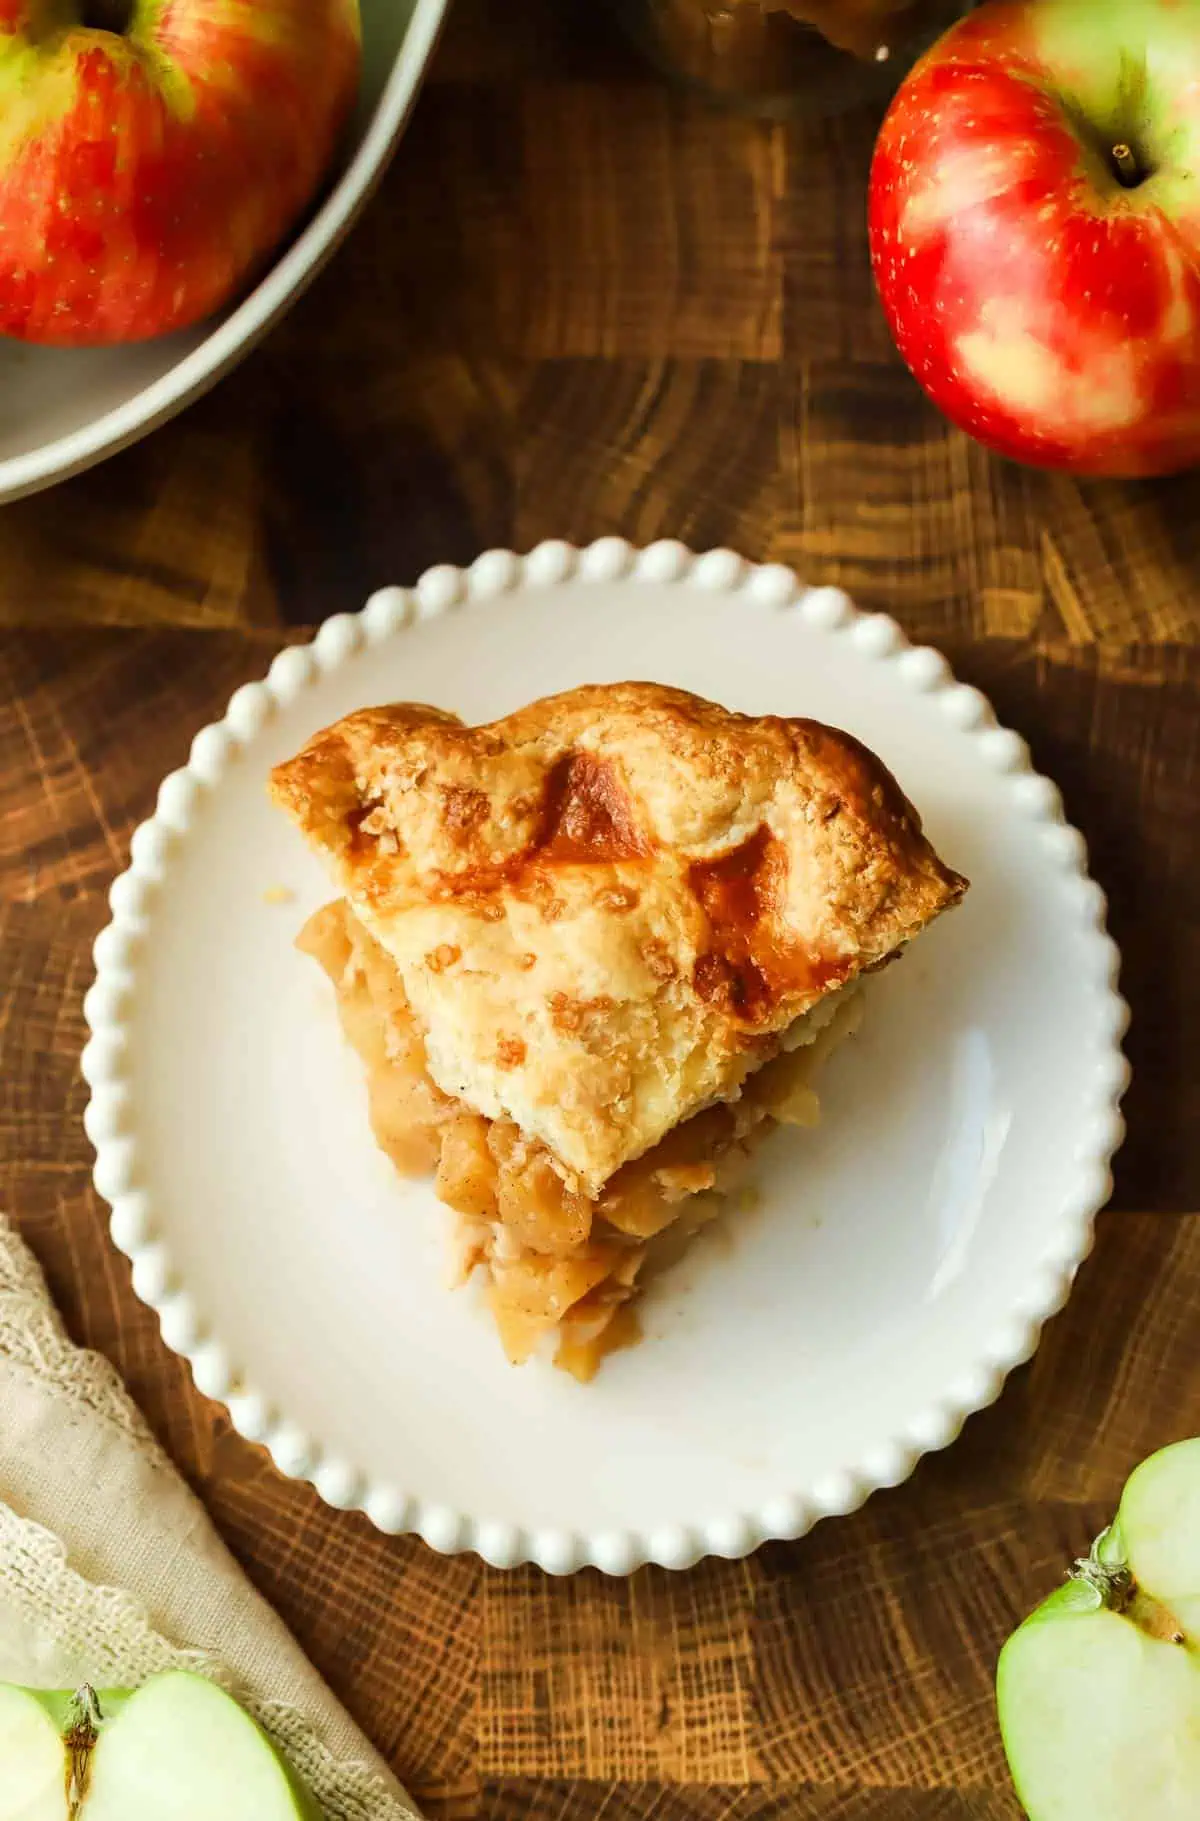
I love a good homemade apple pie, but sometimes I don’t want to make a whole 9-inch pie, especially when it’s just a few of us enjoying dessert. That’s why I created this small batch version! It makes about four small slices so it’s perfect for two to four people, so you can enjoy a slice of homemade pie without having a ton of leftovers.
For this recipe, I use my homemade all-butter pie crust just cut in half. I love the flavor that butter gives the crust, and when you keep the ingredients cold, you get those beautiful flaky layers. Plus, this smaller recipe uses just one stick of butter for both the top and bottom crusts.
I also like to cook the apple filling briefly before assembling the pie. This gives the apples a head start on softening and helps reduce some of the moisture in the filling. The result is a cozy, homemade apple pie with tender apples, warm spices, and a golden, flaky crust.
Why This Recipe Works
- Perfect small batch size: This recipe makes one 6-inch double-crust apple pie, enough for approximately four servings without the leftovers of a full-size pie.
- Flaky all-butter crust: Cold butter creates steam as the pie bakes, helping produce a tender, flaky crust with delicious buttery flavor.
- Precooked apple filling: Briefly cooking the apples helps them soften and releases some of their moisture before the pie goes into the oven.
- Warm apple pie flavor: Brown sugar, cinnamon, nutmeg, and allspice give the filling that classic homemade apple pie flavor.
- Made with simple ingredients: You don’t need any special ingredients to make this pie, just a 6-inch pie plate and a few baking staples.
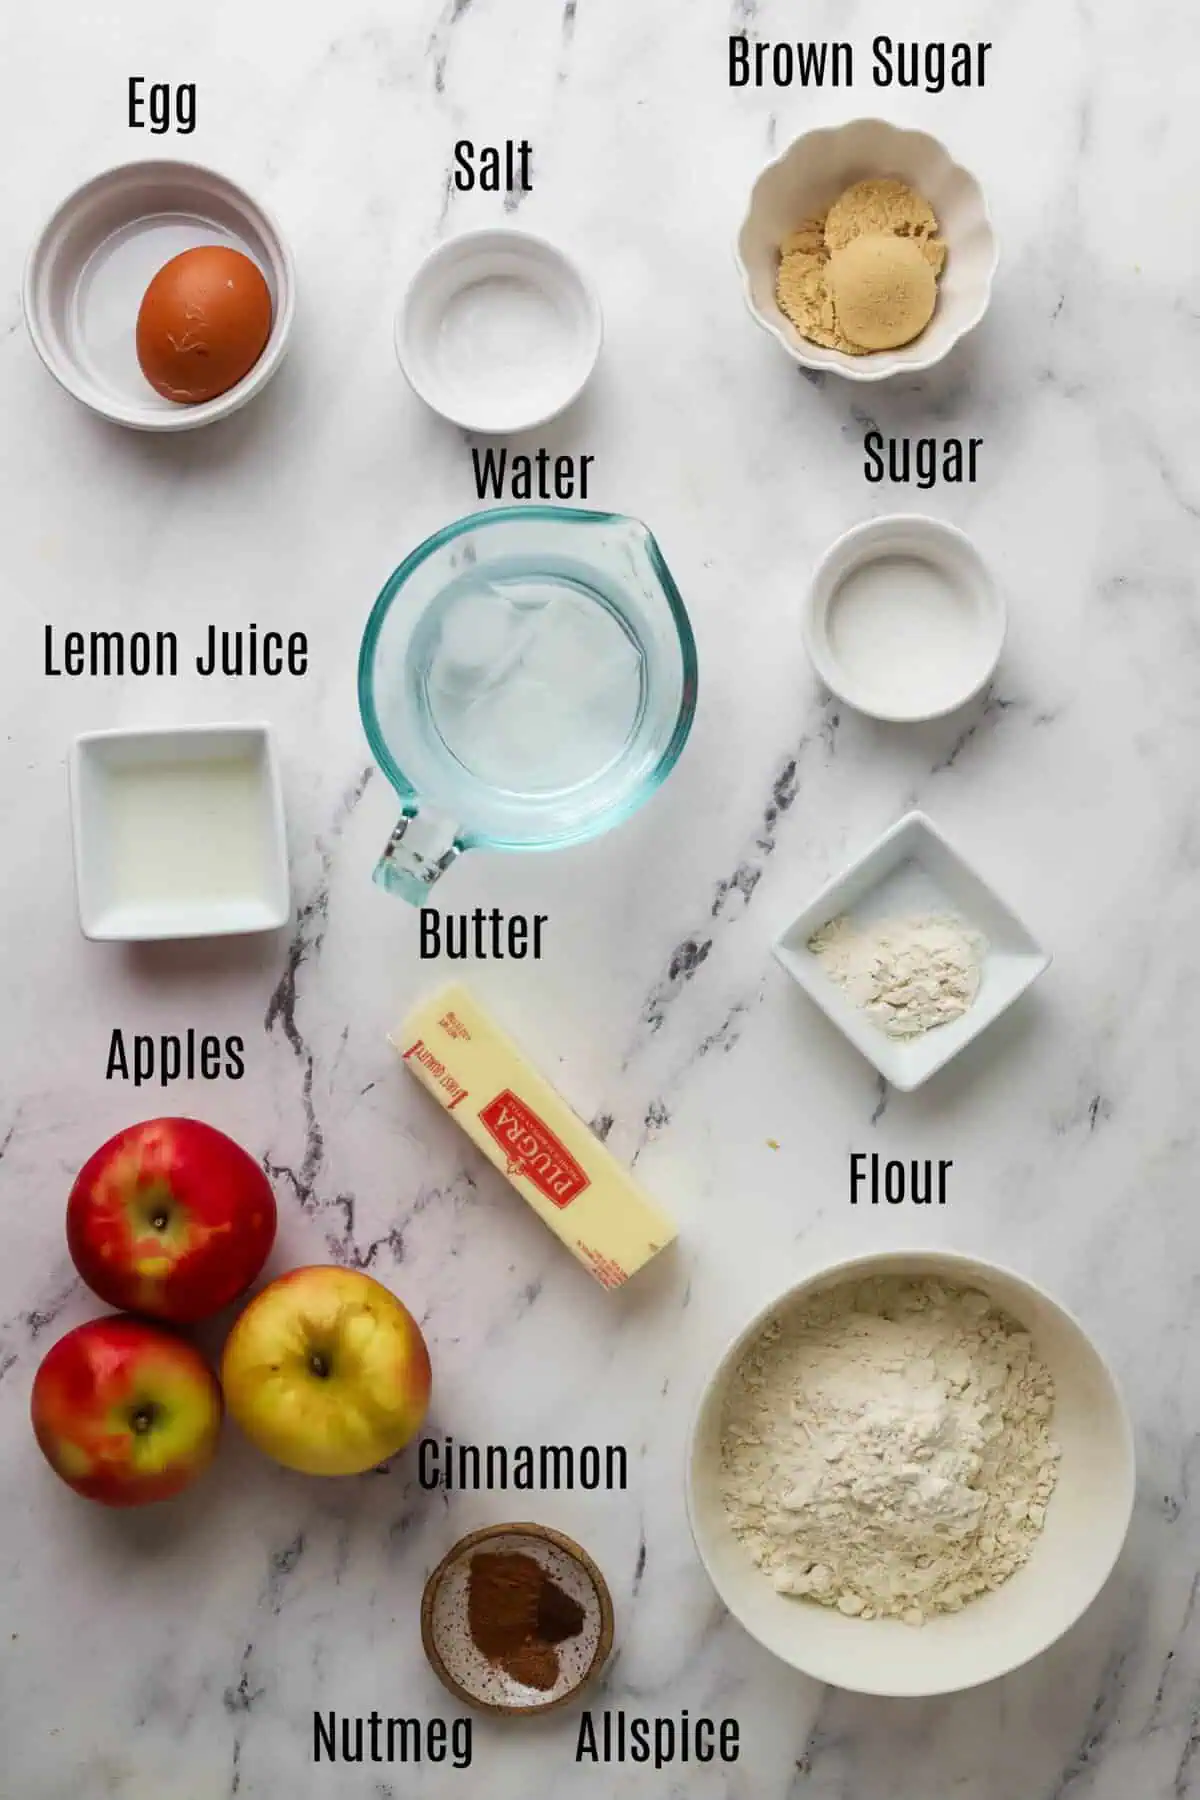
Ingredients You’ll Need
For the Homemade Pie Crust
- All-purpose flour: Be sure to measure your flour correctly. I recommend using a kitchen scale for the most accurate results.
- Granulated sugar
- Salt
- Unsalted butter: Make sure your butter is cold and cut into small cubes. Cold butter is the key to getting a flaky pie crust. For best results I like to use a higher butter fat butter. It gives you the best flavor and the flakiest crust. I love using a butter with a higher butterfat content for the flakeist crust! I used Plugra butter.
- Ice water: Start with the smaller amount and add more only as needed. You want the dough to hold together without becoming wet or sticky. I like to add water to a measuring cup (more than I need) and add a few ice cubes.
For the Apple Pie Filling
- Apples: I recommend firm baking apples, such as Granny Smith or Honeycrisp. You can also use a combination for a balance of sweet and tart flavors. Read Best Apples For Baking.
- Lemon juice: Fresh lemon juice is best.
- Light brown sugar – Granulated sugar will also work.
- All-purpose flour: This helps thicken the juices released by the apples so the filling isn’t too runny.
- Salt
- Ground cinnamon
- Ground nutmeg
- Ground allspice
- Unsalted butter
For Finishing
- Egg: You’ll whisk this with a little water to make an egg wash. It helps give the crust a beautiful golden finish. Read What Is An Egg Wash?
- Granulated or coarse sugar: I like sprinkling a little sugar over the crust before baking for extra sweetness and crunch.
How to Make Small Apple Pie
Step 1: Make the Pie Dough
In the bowl of a food processor, add the flour, sugar, and salt. Pulse a few times to combine.

Add the cold, cubed butter and pulse about 8–10 times, until the butter is broken down into pea-sized pieces. You should still see small pieces of butter throughout the flour mixture. Those pieces of butter are what help create flaky layers as the pie bakes.

Drizzle in 3 tablespoons of ice water and pulse a few times to combine. Squeeze a little of the dough between your fingers. If it holds together, it’s ready. If it’s still dry and crumbly, add more ice water, one teaspoon at a time.

Turn the dough onto a lightly floured surface and gently bring it together. Divide it into two portions, making one slightly larger for the bottom crust.
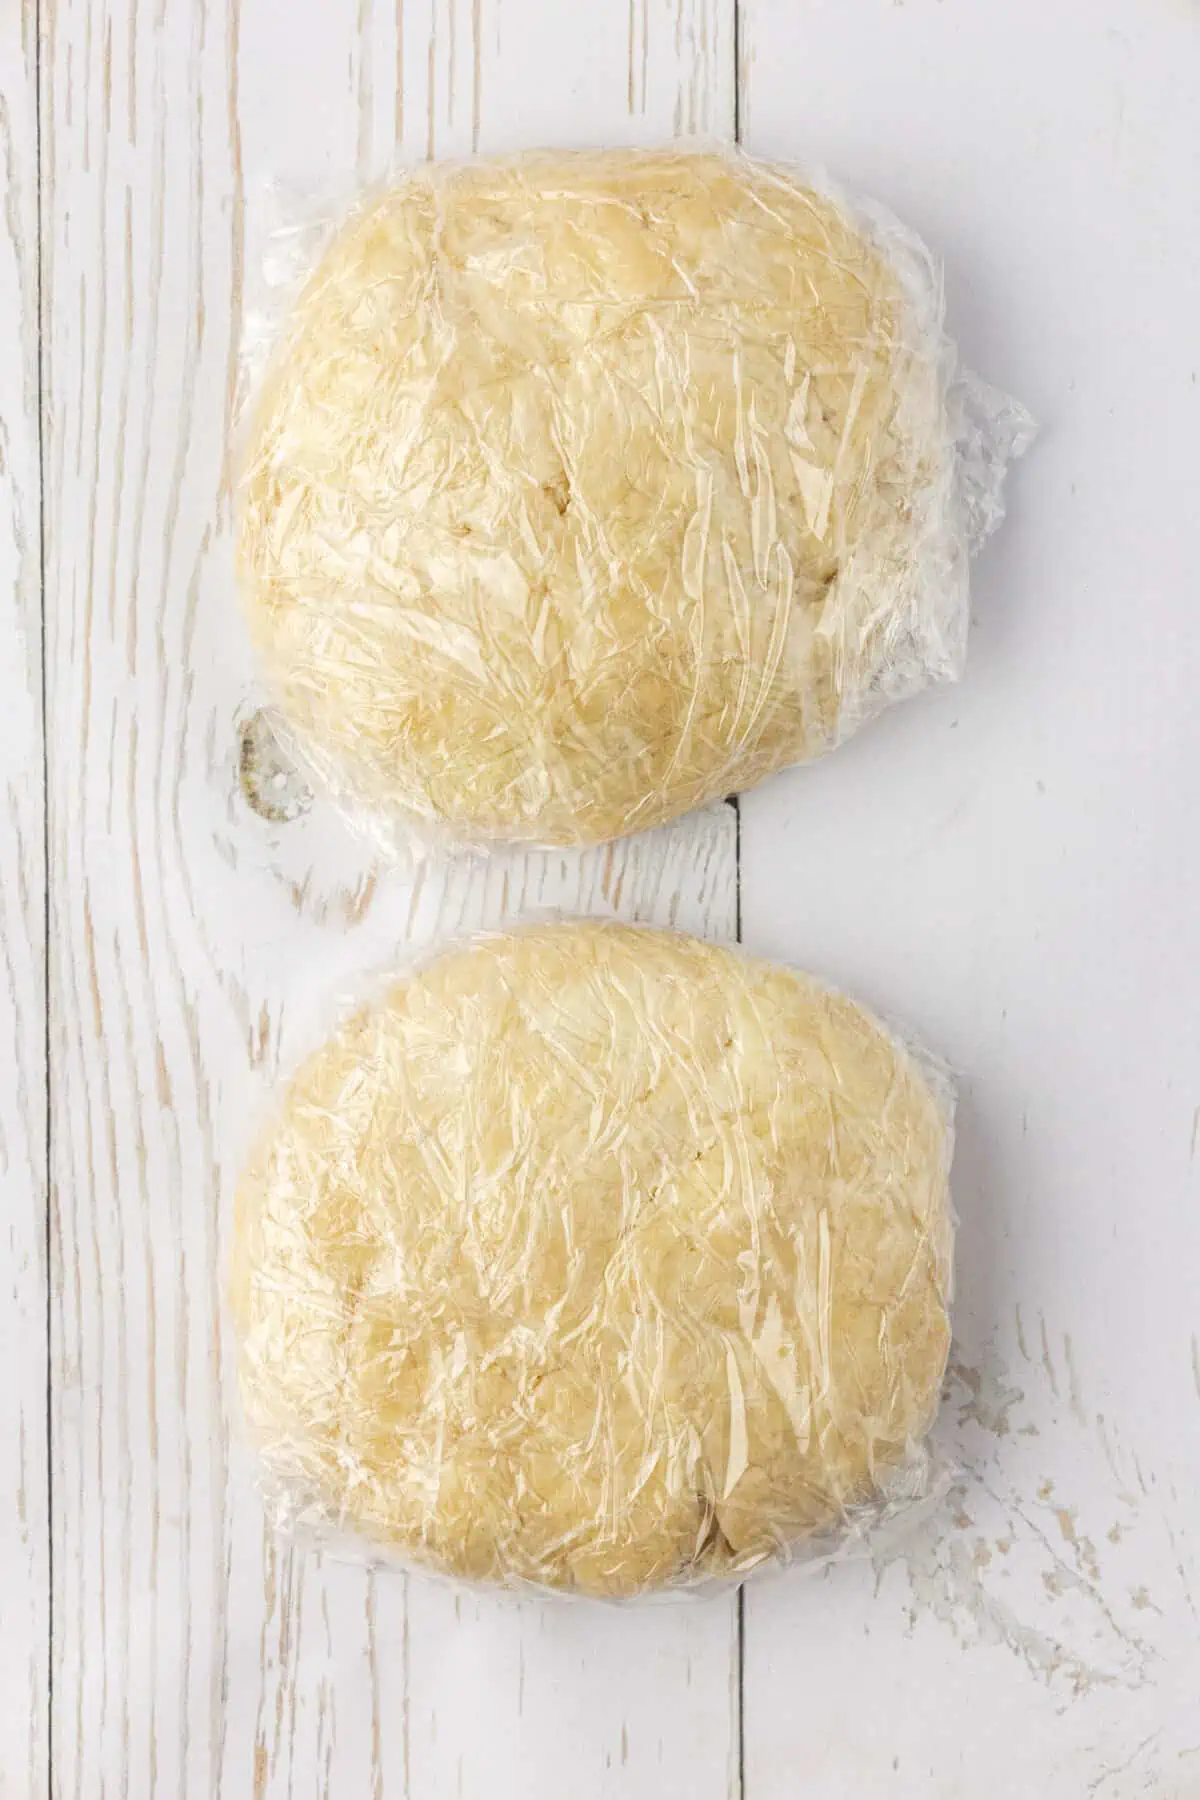
Flatten each portion into a disk, wrap tightly in plastic wrap, and refrigerate for at least 1 hour. Chilling allows the flour to hydrate and keeps the butter firm, making the dough easier to roll out.
Step 2: Cook the Apple Filling
In a medium bowl, toss the peeled and sliced apples with the lemon juice, brown sugar, flour, salt, cinnamon, nutmeg, and allspice.
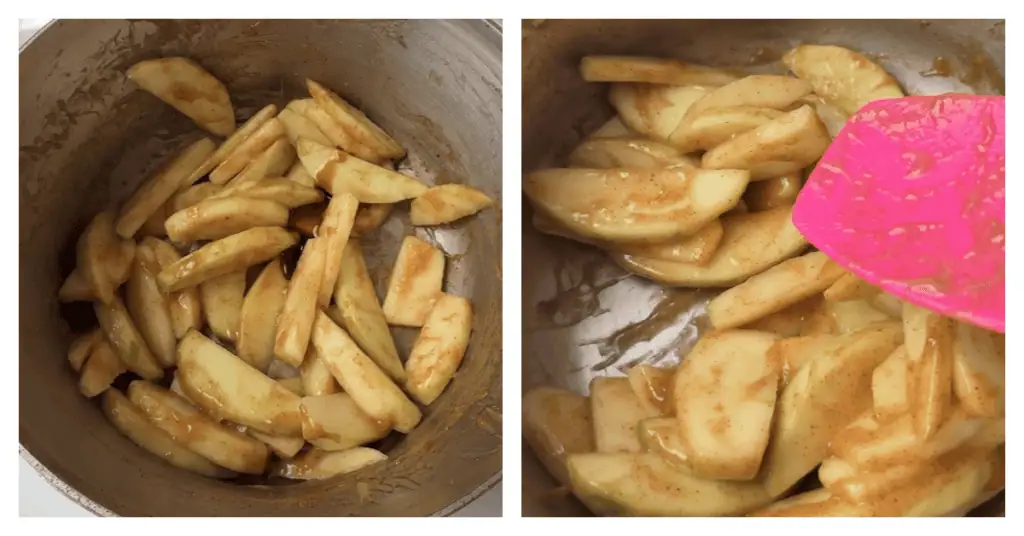
Melt the butter in a medium skillet or saucepan over medium heat. Add the apple mixture and cook for about 5 minutes, stirring occasionally, until the apples begin to soften.
You don’t want to cook the apples completely at this stage. They’ll finish cooking in the oven. This step simply gives them a head start and helps release some of their moisture.
Remove the filling from the heat and let it cool while you roll out the pie dough. Avoid adding hot filling to your pie crust because it can soften the butter in the dough.
Step 3: Roll Out the Bottom Crust
Remove the larger disk of pie dough from the refrigerator. If it’s too firm to roll, let it sit at room temperature for about 10 minutes.
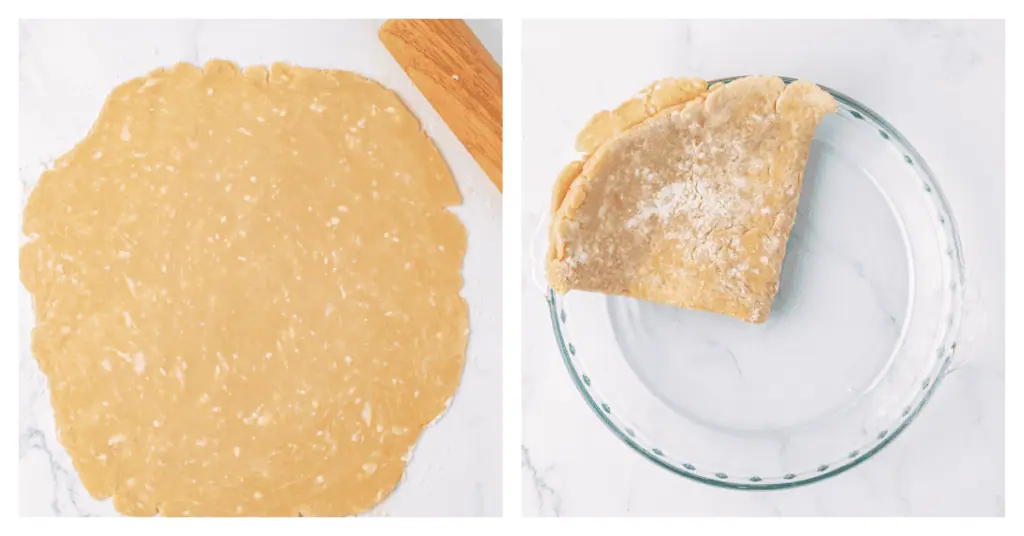
On a lightly floured surface, roll the dough into an approximately 9-inch circle, about ⅛-inch thick.
Carefully transfer the dough to a 6-inch pie plate, gently pressing it into the bottom and sides.
Don’t stretch the dough to make it fit. Stretching can cause the crust to shrink as it bakes.
Step 4: Add the Apple Filling
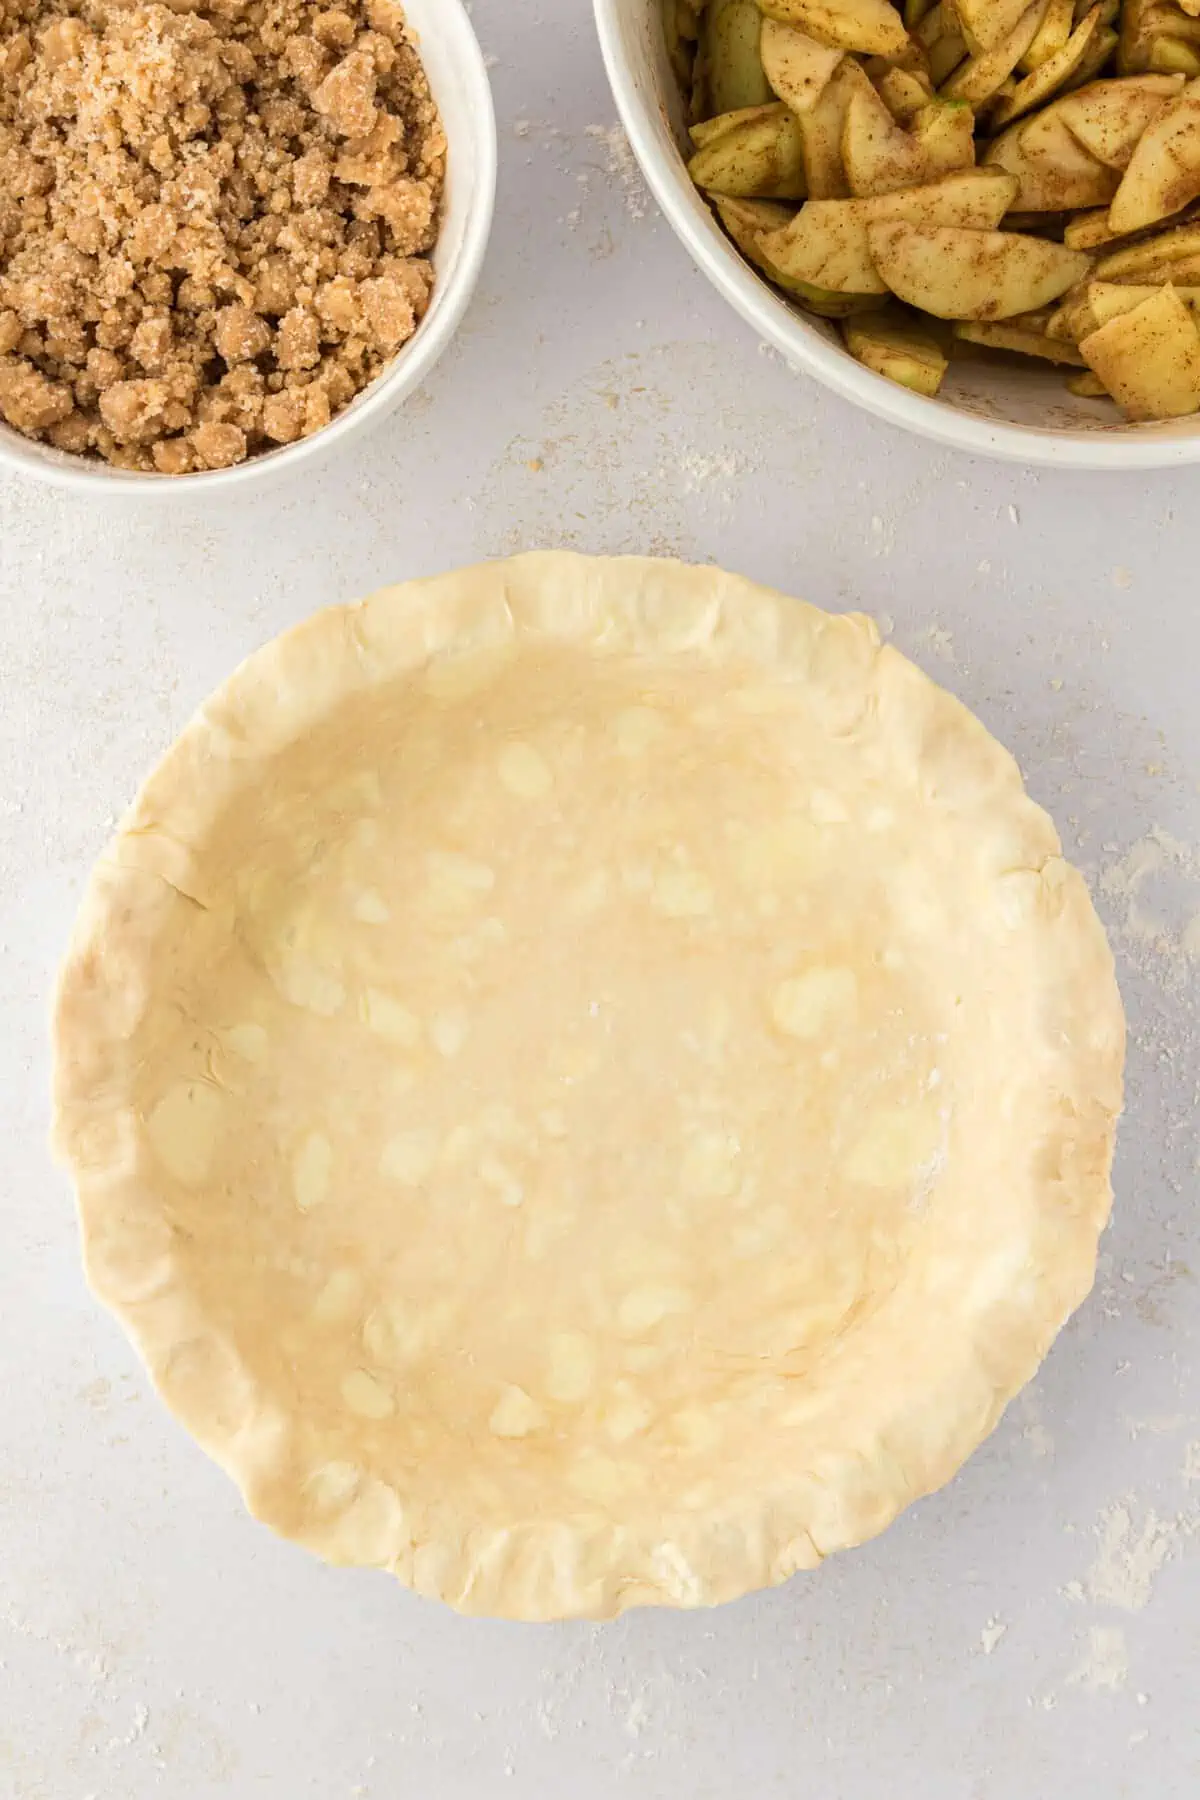
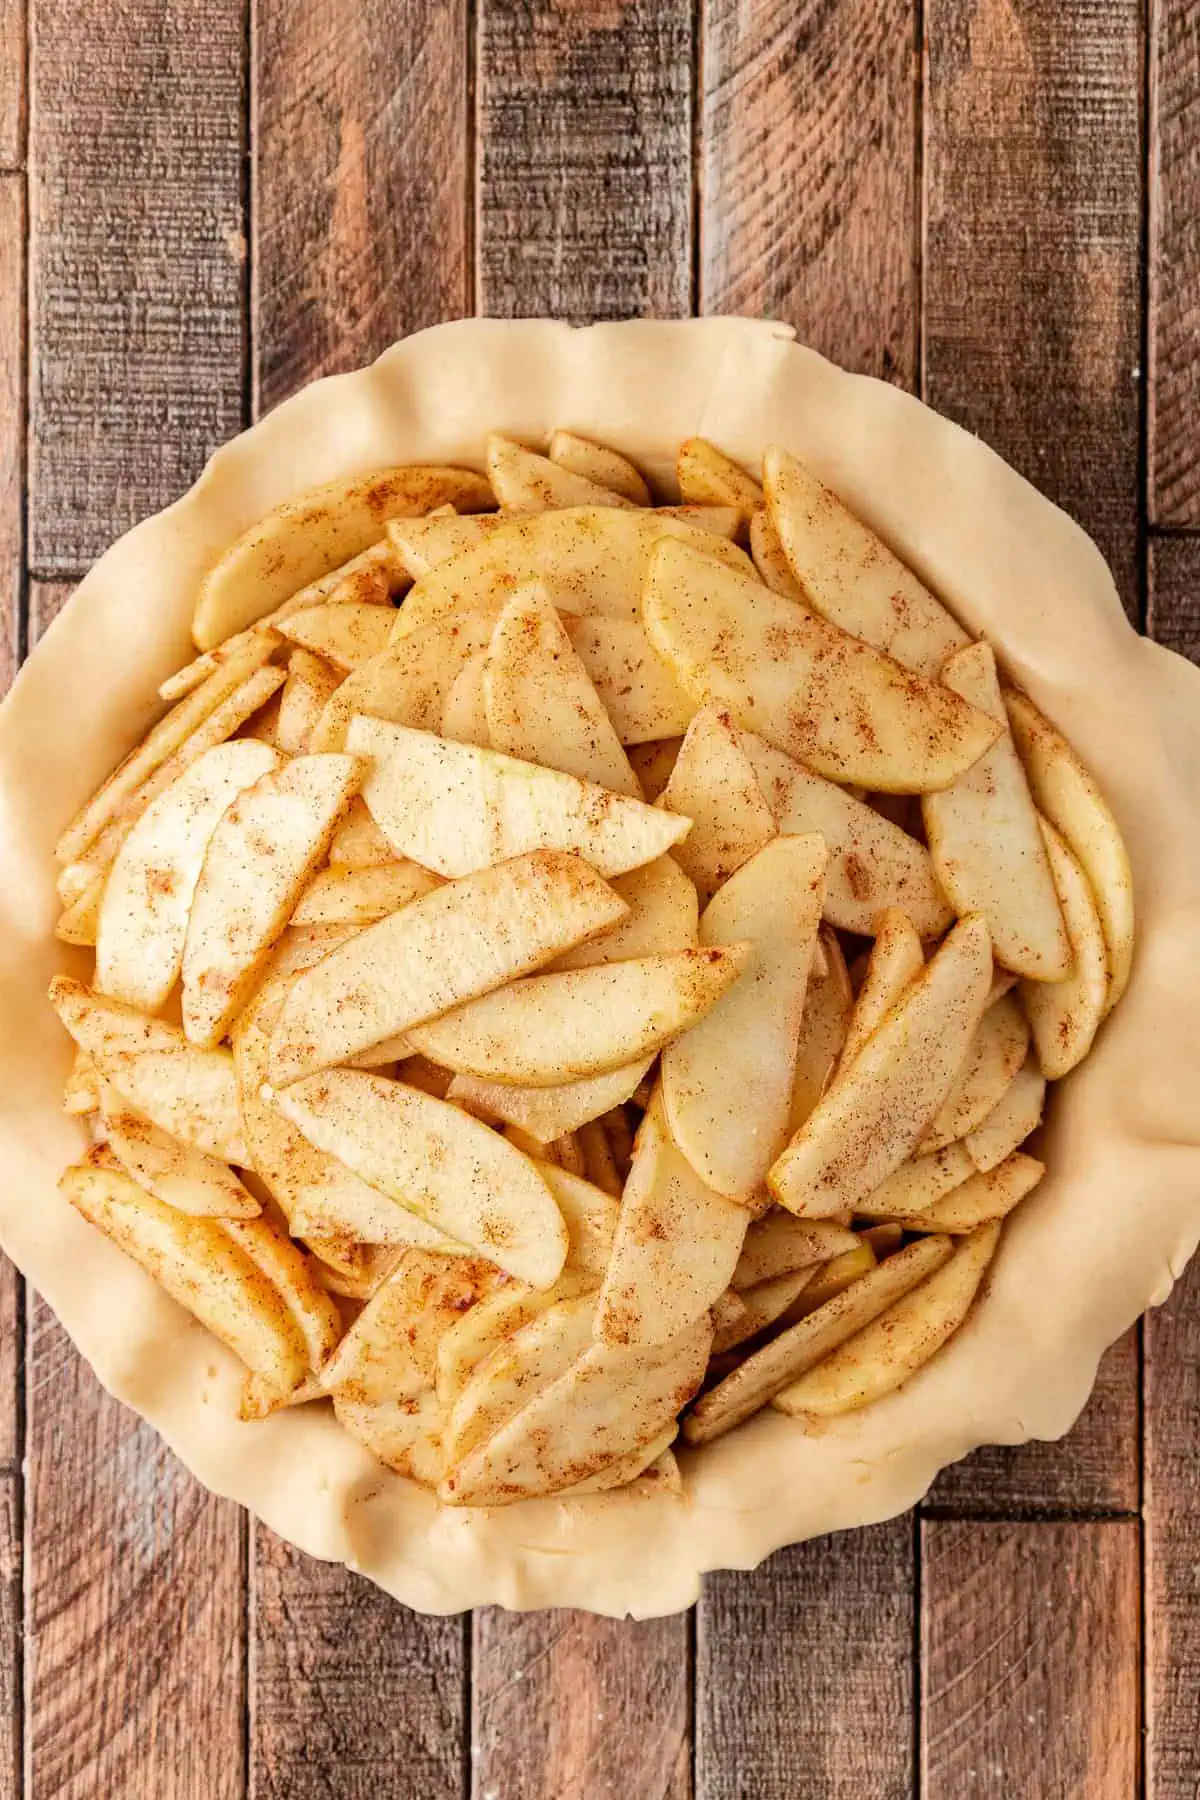
Once the apple filling has cooled, spoon it into the prepared pie crust.
Spread the apples evenly, mounding them slightly in the center. Be sure to include the thickened juices from the cooked filling because they’re full of flavor!
Step 5: Add the Top Crust
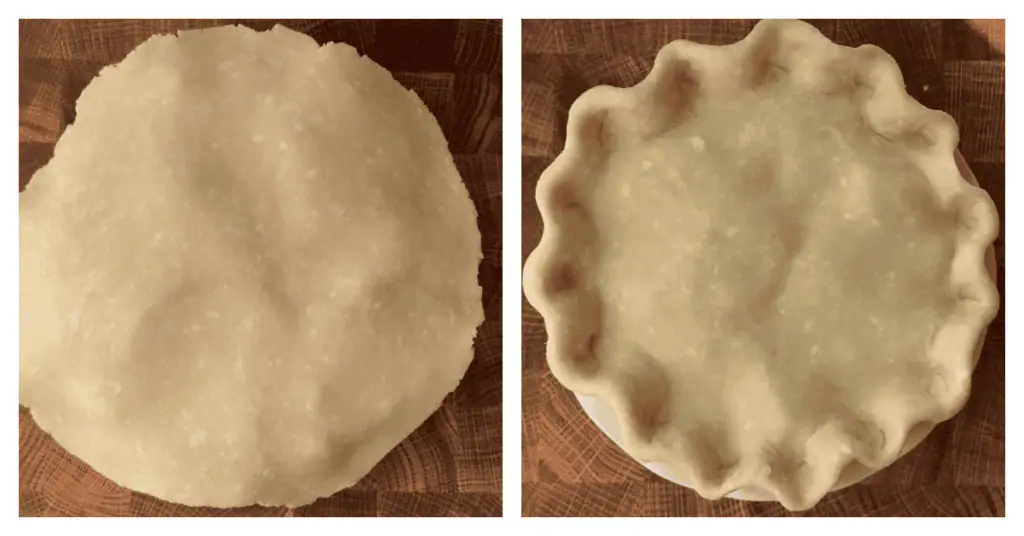
Roll out the second disk of pie dough into an approximately 9-inch circle.
Carefully place the dough over the apple filling. Trim away the excess dough, leaving enough to seal the edges.
Fold the top crust underneath the bottom crust and crimp the edges with your fingers or a fork.
Cut 3–4 small slits in the top crust. These vents allow steam to escape as the apples bake, helping prevent the filling from building up too much pressure underneath the crust.
Step 6: Chill the Assembled Pie
Place the assembled pie in the refrigerator for 30 minutes before baking.
This is one step I wouldn’t skip! Rolling and shaping the dough warms the butter, and chilling the assembled pie helps firm it up again. This helps the crust hold its shape and bake up flaky.
While the pie chills, position an oven rack in the bottom third of your oven and preheat to 425°F (218°C).
Step 7: Brush with Egg Wash
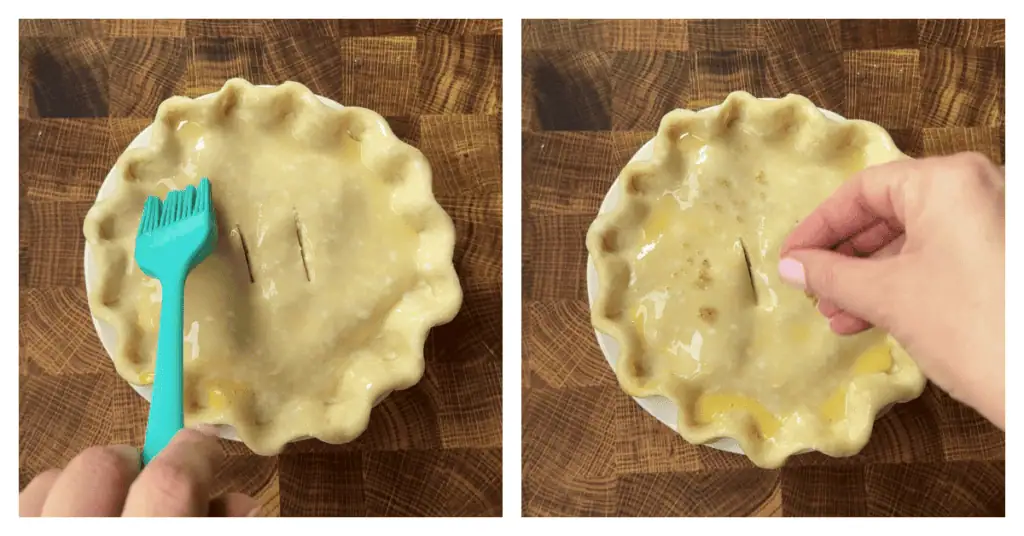
In a small bowl, whisk together the egg and water.
Lightly brush the top crust and edges with the egg wash, then sprinkle with granulated or coarse sugar.
The egg wash helps the crust turn golden brown, while the sugar adds a little extra crunch.
Step 8: Bake the Apple Pie
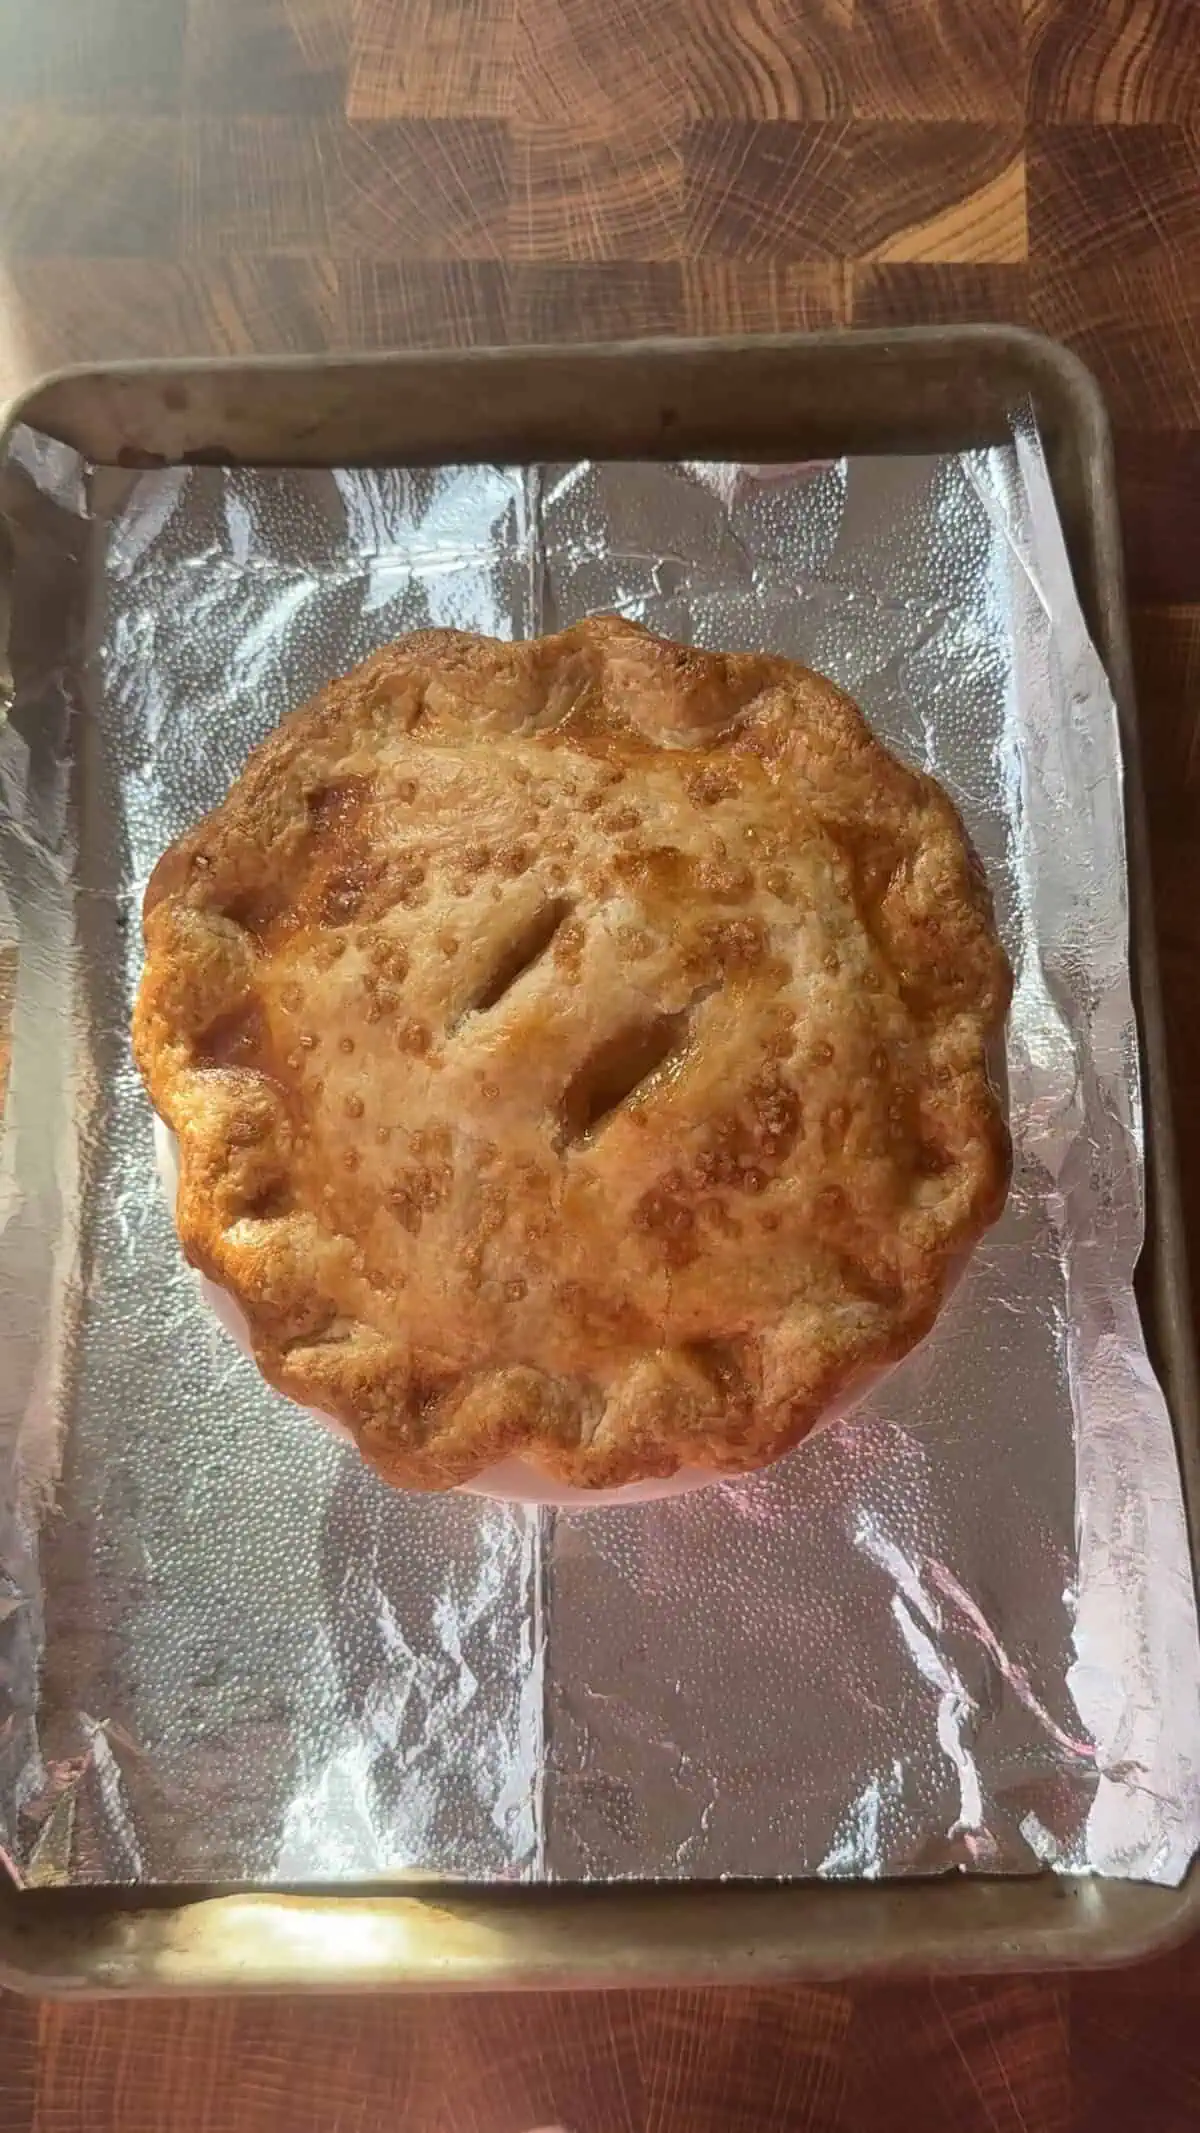
Line a cookie sheet with aluminum foil to catch any juices that might bubble over during baking. Place the pie on the prepared cookie sheet.
Bake in the bottom third of the oven at 425°F (218°C) for 15 minutes.
Without removing the pie, reduce the oven temperature to 375°F (190°C) and continue baking for approximately 45-50 minutes.
The pie is ready when the crust is golden brown and the apple filling is bubbling through the vents.
Starting at a higher temperature helps set the crust, while lowering the temperature allows the filling to finish cooking without the crust becoming too dark.
If the edges begin to brown too quickly, loosely cover them with aluminum foil.
Step 9: Cool Before Slicing
Transfer the baked pie to a wire cooling rack and let it cool for at least 2–3 hours before slicing.
I know it’s tempting to cut into a warm apple pie right away, but cooling is important! The filling continues to thicken as it cools, so your slices will hold together much better if you give the pie time to set. Serve with a scoop of vanilla ice cream or whipped cream and a drizzle of caramel sauce.
My Recipe Tips
- Use firm baking apples. Softer apples can break down too much during cooking and baking. Granny Smith and Honeycrisp are both great choices because they hold their shape well.
- Don’t overprocess the pie dough. You want to see small pieces of butter throughout the dough. If the butter becomes completely incorporated into the flour, you won’t get the same flaky texture.
- Keep the dough cold. If the pie dough becomes too soft or sticky while rolling or assembling, refrigerate it for 10–15 minutes before continuing.
- Don’t stretch the crust. Gently ease the dough into the pie plate. Stretching it can cause the crust to shrink in the oven.
- Look for bubbling filling, not just a golden crust. The filling should bubble through the vents before you remove the pie from the oven. This is a good indication that the apples have cooked through and the juices have thickened.
How to Store Small Apple Pie
Room temperature: Cover the completely cooled apple pie and store at room temperature for up to 2 days.
Refrigerator: Store leftover pie covered in the refrigerator for up to 4 days. You can enjoy the slices cold or warm them before serving.
Freezing baked apple pie: Allow the pie to cool completely, then wrap it tightly in plastic wrap followed by aluminum foil. Freeze for up to 3 months. Label the wrapping with the recipe name and date.
Thawing and reheating: Thaw the pie overnight in the refrigerator. To serve warm, place it in a 350°F oven until heated through, approximately 15–20 minutes for individual slices or longer for the whole pie.
Freezing unbaked pie: You can also assemble the pie and freeze it before baking. Wrap it tightly and freeze for up to 3 months. For best results, bake directly from frozen in a suitable oven-safe pie plate, allowing additional baking time. The exact time will depend on the pie plate and how deeply frozen the pie is.
Frequently Asked Questions
Yes! You can use refrigerated store-bought pie dough instead of making the homemade crust. You’ll need enough dough for both the bottom and top crusts of your 6-inch pie. A double pie crust from the store will work just fine.
A runny filling can happen if the pie isn’t baked long enough or if it’s sliced before it has cooled. Make sure the filling is bubbling through the vents before removing the pie from the oven, and allow at least 2–3 hours of cooling time before slicing.
Absolutely! You can prepare the pie dough up to 2 days in advance and keep it refrigerated. You can also bake the pie the day before serving. In fact, making it ahead gives the filling plenty of time to set before slicing.
More Apple Recipes to Try
If you love baking with apples, here are a few more recipes to try:
- Apple Crumble for Two: A cozy apple dessert with a buttery crumble topping, perfect when you want just a couple of servings.
- Small Batch Apple Crisp: Tender cinnamon-spiced apples topped with a crisp oat crumble, baked in a loaf pan.
- Mini Apple Pies: Individual apple pies with flaky homemade crusts and a sweet apple filling.
- Apple Crumb Cake: A soft, tender apple cake topped with a buttery crumb topping.
- Apple Turnovers: Flaky pastry filled with sweet apples for an easy handheld dessert.

Small Apple Pie (6-Inch Apple Pie)
Ingredients
Homemade Pie Crust
- 1 ¼ cups (150 g) all-purpose flour spooned and leveled
- 1 ½ teaspoons granulated sugar
- ½ teaspoon salt
- ½ cup (1 stick, 113 g) unsalted butter cold and cut into ½-inch cubes
- 3 –4 Tablespoons ice water
Apple Pie Filling
- ¾ pound (to –1 pound) apples about 2 medium apples, peeled, cored, and thinly sliced
- ¾ teaspoon lemon juice
- 3 Tablespoons (38 g) packed light brown sugar
- 1 Tablespoon all-purpose flour
- pinch salt a small pinch
- ½ teaspoon ground cinnamon
- ⅛ teaspoon ground nutmeg
- ⅛ teaspoon ground allspice
- 1 teaspoon unsalted butter for cooking the apples
For Finishing
- 1 large egg beaten with 1 Tablespoon water (you won’t need all of it)
- Additional granulated or coarse sugar for sprinkling
Instructions
Make the pie dough
- In the bowl of a food processor, add the flour, sugar, and salt. Pulse a few times to combine. 1 ¼ cups (150 g) all-purpose flour 1 ½ teaspoons granulated sugar ½ teaspoon salt
- Add the cold, cubed butter and pulse about 8–10 times, until the butter is broken down into pea-sized pieces. Be careful not to overprocess. You want visible pieces of butter throughout the dough to create a flaky crust. ½ cup (1 stick, 113 g) unsalted butter
- Drizzle in 3 Tablespoons of ice water and pulse a few times to combine. Test the dough by squeezing a small amount between your fingers. If it holds together, it's ready. If it's still dry and crumbly, add more ice water, 1 teaspoon at a time, pulsing briefly after each addition. 3 –4 Tablespoons ice water
- Turn the dough out onto a lightly floured surface and gently bring it together with your hands. Divide into two portions, making one slightly larger for the bottom crust.
- Shape each portion into a disk, wrap tightly in plastic wrap, and refrigerate for at least 1 hour before rolling out.
Cook the apple filling
- In a medium bowl, toss the sliced apples with the lemon juice, brown sugar, flour, salt, cinnamon, nutmeg, and allspice until evenly coated. ¾ pound (to –1 pound) apples ¾ teaspoon lemon juice 3 Tablespoons (38 g) packed light brown sugar 1 Tablespoon all-purpose flour pinch salt ½ teaspoon ground cinnamon ⅛ teaspoon ground nutmeg ⅛ teaspoon ground allspice
- Melt 1 teaspoon of butter in a medium skillet or saucepan over medium heat. Add the apple mixture and cook for about 5 minutes, stirring occasionally, until the apples begin to soften. 1 teaspoon unsalted butter
- Remove from the heat and allow the filling to cool while you roll out the pie dough.
Roll Out The Bottom Crust
- Remove the larger disk of pie dough from the refrigerator. If it’s too firm to roll, let it sit at room temperature for about 10 minutes.
- On a lightly floured surface, roll the dough into an approximately 9-inch circle, about ⅛-inch thick.
- Carefully transfer the dough to a 6-inch pie plate, gently pressing it into the bottom and sides without stretching the dough. Allow the excess dough to hang over the edges.
Add the apple filling
- Once the apple filling has cooled, spoon it into the prepared pie crust, spreading the apples evenly and mounding them slightly in the center.
- Be sure to include the thickened juices from the cooked filling.
Add the top crust
- Roll out the second portion of dough into an approximately 9-inch circle.
- Carefully place the dough over the apple filling. Trim the excess dough, leaving enough to seal the edges.
- Fold the top crust underneath the bottom crust and crimp the edges with your fingers or a fork.
- Cut 3–4 small slits in the top crust to allow steam to escape during baking.
Chill the assembled pie
- Place the assembled pie in the refrigerator for 30 minutes before baking. This helps firm up the butter in the crust so it holds its shape and bakes up flaky.
- While the pie chills, position an oven rack in the bottom third of the oven and preheat to 425°F (218°C).
- Remove the chilled pie from the refrigerator.
- In a small bowl, whisk together the egg and water. Lightly brush the top crust and edges with the egg wash, then sprinkle with granulated or coarse sugar.
Bake the pie
- Line a cookie sheet with aluminum foil to catch any drips during baking. Place the pie on the prepared cookie sheet.
- Bake on the rack in the bottom third of the oven at 425°F (218°C) for 15 minutes.
- Without removing the pie from the oven, reduce the temperature to 375°F (190°C) and continue baking for about 45 minutes, until the crust is golden brown and the apple filling is bubbling through the vents. If the crust begins to brown too quickly, loosely cover the edges with aluminum foil.
Cool before slicing
- Remove the pie from the oven and transfer it to a wire cooling rack.
- Allow the pie to cool for at least 2–3 hours before slicing. This gives the filling time to thicken and set so the slices hold together.
Notes
- Apples: Use firm baking apples such as Granny Smith, Honeycrisp, or a combination of both. The amount needed will depend on the depth of your 6-inch pie plate.
- Make ahead: The pie dough can be prepared up to 2 days in advance and stored tightly wrapped in the refrigerator. Let it sit at room temperature briefly if it’s too firm to roll.
- Keep the dough cold: If the dough becomes too soft or sticky while rolling or assembling, refrigerate it for 10–15 minutes before continuing.
- Storage: Cover and store leftover apple pie at room temperature for up to 2 days or refrigerate for up to 4 days.
- Freezing: Wrap the fully cooled, baked pie tightly and freeze for up to 3 months. Thaw overnight in the refrigerator before reheating.