
Single Pie Crust Recipe
This Post May Contain Affiliate Links. Please Read Our Disclosure Policy.
Having a good single pie crust recipe in your backpocket is a must for any baker. But not all single pie crusts are the same, and it’s not as easy as just cutting your regular pie crust recipe in half. Get all the step by step photos, tips and tricks to rock a single pie crust out in your own kitchen!

I’m not going to lie to you… pie crust made from scratch used to intimidate me. I’ve added too much water. Not enough. Overmixed. Not mixed enough. Ended up with a big crumbly mess that’s better suited for the trash can then my pie plate.
And sure I’ve thrown in the towel and grabbed that box of pie crust from the grocery store in desperation. But I’ve come a long, long way baby. And I want you to get there as well.
So today we’re tackling this single pie crust recipe. If you have “piecrustaphobia” (ok that’s made up but you get it) then I think this tutorial today will have you confidently heading to your kitchen and tackling all of your pie crust fears.
Box of pie crust? Say no more! Let’s do this….
Bake Pies With Confidence!
If you’ve ever struggled with shrinking crusts, runny fillings, or pies that just didn’t wow—you’re not alone. But here’s the good news: you can bake pies that look beautiful, slice cleanly, and taste bakery-worthy… without the stress.
Inside my Pie Perfection eBook, you’ll learn how to:
- Master buttery, flaky crusts (no soggy bottoms here!)
- Choose the right thickeners for fruit fillings that hold
- Avoid common pie mistakes with my step-by-step guides
- Bake seasonal favorites all year long—from classic apple to no-bake summer pies
Whether you’re brand new to pie baking or ready to take your skills to the next level, this book will give you the tools and confidence to bake pies you’re proud to share.
👉 Grab Your Pie Perfection Ebook Here!
You bring the rolling pin—I’ll bring the secrets. 💛
What Is A Single Pie Crust?
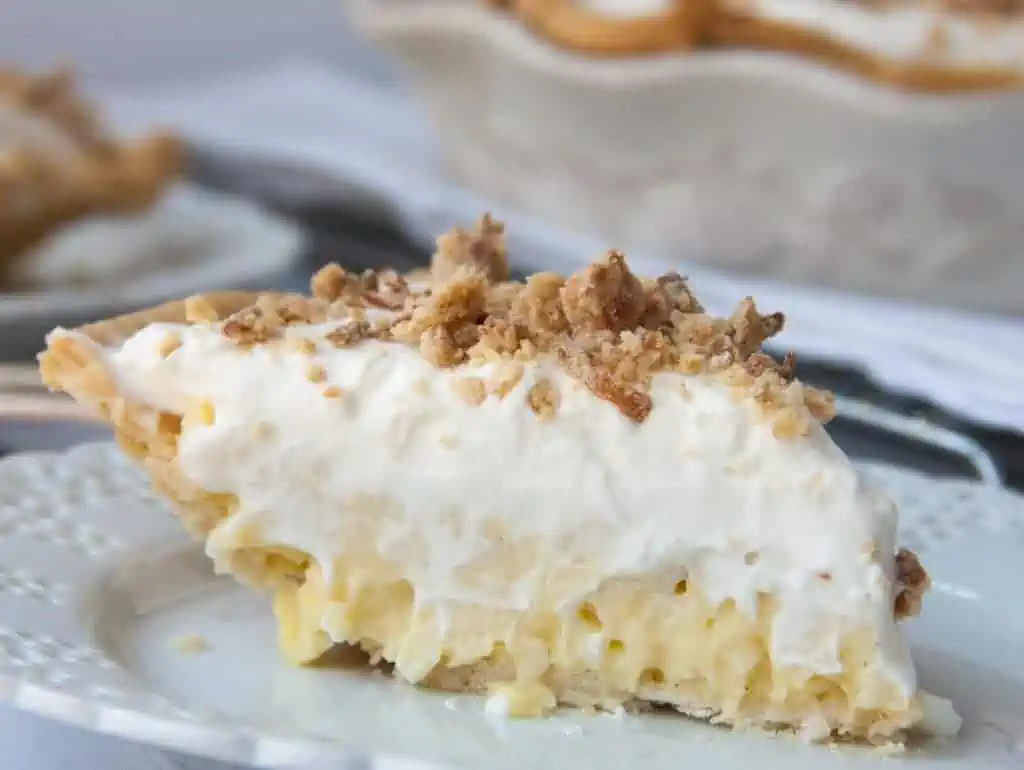
Ok first off let’s establish what the heck we are talking about. A single batch of pie dough that could be used for when you only need one crust. Like a custard pie such as when you want to make my Old Fashioned Coconut Cream Pie for instance.
Couldn’t you just take my Double Pie Crust Recipe and divide it in half, you ask. I used to do that, but what I would find is half a batch of a double pie crust is never enough to roll out your bottom crust. You always need a little bit more pie dough for your bottom crust then you do the top. So dividing in half just won’t work.
Trust me I’ve tried! And I never have enough to have a beautiful crimped pie crust that fits my pie pan.
So I adapted this recipe for a single pie crust from King Arthur Flour, and added a little sugar to it (sugar helps to tenderize the crust) to create my own version of single pie crust. You end up with a perfect amount of dough to make a bottom crust for all your single pie crust needs!
What Do I Need To Make A Single Pie Crust?
- All-purpose flour – Regular AP flour has the right protein content to make a tender, yet sturdy enough crust to roll out.
- Salt – A little salt is always necessary to help bring out all the other flavors. I used kosher salt, which has nice pure salt taste but a larger granule than table salt. If you use table salt, use less.
- Sugar – I like to use just a little sugar in my pie crust. Sugar helps to interfere with gluten development. This helps to create a tender crust. But too much sugar can actually make it too tender to roll out. So I add just a tablespoon.
- Shortening – Shortening has a higher melting point than butter, which means it’s easier to incorporate into your crust. And if you’re making a pretty design for your top crust it will hold it’s shape better. Make sure it’s very cold!
- Butter – Of course, butter adds ALL the flavor. But you need the butter to be very, very, very cold! Colder the better. I also use unsalted butter. Salted butter will add too much salt.
- Ice Cold Water – I like to take a measuring cup and add a few ice cubes to it and fill it up with water. Then I add a tablespoon at a time of the ice cold water.
What Tools Do I Need To Make This Single Pie Crust Recipe?
Believe it or not, you don’t need much. You can make a pie crust in a food processor or as I am going to show you by hand in a bowl.
If you are new to making pie crust, I recommend making it by hand. It gives you more control and you are less likely to overwork your dough.
Also check out: 9 Pie Tools You Need To Make The Perfect Pie

Recipe Tips
- First off, cold is key. Cold butter, cold shortening, cold water. Now, I have heard Martha Stewart goes to the lengths of even chilling her flour. I haven’t gone that far, but hey the colder the better right? The reason being? Cold keeps the butter and shortening from melting. Wait, don’t you want them to melt? Yes. Just not in your hands as your mixing the dough. You want them melting in the oven creating pockets of steam that then creates flaky layers.
- Chill Your Dough. If you find as your are rolling out your dough to be getting sticky, take a break and chill your dough again. After your rolled out and placed it in your pie pan, chill it again. Getting the hint? Cold. Is. Key! Secondly, shortening creates flakiness. Butter imparts flavor. If shortening gives you the heeby jeebies, you can use all butter in your dough. I simply recommend making it by hand if you do. You are less likely to overdo it by hand then in your food processor and therefore still getting the flakiness one desires. I’ve made this pie dough before and had great results.
- Do Not Overwork Your Dough. This pie dough however I decided to use shortening and my food processor. I had quite the list of pies to make for Thanksgiving and I knew the food processor was speed things along. If you don’t want to use your food processor you can easily use a pastry cutter. I have done both. If you do use your food processor, just be very carefully to NOT OVERDO IT. Less is more people. Less is more. If you are not sure, then STOP. You can always bring it all together with your hands before letting it chill and relax in your refrigerator.

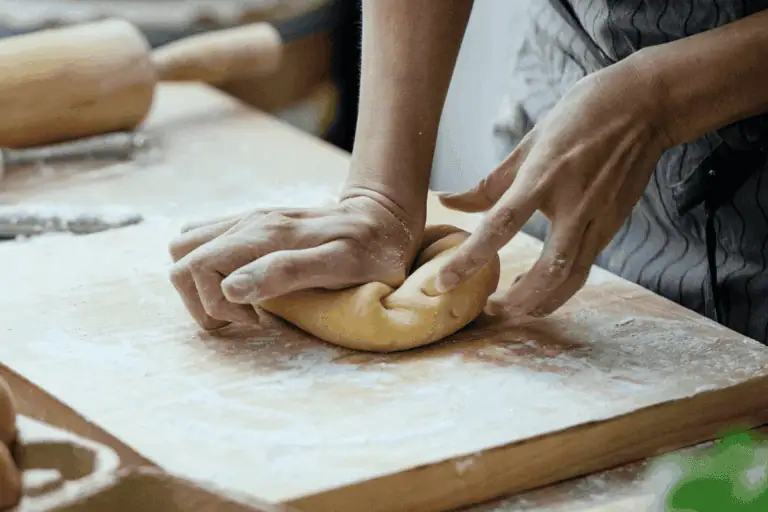
How To Make This Single Pie Crust By Hand
Before we begin. It’s super important your to talk about temperature when making a pie crust. Your ingredients should be COLD. Cold, Cold, Cold. You want cold butter. Cold water. Cold shortening. I have even heard of people putting their flour in the freezer (although I don’t get that far). Just make sure before you begin, your ingredients are cold.
Steps 1-4: Measure out your all purpose flour (properly measured), 1/2 teaspoon salt and a tablespoon sugar. For proper accuracy, it’s best to use a kitchen scale. Then go ahead and stir with a fork.
Step 5 and 6: Add your shortening. Mix in the shortening with a pastry blender.
Step 7 -9: Grate in your butter. Then fluff the mixture together with your fork. Your mixture should be crumbly and butter evenly incorporated.
Pro Tip: You want your butter to be very cold (frozen is best!)
Step 10 and 11: Add in a tablespoon of ice water one at a time and then stir. The amount of water you add will vary depending on the weather (and humidity). So add one tablespoon at a time, and then stir together. You want the dough to look shaggy but then when you squeeze the dough it should stick together.
Step 12: If making a double crust, then divide the dough (again a kitchen scale works best for this) and shape into a round disc and wrap in plastic wrap. And refrigerate for at least 30 minutes!
Pro Tip: Line your counter with plastic wrap. Then pour the pie dough contents on to the plastic wrap. Use the plastic wrap to smush the pie dough together. The dough will come together and you won’t need to toughen the dough and heat up the butter.

How To Make This Single Pie Crust Recipe In Your Food Processor
I used to think making pie crust in my food processor was just wrong. Well, turns out I was wrong. Using your food processor makes things super speedy. As long as you don’t overmix. Two tricks:
- Use The Pulse Feature. Do not just turn it on and let it run. Do this and you are likely to overmix your dough! Instead pulse it a few times and gradually work the ingredients in.
- Stir the water in by hand. If you are afraid of adding too much water. Aren’t we all?! Then empty the crust mixture into a separate bowl and stir your water in with a spatula. This will give you a better feel for the dough and you are less likely to add too much water.
In this photo, there are 2 discs (no you’re not seeing double). This is the same process I use for my double pie crust recipe, but in the end you will only have one disc of dough to refrigerate!

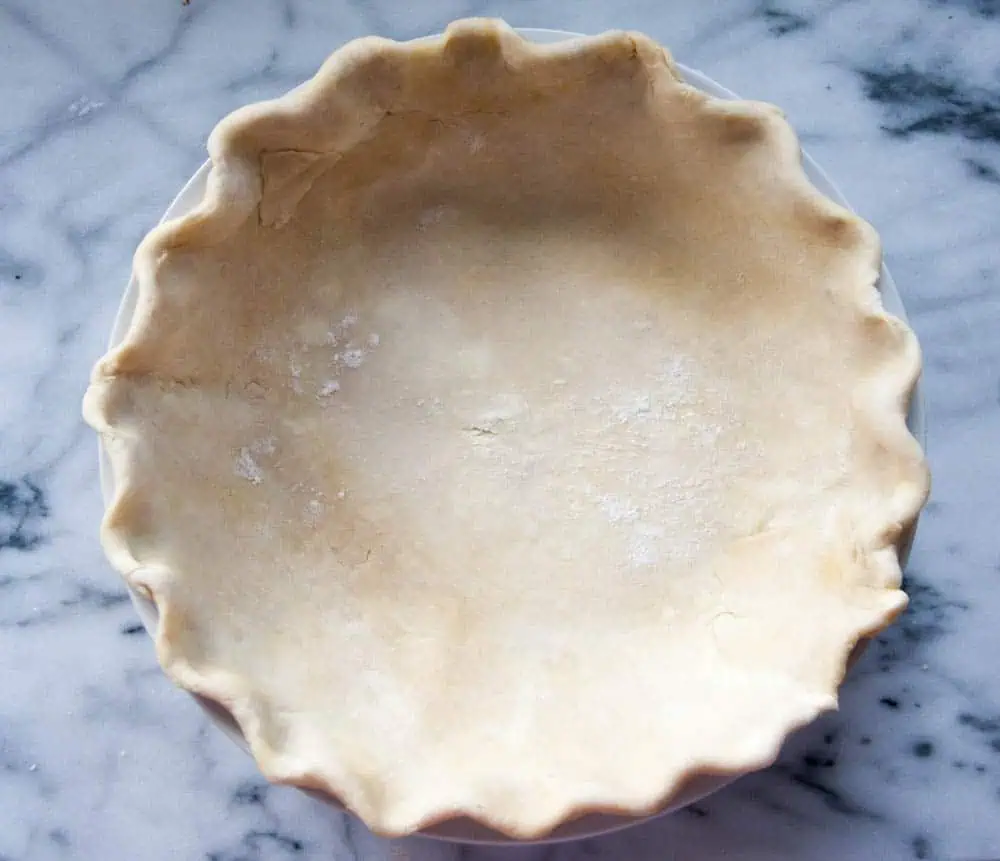
How To Roll And Crimp Your Pie Dough
To properly roll your dough and place into your pie pan I recommend using a pastry mat. I love the non-stick surface and the measurements so I can ensure I’ve rolled enough.
Step 1: Sprinkle your surface with a bit of flour. You just want to slightly flour your surface so you don’t incorporate too much extra flour into your dough.
Step 2: Roll out your dough.
Pro Tip: If your dough is sticking you can always pop it back into the fridge. If your dough is breaking, it may be too dry. Add a few sprinkles of water to the dough.
Step 3: To see if your dough has been rolled out large enough, turn your pie plate upside down. The pie dough should be larger than your pie plate.
Step 4 and 5: Using your rolling pin, roll your pie dough over the pin so it’s completely rolled around it (like a roll of paper towels!)
Step 6: With your pie dough rolled around the pin, roll it out over the pie plate.
Step 7: Trim the overhang with a pair of kitchen shears, leaving about a 1 -inch overhang.
Step 8: For a single crust: Fold the extra pie dough under creating an edge. For a double crust, repeat steps 1-6 and fold both top and bottom dough under to create an edge.
Step 9: Crimp the edges. For 4 easy ways to crimp and decorate your pie crust, read this post.

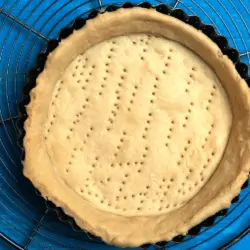
How To Blind Bake Your Pie Crust
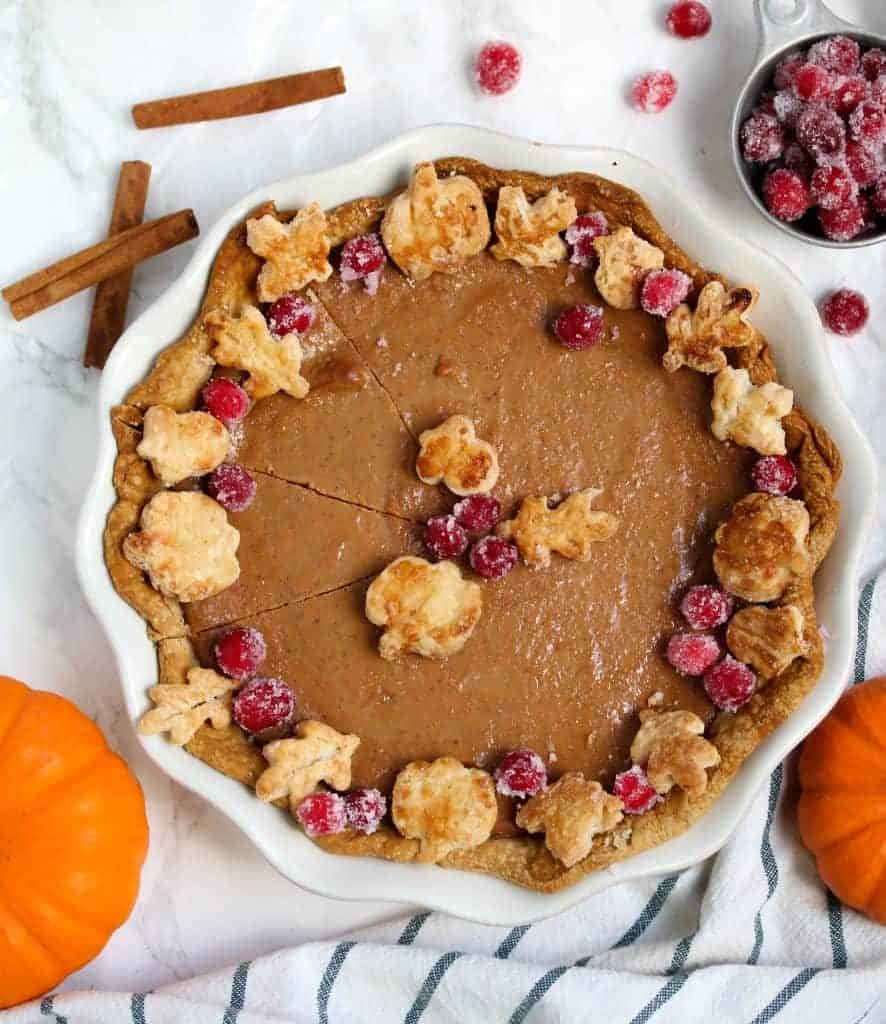
When it comes to making a single pie crust recipe, it’s for a pie recipe that requires blind baking usually. Such as Easy To Make Eggless Pumpkin Pie. Unless you’re making a pie with a streusel topping like my Blueberry Crumble Pie or using it to make a free form tart like this Fresh Cherry Galette.
So if you’re making a pie that needs to have the single crust blind baked. For step by step photos head to How To Blind Bake Pie Crust (in 5 easy steps!).
But basically you need to line your pie plate with parchment paper, or aluminum foil, and fill it with pie weights. You can use dried rice, beans, or store-bought ceramic pie weights. And then you bake your pie crust either partially (for a custard pie that will then be further baked) or for fully baked for a no bake pie.

Single Pie Crust Recipe FAQ’s-
Why Do We Need Our Butter To Be Cold In A Pie Crust?
Butter accomplishes a few things. Sure flavor is important. But it helps to stop gluten from forming. And butter helps to create flaky layers.
If the butter is too warm it will be absorbed into the flour. We need some butter to coat the flour. This helps the flour from forming two much gluten.
Flour contains two proteins, gliadin and glutenin, that when mixed with water form gluten. Gluten forms this network that can help trap gasses and provides structure to our baked goods. But too much gluten means that we end up with a tough structure in the end.
So the fat that’s added to the recipe actually will coat the flour and prevent the flour from interacting with the water in our recipe.
But some pieces need to remain large and visible. That means these pieces, not worked into the dough, will melt in the oven. And butter contains water. That water then will turn to steam. Steam will then escape and push apart our flour layers creating a flaky crust. Yay flaky layers!
Why Does The Water Vary In The Recipe?
So I was always told that the water amount varies because it depends on the weather that day. The humidity in the air. Well, apparently that’s wrong. It has to do with how much of the butter (or fat) is cut into the flour. Just as we learned above, the butter’s job is to block the flour from getting along with the water.
So the amount of water to bring the dough together will always vary a little bit depending on how much of the butter is worked in.
I like to add the minimum amount, and then test the dough by pinching it between my fingertips to see if it forms a solid mass. If you still see lots of crumbs not mixed in, that means you probably need to add a little more water. I like to err on the side of less. If I find that I’ve added too little later, I just spritz my dough down with a water bottle if needed and work in a small extra amount.
Do I Need To Grate The Butter?
I’ve done it both ways. Either grated, then frozen. Or just simply cubed up small and then chilled. Either works really well.
Why Do I Add Shortening?
I know shortening can make people a bit squeamish, but it’s one of the few times that I swear by shortening. Shortening has a higher melting point than butter so it’s easier to incorporate than butter and will help to create those flaky layers.
Shortening will also be easier when creating a decorative pie crust because it holds it’s shape better during the baking process!
Why Do You Refrigerate The Dough Before Rolling It Out?
We need to refrigerate the pie dough after making it to relax the gluten strands. This will help make the pie crust tender and also easier to roll out.
It will also help to firm up the fat again and cut down on any shrinking during the baking process.
My pie dough is crumbly and dry!
Oh I’ve been there. You are so afraid of adding too much water you add too less! If when you go to roll out your dough you find it’s crumbling and dry. Sprinkle on some water. I prefer to use a spray bottle and spritz on water. It adds just a light mist. Then I work the water into the dough.
Afterewards, I like to chill my dough again to let the dough warm up after I’ve played with before I roll it out.
Can I Make Pie Crust Ahead Of Time?
Absolutely you can! And I highly recommend you do. Your dough needs to chill anyway, so why not make it advance. You can make pie crust the day before and refrigerate it.
Or freeze your discs of pie dough for up to 3 months. Let them thaw overnight in the refrigerator.
My pie crust edges are burnt!
If your pie crust edges are getting too dark and starting to burn during the baking process (which can happen with single pie crust recipes since they are pre-baked before the filling). Then be sure to cover them up with a pie shield.
I recommend a silicone pie shield because it will cover them gently and not break the edges off.
For More Pie Tutorials Check Out These Posts:
- 20 Tips For Perfect Pie Crust
- 9 Tips To Prevent A Soggy Pie Crust
- How To Make A Lattice Pie Crust
- All Butter Pie Crust
Other Pie Recipes to Try
- Pear Cranberry Crumble Pie
- Pumpkin Pie (No Evaporated Milk)
- Old Fashioned Coconut Cream Pie
- Homemade Apple Pie
- Pecan Pie (No Corn Syrup!)
Ready To Bake Pies With Confidence?
Imagine making a homemade pie from scratch that everyone raves about! Grab my Pie Perfection eBook and learn how to master flaky crusts, flavorful fillings, and picture-perfect pies—no stress, just sweet success.
👉 Get The Ebook Here!
Single Pie Crust
Ingredients
- 1 ½ cups (180 g) g all-purpose flour
- 1 teaspoon granulated sugar
- ½ teaspoon salt
- 5 Tablespoons (71 g) unsalted butter cold and cut into 1/4-inch pieces
- 4 Tablespoons vegetable shortening cold
- 3-5 tablespoons ice cold water
Instructions
Make pie dough:
- Process flour, sugar, and salt together in food processor until combined, about 5 seconds. Scatter shortenign over the flour mixture and pulse to combine. Then scatter butter over top and process until mixture resembles coarse cornmeal, about 10 seconds. Or do this by hand in a mixing bowl, with a pastry cutter.
- Sprinkle 3 tablespoons of the ice water over the mixture. Pulse together, until dough sticks together. If dough does not stick together, stir in remaining ice water 1 tablespoon at a time.
- Turn dough onto sheet of plastic wrap. Bring dough together into a smooth round disc and flatten slightly. Wrap in plastic wrap and refrigerate for 30 minutes.
- Roll Out Pie Crust
- On a floured work surface, roll out the disc of chilled pie dough. Turn the dough a quarter turn to ensure it's not sticking to your surface. Continue rolling (and turning) the dough until you have a 12" circle. Roll the pie crust over a rolling pin (or fold into quarters) and transfer to your pie plate. Roll out (or unfold) and tuck gently into the pie crust. Fold the edges under and crimp. Chill the pie crust for 30 minutes.
Blind Bake
- Preheat the oven to 375°F. Line the chilled pie crust with parchment paper or aluminum foil. Fill with pie weights, dried beans or rice. Make sure the weights are evenly distributed around the pie dish. Fill to the top of the pie crust.
- Bake until the edges of the crust are starting to brown, about 15 minutes. Remove pie from the oven and carefully lift the parchment paper/aluminum foil (with the weights) out of the pie.
- Prick holes all around the bottom crust (and sides) with a fork. Return the pie crust to the oven.
- For a fully baked pie crust: Bake until the bottom crust is golden brown about 15-18 minutes longer until edges are golden brown. For a partially baked pie crust: Bake until the pie crust is lightly golden brown, and no longer looks raw about 8 minutes longer until edges are lightly golden brown and bottom no longer looks raw. Remove from the oven and allow to cool while you prepare your pie recipe as directed.
- For a no bake pie, let the pie crust cool before adding your filling. For a fully baked pie crust, you can add the filling to the crust while it is warm.
Video
Notes
- Make ahead: You can blind bake a pie crust up to 3 days ahead of time. Just let it cool, wrap it well, and keep it at room temperature until ready to fill. Pie crust can be made up to 3 days ahead of time! Just keep it in the fridge, well wrapped. You can also freeze pie crust up to 3 months. Thaw overnight in the fridge before using.
- Chill Your Pie Crust Before Baking. I find if I don’t do a second chill for 30 minutes, the edges tend to slip down the sides while par-baking leaving a shrunken pie crust.
- Dock The Crust. After you remove the parchment paper, dock the pie crust (aka prick it with the tines of a fork). This will keep the pie crust from bubbling up on you while it finishes blind baking.
- Fill With Weights All The Way To The Top. I par-baked a few pie crusts awhile back and didn’t fill the pie shell to the top of the crust with pie weights and the pie crust shrunk down the sides. So I find it better to make sure it’s completely filled. That can take a lot of pie weights, so that’s why I’ve started using dried beans/rice because it requires a lot.
- Adapted from King Arthur


This recipe works perfectly for my application.
I use this as a base for my Natchitoches meat pie crust.
Thank you so much.
John T. Mac Dougall
Thank you John! I’m so glad the pie crust worked well for you. And I’m not familiar with that recipe I’m going to have to check it out!
The shortening still shows in the recipe.
Hi Joni, you can use all butter or some butter and shortening as the recipe states.
I was just reading this recipe and I thought you were also using shortening along with the butter? Yet in the recipe, shortening is not mentioned. Can you verify if I’m adding shortening or not?
Hi Colleen! So sorry looks like the recipe got swapped for my all butter pie crust, but it’s all fixed now!
Perfect! Thanks so much!